Spring is in the air, and that means temperatures are warming up and tank-tops, shorts, and flip-flops will soon be your preferred attire. Once those highs are steadily in the 80s and 90s, any outdoor activity will become coupled with a bottle of water and the occasional ice-cold glass of lemonade.
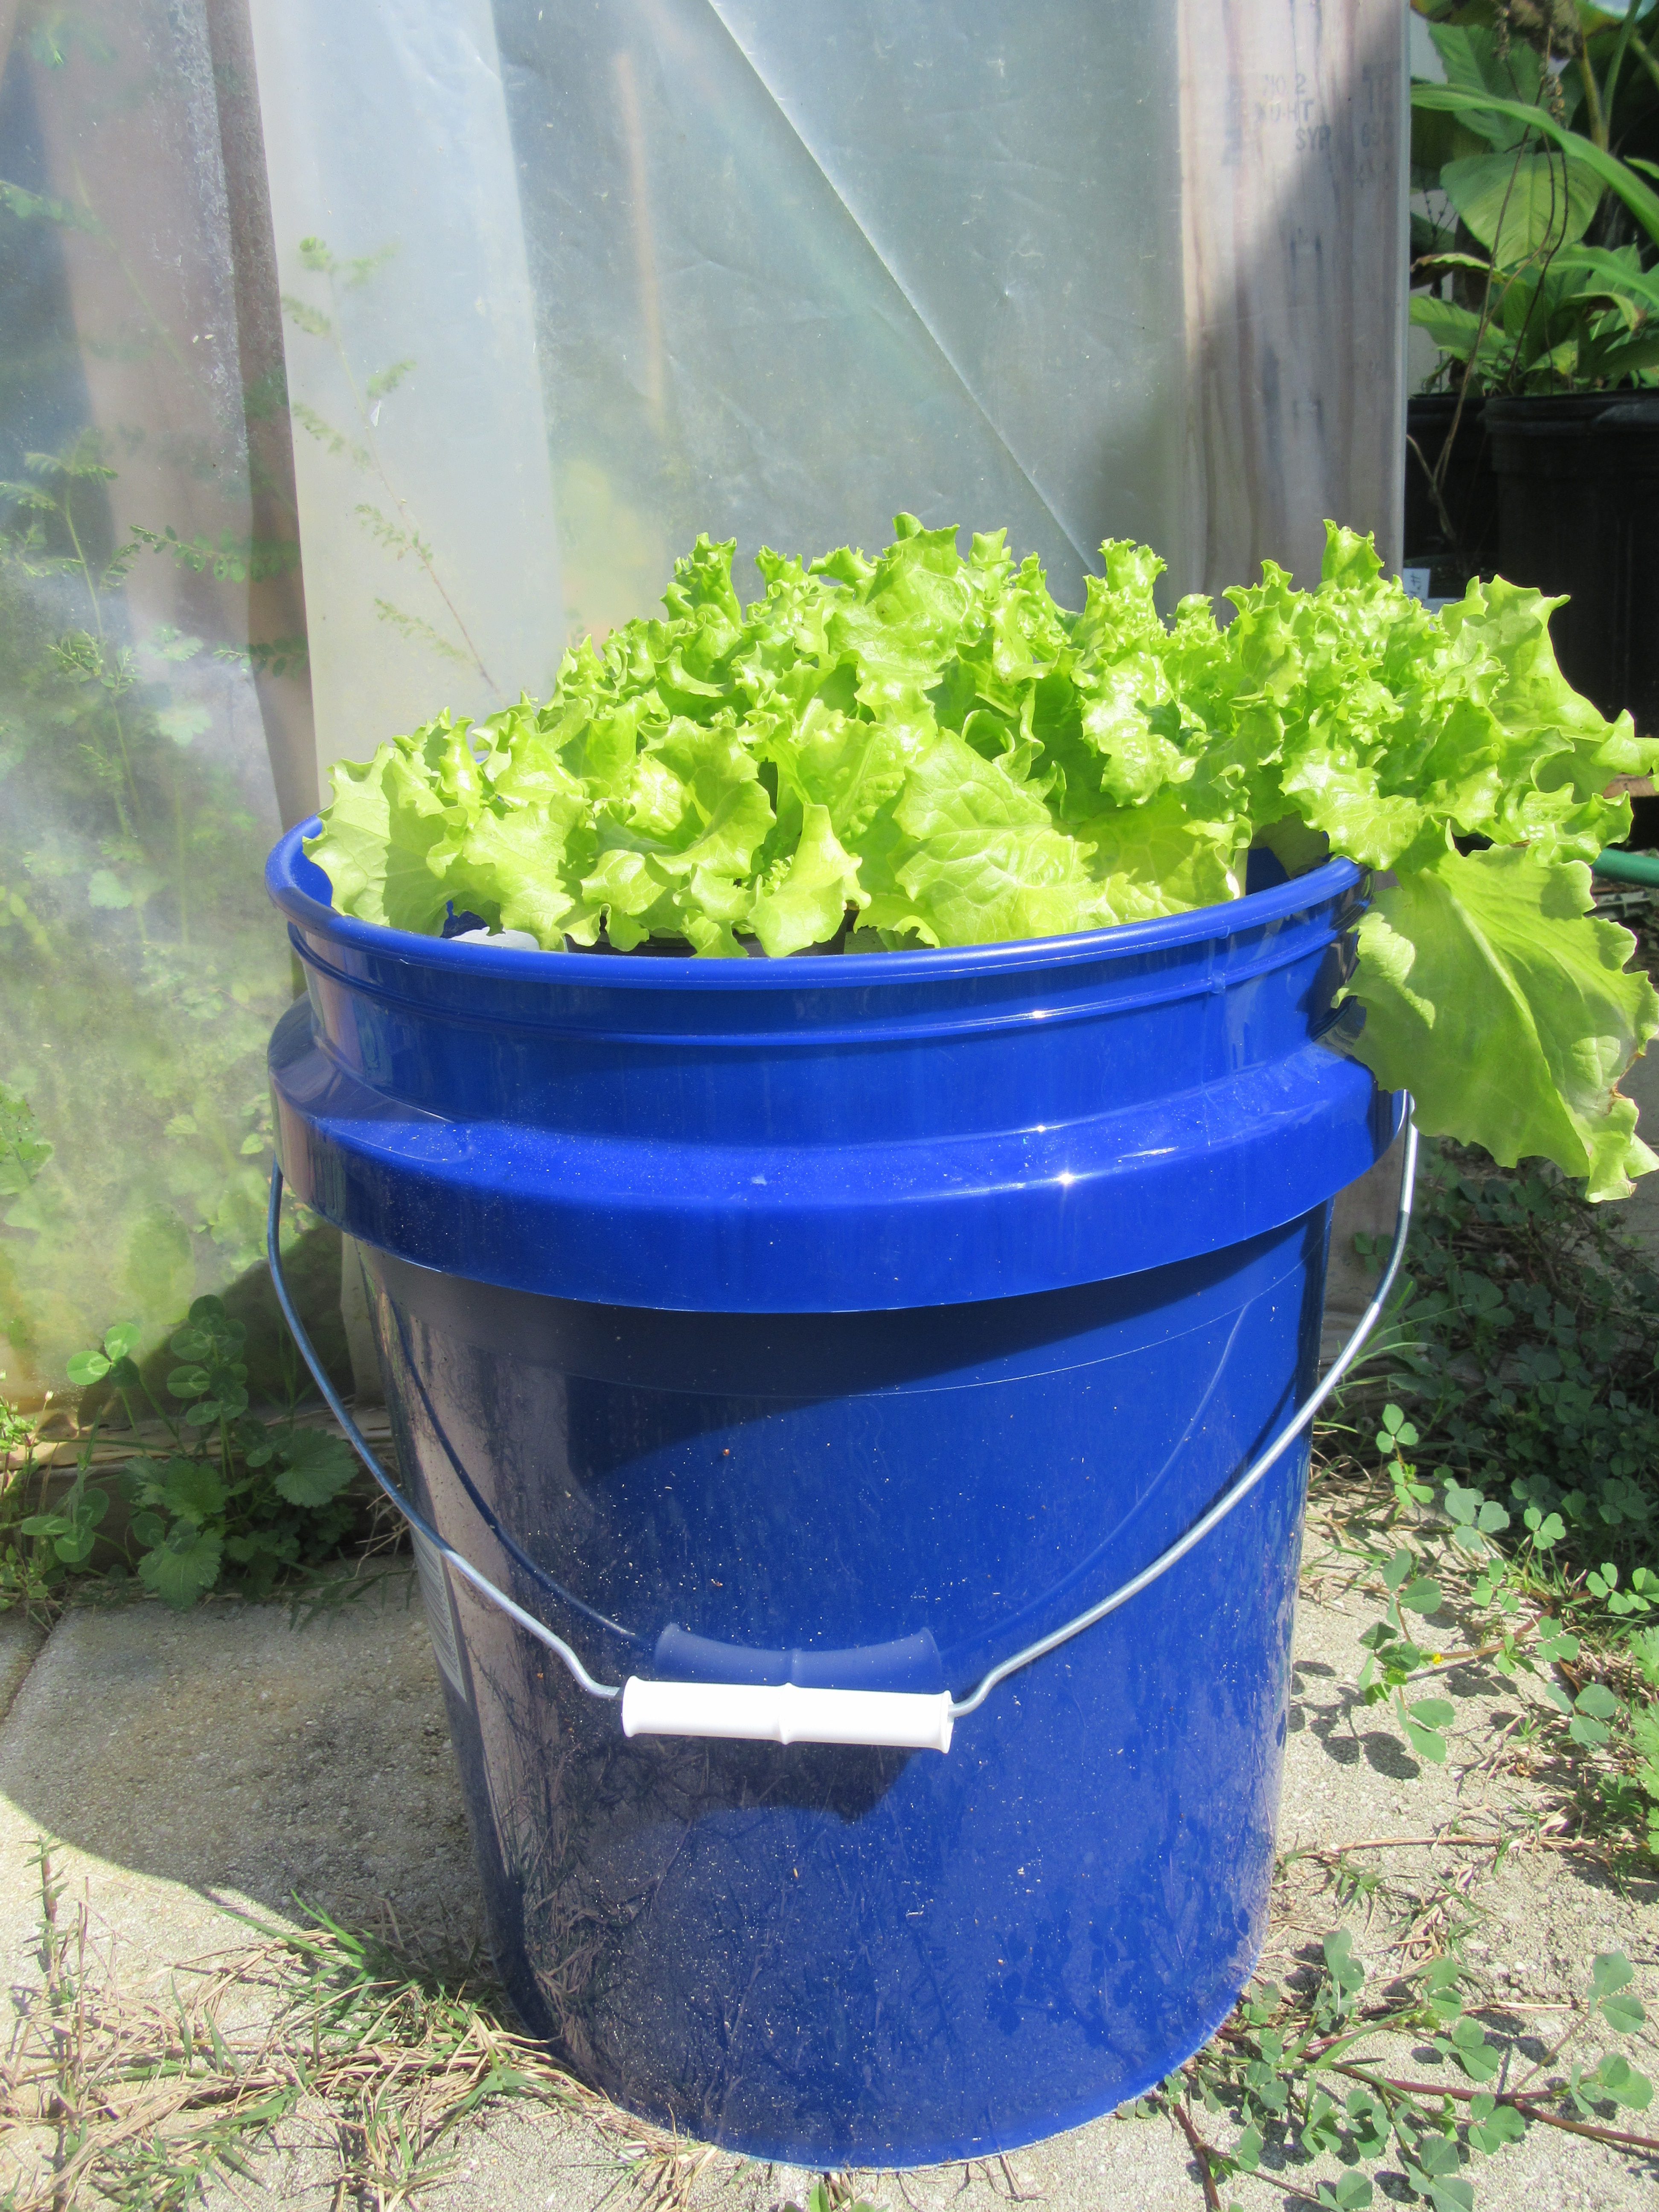
Self-watering containers allow you to continue gardening even if you plan on going on vacation this summer. Photo by Molly Jameson.
If you’re a gardener, you will notice the hot sun doing its best to dehydrate not only you, but your spring vegetable and flower beds too. And although April showers bring May flowers (and Mayflowers bring pilgrims) in many parts of the country, spring is historically one of the driest periods for the Florida Panhandle.
While spring in the Florida Panhandle can be quite dry, it is the relentless heat of summer that really drives up transpiration and evaporation rates. And herein lies the dilemma: the kids are soon to be on summer break, family vacations are on the horizon, and all your favorite summer veggies are on the brink of delivering their bounties.
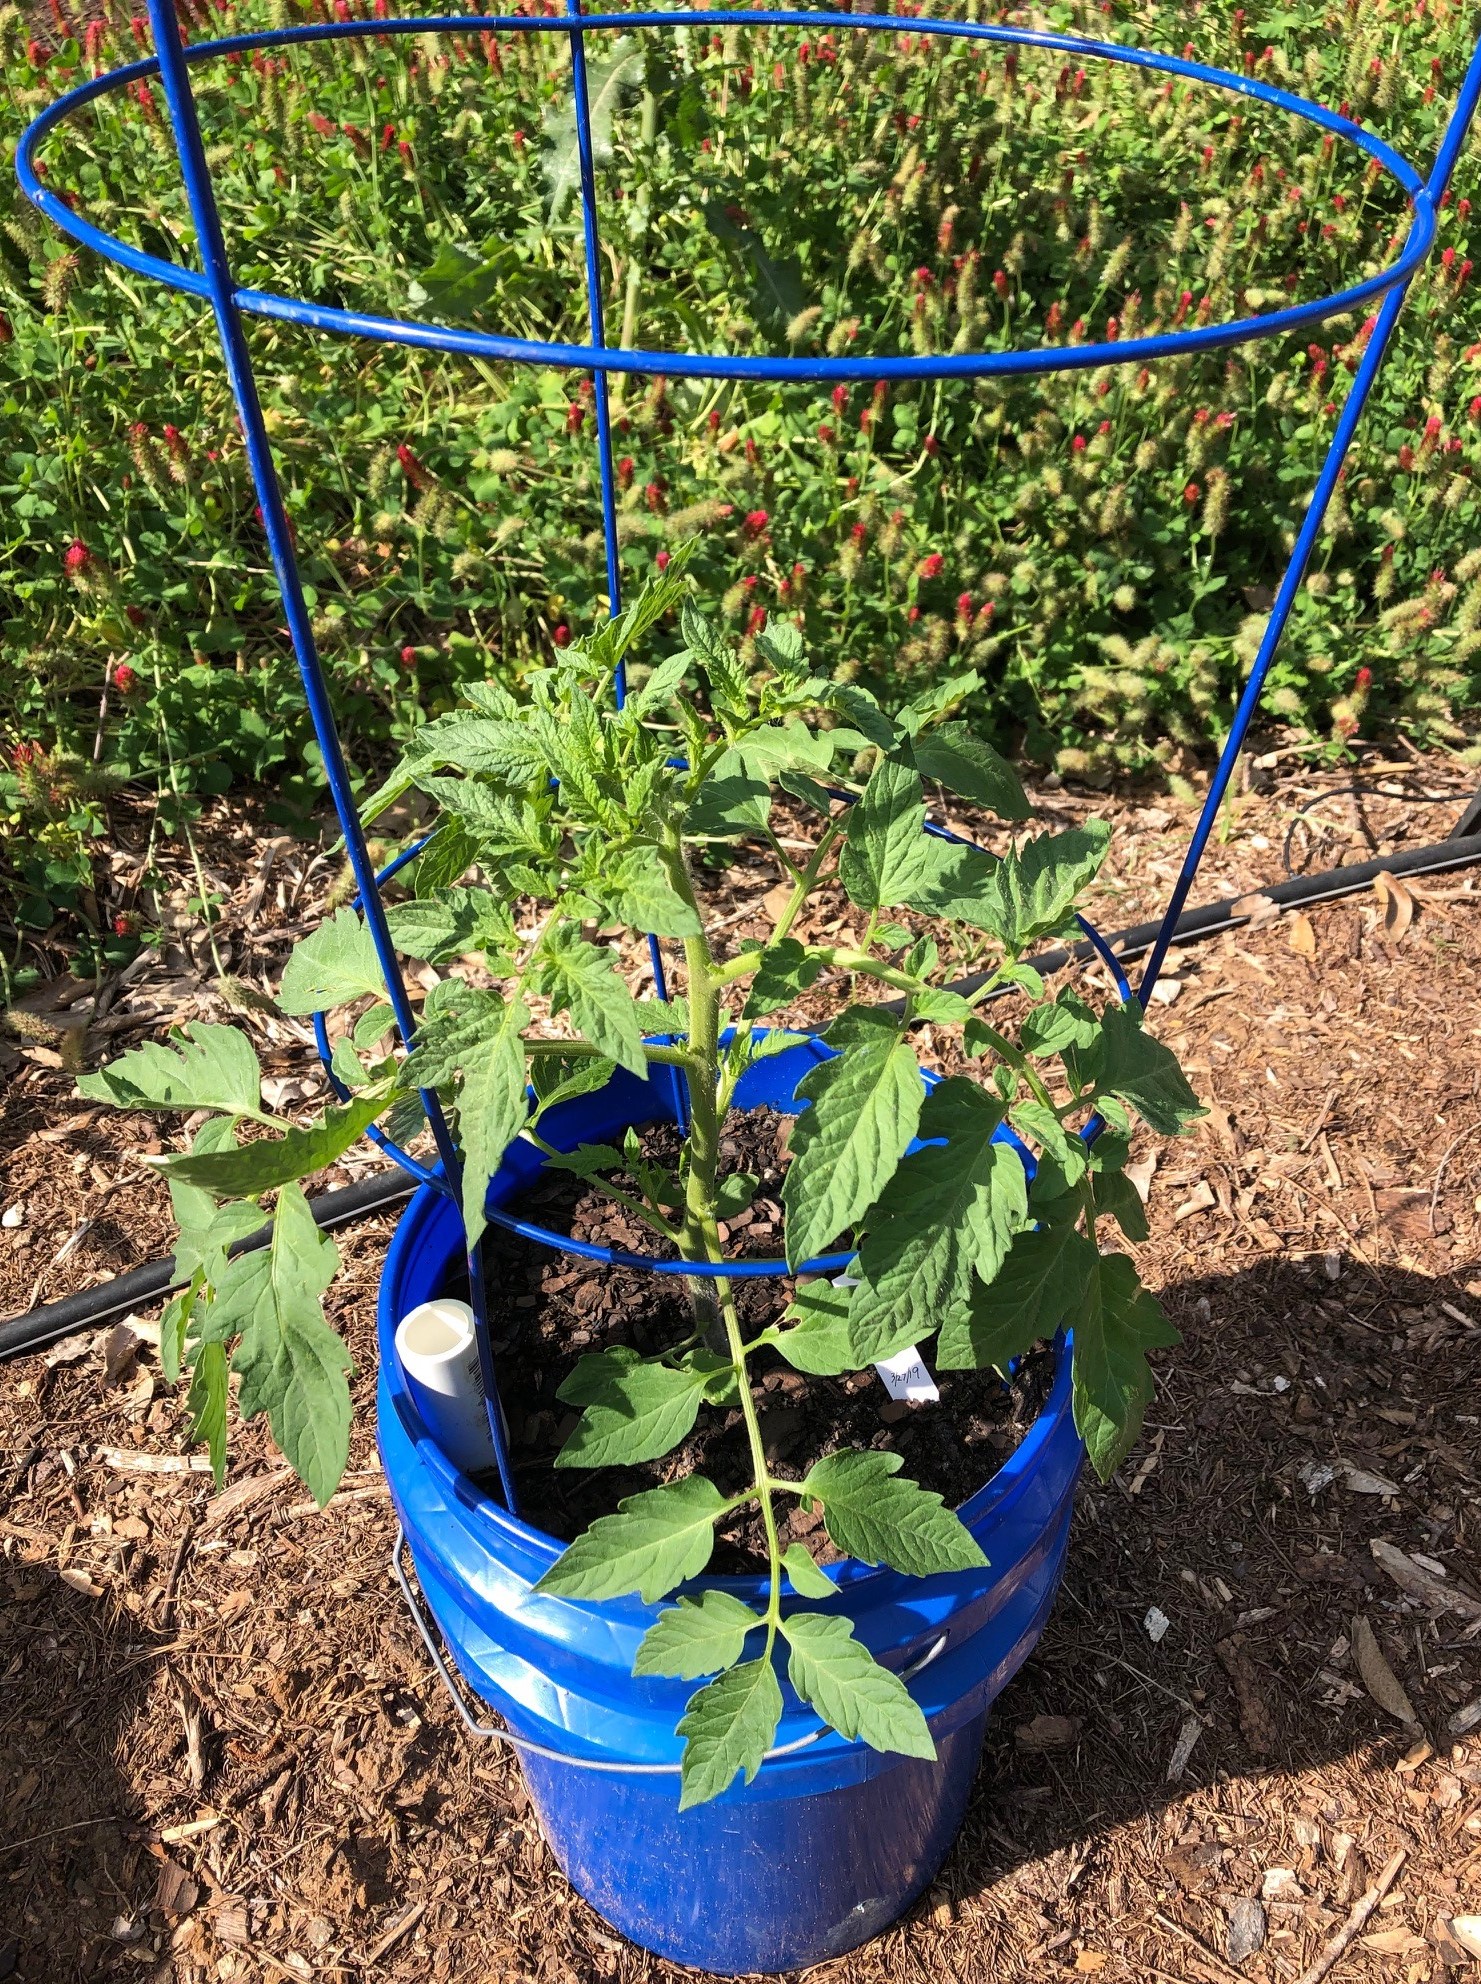
If you do not have a reliable irrigation system and timer or the fortune of a very generous green-thumbed neighbor, you risk your hard work in the garden succumbing to the heat while you are away. If you find yourself sacrificing a summer garden in place of a vacation, don’t despair. There is a low-cost, homemade solution that can step in while you are away: a self-watering container garden.
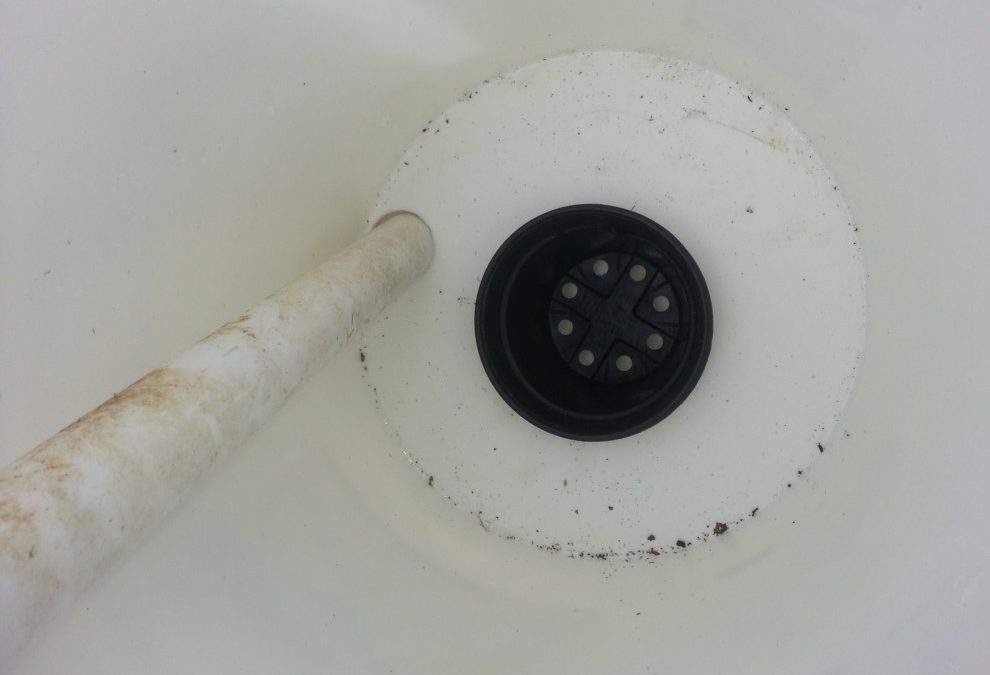
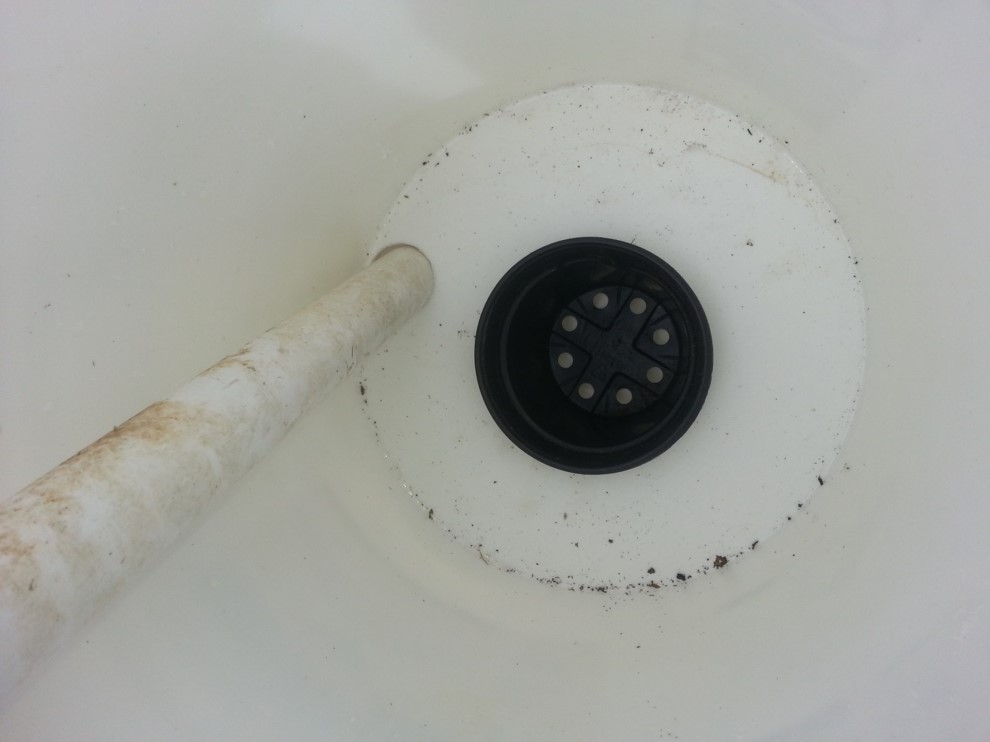
Self-watering containers use the process of capillary action, where water molecules are pulled upward from a water reservoir into soil above and then into and through plant roots. The forces of cohesion, in which water molecules stay close together, and adhesion, in which water molecules “stick” to other substances, create this important phenomenon.
A wicking basket uses capillary action to pull water molecules up from the water reservoir and into the soil. Photo by Trevor Hylton.
While store-bought versions can be costly, you can make a self-watering container for less than $10 with just a few materials and tools. There are multiple designs for creating a self-watering container at home. Typically, designs include two five-gallon food-grade plastic buckets to hold the soil and plant; a knife or hole saw to access the water reservoir; a wicking basket or strips of cotton from an old towel, pants, or shirt to generate the capillary movement of water; a drill and drill bit for drainage; and a plastic pipe for easy filling of the water reservoir.
To make your own, view these Extension-produced self-watering container garden resources and follow the step-by-step instructions that work best for you:
Historic live oaks provide shade and wildlife habitat at the Escambia Extension walking trail. Photo credit: Carrie Stevenson, UF / IFAS Extension
A recent study of 3-5 year olds found that the average pre-reading American child could identify hundreds of marketing brand logos (McDonald’s, Disney, even Toyota). Most researchers would be mightily challenged to find even a middle school student who can identify more than a couple of trees growing in their own backyard. The fields and forests many of us grew up in are steadily converting to look-alike suburban areas, so this lack of local natural knowledge is commonplace. As the quote by Senegalese forester Baba Dioum goes, “In the end, we will conserve only what we love; we will love only what we understand and we will understand only what we are taught.” If kids and adults do not appreciate and understand the natural world around them, we are unlikely to preserve these priceless wonders.
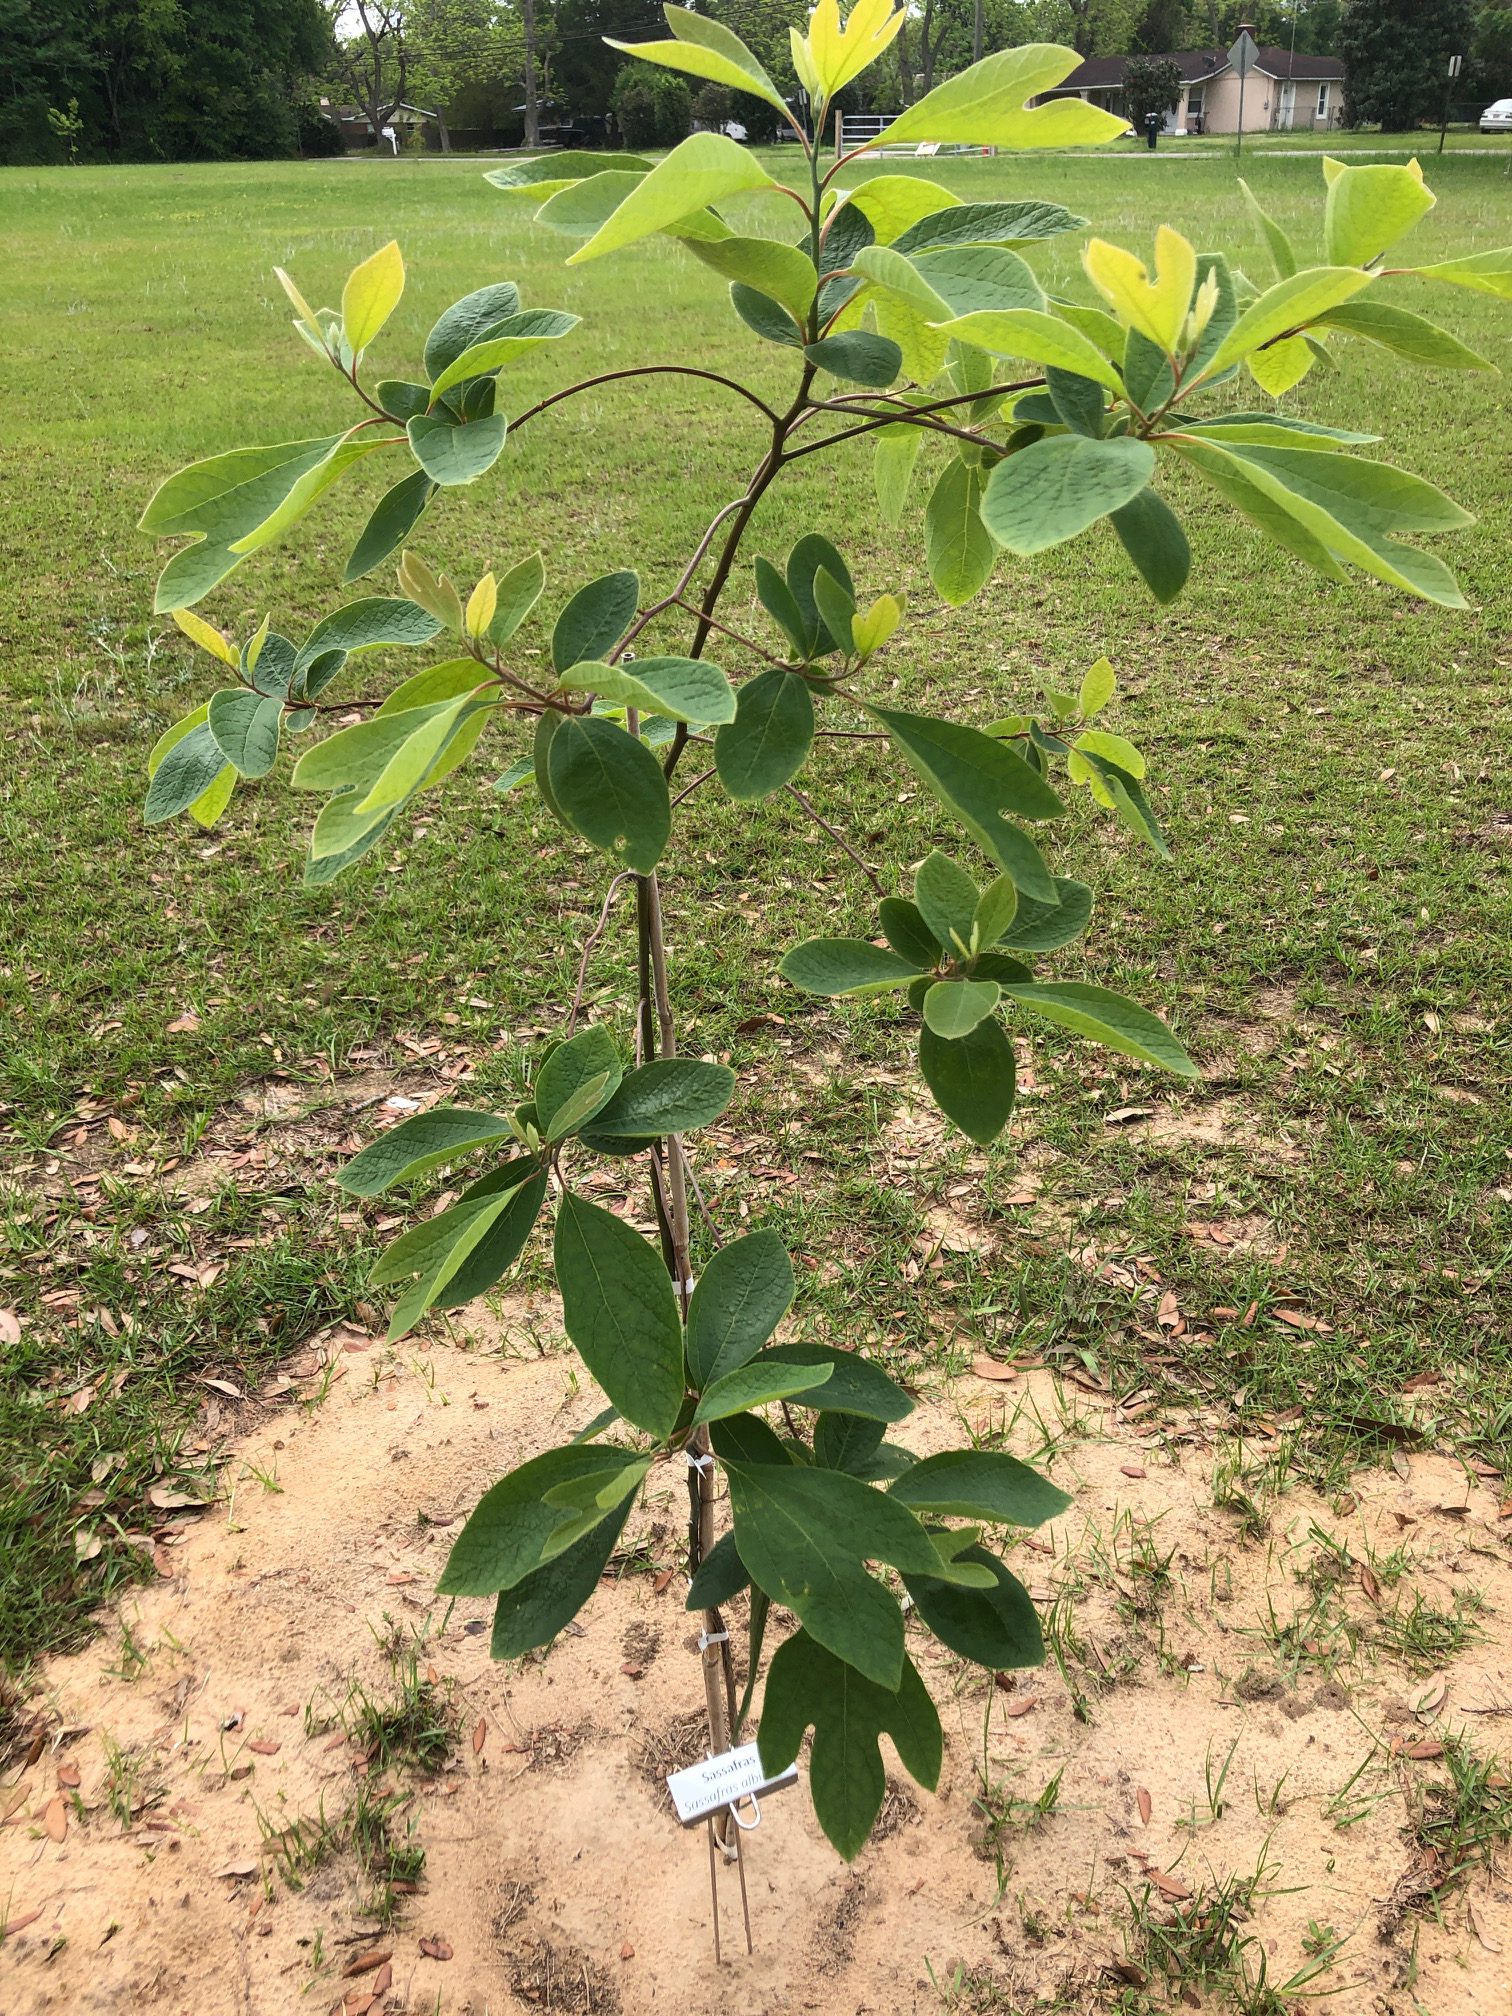
To do our part towards this aim of educating others, we at Escambia Extension received a grant from International Paper to plant 30 trees around our office’s walking track. Every tree has a clearly marked identification tag listing its common and botanical name.
A newly planted sassafras tree on the Extension walking trail. Photo credit: Carrie Stevenson, UF / IFAS Extension
Initially we just planned to add more shade trees to the sunny side of the track, but after a discussion with local foresters, we realized this effort could be an ideal teaching tool. The local middle and high school Future Farmers of America (FFA) chapters participate in a tree identification contest, and are tasked with knowing 50 native tree species. While 10 of them were tropical species that do not perform well in north Florida, we have the other 40 planted here on the property. Students and any interested citizen interested in learning these native species can walk along our track, getting exercise and taking in the natural world around them.
A spring walking event will kick off the official opening of the tree identification trail, so join us April 26 to learn more about healthy living and the value of trees. Or, join us for an Extension Open House on April 27 to explore the demonstration gardens, purchase vegetable plants, or learn more about Extension’s wide array of community services.
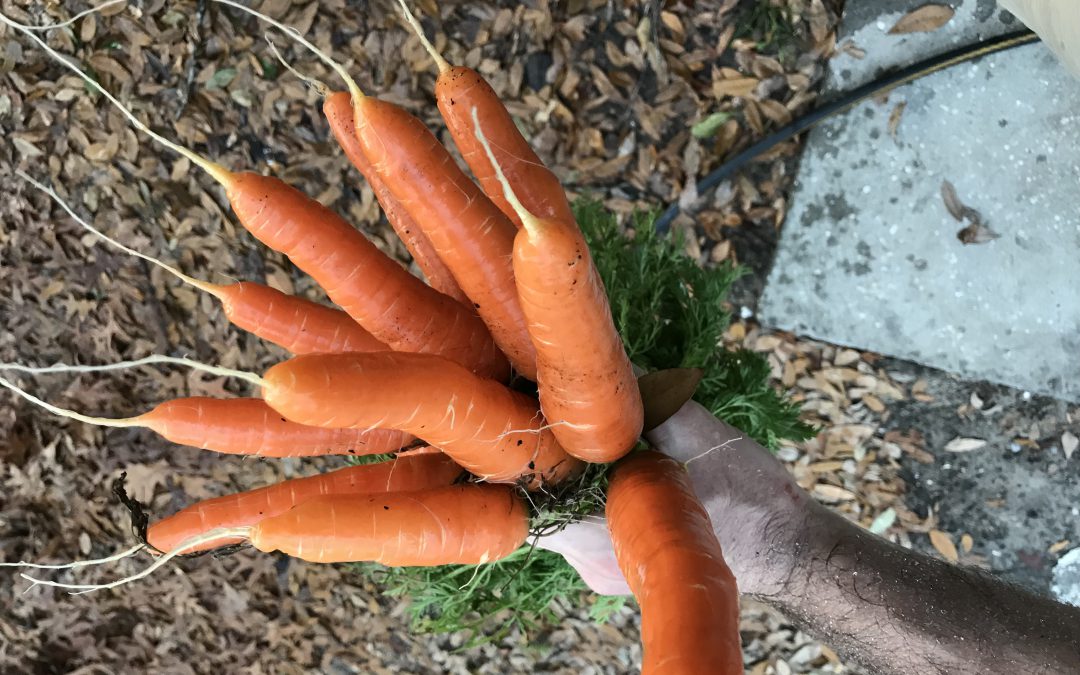
After tending a home vegetable garden for any length of time in the Panhandle, you begin to learn some things. Tomatoes are awfully hard to grow. Raised beds drastically lower the difficulty of gardening in general. You should never plant mint in a permanent veggie garden. Swiss Chard has to be started early because it grows as molasses creeps. Of all of these anecdotal maxims I’ve discovered, the one with the most flavor return on my gardening investment is that carrots should always be a part of your cool season garden. A fresh carrot out of the garden is hard to beat. The difference between a grocery store carrot and one fresh out of your own garden is astonishing and will change your culinary life. Though carrot season in Florida is just ending (my final batch was harvested yesterday), it’s the perfect time to learn about growing carrots here and plan to get some in the ground this fall!
There are a number of reasons to grow and eat carrots. They’re obviously very healthy, though I dispute the whole eat carrots and you’ll have great eyesight thing – apparently I acquired the taste for them too late to help. They go well in more dishes than they don’t. However, the real two reasons you should supplement your grocery store carrot purchases with home grown harvests are that they’re so easy to grow and that there are so many more options than the standard long, thin orange varieties adorning the produce aisle shelves.
‘Bolero’ Carrots
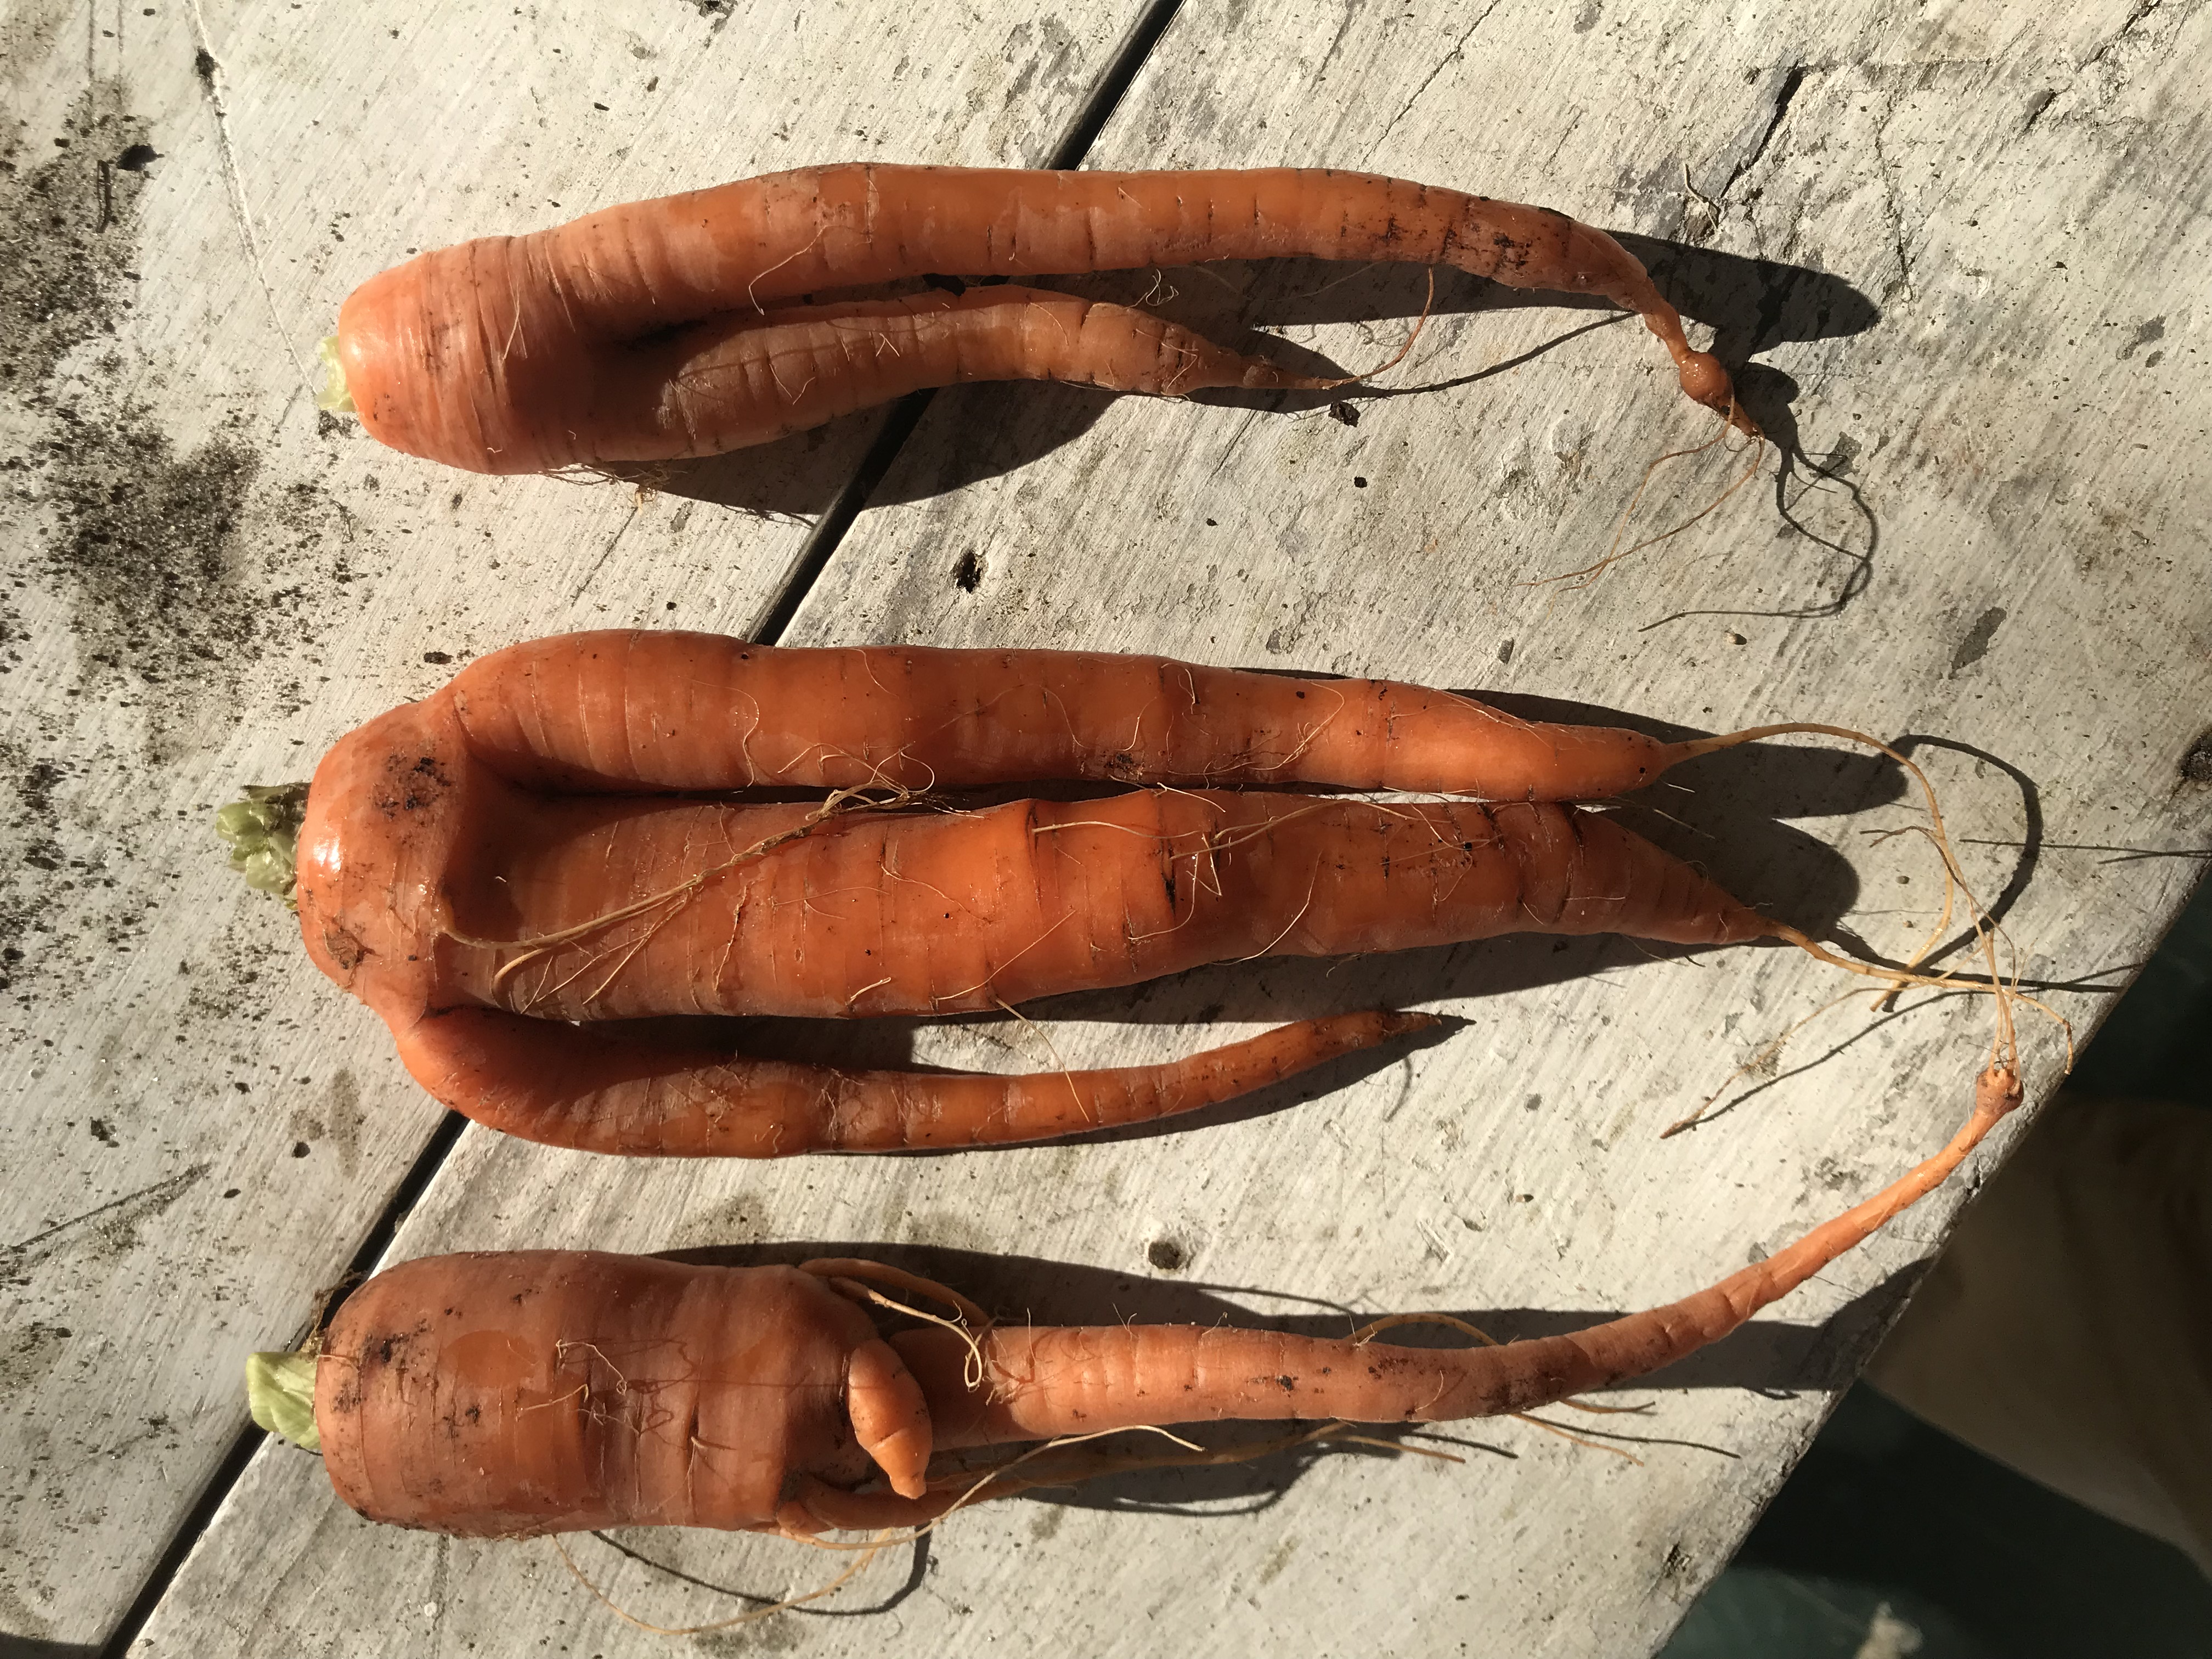
Though carrots are remarkable easy to grow, they do ask a couple of things of gardeners. They are a cool season vegetable and are generally planted from seed beginning in late August through early September in the Panhandle, though successive plantings can continue through at least February if you want to extend your harvest. Also, like many other root vegetables, carrots don’t transplant well so direct seeding in the garden is a must. But before you even consider seeding, care must be taken to make sure the soil bed you’ll be seeding in has been properly prepared. One of the few ways to fail growing carrots is to not start with a loose soil free from any potential obstructions. If the development of the carrot root is disturbed by anything during the germination and growing process (this includes manure aggregates or other clumpy soil, sticks, rocks or even a hard layer of soil hiding under your loose compost), the end product will be deformed. To prevent this, thoroughly till your raised bed soil to at least 12” and break up any larger soil particles that are left with your hands. If you don’t get your soil bed perfect though, fear not, deformed carrots are definitely edible, they just won’t look like they’re supposed to and are more difficult to clean and process!
Deformed carrots due to clumpy compost!
Once you’re ready to plant, I’ve found it easier on poor eyes and fumbling fingers like mine to sprinkle the tiny carrot seeds in shallowly furrowed rows 10”-12” apart and thin the seedlings later, rather than trying to individually space seeds the recommended 1”-3” apart. Finally, these colorful little veggies love water and require good fertility. To ensure good expansion of the edible root, maintain consistent moisture and fertilize at planting with a good slow release fertilizer. Additional fertilizer applications may be required later in the growing season as most carrots take around ten weeks to gain maturity.
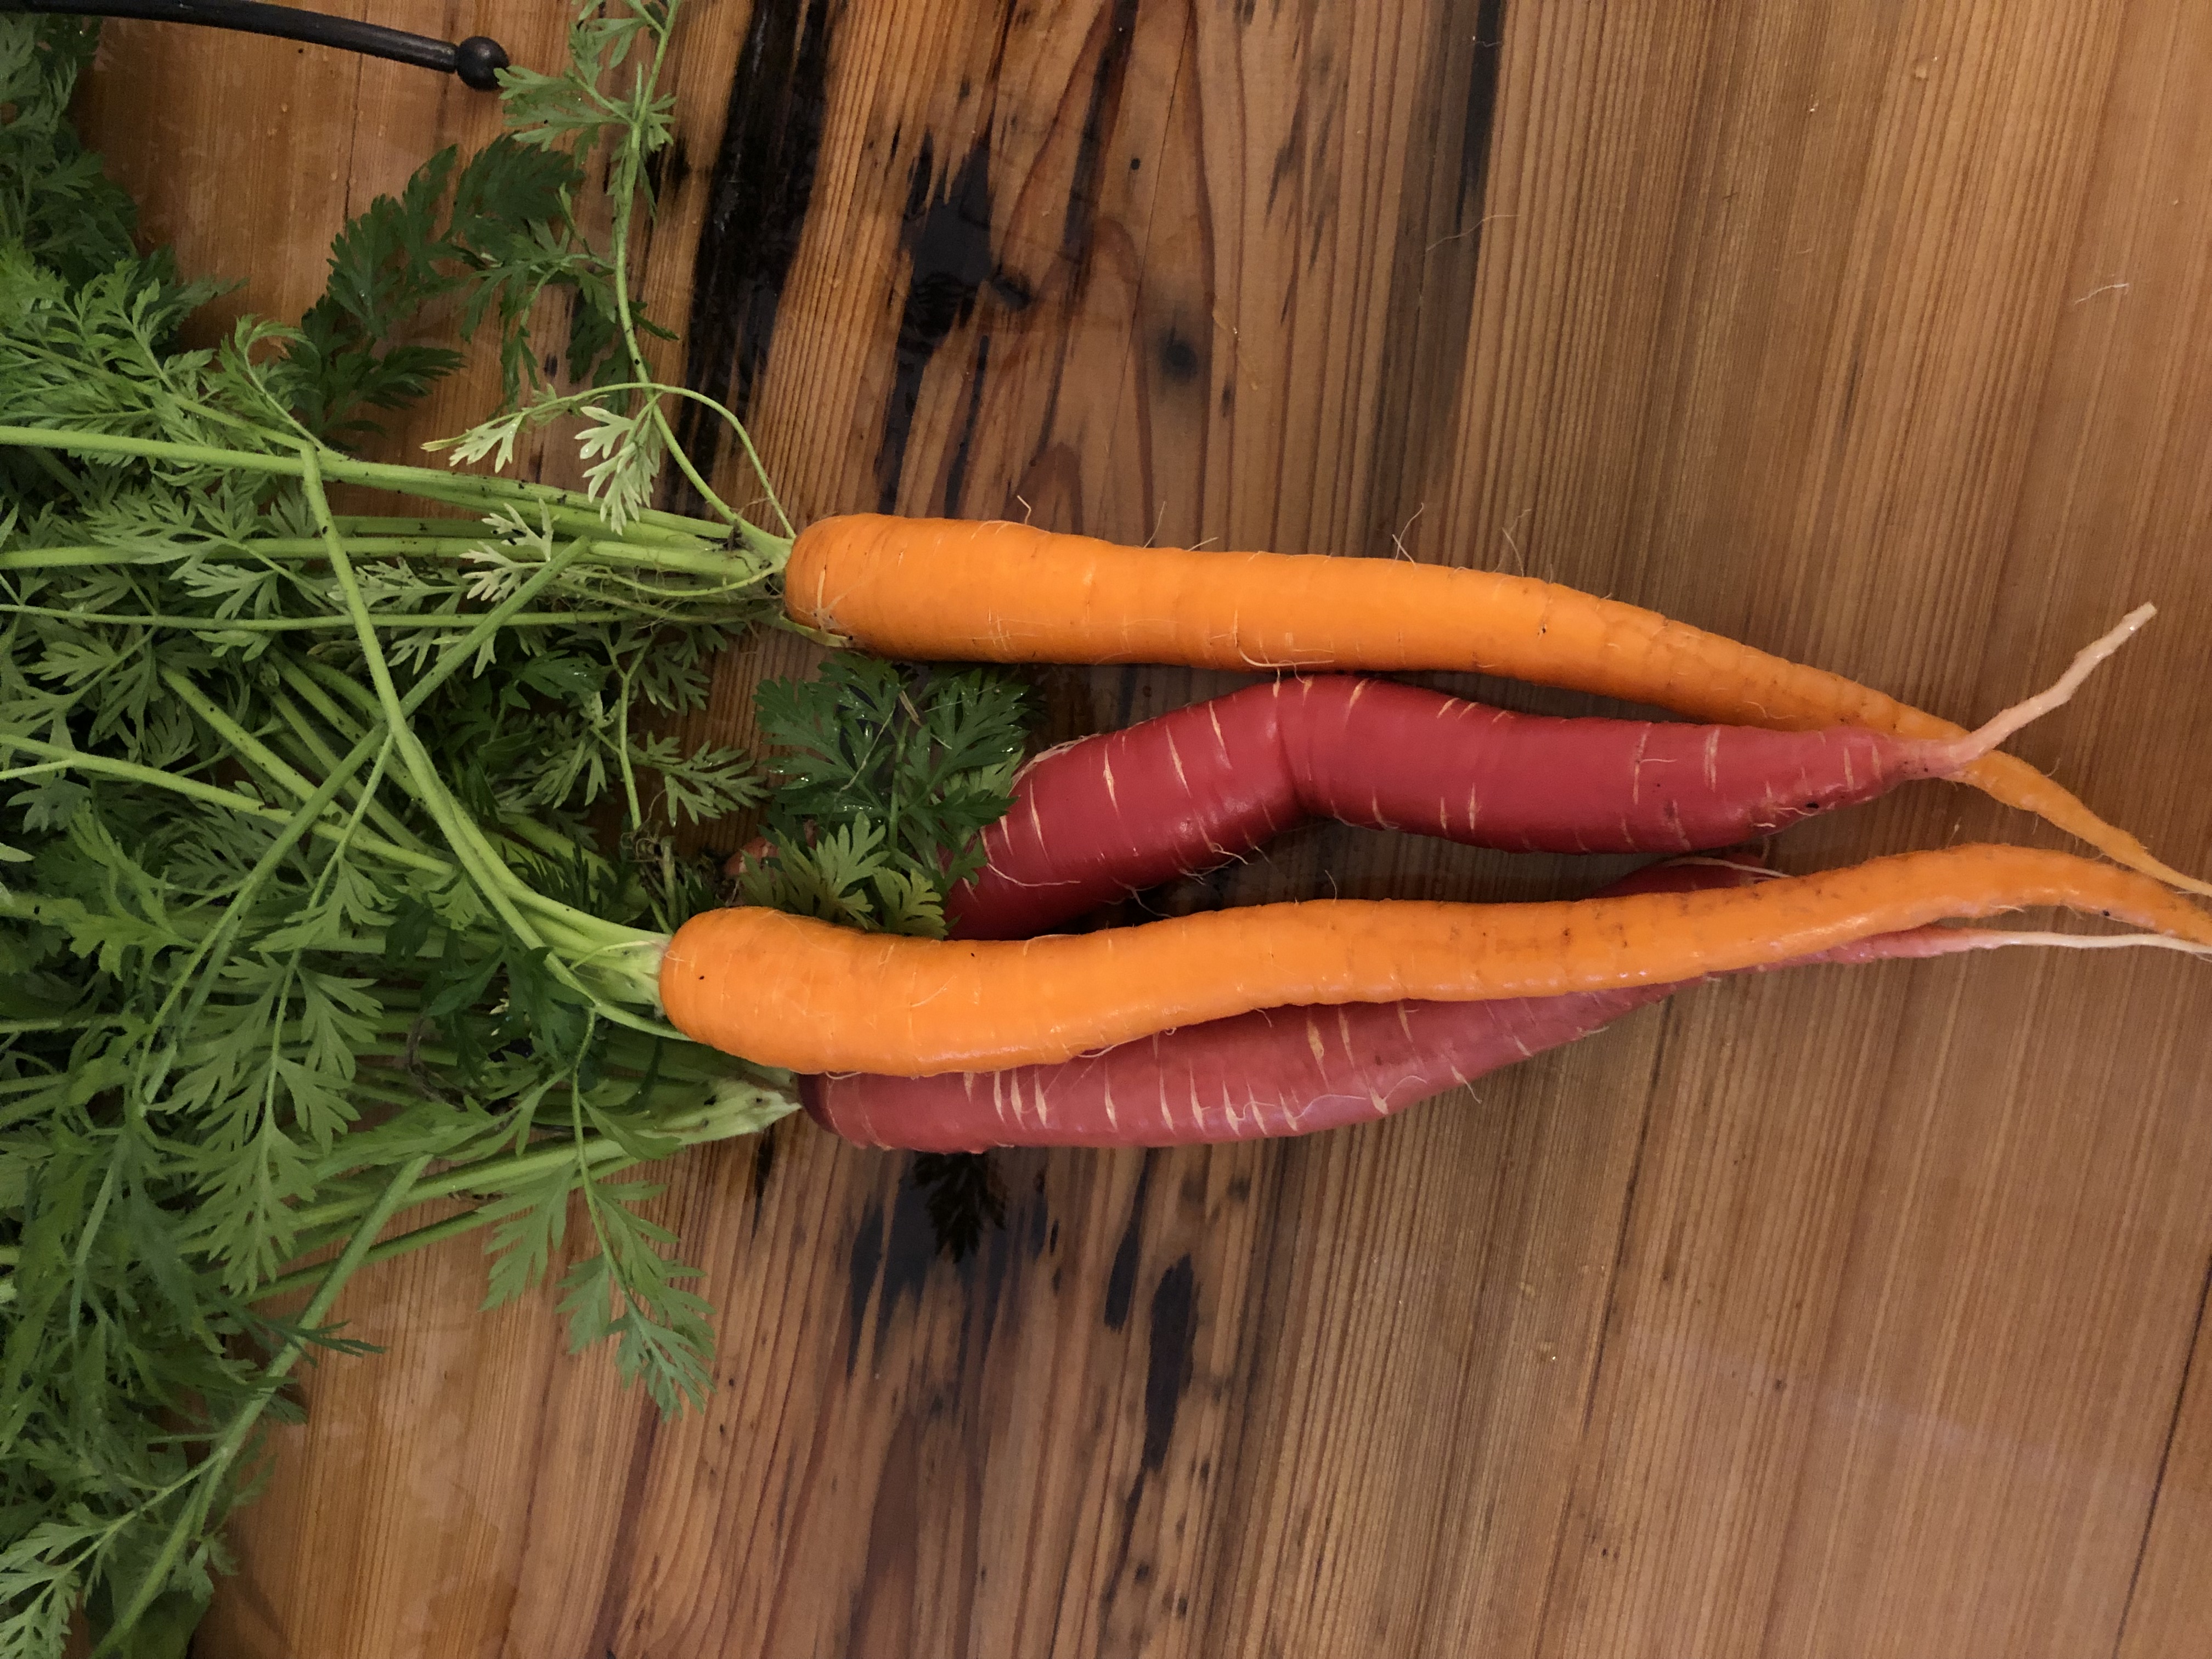
‘Sugarsnax’ (orange) and ‘Malbec’ (red) carrots
In this age of online catalogs, farmer’s markets, and demanding consumers who crave interesting food, the selection of carrot varieties available for gardeners to grow has never been better. Among the hundreds of individual cultivar options are several broad types of carrots you’ll need to choose from. You’re probably familiar with the Imperator types. These are the extra-long, durable carrots most often find in stores. If you have a deep raised bed or other large container, Imperator varieties can be extremely rewarding! I grew the Imperator-type ‘Sugarsnax’ this year and highly recommend it for ease of growing, size and flavor. Next up are the Nantes types. These carrots are medium length and cylindrically shaped. Sometimes called “storage” carrots, these types tend to store well for long periods of time after harvest and retain their flavor well. I’ve tried a few over the last several years and can recommend ‘Bolero’ and ‘Napoli’ with confidence. There is even a carrot type for those of you with shallow raised beds (8” or less) that can’t accommodate the previously listed types! Chantenay type carrots are excellent performers in these situations as they are generally a bit shorter and possess a conical shape with roots wider at the top and tapering to the tip, making a deep soil bed a bit less critical. Finally, there are even some excellent cultivars of carrots in colors other than orange! That’s right, you can grow white, purple, yellow, and even red carrots! I’ve done very well with ‘Purple Haze’ (purple with orange interior), ‘White Satin’ (creamy white color), and ‘Malbec’ (deep, rich red) and highly recommend all three. Keep in mind that the red and purple carrots tend to lose their color when cooked, so the greatest effect is seen when eaten fresh. All of these cultivars can be found at nearly any of the numerous online and catalog seed retainers such as Johnny’s Selected Seeds, Baker Creek Heirloom Seeds, Burpee, and others.
As you can see, carrots are an easy to grow, extremely rewarding vegetable for the home gardener; give some a try in your raised beds next fall! And as always, if you have any questions about growing carrots or any other gardening related question, contact your local UF/IFAS Extension office!
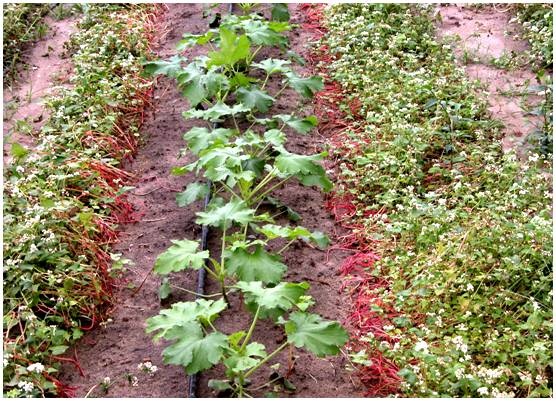
Many gardeners plant a spring vegetable garden with a number of different vegetable types, which is excellent because a diverse and varied garden is proven to improve soil health. Intercropping is a gardening practice of growing different crops in the same field. When planting a mixture of crops in the same field year after year, it is important to rotate the location of each type of vegetable. This is a practice known as crop rotation. Intercropping and crop rotation will help reduce insect pest populations, increase beneficial insect populations, and reduce weed populations .
Crop Diversity
Including plants that pest insects don’t like to eat in a garden forces the pests work harder to find what they find palatable. Studies have found reduced whitefly numbers on squash plantings mixed with a crop of buckwheat when compared to squash planted alone. Another crop mixture that may be unintentional, but may be favorable, is a crapemyrtle stand along a garden’s edge. Crapemyrtles will attract the crapemyrtle aphid which will attract predatory insects. When the predatory insects run out of crapemyrtle aphids to eat, they will move to the vegetable garden and begin to hunt pest insects.
Squash with living mulch of buckwheat. Photo Credit: Oscar Liburd, UF/IFAS Extension
Trap Cropping
A trap crop is a plant that attracts a pest insect away from your food crops. Trap crops work best when planted at the garden’s edge, along a fence row, or in movable containers. A bare space, let’s say 5 feet or so, should be kept between trap crops and vegetable plantings. This will help keep the pests from moving desirable crops plants. When a large population of pests are found on the trap crop then it is time to spray them with insecticide, or cut the crop down and remove or destroy the debris. If trap crops are planted in containers, then it makes them much easier to remove from the garden when necessary.
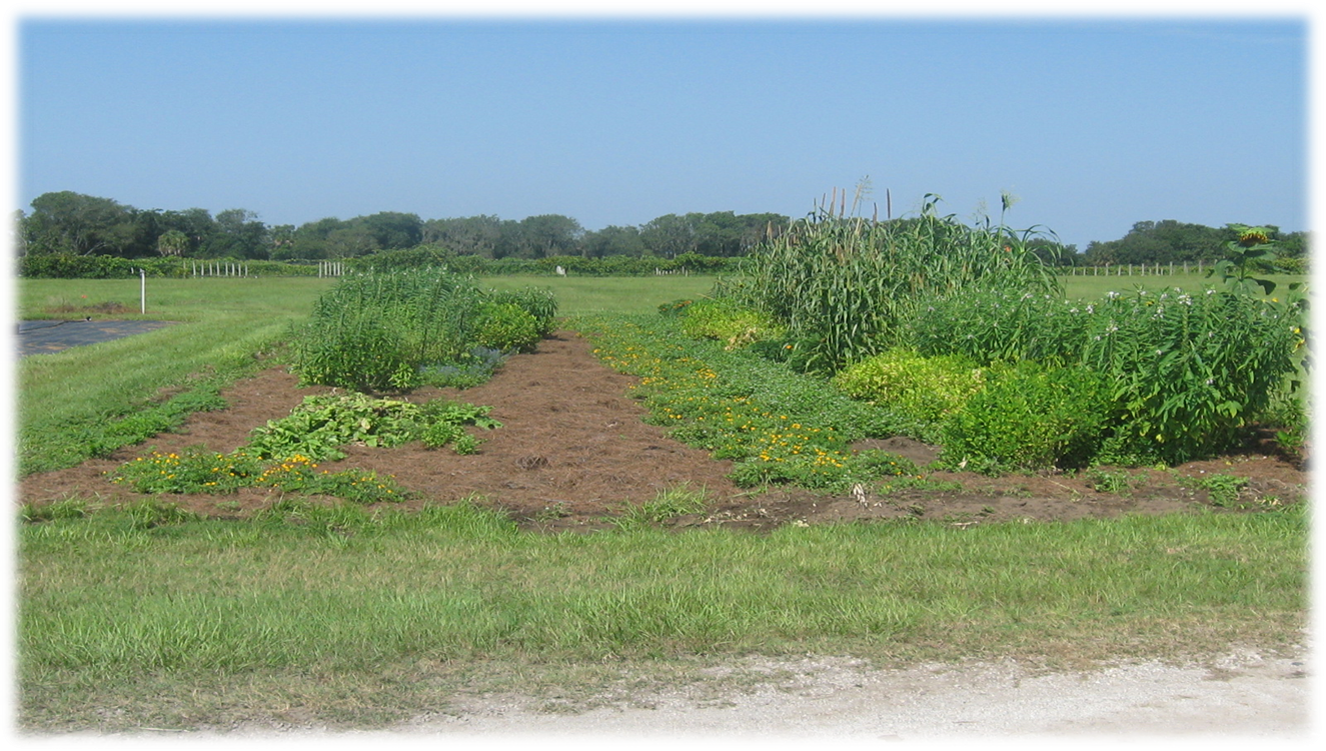
Cover Crops and Green Manure
Soil organic matter can be increased by the use of green manure and cover crops. Cover crops are generally planted during the off-season, but they can be planted in between vegetable rows and tilled in at a designated time as a green manure. Both cover crops and green manure improve garden production by:
Suppressing weeds by competing for water, light, and nutrients;
Holding the soil in place and preventing erosion;
Scavenging for nutrients that can be utilized in future crops;
Reducing nematode populations;
Providing a habitat for beneficial insects.
A mixed plot of cover crops and trap crops. Photo Credit: Matt Lollar, UF/IFAS Extension – Santa Rosa County
A number of different crops can serve as cover crops or green manure crops. Most are legumes (bean family) or grasses. A few that should be tried are:
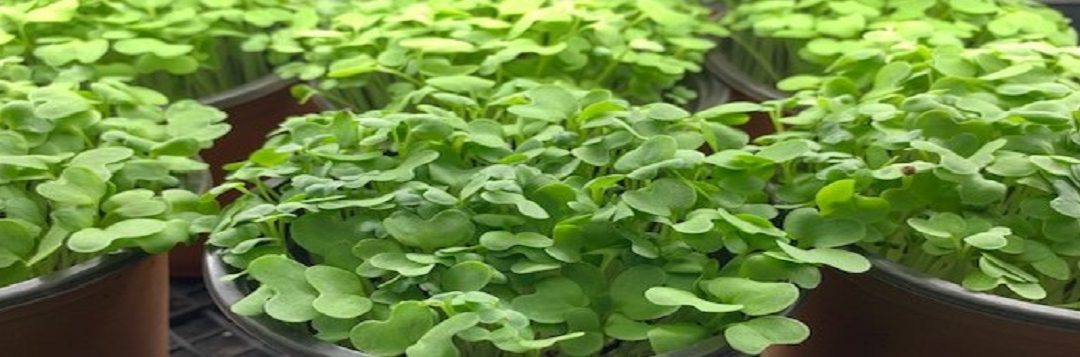
Are you a patient gardener? If not, try you hand at growing microgreens. Why wait for at least a month or so for a harvest when you can enjoy fresh greens in as little as 7 days.
Microgreens are the tender seedlings of your favorite vegetable or herb. They are grown in containers or flats and harvested when the first seed leaves are fully emerged. You may also wait until you see the first true leaf. Unlike sprouts, microgreens require light and are cut when harvesting to only include the stem and leaves. Depending on the seeds you start, you may enjoy mild or spicy greens, or refreshing lemony flavors of a young herb.
Microgreens can offer beautiful colors for your dish. Photo by Beth Bolles, UF IFAS Extension Escambia County.
Here are the basic steps to get started growing microgreens.
Get a commercial tray or recycled container and sterilize it in a 10% bleach solution. Make sure your recycled containers have drainage holes.
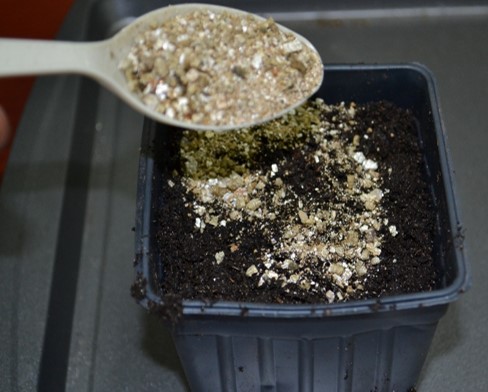
Choose a good seed starting potting mix that is more fine textured. Many seeds you will start are small and a mix with a lot of bark may affect seedling germination. Add one to 1.5 inches of the soil in your container. You don’t need more depth of soil since you will be harvesting in a week to 20 days.
Decide which types of greens you like. Consider arugula, radish, mizuna, or mustard for some spice. Swiss chard and purple cabbage will give you color, while collards, broccoli, and kale will offer mild flavors. Don’t forget about herbs like dill, cilantro, or basil for good flavors too.
Once you have chosen your seed, beginners should seed one selection per container. As you learn the growth rate of your favorite selection, you may can combine different varieties in a flat.
Make sure your soil is moistened (but not soaking) and spread seed on top of the soil. You will be adding about 12 seeds per square inch of soil for small seeds and about 7 seeds per square inch for larger seeds.
Sprinkle vermiculite over the seeds and then use a spray bottle or nozzle mister to moisten the vermiculite.
Vermiculite allows moisture to get to seeds and may reduce seedling disease pressures. Photo by Beth Bolles, UF IFAS Extension Escambia County
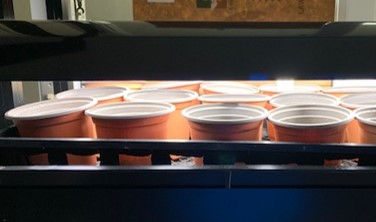
Place containers in a greenhouse, window sill, or indoor growing tray. As soon as the seeds germinate, make sure they are receiving bright light. If growing indoors, the fluorescent or plant lights need to be a few inches above seedlings. Move the lights higher as your seedlings grow.
New seedlings need bright light. Indoor lights that are 2-3 inches from seedlings prevent thin, spindly stems. Photo by Beth Bolles, UF IFAS Extension Escambia County
Maintain a room temperature of about 70 degrees F. Temperatures above 75 degrees F can lead to disease issues
It is also best to water from the bottom to prevent disease issues. If this is not possible, carefully water seedlings so not to injure delicate plants.
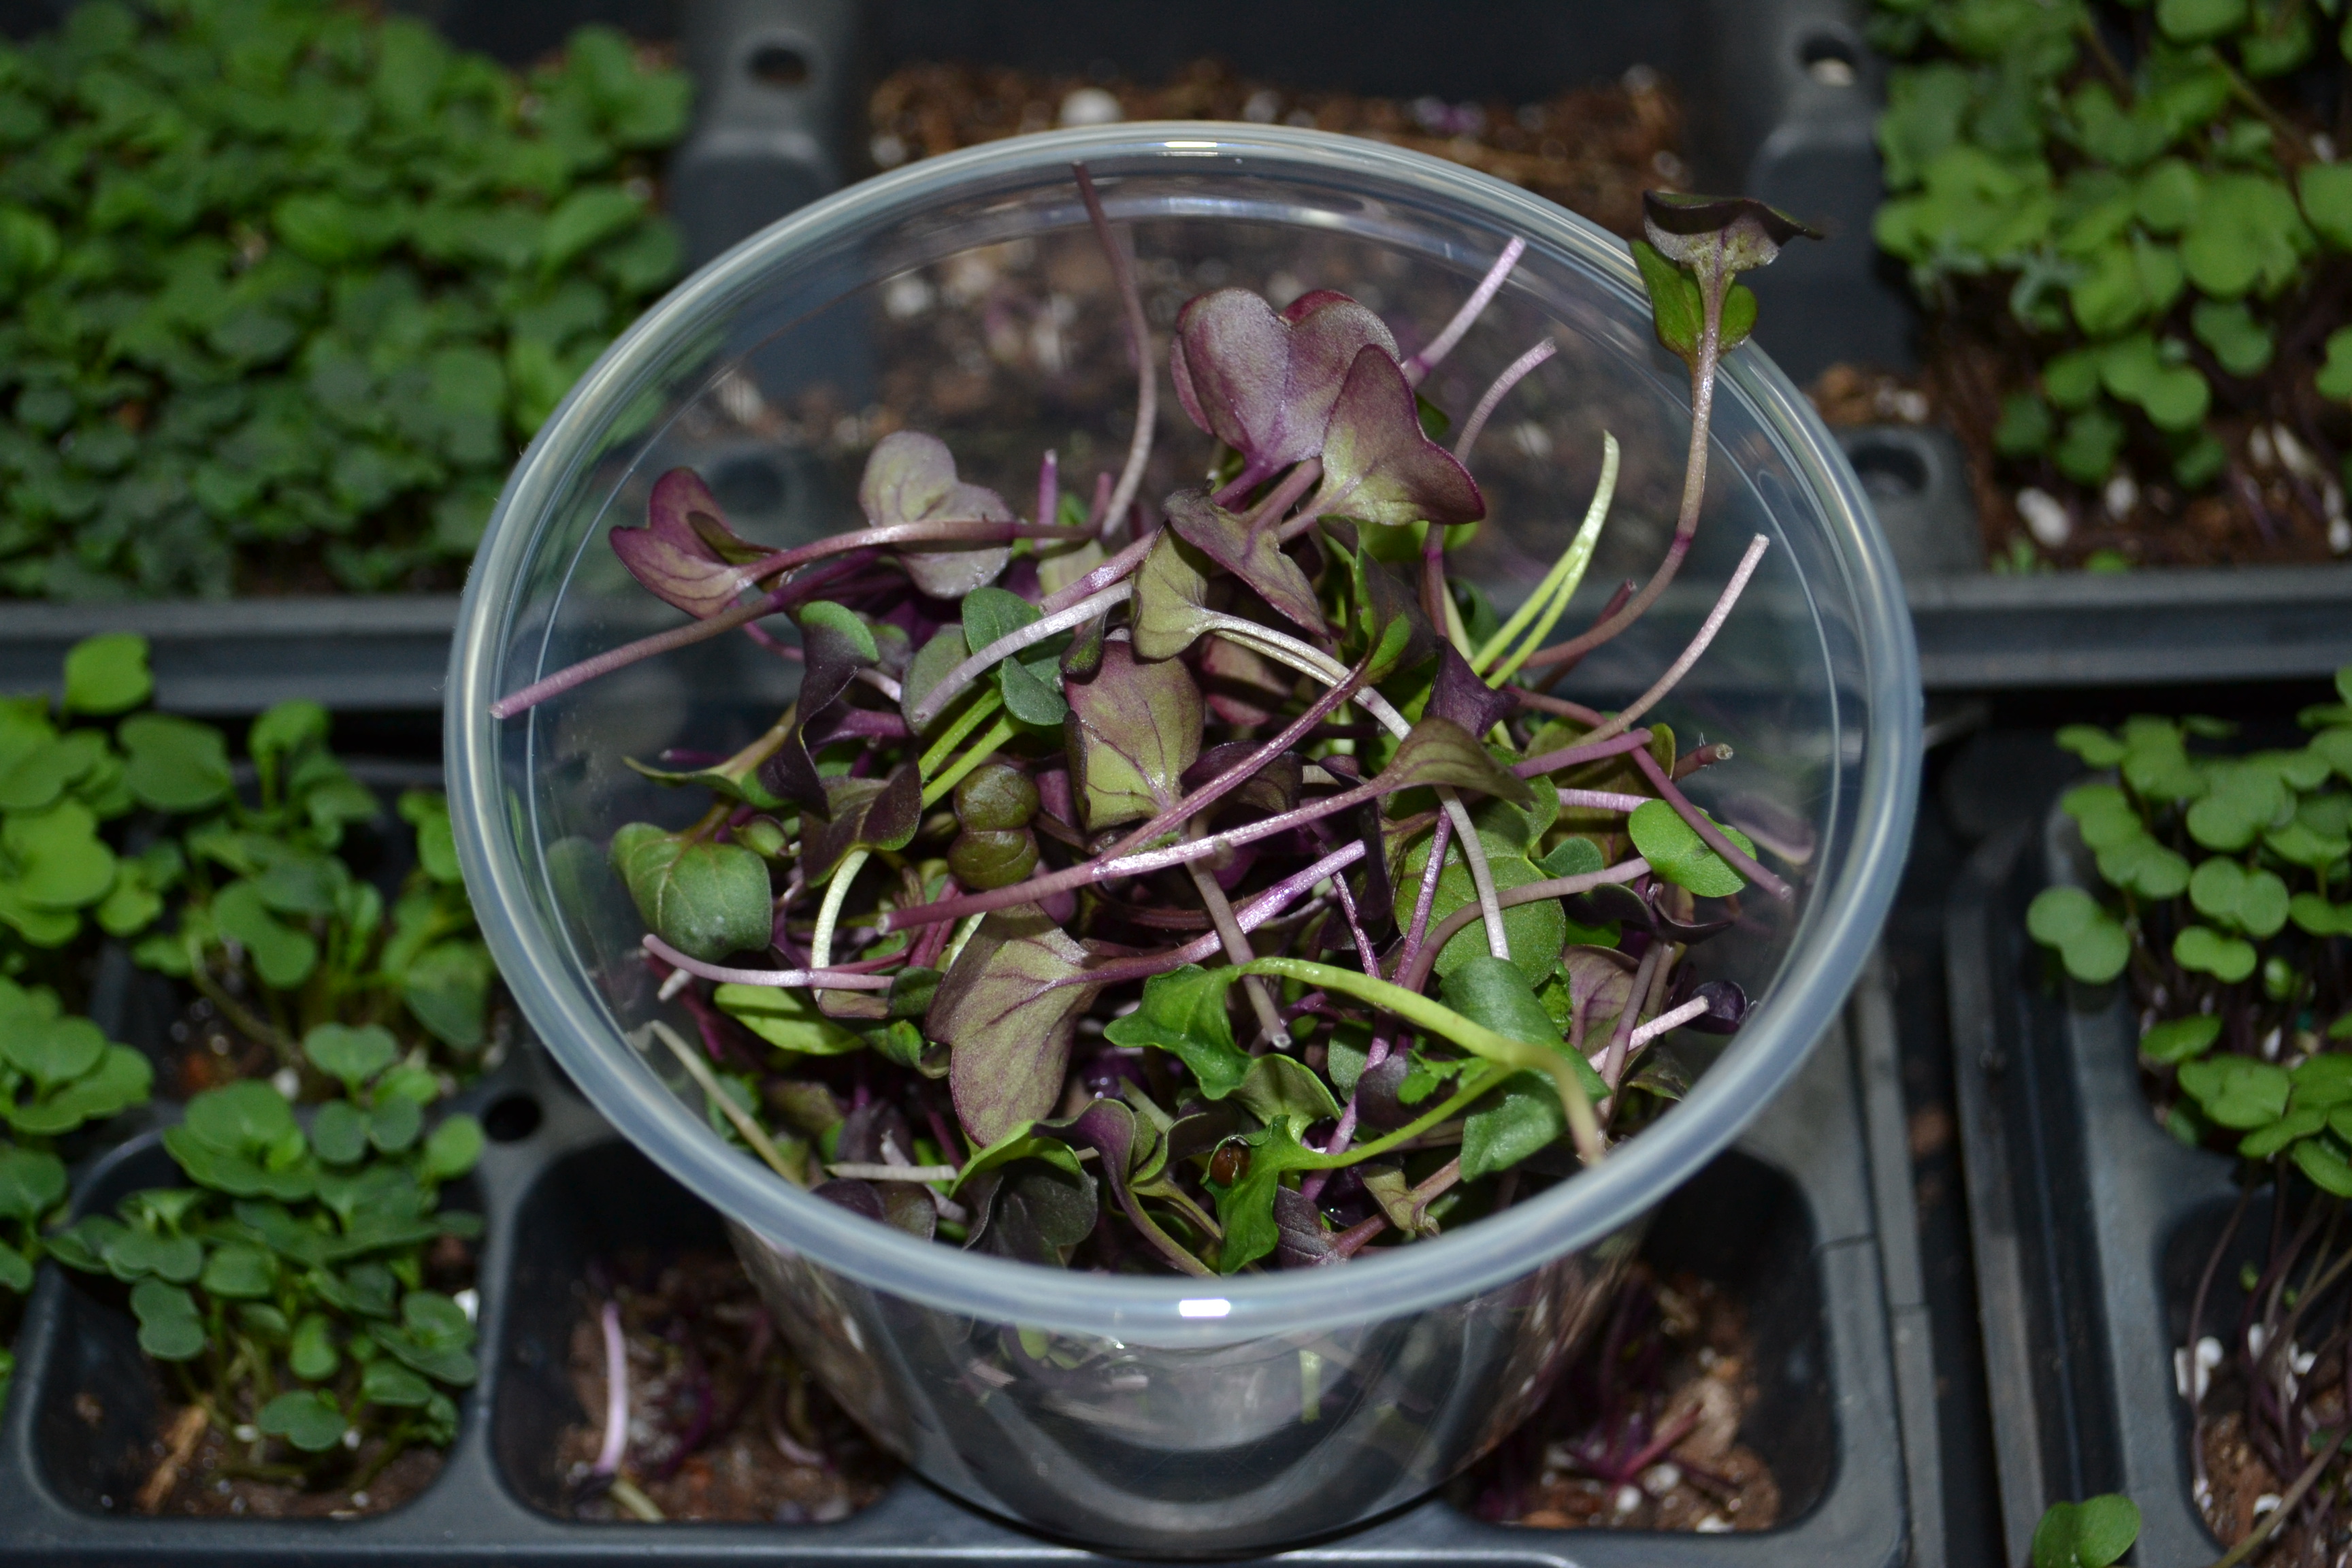
Radish and kale will be ready for harvest in about 7 days. Swiss chard, basils, and cilantro may take 20 days.
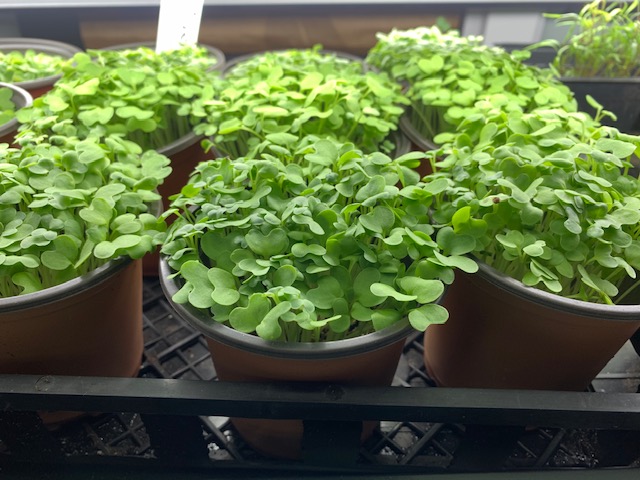
Microgreens are ready to harvest. Photo by Beth Bolles, UF IFAS Extension Escambia County
Use clean scissors to cut stems, careful not to pull up any soil. Remaining soil and roots can be composted.
When you are ready to use in a salad, sandwich or in juicing, place microgreens in a bowl of water to wash. Let them air dry on a paper towel.
The good news about growing microgreens, is if you find they are not to your liking or too much trouble, you it has only been a couple of weeks of effort.