by Ray Bodrey | Feb 5, 2019
The “new” or “Irish” potato is one of America’s most popular vegetables and a fine cool season crop choice for gardeners in the Panhandle.
The history of the potato is quite interesting. The potato was first domesticated in Peru between 3000 BC-2000 BC. Potatoes were first planted, where in states? Idaho, of course, as early as the 1830’s. By 1900, Idaho’s production exceeded one million bushels. Potatoes are diverse in appearance and uses. Potatoes are high in nutrition and have fewer calories than other starches such as rice, pasta and bread.
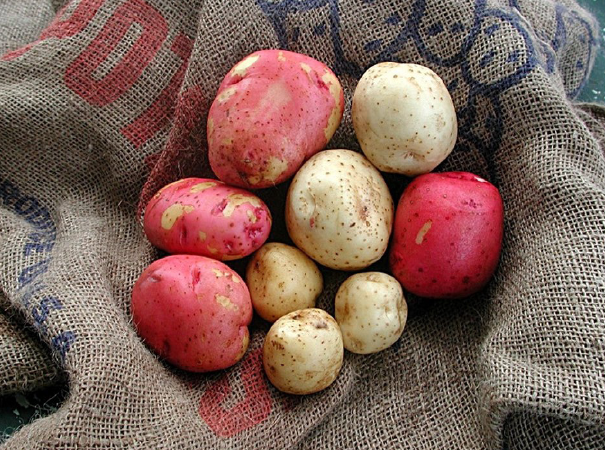
In Florida, potatoes can be planted in the winter or early spring. February 1st to March 10th is the prime planting range. As a general production rule, 100 lbs. of seed potatoes will typically yield around ten bushels. Be sure to use only certified seed potatoes for best planting stock. These can be found at most garden centers. For best results, select varieties recommended for North Florida like ‘Atlantic’, ‘Sebago’, and ‘Superior’ (all round, white potatoes). Also, ‘Red Lasorda’ and ‘Red Pontiac’ are viable round, red potatoes. Resist using potato stock bought from produce sections at grocery stores. Odds are, symptoms of a number of diseases will occur. For planting, each seed potato should be cut into smaller pieces, displaying two or more eyes. To prevent fungal pathogens, the most common culprit in potato production, use a light dusting of a fungicide to combating decay.

Figure 1. Red and white potatoes grown in Florida.
Credit: C. Hutchinson. UF/IFAS Extension
It’s best to plant seed potatoes in raised rows, where the height of the mound is 6 inches and the width is 1 to 2 feet. Row spacing should be at least 3 feet apart. The seed furrow should be 3-4 inches in depth, through the center of the row. Seed potatoes should be planted in 1 foot intervals. Cover, and water freshly planted rows. Fertilizing is key. One quart of 10-10-10 fertilizer for every 50 feet of row space is needed for the initial application. Through the season, for every 3 weeks, side dress the rows with a pound of 10-10-10 per 50 feet of row space.
Following these steps will ensure a productive potato crop. For more information please contact your local county extension office.
Supporting information for this article and further information can be found in the following the UF/IFAS EDIS publication: “Growing Potatoes in the Florida Home Garden” by Christian T. Christensen, Joel Reyes-Cabrera, Libby R. Rens, Jeffrey E. Pack, Lincoln Zotarelli, Chad Hutchinson, Wendy J. Dahl, Doug Gergela, and James M. White: https://edis.ifas.ufl.edu/pdffiles/HS/HS18300.pdf
UF/IFAS Extension is an Equal Opportunity Institution.
by Matt Lollar | Feb 5, 2019
Winter is in full swing and home grown produce is probably not the first thing that comes to mind. But it should be! It’s time again to start thinking about spring vegetable gardening. While a number of crops can be started by direct seeding in the soil, success rates are higher when plants are started indoors or in a covered structure. In order to be successful, it’s important that you follow some simple steps.
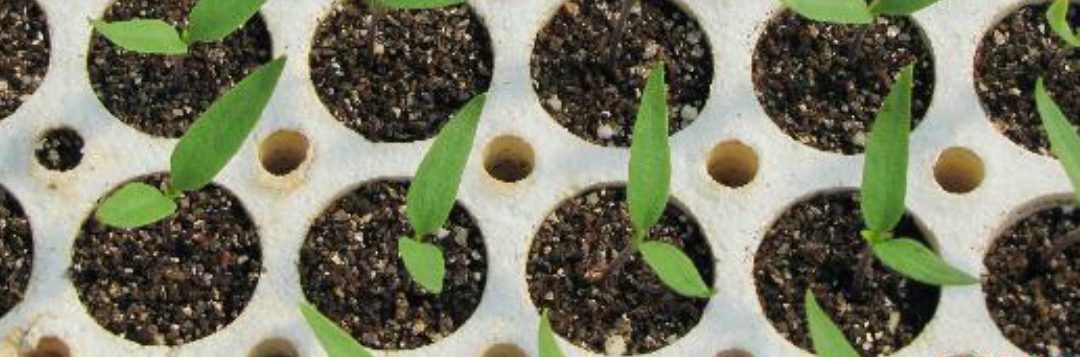
Seedless watermelons planted in a 128-cell flat. Photo Credit: Gene McAvoy, University of Florida/IFAS Extension – Hendry County
- Transplant Trays/Flats – Trays are made from different materials such as plastic, polystyrene, and compostable materials. Different cell sizes are also available. Generally, smaller cells are used for smaller seeds and larger cells are used for larger seeds. It’s important to think of the life cycle of the crop. For example, lettuce and other leafy greens have much shorter life cycles compared to tomatoes. Because of this, they have smaller root systems at transplant time and may not develop a good rootball in a large cell. Therefore, lettuce would perform better in a smaller cell.
- Media – It’s important that you choose a germination mix instead of a potting mix. Definitely don’t use garden soil! Germination mixes are typically a combination of finely ground peat, perlite, and other soiless substrates.
- Seed – Purchase seed from a reputable source with a germination guarantee. If you save seeds for future gardening, then store them in a cool, dry place. Seed can be stored in the refrigerator. However, do expect the germination rate of stored seeds to diminish over time. Coated seed is recommended for smaller seeds to make seeding easier and more efficient. Seeds should be planted in media at a depth of approximately 3 times the diameter of the seed. Check the seed package for additional planting recommendations. For more germination and storage information please see this publication from the University of Nebraska.
- Fertilizer – Too much fertilizer can result in leggy and possibly burned plants. A 20-10-10 (or similar ratio N-P-K) water-soluble product is generally used in commercial production. Rates are dependent on crop, sunlight, and temperature. The media should be kept moist, but not continually wet.

Well-grown kale transplants ready for field planting. Photo Credit: Gene McAvoy, University of Florida/IFAS Extension – Hendry County
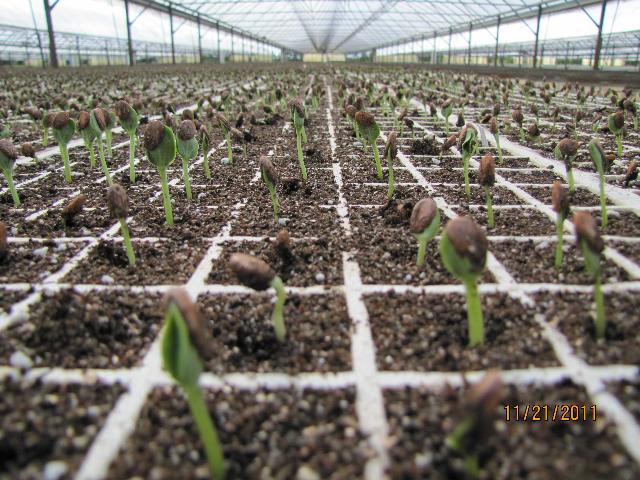
Seeds can take up to 14 days to germinate depending on species and conditions. Most transplants are ready for the garden by 6 to 8 weeks. To improve success rate and accelerate production time, most farmers harden off their transplants before planting. Hardening off is the process of stressing the transplants for about a week. Generally, transplant trays are taken out of the greenhouse (or other transplant area such as a window sill) and set outside. Watering frequency is reduced and fertilization is halted. It’s important that the plants aren’t completely neglected, but just stressed enough to prepare them for the elements. A good place to put the trays is under a tree in partial shade. After this hardening off period, the transplants are ready for your garden. Hopefully these tips will make you a more successful gardener!

by Daniel J. Leonard | Jan 18, 2019
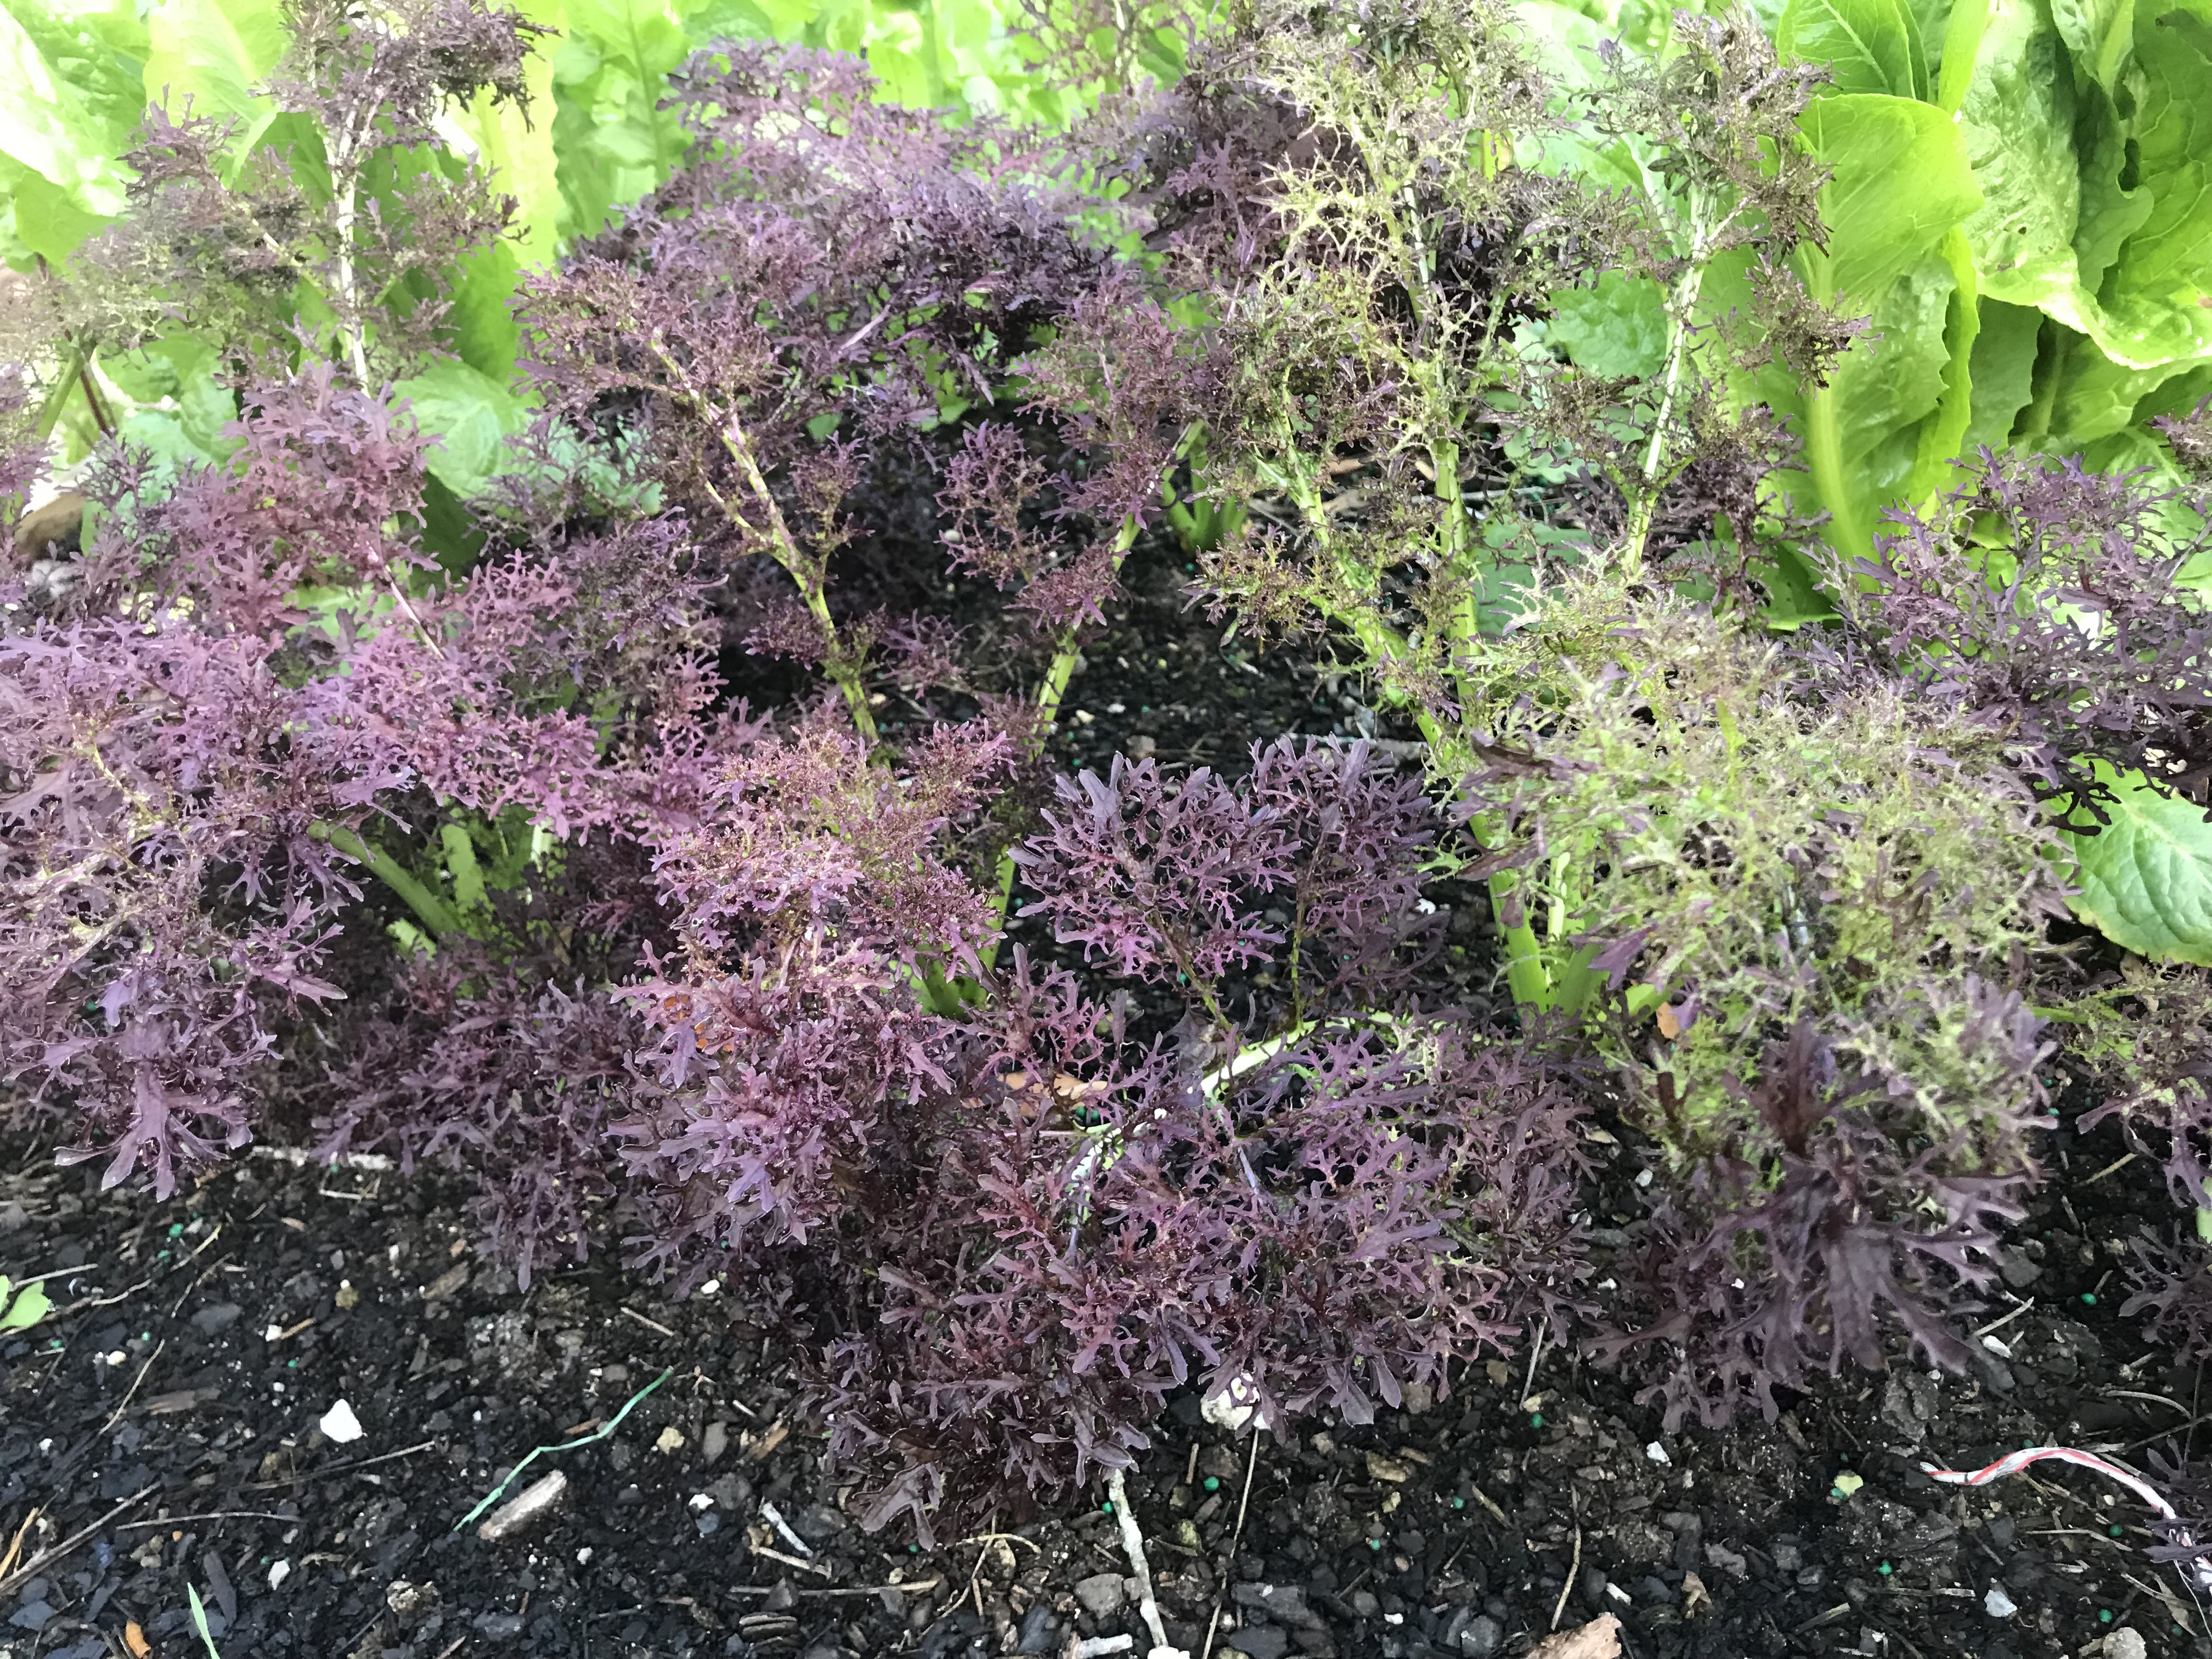
Many Americans have a remarkably unrefined taste in salads; my brother has long counted himself in this group. Dice up some crunchy Iceberg type lettuce, splash on a dollop of ranch dressing, maybe chop a leaf of romaine up if you’re feeling frisky and call it a salad, this is the way we’ve been trained to eat. I’m here, a voice in the supermarket produce aisle wilderness calling, to tell you it’s time to open up your palate, look beyond lettuce, live a little, and add some spice to your life and salad bowl with three of my favorite easy to grow leafy greens: Mizuna, Frilly Mustard, and Italian Dandelion.
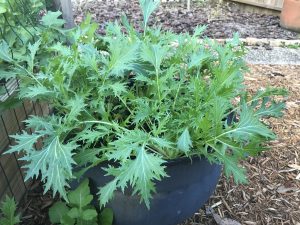
Mature Mizuna plants in the author’s container garden.
Before we get into species specifics, let’s cover a couple of reasons you should grow them at home! Growing your own flavor-packed greens has many benefits. First, leaves from these plants can be difficult to find anywhere but specialty health food stores or high-end supermarkets. Growing your own ensures a consistent supply, especially if one utilizes the “cut and come again” harvesting method (just remove the leaves and stems you need that day, leave the crown intact and allow the plant to regrow for next week’s harvest). Second, you do not have to worry about the too common food safety recalls and other health scares involving “leafies”. If you follow standard safety practices (clean irrigation water, wash picked leaves and store properly, etc.), you’ll be eating scrumptious salads when everyone else is begrudgingly trashing entire bags of recalled store-bought greens. Finally, each of these species double as gorgeous accent plants in
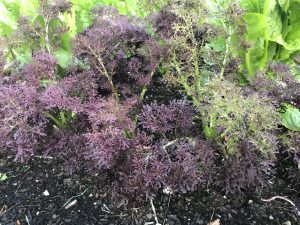
‘Scarlet Frills’ Mustard in the author’s container garden.
raised beds or containers. I love plants that do heavy lifting as both eye-catching ornamentals and delicious edibles!
Mizuna is a little known member of the mustard family that is quickly becoming one of my favorite leafy greens! It faces no major pest or disease problems in the garden and it is extremely tolerant of the cold weather Floridians periodically face through the winter, laughing off frost. Mizuna possesses lovely, deeply cut, pale green, fringy leaves complete with crispy white stems, all of which are edible – no need to separate stems when processing to eat! This lovely little Asian green has a mild peppery taste (think a toned-down Arugula) and adds perfect flavor and texture to any salad!
Many Southerners are well acquainted with traditional Mustard greens and their preparation (more than a little bacon and salt) but may not be aware of newer Mustard cultivars that give the species a bit of refinement and make it a salad celebrity! This winter, I’m growing a cultivar of Mustard called ‘Scarlet Frills’ (aptly named with finely serrated burgundy-red leaves) and really enjoy its peppery horseradish taste as a foil to the mildly sweet taste of traditional salad greens like lettuce and spinach. Mustards are extremely cold tolerant and slow to bolt, making it a mainstay in the salad garden all winter long; you really get your money’s worth from a few Mustard plants! However, even if this leafy green wasn’t delicious, it would be worth growing. The “fancier” Mustard cultivars are highly ornamental and deserve a spot in any cool season container garden.

‘Italiko Red’ Italian Dandelion in the author’s container garden.
Finally, the one that turns up the most noses when I mention growing and eating it, Italian Dandelion (Cichorium intybus)! I’m not advocating foraging in your turfgrass to find dinner, in fact, Italian Dandelion is not a true dandelion (it’s actually a chicory). However, it does share a number of features with its weedy cousin, including leaves that are similar in appearance and a vigorous taproot. That’s where the comparisons stop though, as Italian dandelion is a superior garden plant, more upright growing, much larger, and deeper green (some varieties including the one I grow ‘Italiko Red’ have red veined leaves) than its wild cousin. Unlike Mizuna and some of the milder mustards, Italian Dandelion is a bit of an acquired taste. It imparts a strong bitter flavor that may be cut with milder greens in a salad or cooked down to reduce bitterness. Either way you try it, put Italian Dandelion on your cool season garden next year!
Mizuna, Frilly Mustard, and Italian Dandelion all require similar growing conditions. In Florida, leafy greens are cool season vegetables, growing through the fall, winter and spring months. Seeds should be sown in late September and can be stagger-sown (plantings every couple of weeks) to ensure a steady supply through spring. As a rule, they prefer rich, well-drained soil high in organic matter. These soil conditions are achievable with either quality commercial potting mixes or homemade concoctions of compost and pine bark. The beds or containers you fill with the aforementioned soil should be sited near a good water source (plants that aren’t convenient to water get neglected, trust me) in an area that gets 6-8 hours of full sunlight. I like to topdress at planting (if using transplants) or after germination (if using seed) with a good general purpose, slow-release fertilizer, many formulations and brands that work are widely available for purchase. Finally, be sure to purchase seed from a quality source. Online purveyors Johnny’s Selected Seeds, Baker Creek Heirloom Seeds, and Sow True Seeds are good places to start, though the options are nearly endless!
Next year, when planning your cool season garden, remember to add a little spice with these three leafy greens, Mizuna, Frilly Mustard, and Italian Dandelion! For more information about cool season gardening and other topics, consult your local UF/IFAS Extension Office.
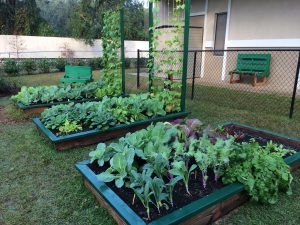
by Molly Jameson | Jan 14, 2019
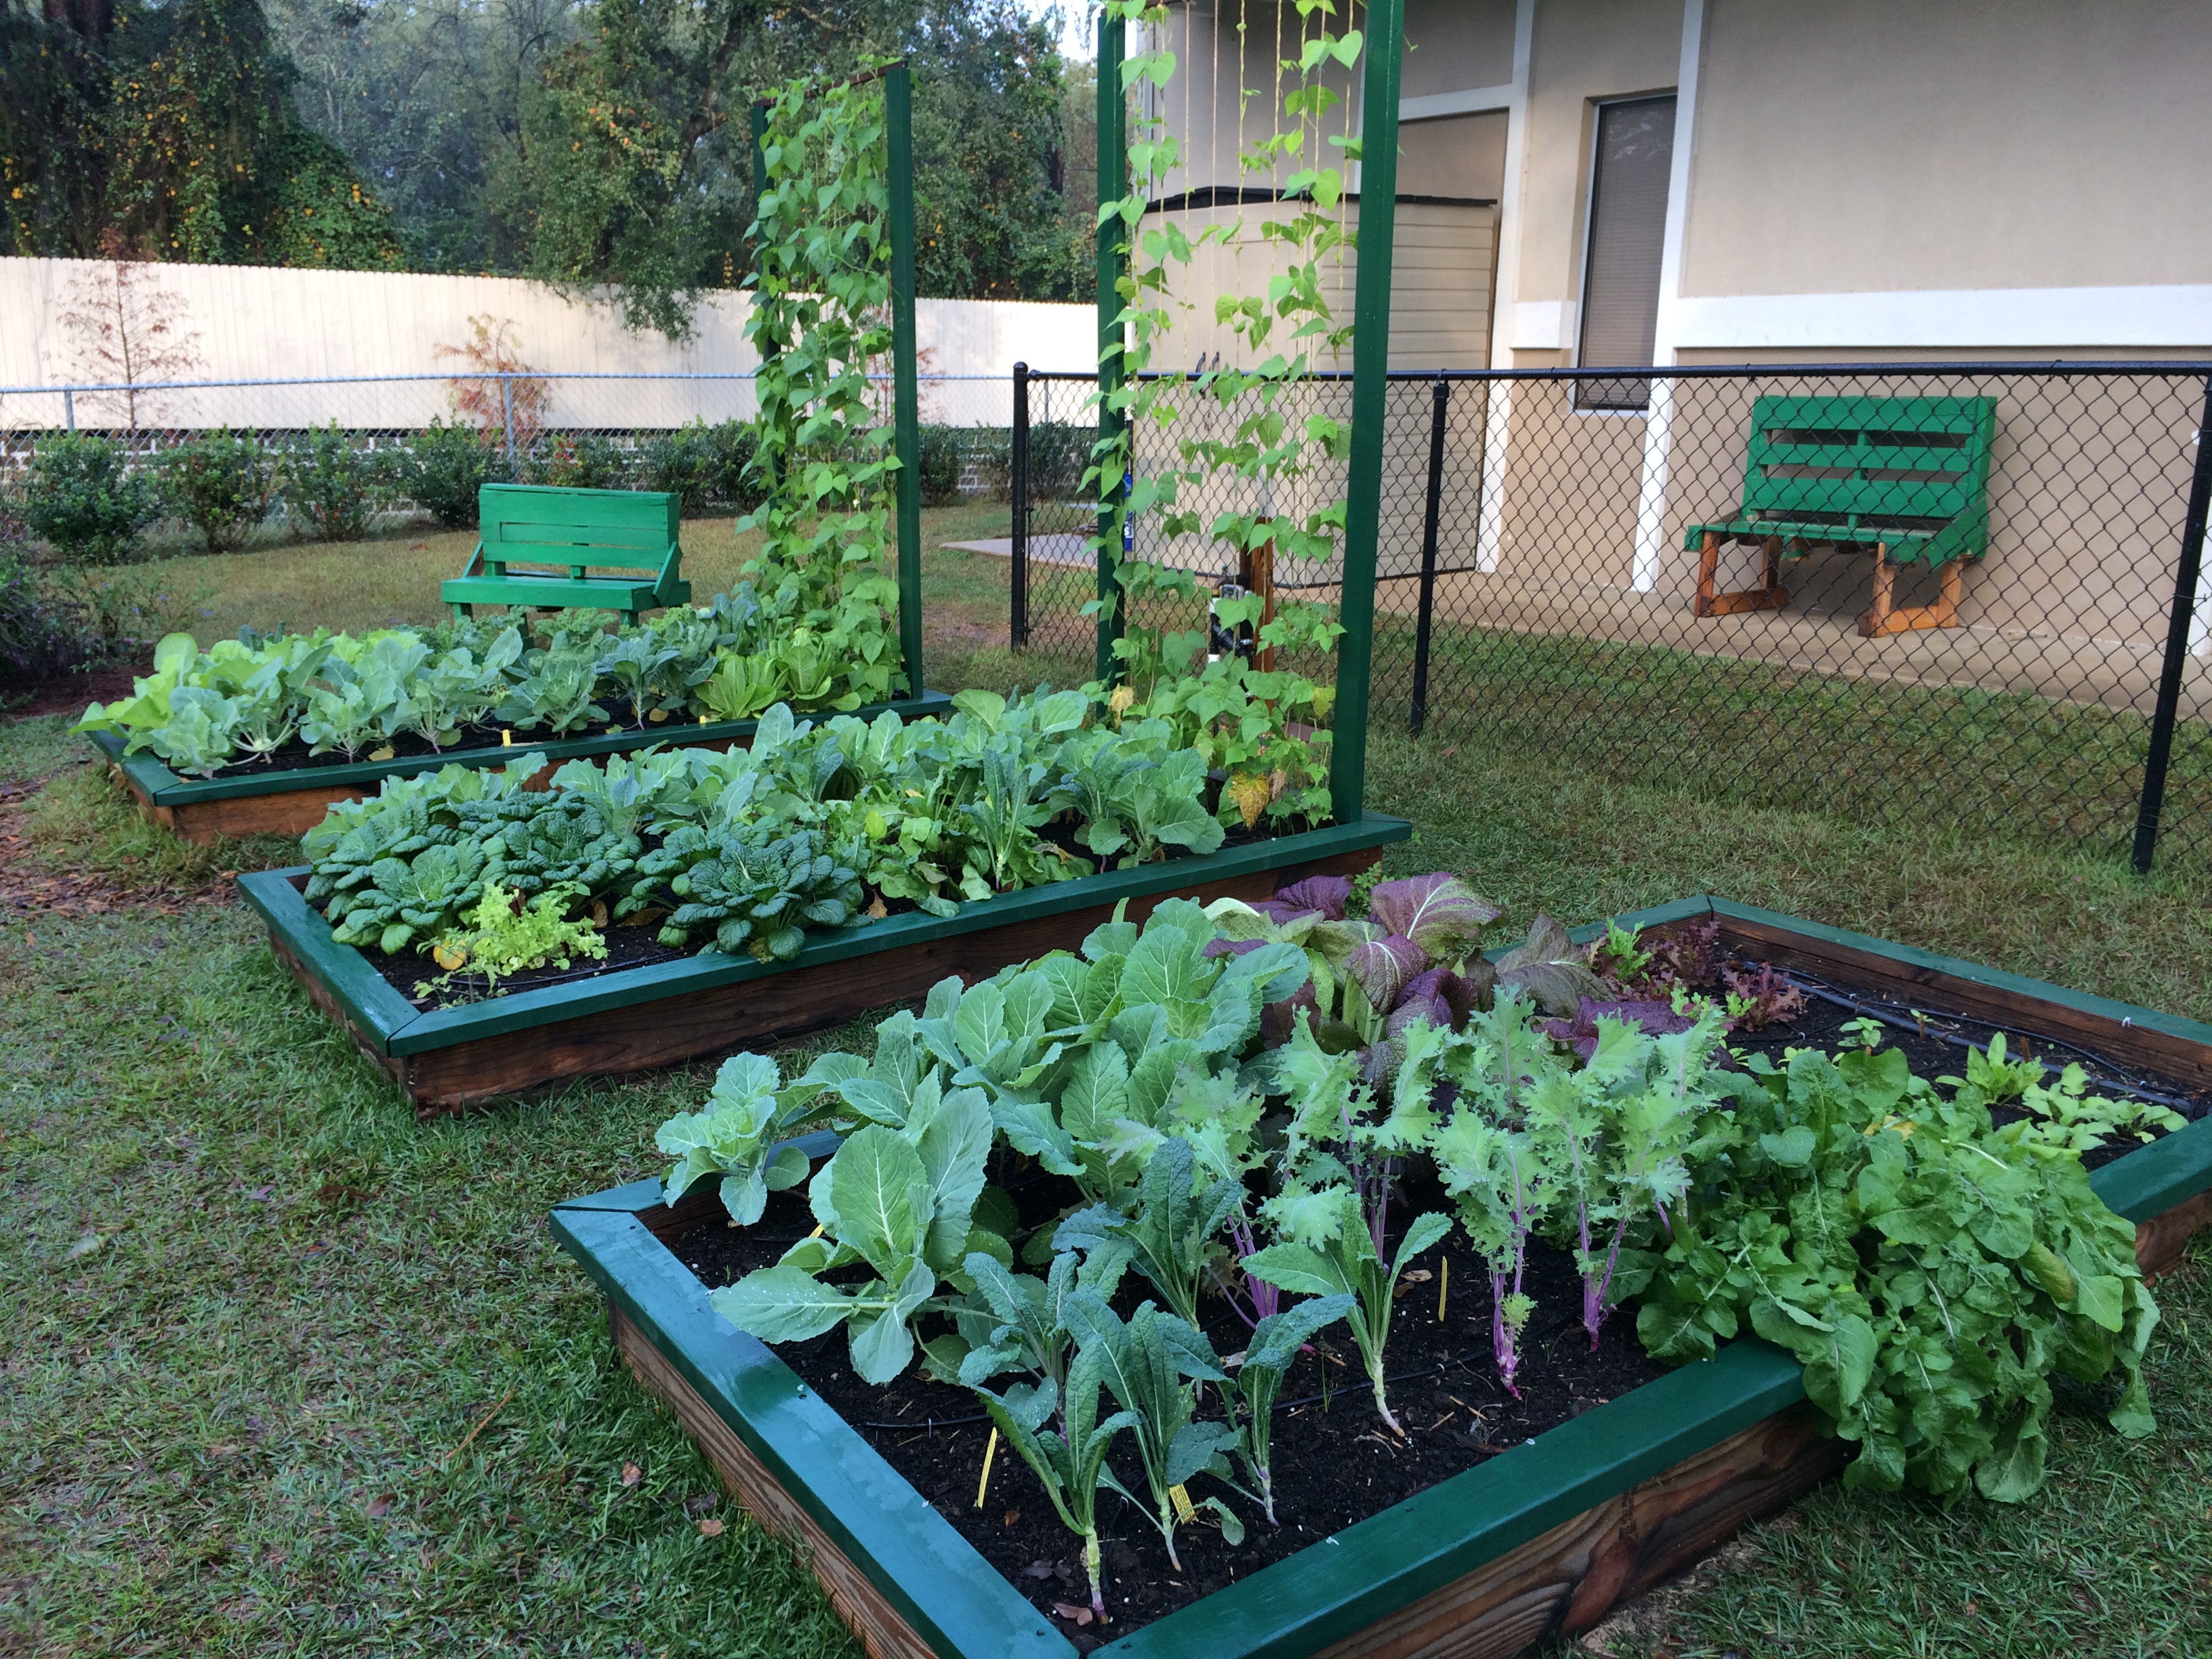
Raised beds are an excellent way to get started with gardening. Photo by Molly Jameson.
One of the biggest obstacles a vegetable gardener faces is how to supply crops with healthy soil that can support crop growth all season long. Many native soils in Florida are stripped of imperative nutrients that crops need to grow, are too compacted from vehicle and foot traffic, and are often too sandy to support soil life, which is very important for nutrient cycling, building soil structure, and combating pests and diseases.
One of the best ways a gardener can ensure a successful gardening experience is to build a raised bed garden. No matter your native soil type and existing conditions, raised bed gardens allow a framework for building nutrient rich soil that can supply crops with what they require to grow healthily and thrive.
Want to learn how to garden using raised beds? On February 5, from 6:00 to 7:30 p.m., UF/IFAS Extension Leon County is offering a Raised Bed Gardening 101 workshop as part of the Red Hills Small Farm Alliance’s Seven Days of Local Delights. This is a week-long annual celebration that includes educational workshops, restaurant partnerships, fundraisers, and more that supports the local food community and farmers in the Red Hills Region. This year, the Seven Days of Local Delights runs from Sunday, February 3 to Sunday, February 10.
A trellis can even be built right on the end of a raised bed. Photo by Molly Jameson.
At the Raised Bed Gardening 101 workshop, learn how to choose the best raised bed garden site location, basics of irrigation in raised beds, planting dates and plant spacing, the difference between treated and untreated lumber, how much and what type of soil to use, and other tips on growing food in your backyard.
There is no cost to attend, but please register on Eventbrite (https://sdldraisedbedgardening101.eventbrite.com). For more information, contact Molly Jameson at mjameson@ufl.edu.
Check out everything going on during the Seven Days of Local Delights at the Red Hills Small Farm Alliance website: https://www.redhillsfarmalliance.com/seven-days. If you are not in the Tallahassee area, check with your local extension office to see what gardening events they may have available and how you can support your local food community and farmers in your area.
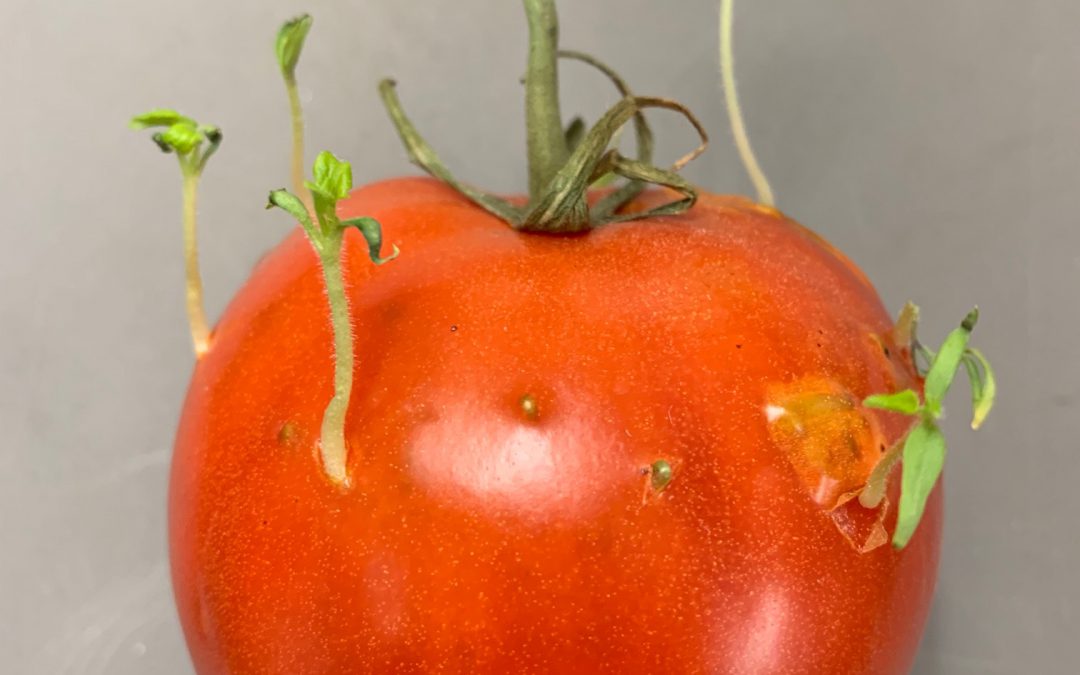
by Mary Salinas | Jan 14, 2019

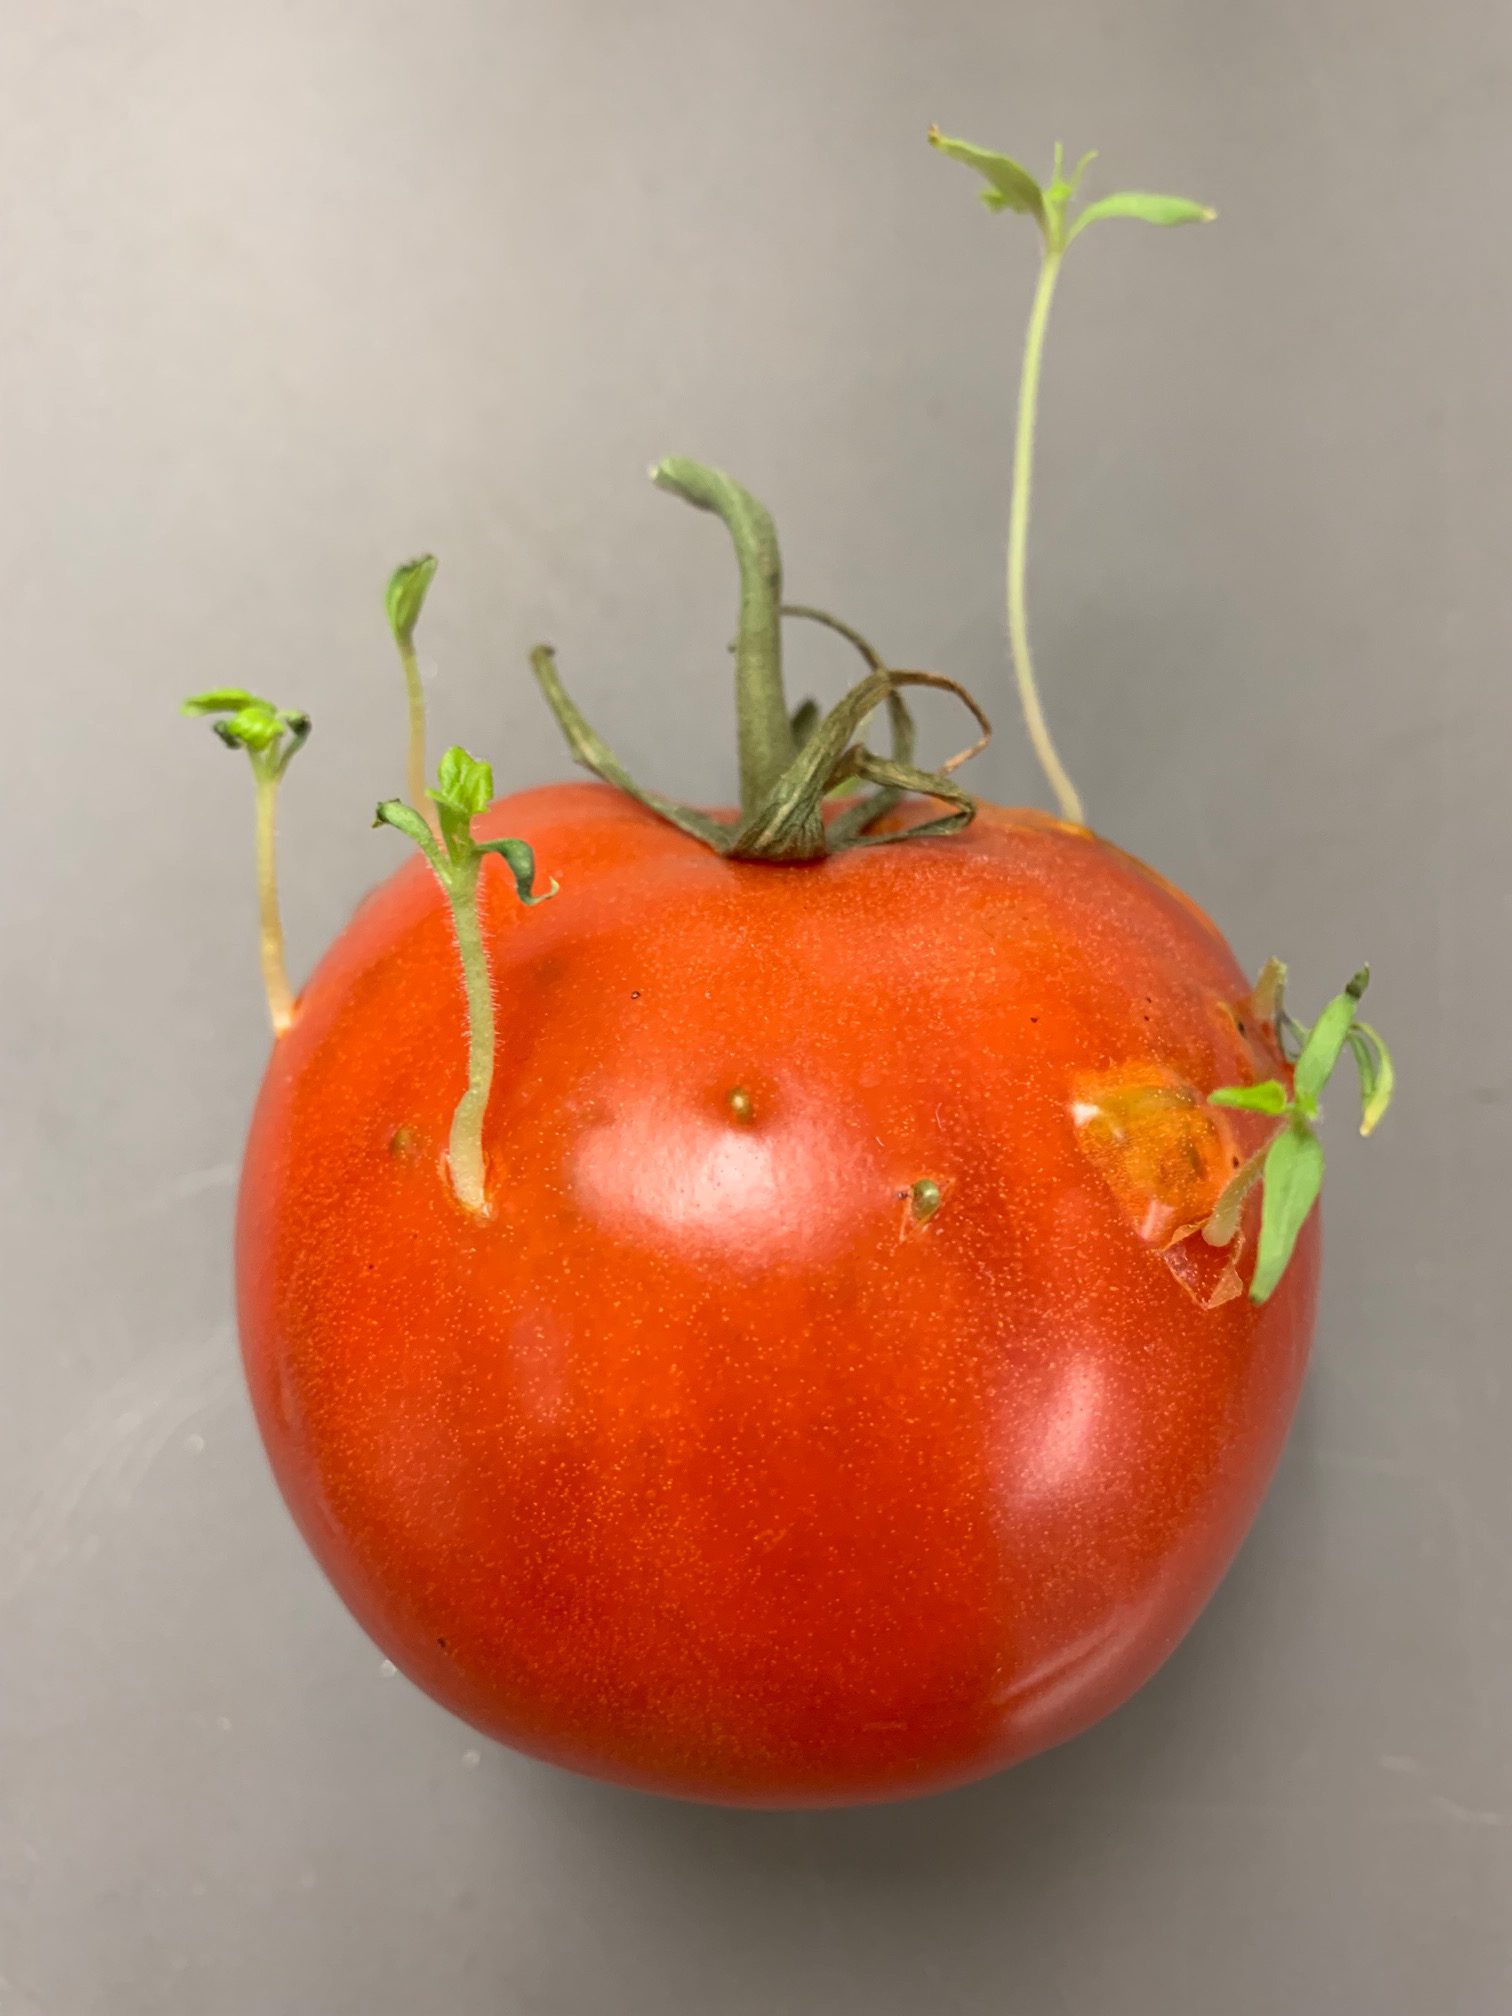
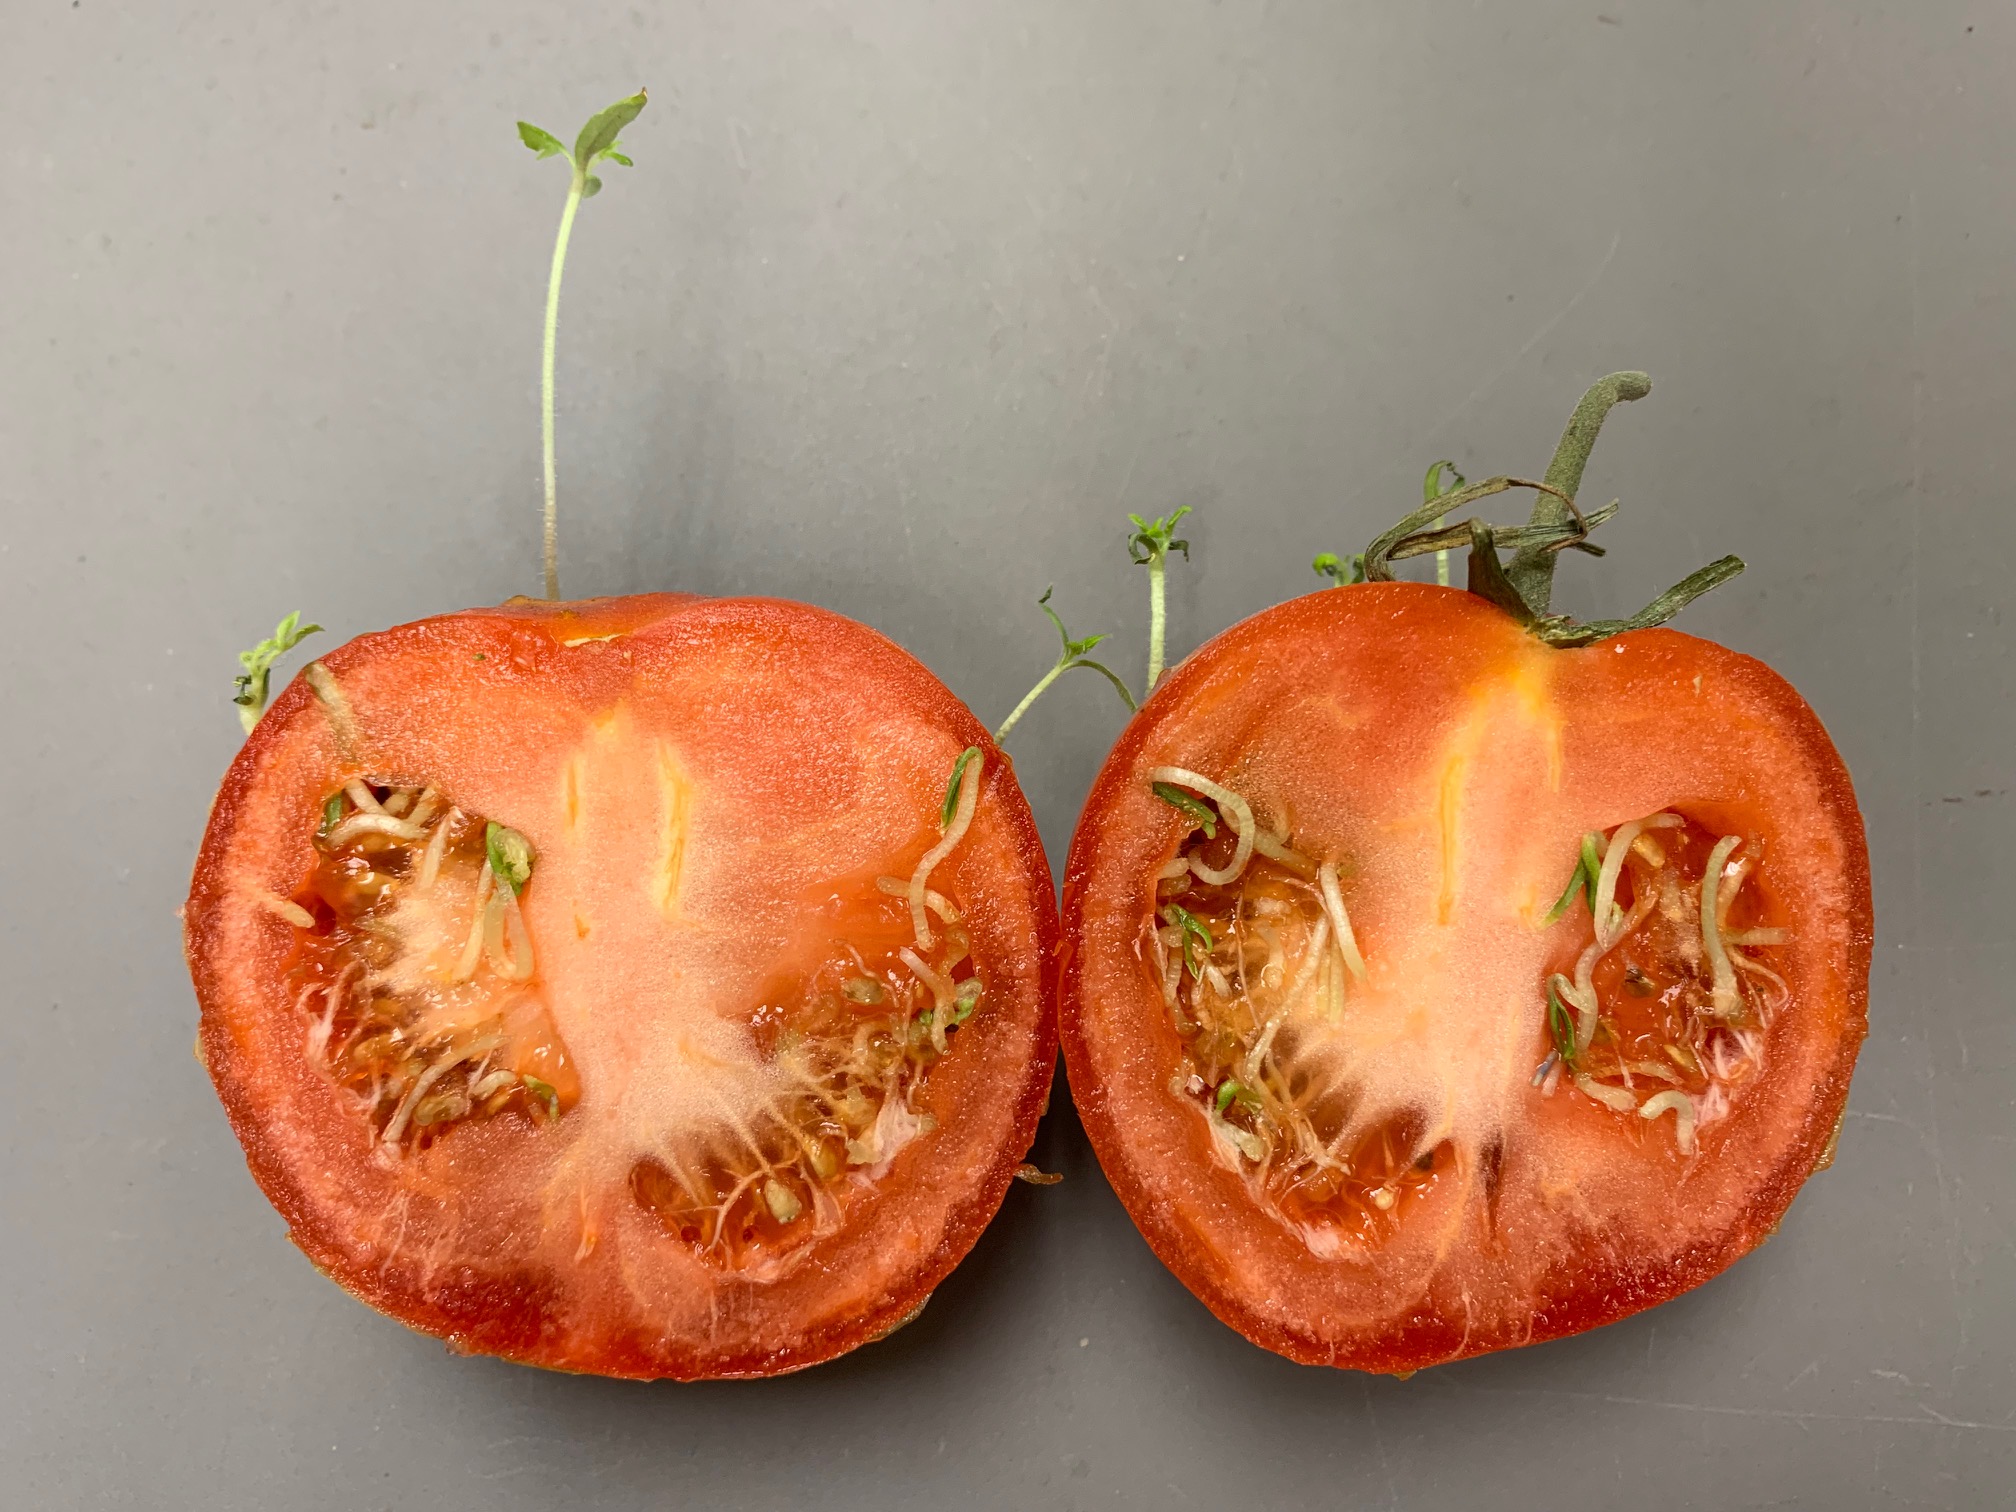
Tomato with sprouts. Photo credit: Mary Salinas, UF/IFAS Extension.
What in the world is happening to the tomato in this photograph? Are those hostile parasitic plants taking over the tomato?
No, nothing so sinister. You are just seeing anxious new tomato plants sprouting from the seeds inside the tomato.
A naturally-occurring plant hormone normally prevents seed inside of fruit from sprouting too soon. But sometimes the piece of fruit is hanging around a bit longer than nature planned and the hormone that prevents the seed sprouting is depleted. So, the seeds start to sprout and look like squiggly white worms inside the tomato. With enough time, they pop through the skin and emerge as little tomato plants.

Halved tomato with interior sprouts. Photo credit: Mary Salinas, UF/IFAS Extension.
This phenomenon also commonly happens in pepper, citrus, apple, jackfruit, avocado and pear.
Yes, you can separate the little plants and plant them on their own if you would like.
For more information on growing tomatoes:
Tomatoes in the Florida Garden
Florida Vegetable Gardening Guide

by Molly Jameson | Nov 21, 2018
Arugula is a pungent, peppery leafy green native to the Mediterranean. It is in the Brassica or crucifer family, which also contains vegetables such as broccoli, kale, radishes, and cabbage, but is perhaps less common in the edible garden landscape. Although arugula is typically considered a fall vegetable, it can be seeded all year long with a little bit of protection from extreme cold or heat.
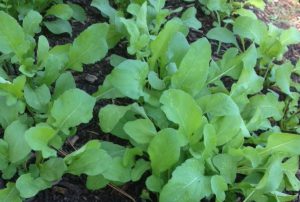
Arugula is an easy green to grow and adds pungent, peppery flavor to salads, pizzas, and many other dishes. Photo by Turkey Hill Farm.
Matter of fact, you can plant arugula every few weeks year-round to enjoy young tender leaves anytime. Since arugula has a compact root system, sow seeds one to two inches apart, thin out young whole plants as they fill in, and add them to salads for some extra dinner pizazz. Once plants are four to six inches apart, begin to harvest just arugula leaves, leaving the plants to grow taller in height. Leaves make great toppings on a sandwich or pizza, can be tossed in pasta just before serving, or can be steamed, stir-fried, or pureed and added to a plethora of dishes.
Although arugula is not as flashy as many of its fall garden counterparts, it is often the easiest to manage and last to get pest and disease problems. While your lettuce is attacked by slugs, kale crawling with aphids, and cabbage chewed up by armyworms, arugula often shines unblemished. And in late fall and winter, arugula will only need cold protection if we have a hard freeze (temperatures below 28 degrees for more than four hours). In these cases, cover your plants with frost cloth, bed sheets, or simply buckets, if your arugula patch is small. Just remember to secure your cover to the ground, such as using bricks to pin the cloth, to prevent gaps for air to escape. If done correctly, you can raise air temperatures eight degrees.
From June to September it will be helpful to plant your arugula in partial shade or use shade cloth with 40 to 60 percent density to cut the intensity of the heat. Spring and summer planted arugula may go to seed faster than in fall or winter, but because it is such an easy plant to sow and manage, you can be planting your next round just as your previous crop begins to senesce.
Throughout the life cycle of arugula, you will notice changes in the intensity of the plant’s complex flavor. This is due to fluctuations in sulfur compounds called glucosinolates, which increase as the plant matures.
So be brave, clear some space in your garden plot, and give this spicy cabbage cousin a try!