by Matthew Orwat | Jan 23, 2018
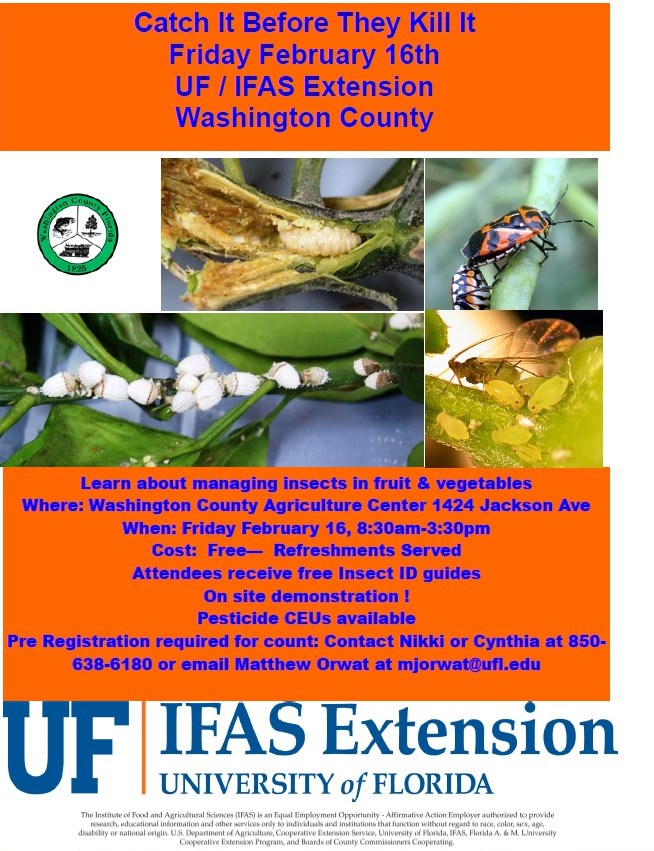
Please join us for an informative workshop to learn about managing insects in fruit & vegetables. You will learn how to identify common insect pests, control insect pests and submit samples for diagnosis from University of Florida / IFAS specialists. Attendees will receive free Insect ID guides and participate in an on-site demonstration ! Pesticide CEUs will be available for license holders as well. This workshop Washington County Agriculture Center 1424 Jackson Ave., East wing. it will be Friday February 16, 8:30am-3:30pm and there is no cost. Pre-Registration required for count: Contact Nikki or Cynthia at 850-638-6180 or email Matthew Orwat at mjorwat@ufl.edu
Agenda
Welcome 8:30am-8:35am
Matthew Orwat, Washington County Cooperative Extension
Introduction 8:35am-8:40am
Amanda Hodges, University of Florida
True bugs in Spring Vegetables-Identification and Management 9:00am-10:15am
Amanda Hodges and Ploy Kurdmongkoltham, University of Florida
Cowpea Curculio 10:15am-10:30pm
Ploy Kurdmongkoltham and Amanda Hodges, University of Florida
Break 10:30am-10:45am
Whitefly Management 10:45am-11:10am
Matthew Orwat, Washington County Extension
Importance of Invasive Species to North Florida Vegetable Production 11:10am-11:30am
Amanda Hodges, University of Florida
Invasive Stink Bugs and Related True Bugs 11:30am-11:50pm
Brown Marmorated Stink Bug, Bagrada Bug, and Kudzu Bug
Amanda Hodges, University of Florida
Lunch 11:50pm-12:30pm
Tomato leafminer Tuta absoltua 12:30m-12:45pm
Brad Danner, FDACS-DPI Survey Specialist
Old World bollworm and Exotic Spodoptera Pests 12:45pm-1:05pm
Silvana Paula-Moraes, University of Florida
Common Vegetable Plant Diseases in the Florida Panhandle
curcubits and hands on samples 1:05pm-1:35pm
Sanju Kunwar, University of Florida
Pest and Pathogen Walk 1:35pm-2:05pm
CAPS Exotic Corn Diseases of Concern 2:05pm-2:35pm
Brad Danner, FDACS-DPI Survey Specialist
Sample Submission, Arthropod and Disease samples 2:35pm-2:50pm
Ploy Kurdmongkoltham and Amanda Hodges, University of Florida
Conclusion and Post-Workshop Survey 2:50pm-3:15pm
Amanda Hodges, University of Florida
by Matt Lollar | Dec 14, 2017

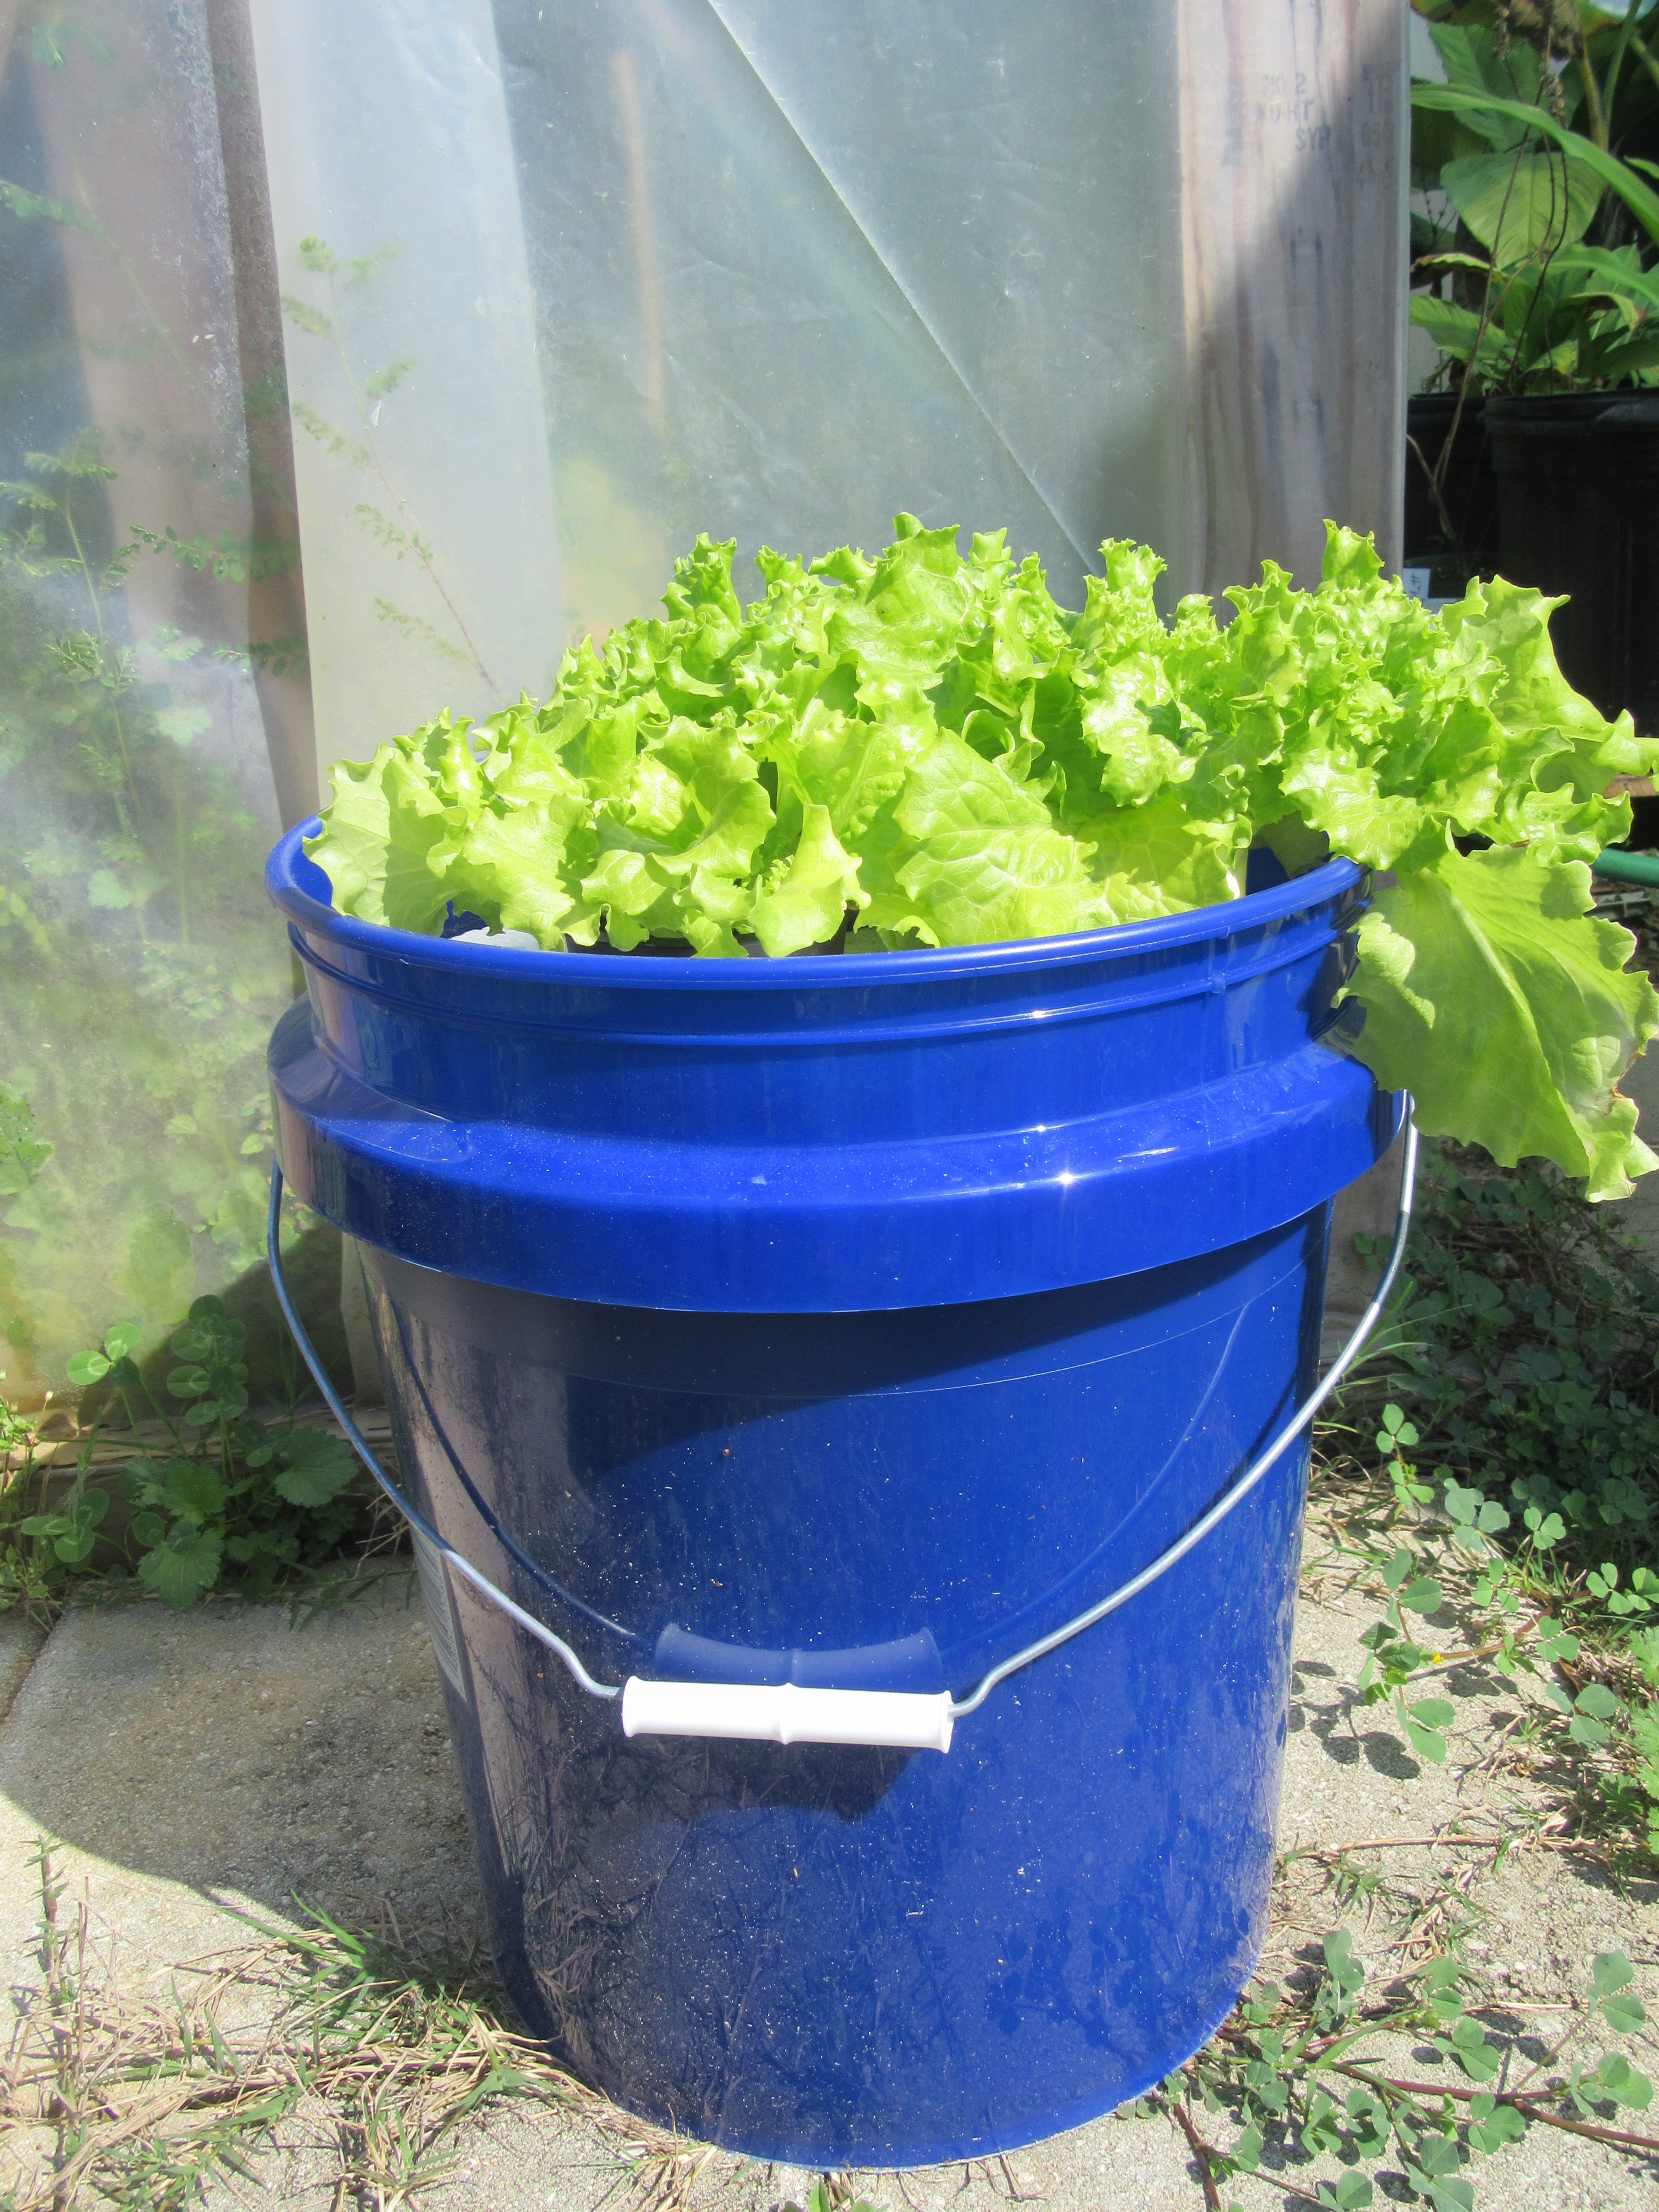
Leaf lettuce growing in a floating hydroponic system. Photo Credit: University of Florida/IFAS Extension.
Christmas is just around the corner and what better gift could you give other than the gift that keeps on giving…a hydroponic bucket garden! Floating hydroponic gardens are easy to build with supplies found at just about any home and garden center. A simple garden can be constructed with a 5-Gallon bucket, polystyrene foam board insulation, and “net pots” or other suitable containers to support the plants. Leaf lettuce and herbs are suitable plants for growing in a floating garden and will grow well indoors as long as there is plenty of natural light available.
SUPPLIES
- 5-Gallon Bucket
- Polystyrene Foam (1½ inch or thicker)
- Water
- Water-Soluble Fertilizer (10-10-10, 20-20-20, 24-8-16, or similar grade)
- Epson Salts (magnesium sulfate)
- Suitable Plants (leafy lettuce, greens, or most herbs – NOT rosemary)
- “Net Pots”, Polystyrene Cups with punctures, or other suitable containers
- Jigsaw, Drywall Saw, or Sharp Knife
- Hole Saw
CONSTRUCTION
- Cut, with a jigsaw, a 1½ inch board of polystyrene foam board insulation into 1-by-1-foot squares.
- Place the bottom of the bucket on a 1-by-1 foot square of foam and trace the shape of the bucket on the foam. Cut out the circle.
- Use a hole saw to cut evenly spaced holes out of the foam. (Typically 3 to 4 depending on “net pot”/plant container size.) The hole size should allow the bottom of the plant container to be level with the underside of the foam.
FERTILIZATION & PLANT CARE
Fill the bucket with approximately 2.5 gallons of water. Add 1 to 2 teaspoons of water-soluble fertilizer for each gallon of water to be used in the bucket (approximately 5 to 9 teaspoons for 4.5 gallons of water). Add ½ to 1 teaspoon of Epson Salts for each gallon of water to be used in the bucket (approximately 2.5 to 4.5 teaspoons for 4.5 gallons of water). Mix the fertilizer and Epsom Salts with the water in the bucket. Continue to fill the bucket with water to within 1½ inches of the rim of the bucket. Set “net pots” or plant containers in the hole cutouts in the foam circle. Lay the foam circle, with inserted containers, on the surface of the water/fertilizer mixture in the bucket. Place the young starter plants in the containers. Do not remove the potting mix from the plant roots. The most critical aspect is the depth of the transplant’s root ball in the solution. The bottom of the root ball should be flush with the surface of the water. As the water/fertilizer mixture is taken up by the plants and evaporated, the water level in the bucket will decline.
FURTHER INFORMATION
A bucket garden may just be the beginning of your hydroponic ventures. For additional publications on growing hydroponic vegetables please visit the University of Florida/IFAS EDIS website hydroponic production page. If you want to start your own hydroponic farm then you may also be interested in attending the “Starting a Successful Hydroponic Business” training at the Suwannee Valley Agricultural Extension Center in Live Oak in March.
by Matthew Orwat | Dec 1, 2017
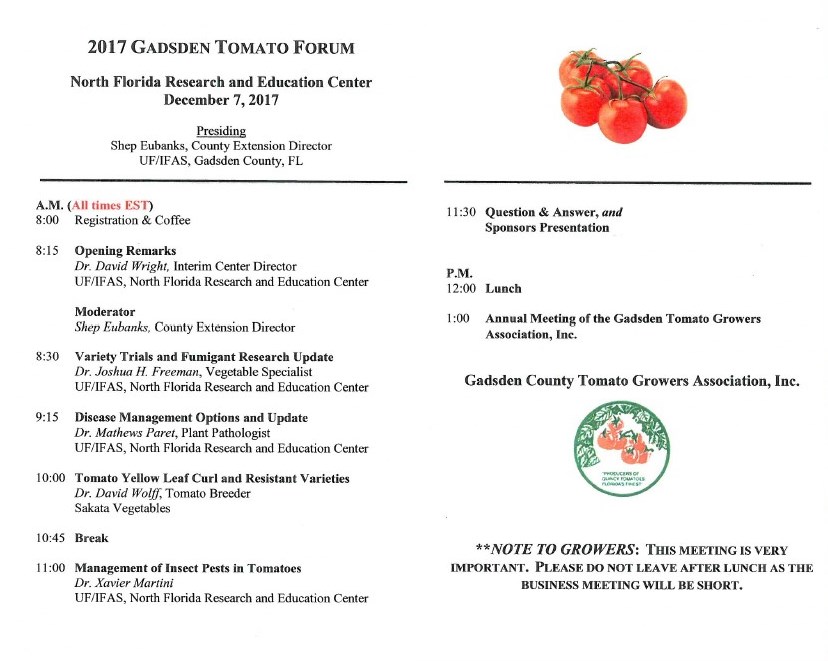
Gadsden Tomato Forum December 7 2017. 8:00am-2:00pm
At the North Florida Research and Education Center (NFREC)
155 Research Rd, Quincy, FL 32351
For more information contact
Shep Eubanks
Phone: (850) 875-7255
bigbuck@ufl.edu


by Molly Jameson | Nov 27, 2017
If you are a regular reader of Gardening in the Panhandle, you know that this e-newsletter covers many topics related to ornamental and vegetable gardening, Florida-friendly landscaping, pest management, and lawn and garden fertility.
But did you also know that UF/IFAS Extension in the Florida Panhandle has four other E-newsletters covering topics such as Florida agriculture, wildlife and natural resources, 4-H youth, economic well-being, health and nutrition, and overall life quality for individuals and families?
These other E-Extension in the Panhandle newsletters include Panhandle Agriculture , Panhandle Outdoors, 4-H in the Panhandle, and Living Well in the Panhandle.
[notice]Additionally, UF/IFAS also has an extensive collection of publications on many of these e-newsletter topics. If you haven’t already, check out the Extension Data Information Source (EDIS) website. It is a comprehensive, single-source repository of all current UF/IFAS numbered peer-reviewed publications. Visit EDIS for a complete listing.[/notice]
As a Gardening in the Panhandle enthusiast, here is a list of horticulture and gardening related EDIS publications you might find useful:
Vegetable Gardening
Home Lawns and Landscapes
Soil and Fertility
Pest Management
by Molly Jameson | Nov 13, 2017
Take lessons from a farmer to control fire ants in your garden. Photo by Molly Jameson.
As I near the three-year mark of being an Extension Agent, I think about how fortunate I am to have a career that not only encourages me to meet all our local farmers, but also to learn from them and share their knowledge with the community.
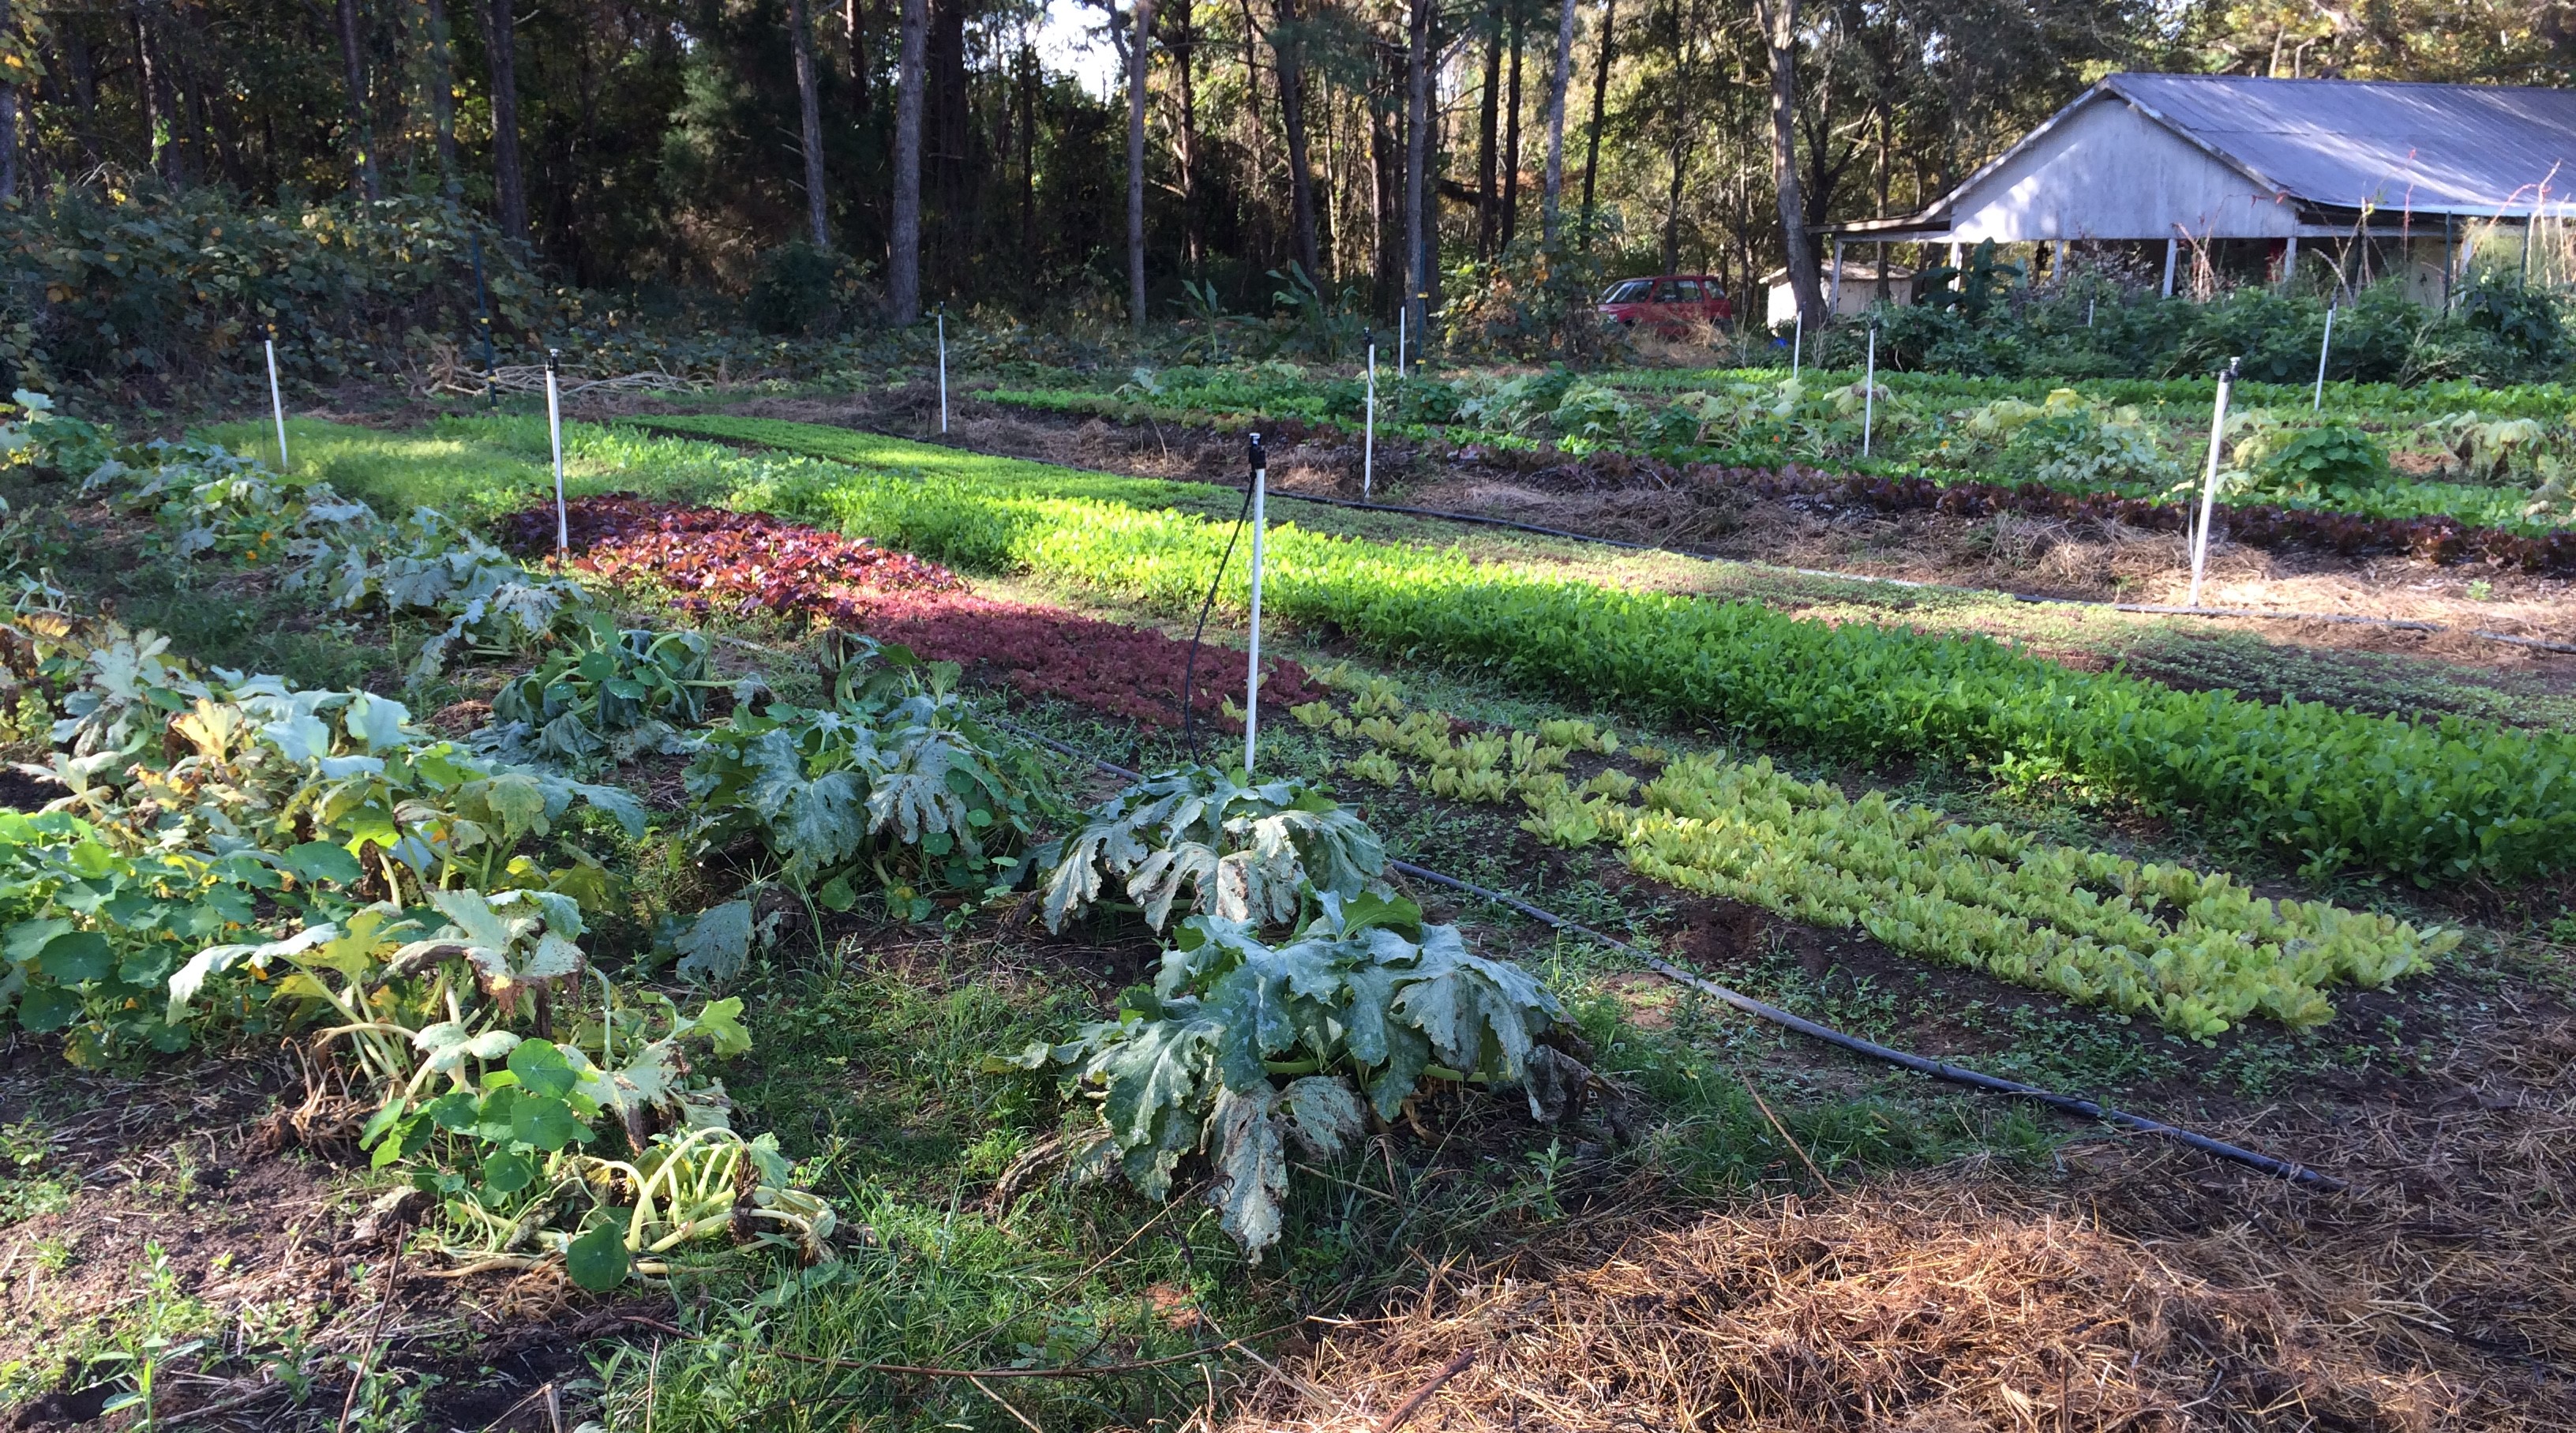
A few months ago, I visited Blake Canter of Owen River Farm. Blake gave me the grand tour of his small mixed vegetable plot, which is in far east Tallahassee.
One thing that I remember most about my visit with Blake was what has worked for him in controlling the notorious red imported fire ant (Solenopsis invicta). I have heard of many different ways to control these non-native invaders, each with its drawbacks, and, it seems, anecdotally limited success.
For instance, spinosad, a nervous system toxin, has been known to be effective on fire ant populations and is considered safe to use in vegetable gardens. But in practice, I have heard mixed reviews. In my home garden, I either douse the mounds with boiling water (be careful!) or leave my garden hose in the hot sun and scorch them while the water is still hot. But often, I signal defeat, letting them take captive of two corners of my raised beds.
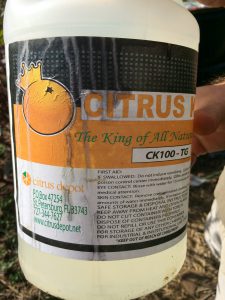
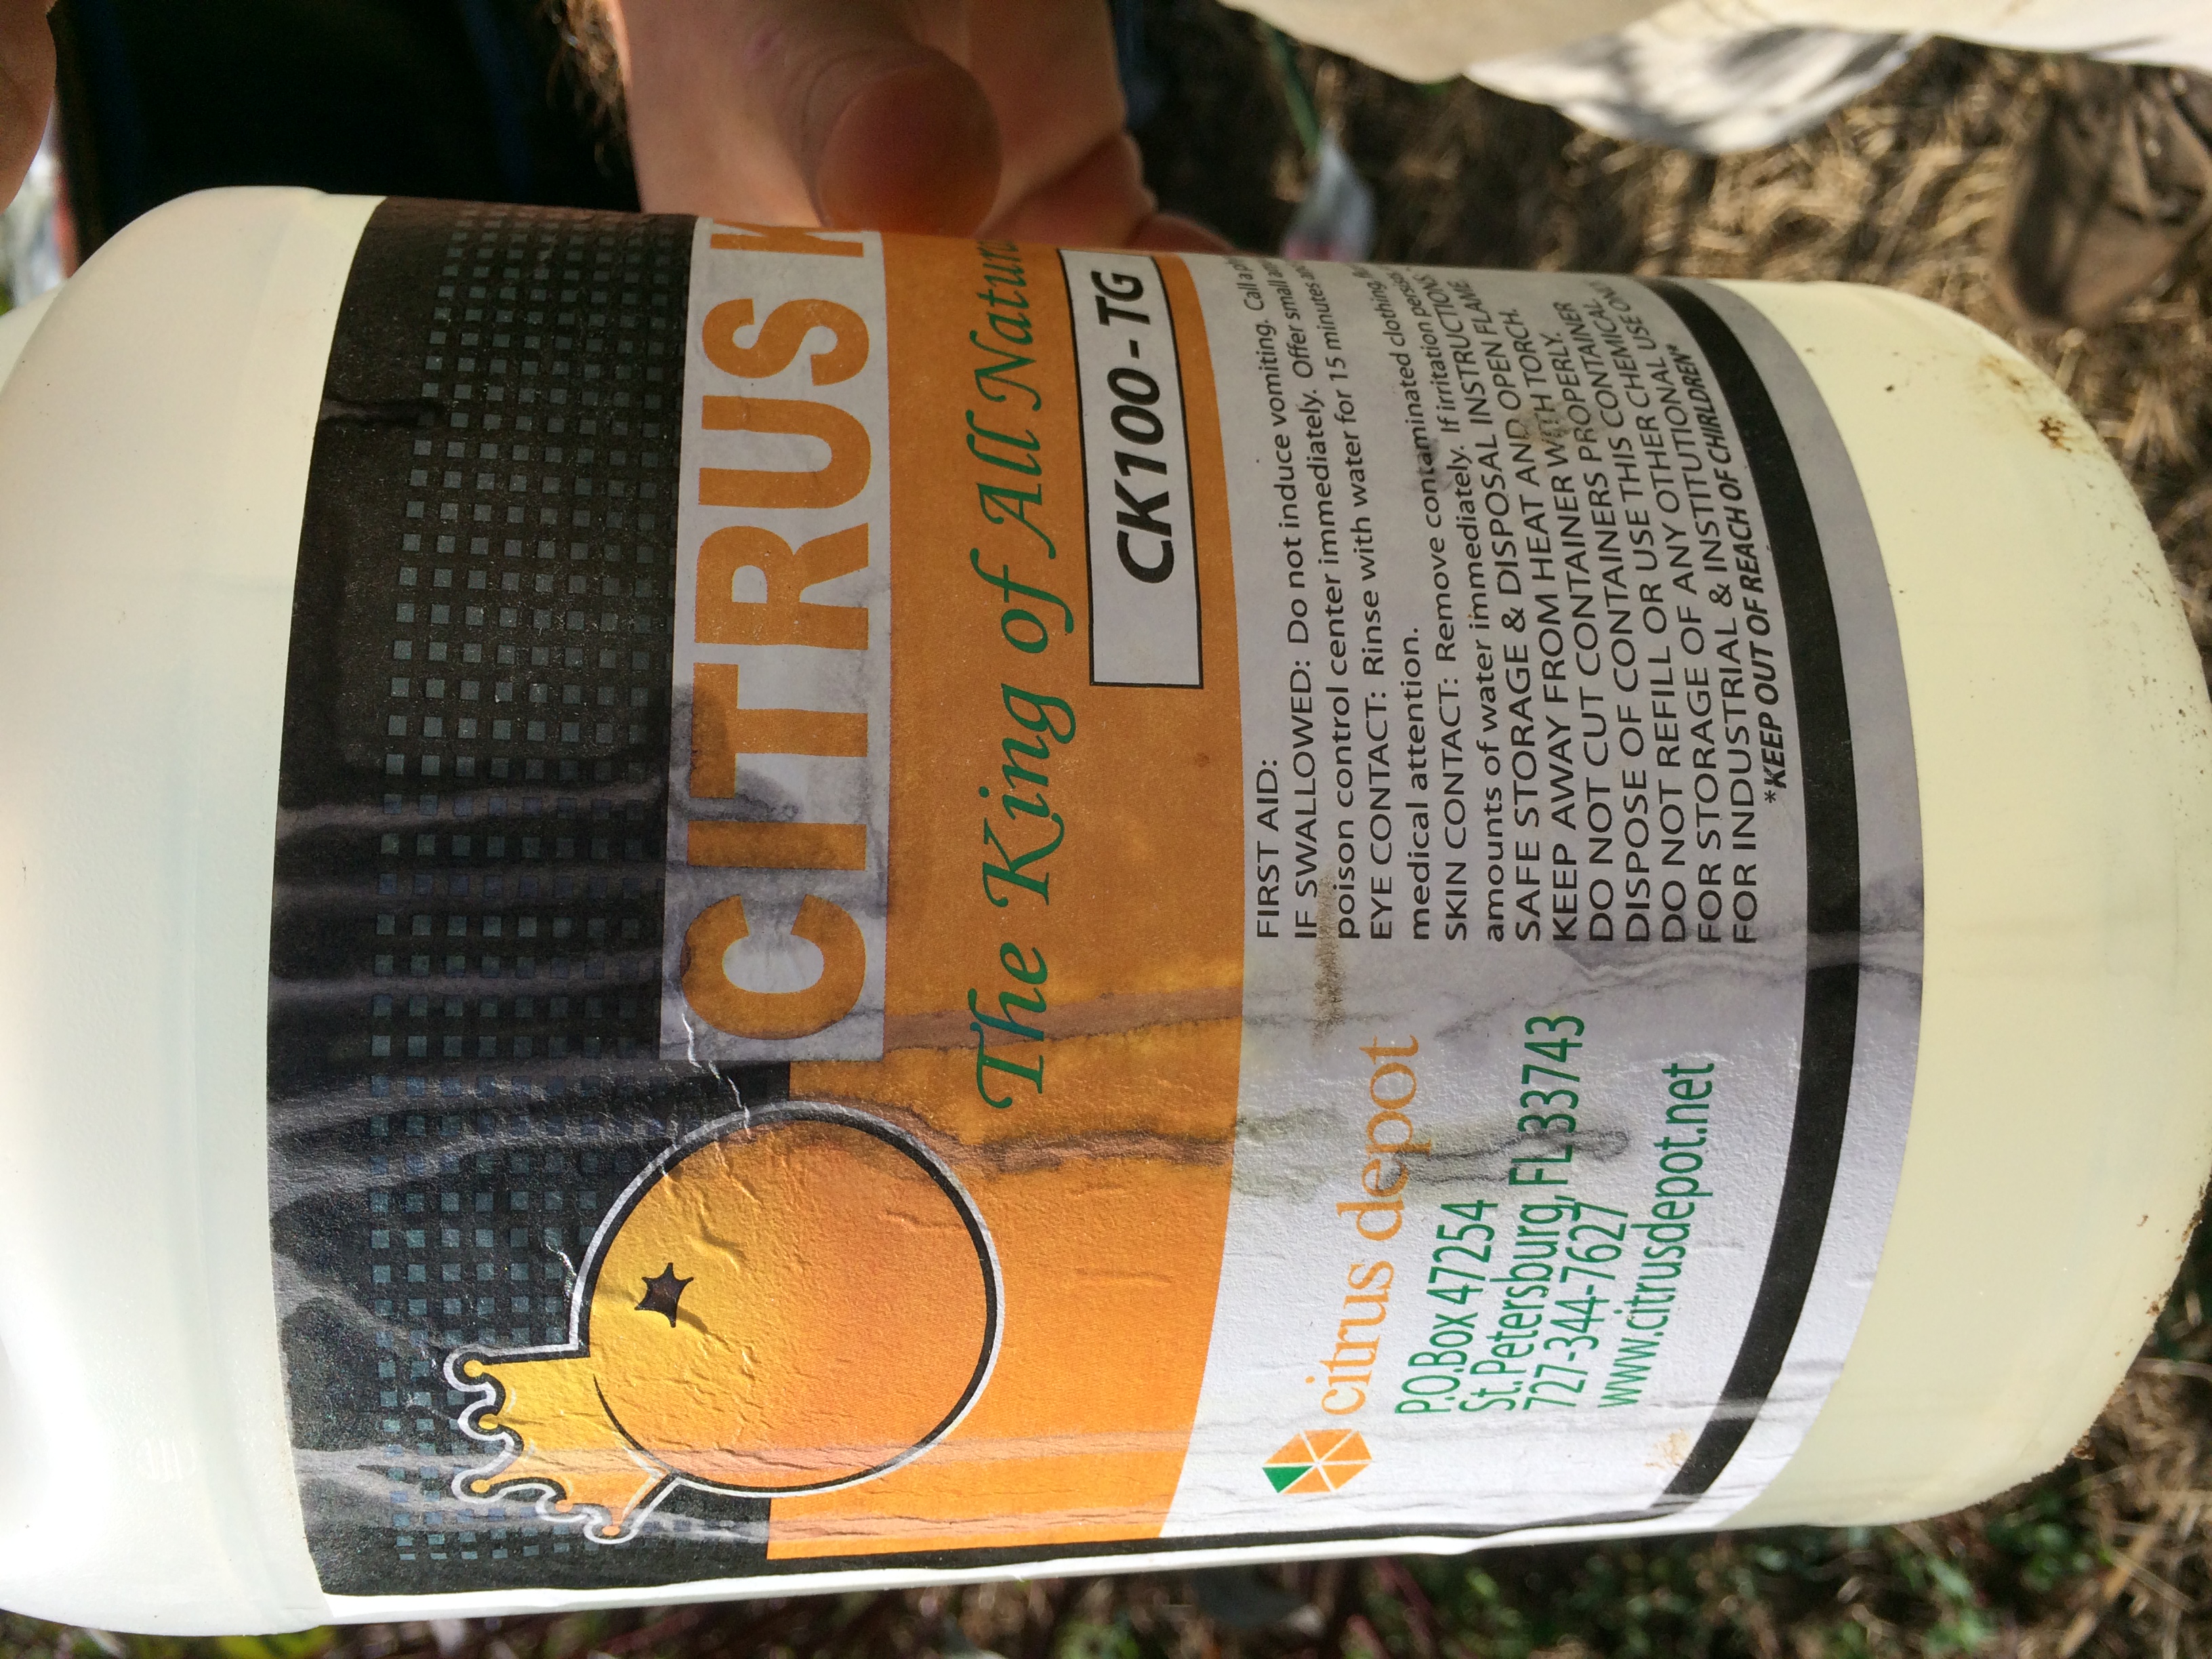
Blake at Owen River Farm makes his fire ant control mixture by combining commercial grade d-Limonene and a hefty squirt of eco-friendly dish soap into five gallons of water. Photo by Molly Jameson.
Blake’s technique on Owen River Farm is using commercial grade d-Limonene, which is a distilled orange oil nerve toxin. Blake mixes one-third cup of d-Limonene with a hefty squirt of eco-friendly dish soap in a five-gallon bucket of water. He then uses this mixture as a drench for fire ant mounds – which he figures is about as effective as boiling water – but much safer and easier to handle (be sure to follow the label carefully when using any product).
Blake goes out early in the morning (when fire ants move slower and queens are usually higher in their nests) and pours the mixture onto the mounds in a spiral formation, from outside in, to minimize escape. He tries to collapse the mound as much as possible, while pouring slowly so it penetrates deeply, with minimal runoff.
Depending on colony size, Blake uses about half the bucket, or more, on just one mound. He warns that he has lost a cucumber plant that was about a foot away to this method, but he knows the ants will often do even more damage, if not sting and bite (they do both!) him hundreds of times, as he works in his vegetable beds.
Blake likes this method because, “I can specifically target the fire ants, and after doing its job, the all-natural orange oil quickly becomes inert. When I used organic ant bait I found that the native ants took up the poison, often times faster than the fire ants. This was particularly bad because native ants are the number one competition for fire ants.”
Blake also points out, “Make sure anyone you recommend this to can identify the difference between fire ant mounds with no center opening to the mound, and native ant mounds, where there is usually an entrance hole in the center of the mound.”
The hardest part, Blake says, is finding the queens. For instance, he says ants often make auxiliary mounds at the base of okra plants, but this is not where the queen resides. The queen will often be in a central mound many yards away from where her workers are foraging. And, unfortunately, these worker ants love easily habitable soft soil, just like in our raised bed vegetable gardens.
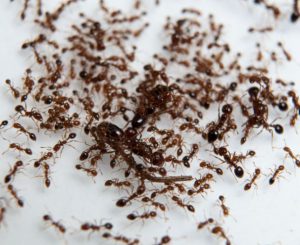
Fire ants in a petri dish. Photo by UF/IFAS.
Despite these challenges, last fall Blake drenched colonies whenever he found a mound around his farm (sometimes daily), and after a few weeks he noticed a drastic reduction in fire ant populations. And happily, an increased population of harmless (and even helpful!) native black ants. His brassica (think kale, collards, broccoli, cabbages) transplants were no longer getting girdled by vicious fire ants and he was no longer ending up with dozens of ant bites every time he worked in his beds!
Blake does warn that you must stay vigilant, especially in the summer and fall and after rain events, when the ants become busy building new colonies.
Lastly, Blake also uses his orange oil mixture as a spray for contact killing ants and other garden pests. However, just as with all horticultural oils and soaps (often made from plant oils, animal fats, or petroleum), care must be taken not to burn the foliage of your crops. Blake will sometimes dilute his mixture for this purpose. But just remember, to really stop an ant infestation, you must take down the queen!
For more information on least-toxic garden pest control strategies, read the UF/IFAS EDIS publication “Natural Products for Managing Landscape and Garden Pests in Florida” available at: https://edis.ifas.ufl.edu/in197.
by Matt Lollar | Oct 24, 2017
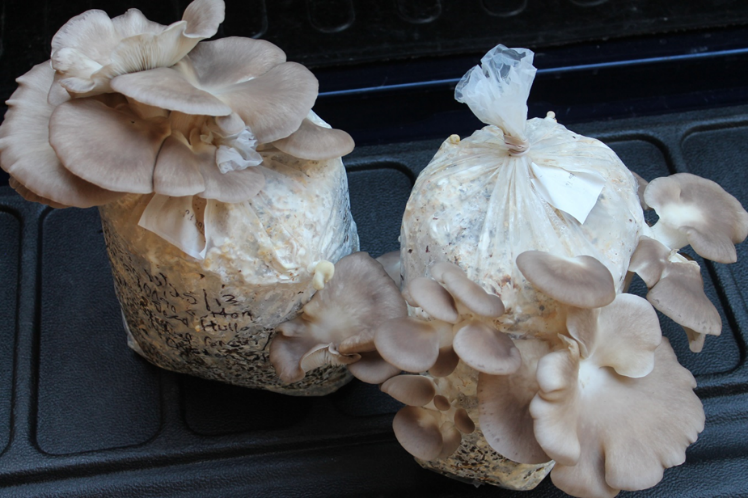
The Jackson County Master Gardeners are hosting a hosting a Mushroom Growing Workshop on Saturday, November 18 at the Jackson County Extension Office, 2741 Penn Ave., Marianna, FL.
MUSHROOM GROWING WORKSHOP
SATURDAY, NOVEMBER 18
9:00 AM to 2:00 PM
• Learn to grow oyster mushrooms.
• Learn about mushroom nutrition.
• Learn to culture your own mushroom spawn.
• Take home two inoculated mushroom bags!
• A home cooked lunch is included!
Registration Fee $20.00
Includes Lunch
Space is Limited
Bring a jar of peanut butter to donate to the Backpack for KIDS program and you will be entered in a special raffle!
To register, contact the Extension Service at (850)482-9620 or s.farr@ufl.edu.
Pre-register by November 16th.