Written by: De’Anthony Price, Agriculture & Natural Resources Extension Agent, UF/IFAS Extension – Jefferson County
Florida is the perfect place to grow sweet potatoes (Ipomea batatas). Sweet potatoes are considered a long-season crop, and Florida’s long, hot summers allow them to grow and mature well here.
Sweet potatoes are native to America and known for their colorful and tasty tubers. Their flesh can be yellow, orange, or even purple. They are a great source of vitamins A and C. Sweet potatoes are an excellent warm-season crop for Florida. They require a long growing season but will reward you greatly for your patience. The leaves are edible as well. Not only are they nutritious, but the young leaves and shoots also provide a source of tender and mild-tasting leafy greens through the hot Florida summer. Sweet potatoes are a healthier alternative to white potatoes with a high glycemic index. The starch from a white potato is quickly metabolized, leading to a rapid increase in blood sugar. Sweet potato starches are metabolized at a slower rate.
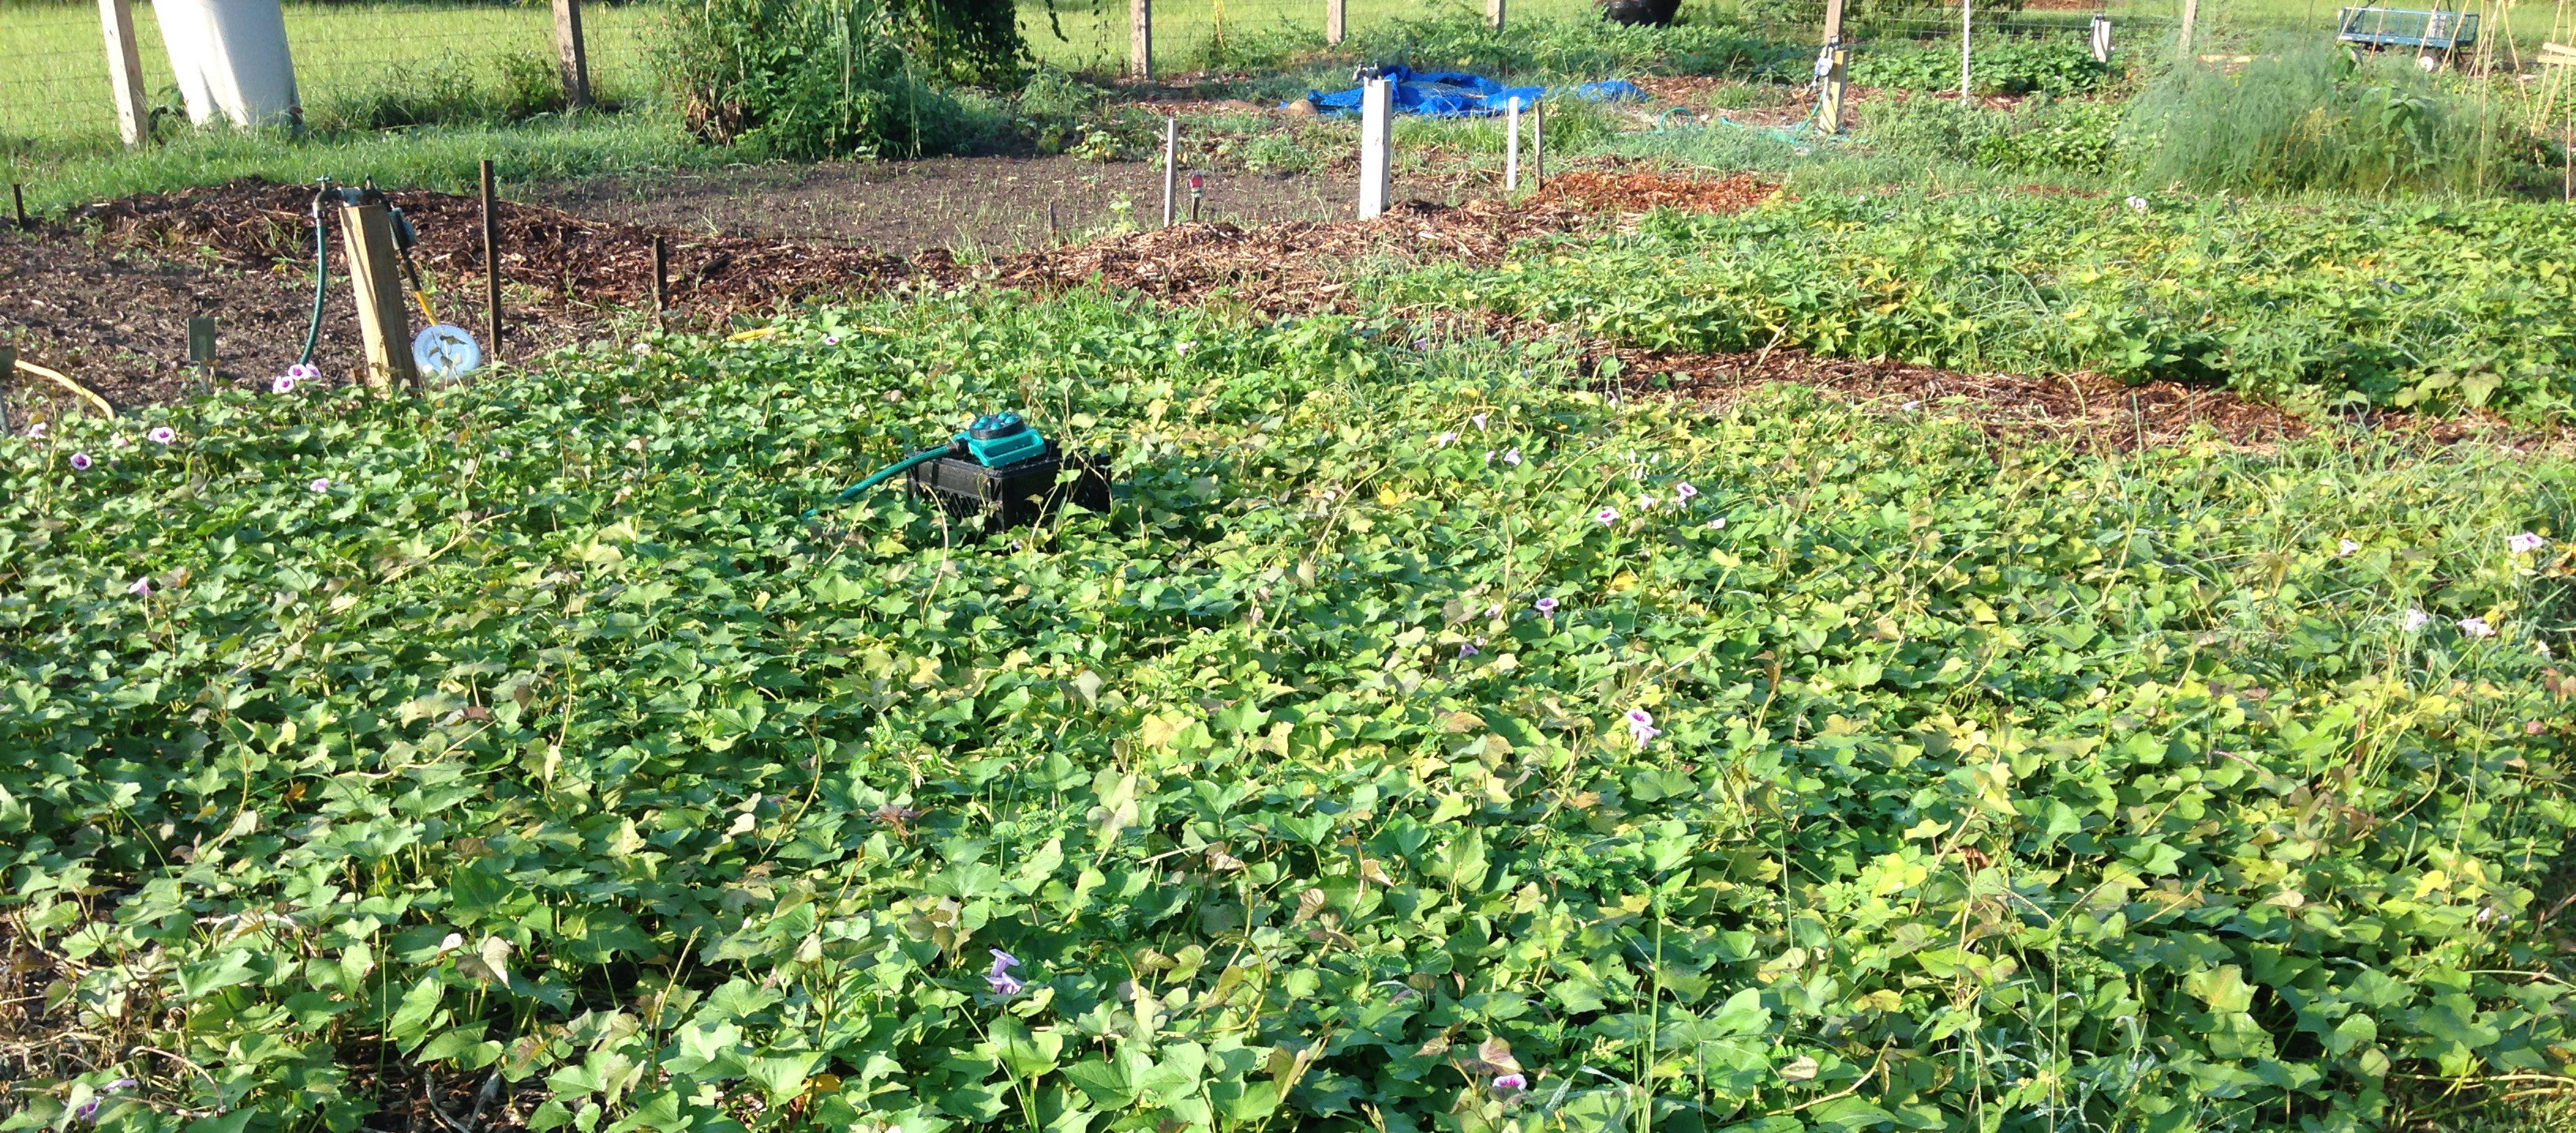
Sweet potatoes are ideal for filling the gap between summer and fall crops as they have a long growing season. Photo by Janis Piotrowski.
Planting and Care
Sweet potatoes can be planted in the spring through the end of June. Sweet potatoes grow in a well-drained loamy to sandy soil and do not require much fertilizing. If the soil contains clay, add some aged compost or other organic amendments to the planting bed to improve drainage. Sweet potatoes grown in unamended clay soils are usually small.
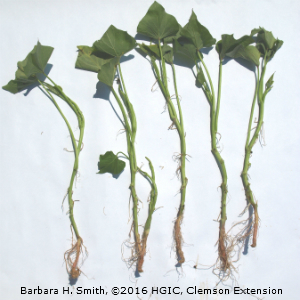
Sweet potatoes are generally planted from March through June in the Florida Panhandle. Sweet potatoes are typically started from transplants called “slips.” Sweet potato slips are six to eight-inch sweet potato vine cuttings with most of the leaves pulled off. You can purchase sweet potato slips from a local garden center or a seed catalog. Make sure you only buy certified, disease-free slips. One can also quickly start your sweet potato slips from a store-bought sweet potato. Sweet potato weevils can be a severe problem and starting with certified-free transplants can help you avoid issues.
Plant sweet potatoes in rows spaced 48 to 54 inches apart, with 12 to 14 inches between each plant. Look for transplants that are about 6 to 9 inches long. Sweet potatoes will do best when they receive a consistent water supply; inconsistent watering can cause them to split while growing. Sweet potatoes can be kept throughout the season using vine cuttings to create new plants.
Wireworms and root-knot nematodes are the biggest problems for home gardeners. However, many insect and disease problems can be avoided by choosing disease-resistant varieties and using sound cultural gardening practices. Crop rotation with a vegetable in another family can help prevent nematode and soil disease. Rotating where you plant can help prevent problems with a major pest, the sweet-potato weevil (Cylas formicarius).
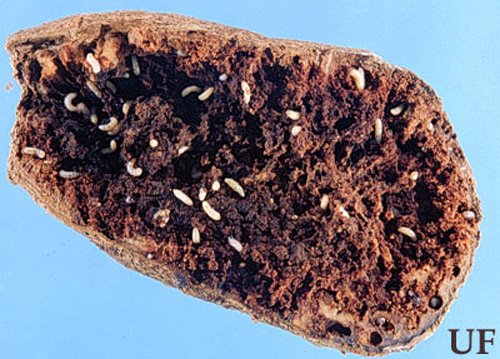
Damage to sweet potato tuber caused by larval feeding of the sweetpotato weevil, Cylas formicarius. Photo Credit: James Castner, University of Florida.
For the tastiest sweet potatoes, always dig up the previous crop and start a new planting. While sweet potatoes can be grown year-round in tropical regions, plants left to grow for too long can encourage pest populations. The sweet potatoes eventually become too large and tough for most people’s tastes.
Florida-friendly varieties
‘Centennial’ and ‘Beauregard’ are two varieties that grow well in Florida gardens. Beauregard is found quite often in garden centers. It shows some disease resistance and produces a high yield. It has light rose skin and a deep orange flesh that matures in 105 days. Centennial sweet potatoes tolerate clay soil, are disease resistant, and mature in 90 days.
Harvest and Storage
Sweet potatoes should be ready to harvest 90–120 days after planting. The tops will die back as it gets close to harvest time. Sweet potatoes should be harvested before the first frost. Cool soil reduces their quality and storage life. Sweet potato skin is fragile, so freshly dug roots need to be handled gently.
The ideal conditions for curing sweet potatoes are roughly 85°F with 90 percent humidity. To help increase their sweetness, place harvested sweet potatoes in a dark, warm room for at least two weeks before eating. Once your sweet potatoes are done curing, store them in a cool, dry pantry—not the refrigerator! Storing your sweet potatoes at temperatures below 50°F can cause them to have an off flavor or rot. Patience will pay off with delicious and healthy sweet potatoes that can be added to the dinner plate as a vegetable side or in a sweet pie served for dessert. While “yam” is sometimes used to describe the sweet potato, a true yam comes from a different plant.
With the arrival of spring weather in the Panhandle, many people have begun planning a vegetable garden. However, many gardeners that I talk to tell me more of their gardening frustrations than successes. I surmise the main reason for their frustration is simply doing what gardeners have done across centuries and all over the world, planting in the ground. That’s a great strategy in many places; unfortunately, in the Panhandle, we are not often blessed with great soil. We can overcome our poor soil conditions and be more successful by going above ground with raised beds!
Gardening in raised beds has three primary benefits for area gardeners: the ability to control soil conditions, reduce disease problems, and be space efficient. The first raised bed benefit is the most critical. Soil in and around much of the Panhandle is sandy in nature with little rich organic matter. To make matters worse, much of our native soil is either too well-drained and dries out rapidly or is the opposite and frequently stands in water – neither is conducive to garden success. We can alleviate all the above issues by creating our own perfectly draining, nutrient-rich soil environment inside a raised bed. One can either make their own soil concoction by experimenting with different ratios of compost, aged pine bark, peat moss, perlite, etc. or simply purchase bagged garden soil. I use either 100% mushroom compost or a 1:1 mix of mushroom compost & aged pine bark, but many soil component combinations work well.
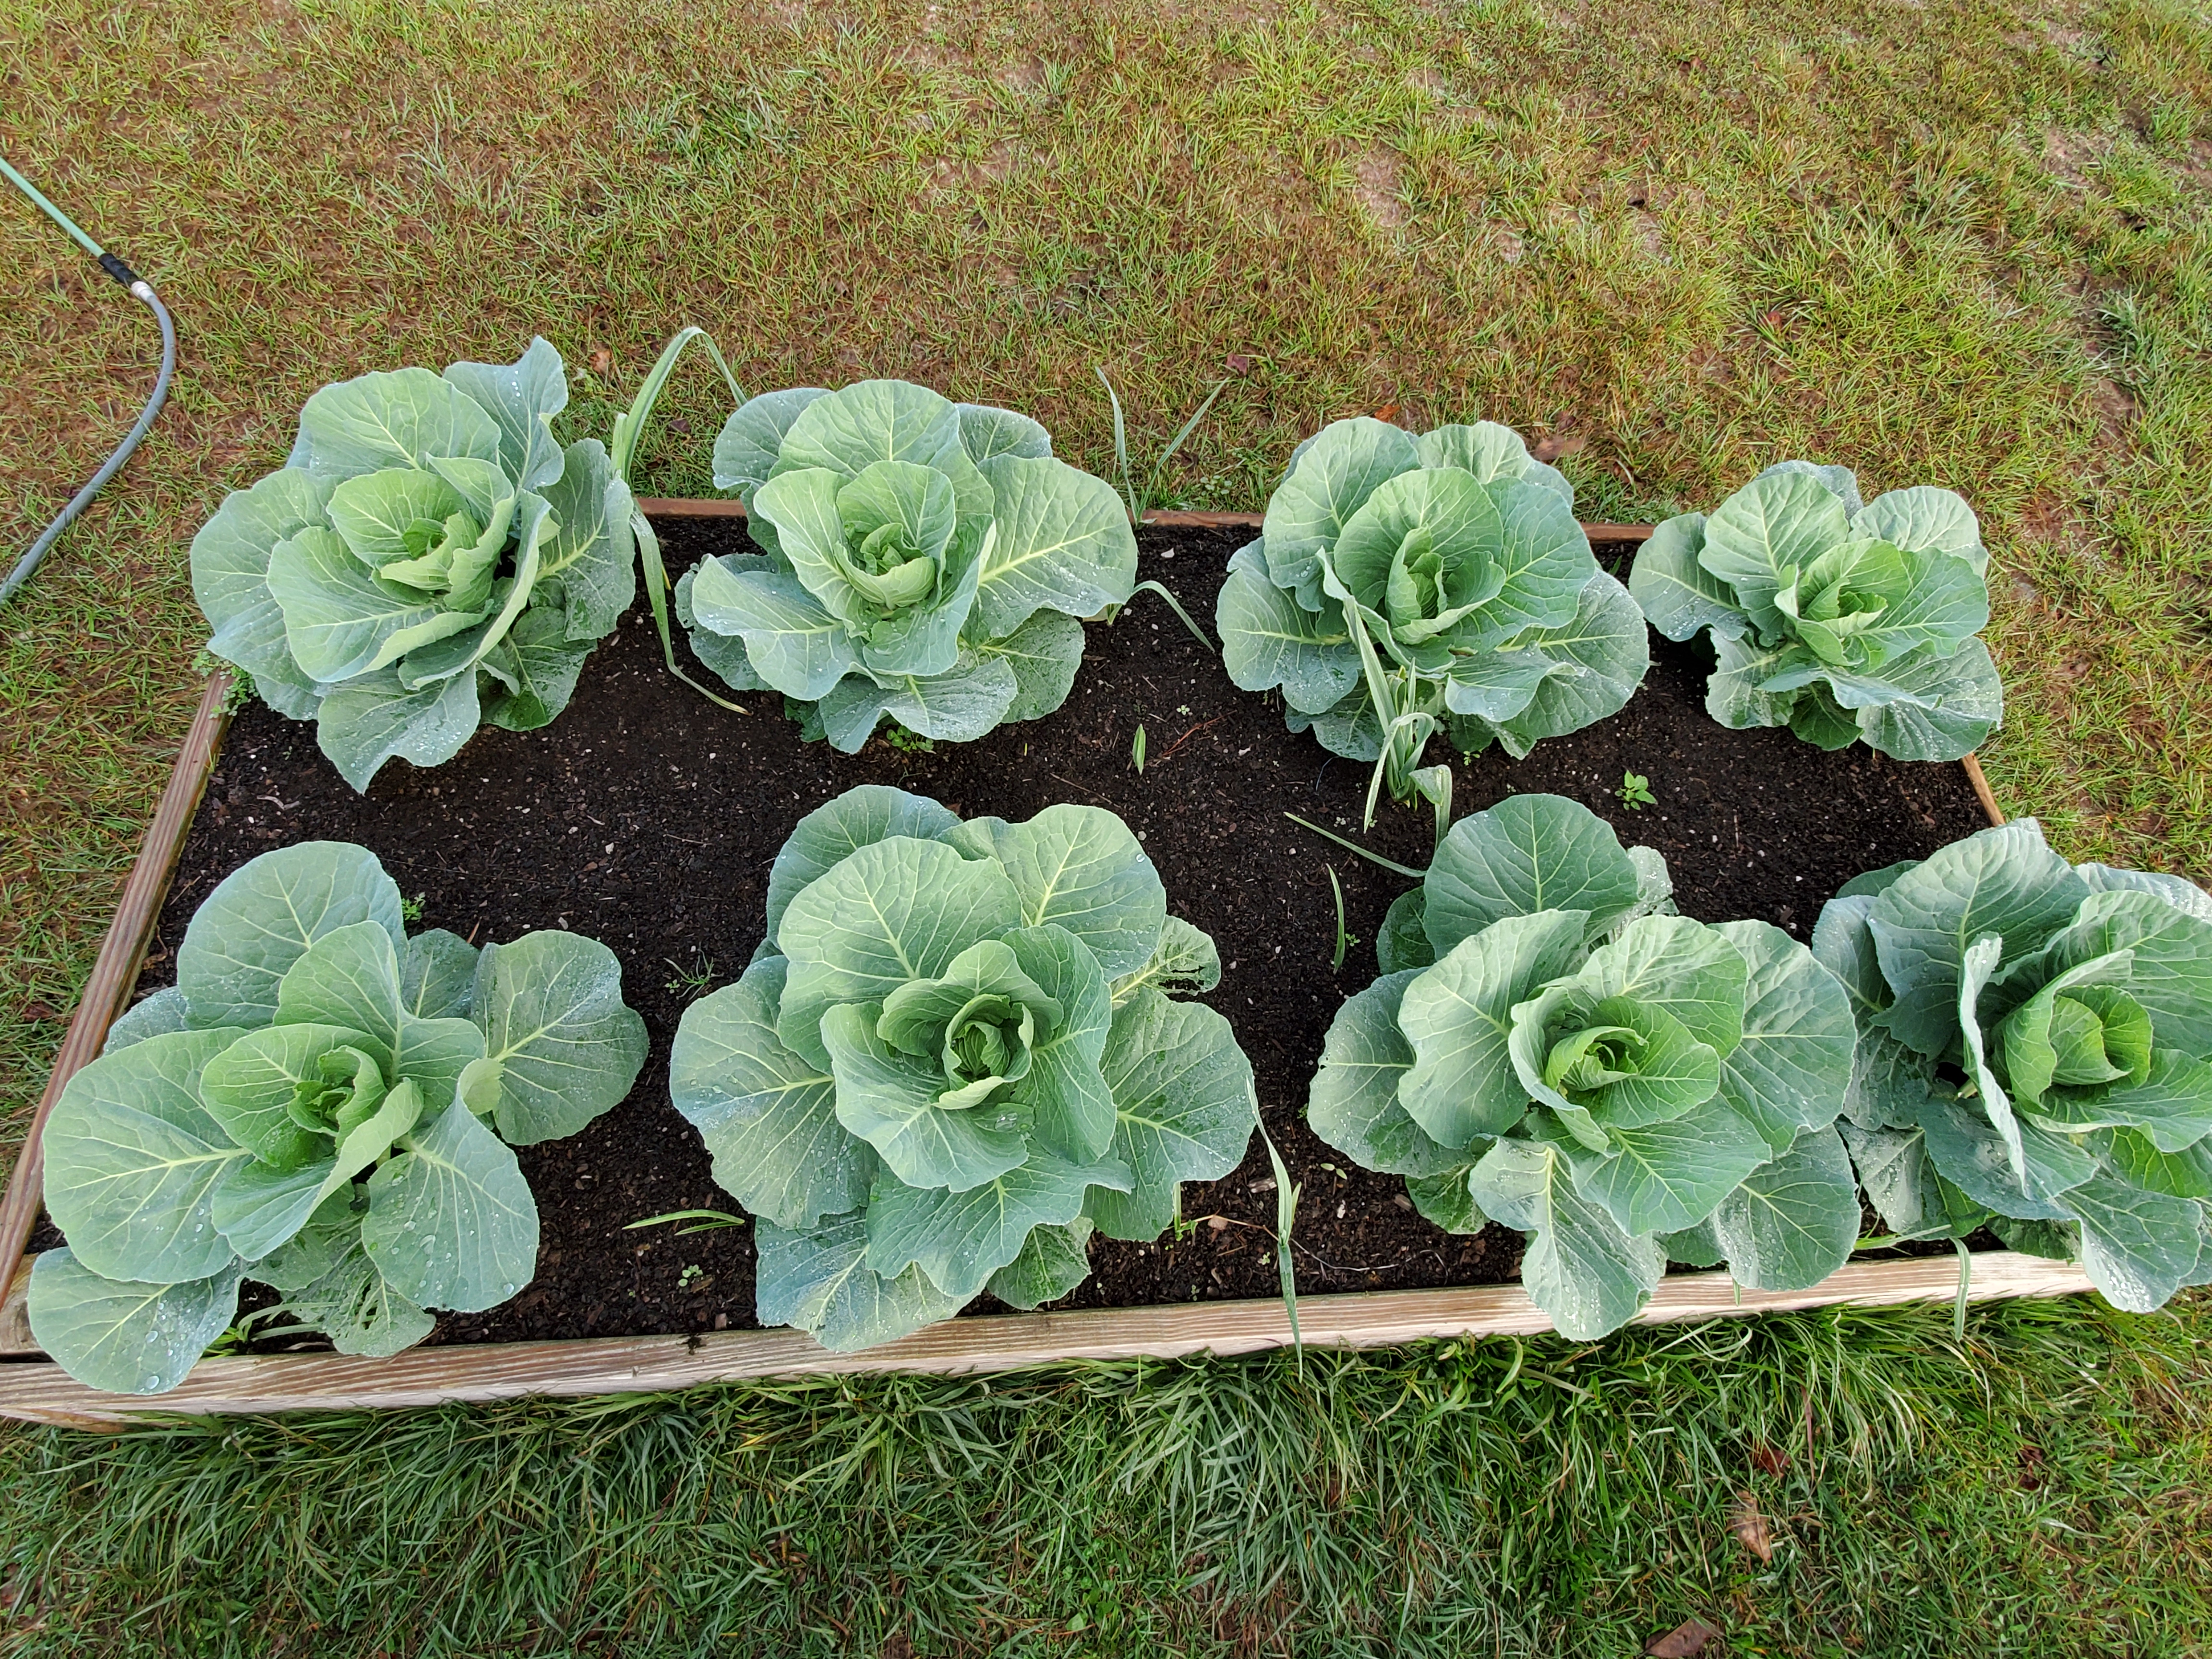
Cabbage grown in a 4’x8′ raised bed. The soil media is mostly mushroom compost. Photo courtesy of Daniel Leonard.
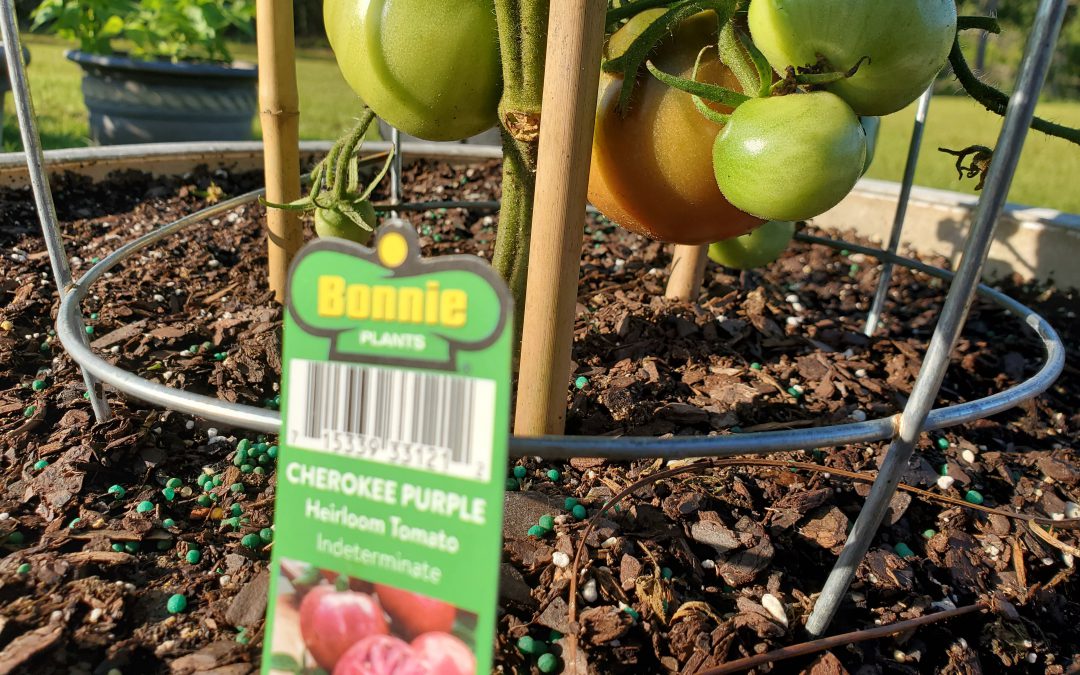
Gardening in raised beds can also dramatically reduce the incidence of disease. Many of the most serious vegetable garden diseases like Bacterial Wilt and Late Blight in tomato are soilborne, surviving for years in the ground and only needing a splash of rainwater to transfer them onto your vegetable plants. Growing in beds with curated soil mostly alleviates this issue. Our sandy soils also tend to have damaging levels of difficult to control nematodes (microscopic round worms that feed on plant roots). Because nematodes prefer porous sandy ground, switching to raised beds with rich organic soils also removes that concern.
Finally, growing in raised bed gardens allows for a very efficient use of space. A typical raised bed is 4’x8’ in diameter, meaning you can site one nearly anywhere, regardless of how big or small your yard is. You don’t even need a yard space in some cases! If you have only a sunny porch or driveway, you can certainly mimic raised bed conditions with large containers. Most people are surprised by the amount of produce that you can pack into one or several 32 square foot raised garden beds, especially when you pay attention to plant mature size and group accordingly. The square foot gardening method is a great way to maximize raised bed produce yield.
If you have struggled in past years to produce a fruitful, high-yielding, mostly disease-free garden, your problem might be below your feet in the soil. As you plan your vegetable gardening activities this year, try gardening in raised beds and get ready for your best gardening season yet! For more information about vegetable gardening, raised bed construction, or any other horticultural topic, contact your local UF/IFAS County Extension office. Happy Gardening!
New Zealand spinach has a mild flavor, flourishes in the heat, and can serve as a nutritious summer salad. Photo by Forest and Kim Starr.
If you’ve ever tried growing lettuce (Lactuca sativa), true spinach (Spinacia oleracea), or crops in the cabbage family (Brassica spp.) in late spring or summer in the subtropics of Florida, you know that our extreme heat can make it difficult. Between bolting leaves, fungal diseases, insect pressure, and poor germination, it can be quite a challenge to keep greens on the dinner table all year long.
Fortunately, there are a few greens that – while less well known – can take our Florida heat and are relatively easy to grow. Some of these greens include New Zealand spinach, Malabar spinach, and perpetual spinach. They are frost sensitive and prefer well-drained, slightly acidic soil and require regular watering, but they don’t need a lot of fertilizer or special attention. Additionally, they are resistant to most pests and diseases.
New Zealand Spinach
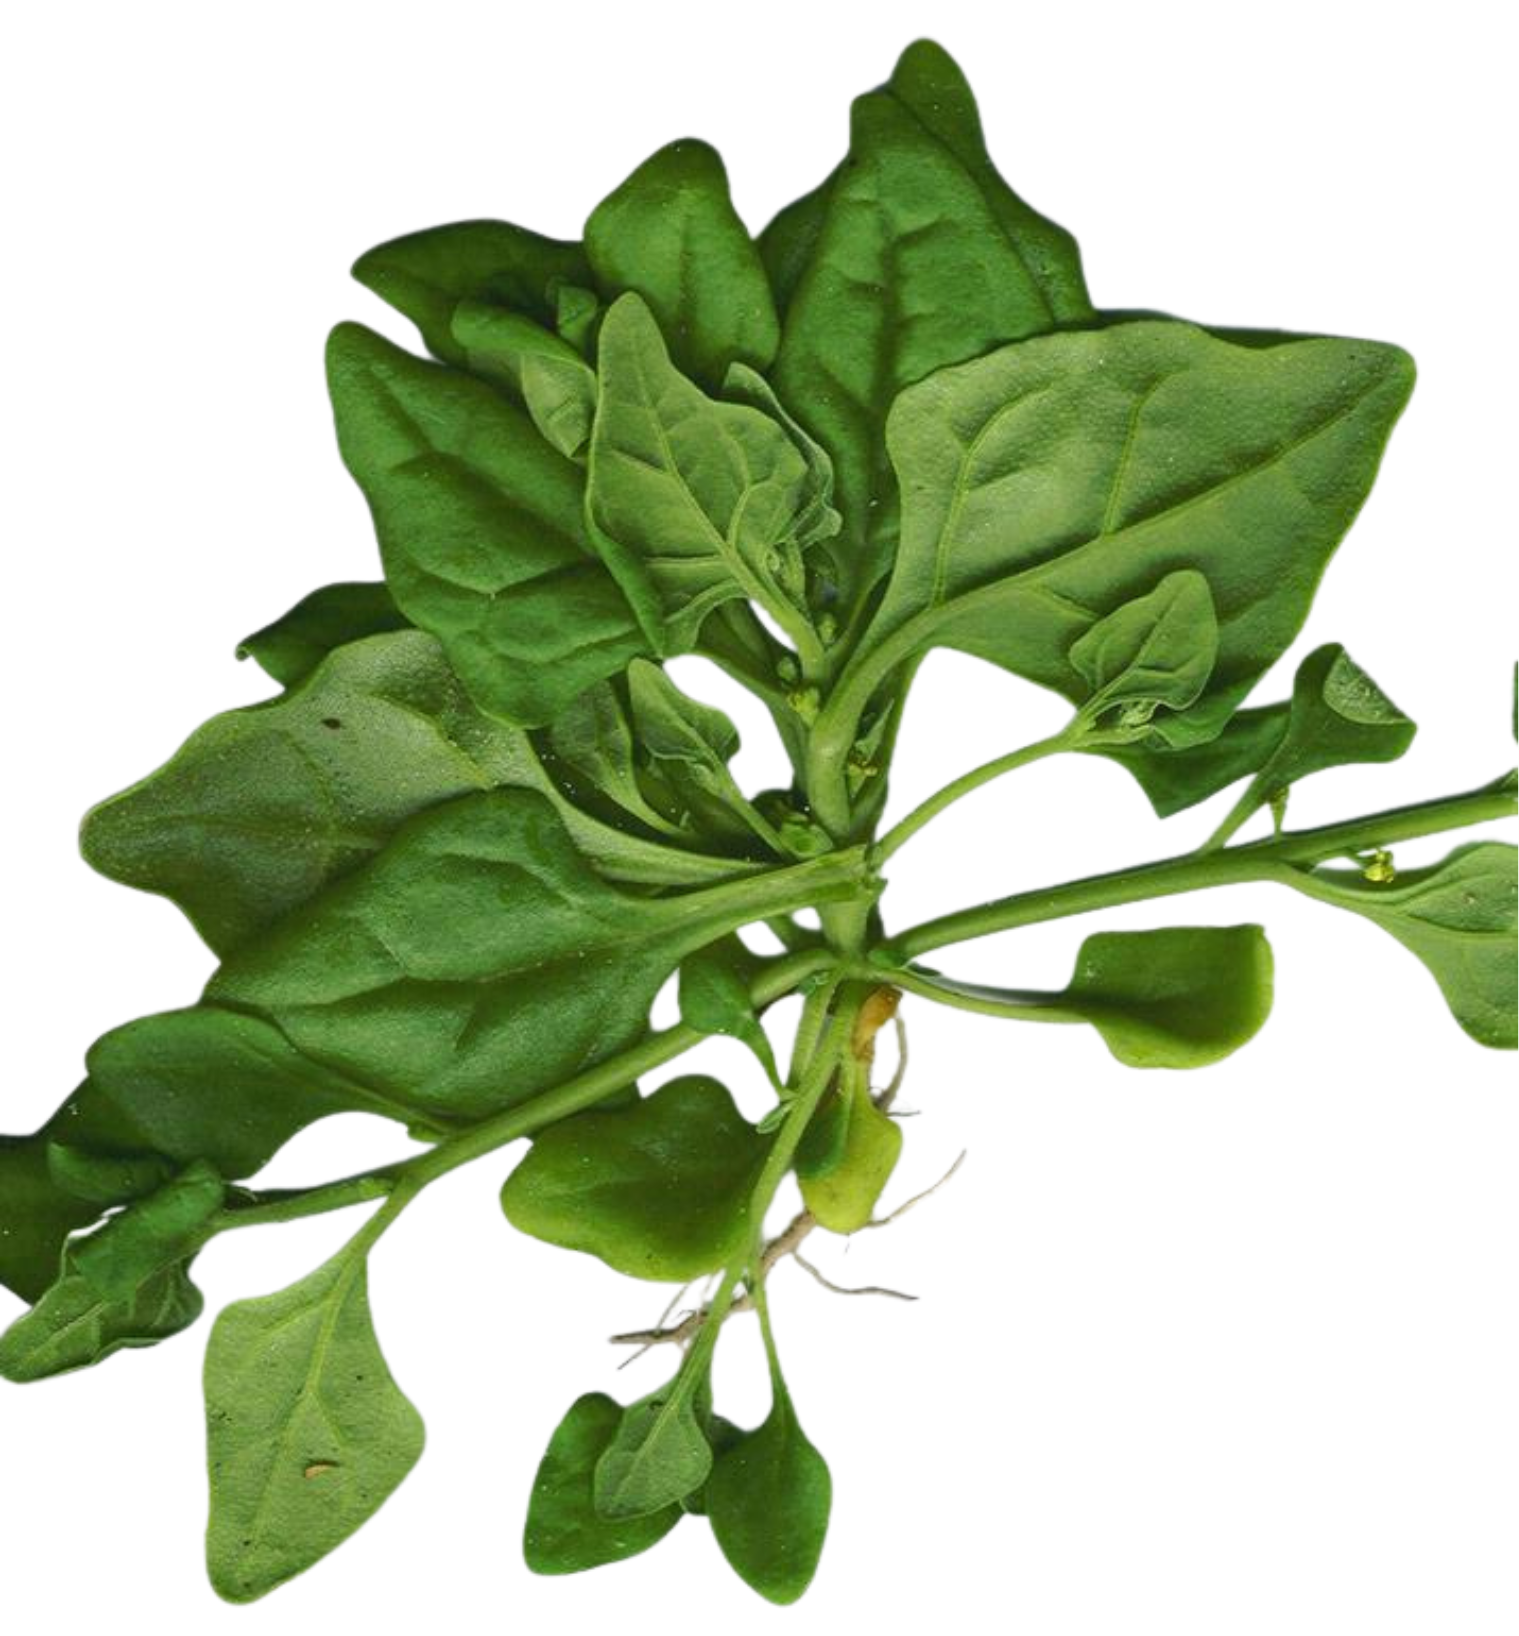
New Zealand spinach tastes similar to true spinach but can stand up to the Florida heat. Photo by Forest and Kim Starr, Starr Environmental, Bugwood.org.
New Zealand spinach (Tetragonia tetragonioides) is a leafy green that is native to New Zealand, but it is well-adapted to warm climates such as ours. It grows one to two feet in height and branches two to three feet across. In the kitchen, it is known for its mild, slightly salty flavor, and it is a great source of vitamins A and C, iron, and calcium.
New Zealand spinach germinates slowly, taking two to three weeks to sprout. Soaking seeds for 24 hours directly before planting can help them along, but be patient, and keep the planted area weed free.
Sow seeds a quarter-inch deep, two inches apart, and water well, keeping the soil moist but not waterlogged. Once germinated, thin to eight to 12 inches apart. After the plant has grown about a foot, harvest a few tender leaves off of each branch, making sure enough leaves remain so the plant can continue to photosynthesize and grow.
Read the UF/IFAS publication Spinach, New Zealand to learn more about growing New Zealand spinach.
Malabar Spinach
Malabar spinach (Basella alba and B. cordifolia) is a fast-growing leafy vine native to tropical South Asia. It is known for its thick, succulent leaves and its slightly lemony flavor. It is a good source of antioxidants, vitamins A and C, iron, and calcium.
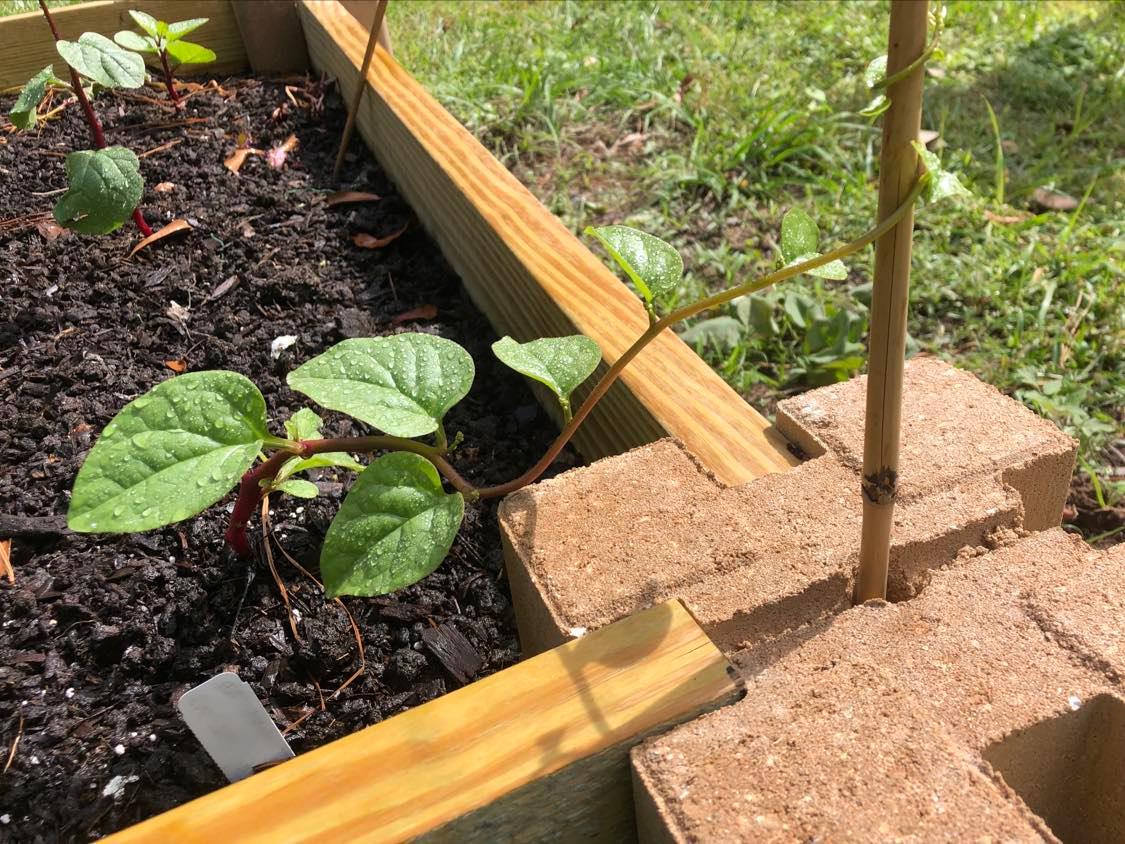
Support fast-growing Malabar spinach vines with a trellis or stakes. Photo by Molly Jameson.
Like New Zealand spinach, Malabar spinach is vulnerable to frosts and grows well in hot, humid conditions. Wait until soil temperatures reach 65°F to 75°F to sow or wait at least three weeks after the last frost date. Typically, in our area, it does best sown from mid-April through early June.
Sow seeds a quarter-inch deep, two inches apart. Also, like New Zealand spinach, Malabar spinach can take two to three weeks to germinate, so soaking seeds for 24 hours prior to planting is recommended. Once planted, keep the area weed free and well-watered, but not waterlogged.
After germination, thin the sprouts out so that they are spaced 12 inches apart. In optimal conditions, the plant can reach maturity in 70 days. Vines will continue to grow to 10 feet or longer and will benefit from a trellis, a fence, or stakes to assist in climbing. Harvest the leaves and young stems and prune back any overlong vines.
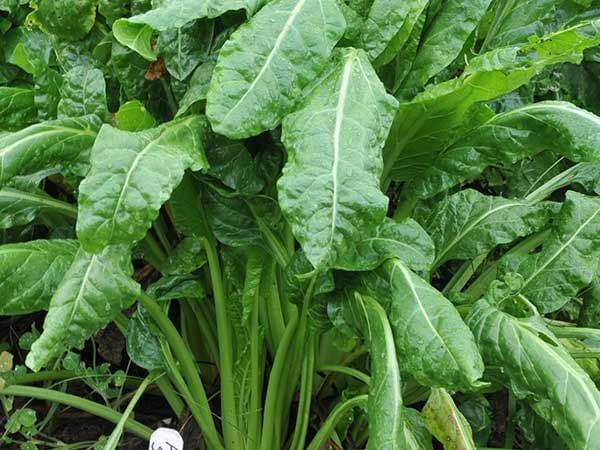
Perpetual spinach is related to Swiss chard and beets, but it is more “spinach-like” in flavor. Photo by Baker Creek Heirloom Seed Company.
Perpetual spinach (Beta vulgaris), or spinach beet, is a leafy green that is the same species as Swiss chard and beets, but tastes more like a true spinach and is known for its mild, slightly sweet flavor. It is a great source of vitamins A, C, and K, as well as calcium, magnesium, and iron.
Perpetual spinach can tolerate cooler temperatures than New Zealand and Malabar spinach, but it also grows well in warm weather and can continue to produce throughout the growing season.
Sow seeds a half-inch inch deep, two inches apart. Water well and keep the soil moist but not waterlogged. Again, be patient, as like the other heat-loving greens, perpetual spinach can take up to two to three weeks to germinate.
Once the plants have sprouted, thin them out so that they are spaced six to eight inches apart. Begin harvesting by cutting leaves at the base of the stem. If the plants get too big or the leaves begin to taste bitter, cut the leaves back to about three inches above the soil and they will produce new, tender leaves.
While these heat-loving greens do not taste the same as lettuce, true spinach, kale, or collards, they are incredibly versatile in the kitchen and have a unique flavor profile. They can be eaten raw in salads, or they can be cooked in a variety of dishes. For example, New Zealand spinach can be sautéed with garlic and lemon juice, while Malabar spinach can be used as a green in a delicious stir-fry. Perpetual spinach can be used in soups, stews, casseroles, and salads.
Other heat-loving greens to try out in the garden include Okinawa spinach (Gynura crepioides), longevity spinach (Gynura procumbens), and Surinam spinach (Talinum triangulare).
If you are looking to keep homegrown greens on the dinner table this spring and summer, give heat-loving greens a try! They are easy to grow, resistant to pests and diseases, and are great additions to many dishes.
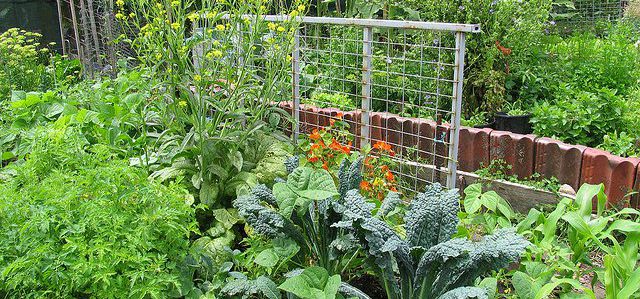
A mixed vegetable garden. Photo Credit: eXtension.org.
It doesn’t get much better than eating fresh vegetables out of your own garden. I guess you could add a beverage to the mix to improve the experience. A dry chenin blanc would probably go well. Unfortunately, this month’s Gardening in the Panhandle LIVE steered clear of wine as a topic, but the featured agents did focus on vegetables.
Container Gardening
Size does matter when it comes to container gardening. Think about the full grown size of the plants you plan to grow when selecting a container size. For most vegetables, 10 inches wide by 10 inches deep is sufficient, but you can grow in much larger containers. The larger the container, the more room the roots will have. For more information on gardening in containers, check out the articles “Don’t Think You Have a Green Thumb? Try Container Gardening!” and “Container Gardens for Outdoor Spaces”.
If you have a really deep container and don’t want to spend the money on potting soil to fill it up, then you’re kind of out of luck. Rocks or other materials placed in the bottom of containers will create a perched water table. So basically, you’re creating a shallower container by putting materials other than potting mix in the bottom. The physics on this topic is better explained in “Rocks in Pots: Drainage or Perched Water Table Problems?”.
It’s best to start with new potting soil each year. Especially if you plan to grow the same plant species/families in the same containers. However, if you do plan to reuse potting soil, make sure to mix it up a bit with a trowel or dump it out and put it back in the container or another container. Also, choose a different crop than what you grew in the soil the previous year. Here’s an interesting publication on growing squash in recycled potting soil.
Raised Beds
Raised beds are a great option if you live in an area with poorly drained soil or with a soil that doesn’t hold nutrients. They also can be built on legs like a table to save your back some stress. More information on build a raised bed can be found in the article “Building Raised Beds”.
Vegetables need space to grow whether they’re planted in the ground, in a small container, or in a raised bed. Recommended varieties for container gardening and spacing recommendations can be found in this container gardening fact sheet from UF/IFAS Extension in Leon County.
Who says you can’t landscape with vegetable plants and fruit trees? Vegetables such as cabbage and kale can add a depth of color and texture to your annual flower beds. And blueberry bushes and citrus trees have beautiful blooms that bees love.
Trellises can be easily built and attached to raised bed gardens. Pole beans and Malabar spinach are just a couple examples of vegetables that need something to climb on. Lettuce and other small vegetables can be grown vertically in different hydroponic systems.
Plant Selection
Some seeds can be sown directly into the garden while others should be started in trays and transplanted. More information on sowing seeds and timing can be found in the Vegetable Gardening Guide. Just make sure to check out the tables at the end of the guide.
Some plants are more tolerant of salt air and salt water. This doesn’t mean you can water these plants with the Gulf of America, but they will tolerate a little bit of salt. A list of salt tolerant vegetables can be found in “Salt Tolerant Vegetable Gardening”.
A number of cherry tomato varieties produce a big crop fast and over a long period of time. A list of recommended cherry tomato varieties can be found in this article on cherry tomatoes.
There aren’t a lot of options for perennial vegetables in North Florida. A perennial vegetable that can be grown here, taro, can be invasive. If you plan to grow this vegetable, please consider growing it in a container. Fortunately, we have a lot of options for perennial fruiting crops. More information on growing fruit trees can be found in the publication Dooryard Fruit Varieties.
Blackberries grow well in North Florida. You may want to try the thornless varieties ‘Freedom’, ‘Traveler’, ‘Osage’, and ‘Ouachita’. More information on growing blackberries can be found in the publication “The Blackberry”.
Some vegetables grow well in the shade. The “Veggies and Herbs Made in the Shade” publication includes a list of shade loving vegetables and herbs along with growing tips.
Community gardens provide a place to garden for people that may not have space at home. Gardening in these plots also gives people a place to meet their neighbors. Information on starting a community garden can found in the publication “Starting a Community Garden”.
Homegrown beets don’t taste anything like the ones your grandmother gave you out of a can. More information on growing beets and other root crops can be found in the Root Crop Chapter of the Vegetable Production Handbook of Florida.
Vine borers and leaf footed bugs are some of the most damaging pests to a vegetable garden. Planting early in the season can help avoid these pests, but if you’re too late on planting then you might want to give some natural products a try. The publication “Natural Products for Managing Landscape and Garden Pests in Florida” provides some good pointers on controlling these and other insect pests.
Squirrels and other wildlife can also be pests in the garden. Deterrents can help keep these pests out of the garden.
Ants don’t usually mess with your vegetables, but they can be a nuisance when working in the garden. Fire ant management information can be found in the publication “Managing Imported Fire Ants in Urban Areas”.
Squash and other cucurbits don’t last long in wet areas. They don’t last long on the vine in the first place. Growing on plastic mulch, or even pine straw, can help these vegetables stay dry. You may also want to consider building a trellis for vining cucurbits. Also, make sure to harvest in a timely manner. Squash that overripen on the vine attract insect and disease pests and just don’t taste very good.
Weeds can compete for nutrients with your crops and don’t look very attractive in the garden (or anywhere). If you’re tired of hand weeding, the Vegetable Production Handbook of Florida lists herbicide options by crop.
Past episodes of Gardening in the Panhandle LIVE can be found on our YouTube playlist.
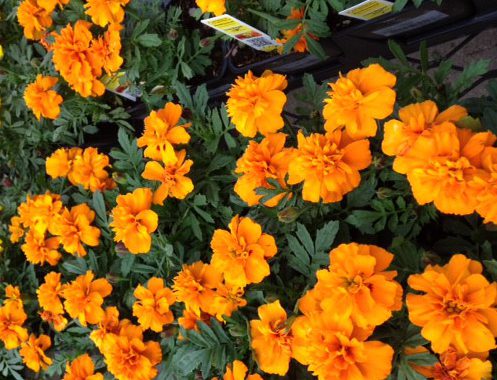
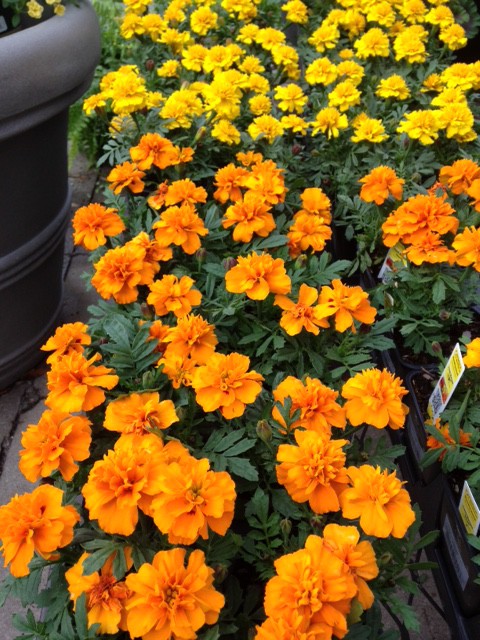
Did you know that Petunias repel asparagus beetle or that Marigolds planted among potatoes discourage Colorado Potato beetles? Are you aware that cabbage planted near lettuce has an adverse effect on the growth and flavor? In this article I would like to talk about one of my favorite topics, companion planting. Companion planting can be defined as the practice of planting two or more plant species close together to gain benefits either on growth, flavor or pest control. I would like to talk about the many benefits of companion planting in more detail.
Trap cropping: when a neighboring crop is selected to attract the pests and distract from the main crop. An example of this is planting collards to attract the diamond back moth from cabbage or planting dill with tomatoes because tomato horn worms prefer dill.
Nitrogen fixation: planting legumes such as beans and peas have a relationship with bacteria in the soil called Rhizobium. Legumes can convert it to a form that plants can use.
Biochemical Pest Suppression: Some plants can exude chemicals from roots or aerial parts that suppress or repel pest and protect the neighboring plants. An example of this is African Marigold release thiopene which acts as a nematode repellent.
Physical Spatial Interactions: Tall growing sun loving plants can share space with lower growing shade tolerate plants. This results in higher yields and has pest control benefits. One of the oldest examples of this is Three Sisters (corn, beans, and squash). Corn is planted for the pole beans to climb and provides a high canopy of foliage that can confuse squash borer and reduce damage. Beans are nitrogen fixing and corn requires a lot of nitrogen. Squash has broad spreading leaves that provide a living mulch and reduce weeds and hold moisture.
Beneficial Habitats: provide a desirable environment for beneficial insects such as lady beetles, lacewings, hover flies, mantids, non-insects such as spiders and predatory mites. Plants in the Umbel family (carrots, parsley, dill) are known for this as well as sweet alyssum.
Security through Diversity: More mixing of various crops and varieties equals a degree of security to the grower.
Some good examples of Companions are the following:
Broccoli: mint, dill, rosemary; aromatic herbs help repel pest Cabbage: mint, onion, oregano, dill, sage, clover, chamomile, nasturtium; Chamomile improves the growth and flavor and Nasturtiums offer caterpillars an alternate food source Carrots: English peas, lettuce, onion family, tomato; maximize space, provide shade and nitrogen fixer Peppers: tomato, beans, onion, geranium, petunia; Geranium repels Japanese beetles and petunias repel a variety of insects Spinach: strawberry, cauliflower, eggplant, radish; radish repels leaf miners Tomato: asparagus, carrot, parsley, basil, marigold, garlic; garlic repels red spider mites
People love eating potatoes, and farmers love planting them. Traditionally, Valentine’s Day is a known date for planting potatoes. This tradition goes back generations. Potato planting time in North Florida is during the coldest months of January to February, although February 14th is a popular planting day. The taste and texture of homegrown potatoes are far superior to those of store-bought spuds! Garden potatoes also provide a bounty of nutrients. The potato (Solanum tuberosum) is a member of the nightshade family. This cool-weather vegetable typically yields bigger crops in the northern portion of the U.S., however potatoes can be grown as a winter crop in warmer climates.
Potato Varieties
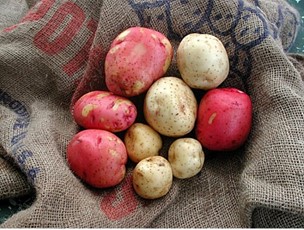
The most popular and successful varieties grown in Florida are based on yield, disease resistance, quality, and adaptability to warm climates. These varieties are white-skinned potatoes ‘Yukon Gold,’ ‘Gold Rush,’ ‘LaChipper,’ and ‘Sebago’, and red-skinned varieties ‘Red Pontiac’, ‘Red LaSoda’, and ‘LaRouge.’ For russet varieties, home gardeners can select varieties that mature relatively early (100-115 days), such as ‘Russet Norkotah.’ Exotic potato varieties are fun and interesting to try since these varieties are hard to find in supermarkets. They are often smaller, taking less time to cook, but are also very colorful, which can increase the nutritional content. Potatoes with bright orange flesh have more carotenoids, and those with red pigments have more anthocyanins, both having health benefits. Other fun varieties include fingerling types and varieties with blue/purple flesh. The ‘All Blue’ potato has deep blue skin and flesh and produces blue flowers. Certified seed potatoes are ideal and can be found at your local feed store or garden center.
Credit: C. Christensen
Planting Prep: Before Planting
The seed potato needs to be cut into the size of an egg, with at least one eye per section. They must be dried in a cool, dark place for a few days. Plant the sections in a 4-6 inch deep trench that receives full sun, with the cut side down and sprouts facing up. Potato plants are heavy feeders and need nutrition through the growing season. To determine what kind and quantity of nutrients to apply to the soil, get the soil tested by a qualified laboratory. Contact your local Extension office for local fertilization recommendations. Apply a 10-0-10 fertilizer at 7.5 pounds per 100-foot row, both at planting and again 3-4 weeks later, by side-dressing fertilizer about 4-6 inches to either side of the plant.
Growing, Harvesting, Storage
Potatoes are ready to dig in about three months. Since potato tubers push up above the soil surface, the soil needs to be mounded around the stems as the plant grows. Tubers exposed to the sun turn green, making them inedible. Remove the tops 2-3 weeks before digging to “toughen the skin.” After harvesting, potatoes need to be kept in a cool (60-65 degrees F) dark place for 10-14 days to allow any damages to heal. Move them to a final storage location with high relative humidity, good aeration, and cool temperatures (38-40 degrees F). Washed tubers should be allowed to dry thoroughly before storing. Under proper conditions, potatoes can be stored for 3– 6 months or more.