by Matt Lollar | Apr 23, 2018
Recently, an Extension Agent in the Florida Panhandle received a picture of some mushrooms popping up in a client’s garden. These particular mushrooms were in a spot where leftover mushroom compost had been dumped. The compost was previously used to grow oyster mushrooms and the client was hopeful that she had more oyster mushrooms growing in her yard. Unfortunately, the lab results came back stating the mushrooms in question were Armillaria spp.
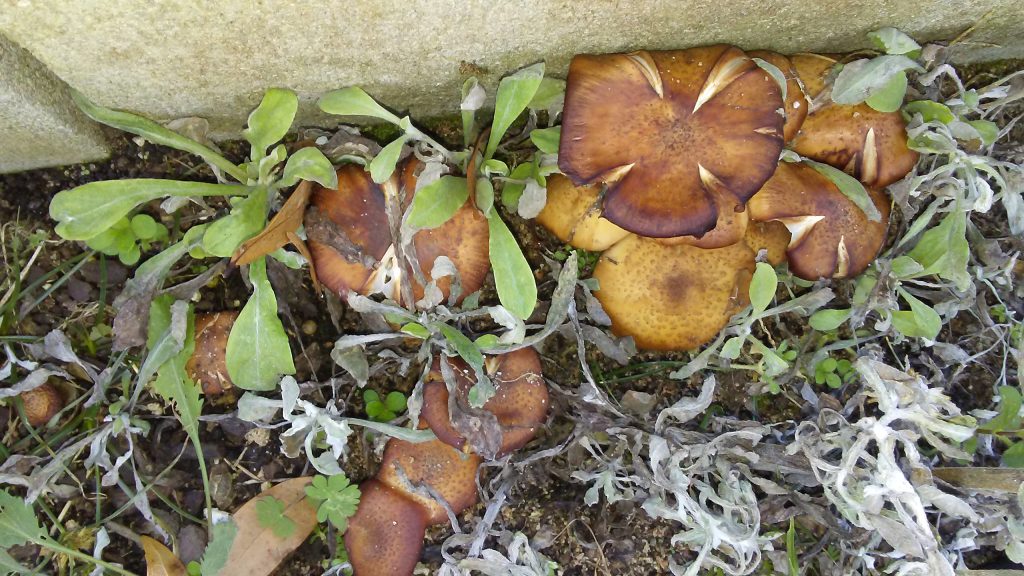
Armillaria spp. in the garden. Photo Credit: University of Florida/IFAS Extension.
Armillaria spp. cause root rot of trees and shrubs throughout the world. The fungus infects the roots and bases of trees, causing them to rot and eventually die. Some species of Armillaria are primary pathogens that attack and kill plants, but most are opportunistic pathogens that are attracted to unhealthy or stressed plants. Fruiting structures of the fungi can be recognized by the clusters of yellow to brown-colored mushrooms that emerge during wet conditions. However, the mushroom caps sometimes never form and the plant material needs to be inspected more thoroughly to find the disease culprit. Infected plants may have wilted branches, branch dieback, and stunted growth and should be removed and replaced with resistant species.
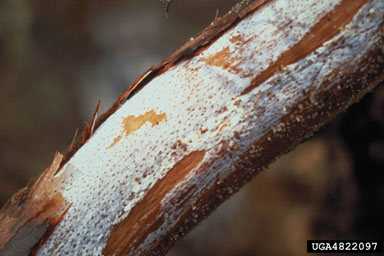
White mycelial fan under the bark of a root infected with Armillaria tabescens. Photo Credit: Ed Barnard
Management – The best method for controlling Armillaria root rot is with proper plant installation and maintenance. Planting plant material at the proper depth will allow the roots to breathe and reduce the opportunity for the roots to rot. Pruning tools should be sanitized between plant material. Proper irrigation and fertilization will also reduce the risk of plant disease and root rot. Lastly, you can choose to plant a diverse landscape with resistant species.
For more information on Armillaria root rot and a comprehensive list of resistant species, please view the EDIS publication: Armillaria Root Rot
by Daniel J. Leonard | May 18, 2017
If you’re like me, growing turfgrass is often more of a hassle than anything else. Regardless of the species you plant, none tolerates shade well and it can seem like there is a never-ending list of chores and expenses that accompany lawn grass: mowing (at least one a week during the summer), fertilizing, and constantly battling weeds, disease and bugs. Wouldn’t it be nice if there were an acceptable alternative, at least for the parts of the lawn that get a little less foot traffic or are shady? Turns out there is! Enter the wonderful world of perennial groundcovers!
Perennial groundcovers are just that, plants that are either evergreen or herbaceous (killed to the ground by frost, similar to turfgrass) and are aggressive enough to cover the ground quickly. Once established, these solid masses of stylish, easy to grow plants serve many of the same functions traditional turf lawns do without all the hassle: choke out weeds, provide pleasing aesthetics, reduce erosion and runoff, and provide a habitat for beneficial insects and wildlife.
The two most common turfgrass replacements found in Northwest Florida are Ornamental Perennial Peanut (Arachis glabra) and Asiatic Jasmine (Trachelospermum asiaticum); though a native species of Mimosa (Mimosa strigillosa) is gaining popularity also. All of these plants are outstanding groundcovers but each fills a specific niche in the landscape.

Perennial Peanut Lawn
Perennial Peanut is a beautiful, aggressive groundcover that spreads through underground rhizomes and possesses showy yellow flowers throughout the year; the show stops only in the coldest winters when the plant is burned back to the ground by frost. It thrives in sunny, well-drained soils, needs no supplemental irrigation once established and because it is a legume, requires little to no supplemental fertilizer. It even thrives in coastal areas that are subject to periodic salt spray! If Perennial Peanut ever begins to look a little unkempt, a quick mowing at 3-4” will enhance its appearance.

Asiatic Jasmine
Asiatic Jasmine is a superb, vining groundcover option for areas that receive partial to full shade, though it will tolerate full sun. This evergreen plant sports glossy dark green foliage and is extremely aggressive (lending itself to very rapid establishment). Though not as vigorous a climber as its more well-known cousin Confederate Jasmine (Trachelospermum jasminoides), Asiatic Jasmine will eventually begin to slowly climb trees and other structures once it is fully established; this habit is easily controlled with infrequent pruning. Do not look for flowers on this vining groundcover however, as it does not initiate the bloom cycle unless allowed to climb.

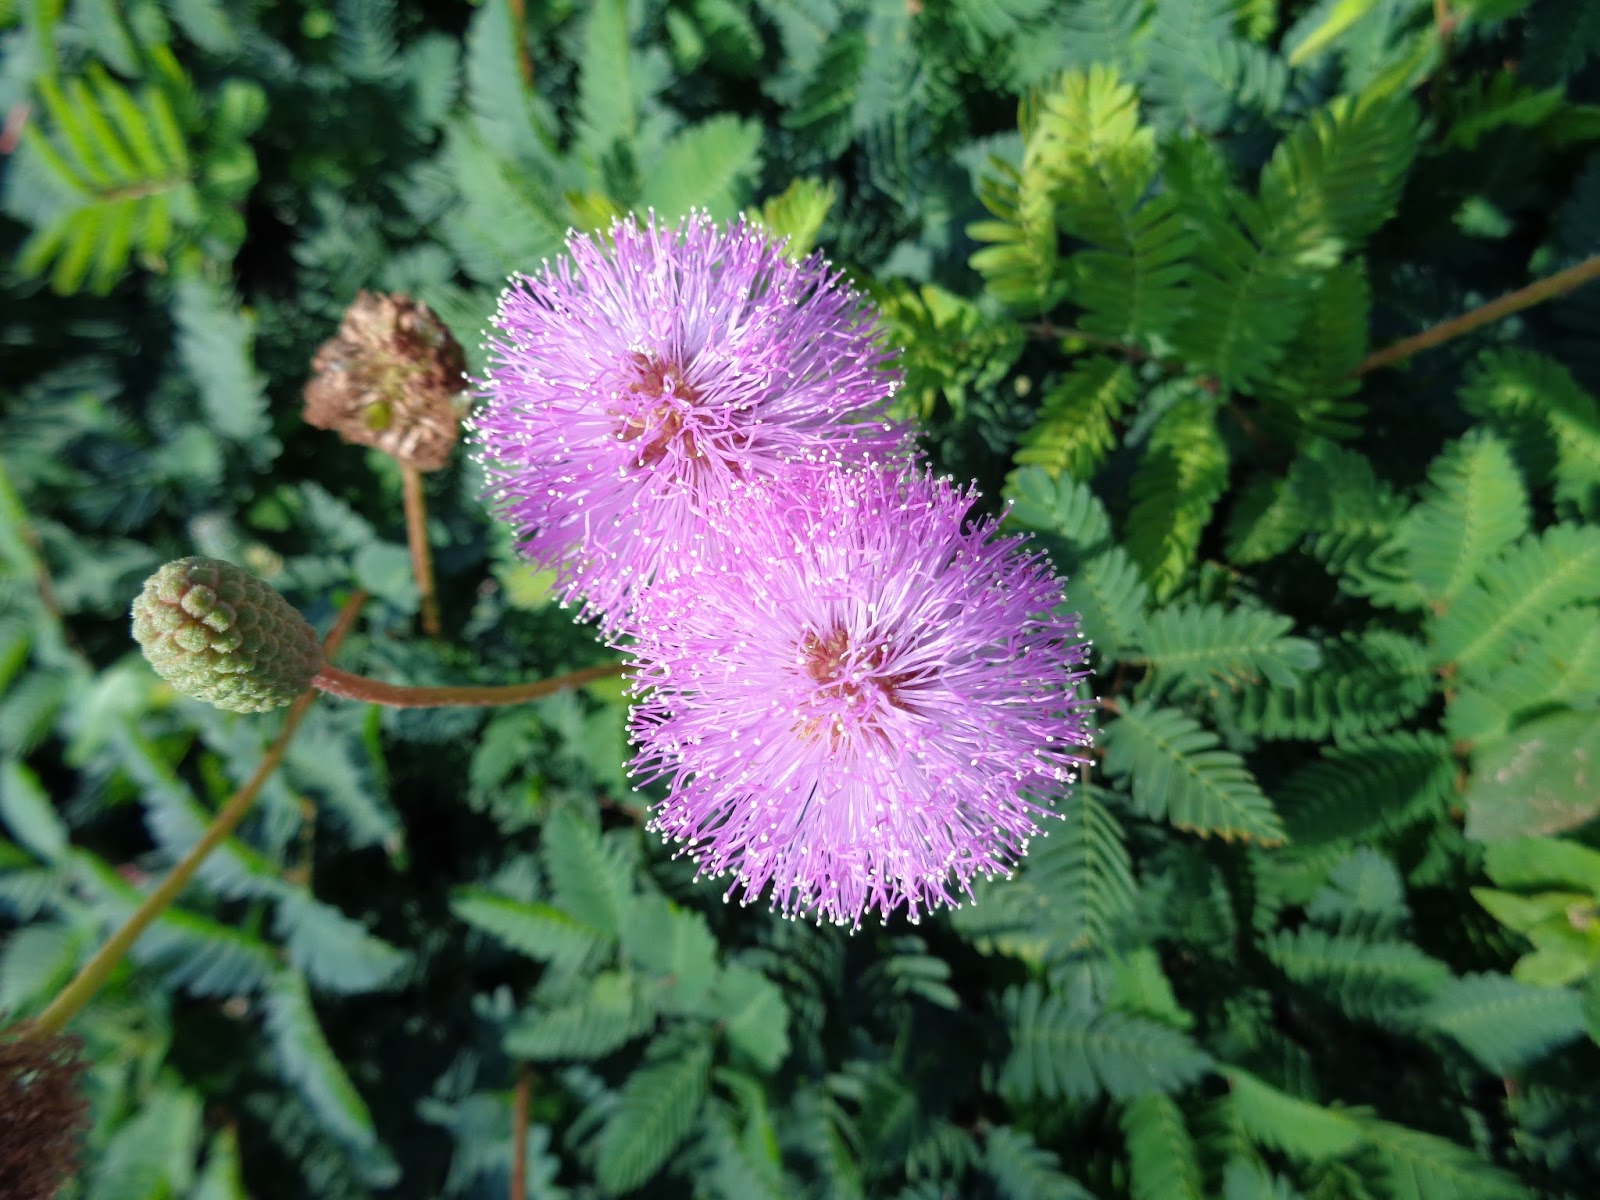
Sunshine Mimosa
For those that prefer an all-native landscape, Sunshine Mimosa (Mimosa strigillosa), also known as Sensitive Plant, is a fantastic groundcover option for full-sun situations. This herbaceous perennial is very striking in flower, sending up bright pink, fiber-optic like blooms about 6” above the foliage all summer long! Sunshine Mimosa, like Perennial Peanut, is a legume so fertility needs are very low. It is also exceptionally drought tolerant and thrives in the deepest sands. If there is a dry problem spot in your lawn that receives full sun, you can’t go wrong with this one!
As a rule, the method of establishing groundcovers as turfgrass replacements takes a bit longer than with laying sod, which allows for an “instant” lawn. With groundcovers, sprigging containerized plants is most common as this is how the majority of these species are grown in production nurseries. This process involves planting the containerized sprigs on a grid in the planting area no more than 12” apart. The sprigs may be planted closer together (8”-10”) if more rapid establishment is desired.
During the establishment phase, weed control is critical to ensure proper development of the groundcover. The first step to reduce competitive weeds is to clean the site thoroughly before planting with a non-selective herbicide such as Glyphosate. After planting, grassy weeds may be treated with one of the selective herbicides Fusilade, Poast, Select, or Prism. Unfortunately, there are not any chemical treatments for broadleaf weed control in ornamental groundcovers but these can be managed by mowing or hand pulling and will eventually be choked out by the groundcover.
If you are tired of the turfgrass life and want some relief, try an ornamental groundcover instead! They are low-maintenance, cost effective, and very attractive! Happy gardening and as always, contact your local UF/IFAS County Extension Office for more information about this topic!
by Molly Jameson | Apr 7, 2017
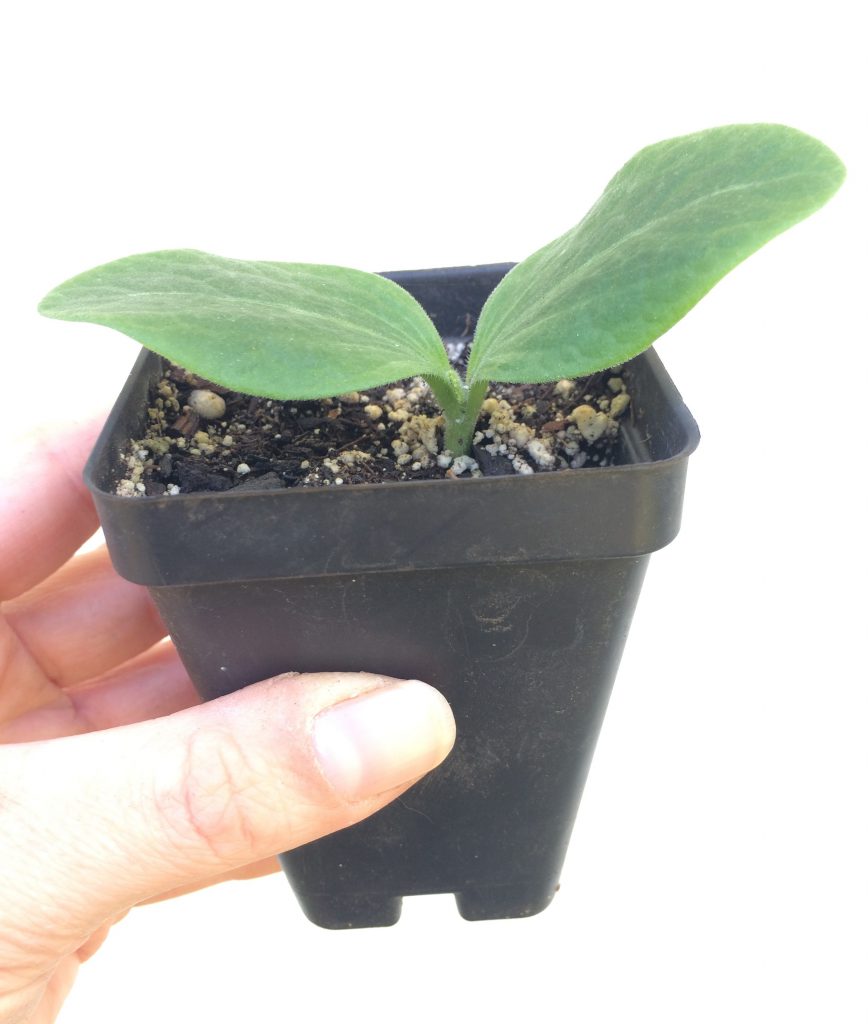
Be careful planting cucurbit transplants, as they have sensitive roots. Photo by Molly Jameson.
When I think of the end of winter and the hot temperatures that will soon be here to stay in the Florida Panhandle, I often feel a little melancholy. But the one silver lining that always picks me back up is remembering what warmer temperatures will mean in the garden. This is the start to all the fun, colorful, fruiting crops. Think of the oranges, reds, yellows, and even purples that will soon fill their vines.
As an extension agent, one of the questions I am often asked is whether to start summer vegetables from seed directly in the garden, or to start seeds in pots and transplant them later. The answer is – as is often the case – it depends.
Are you planting tomatoes, peppers, or eggplant? Well, the beginning of April is too late to start from seeds with these crops in our neck of the woods. Buy transplants! Are you growing beans, okra, or root crops? Now that we are past the risk of frost, put those seeds directly into your garden. Are you growing cucurbits, like squash, cucumbers, or melons? You have a choice. You could seed them directly, or you could start seeds in pots. What is the advantage of starting in pots, you ask? Well – this will give you the chance to pick the strongest plants and will allow you to transplant them exactly where you want them. The disadvantage? Other than the extra work, cucurbits tend to be sensitive to disturbance. Be sure to handle with care and do not over water once your seedlings have sprouted.
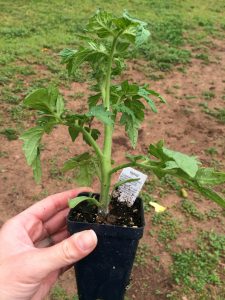
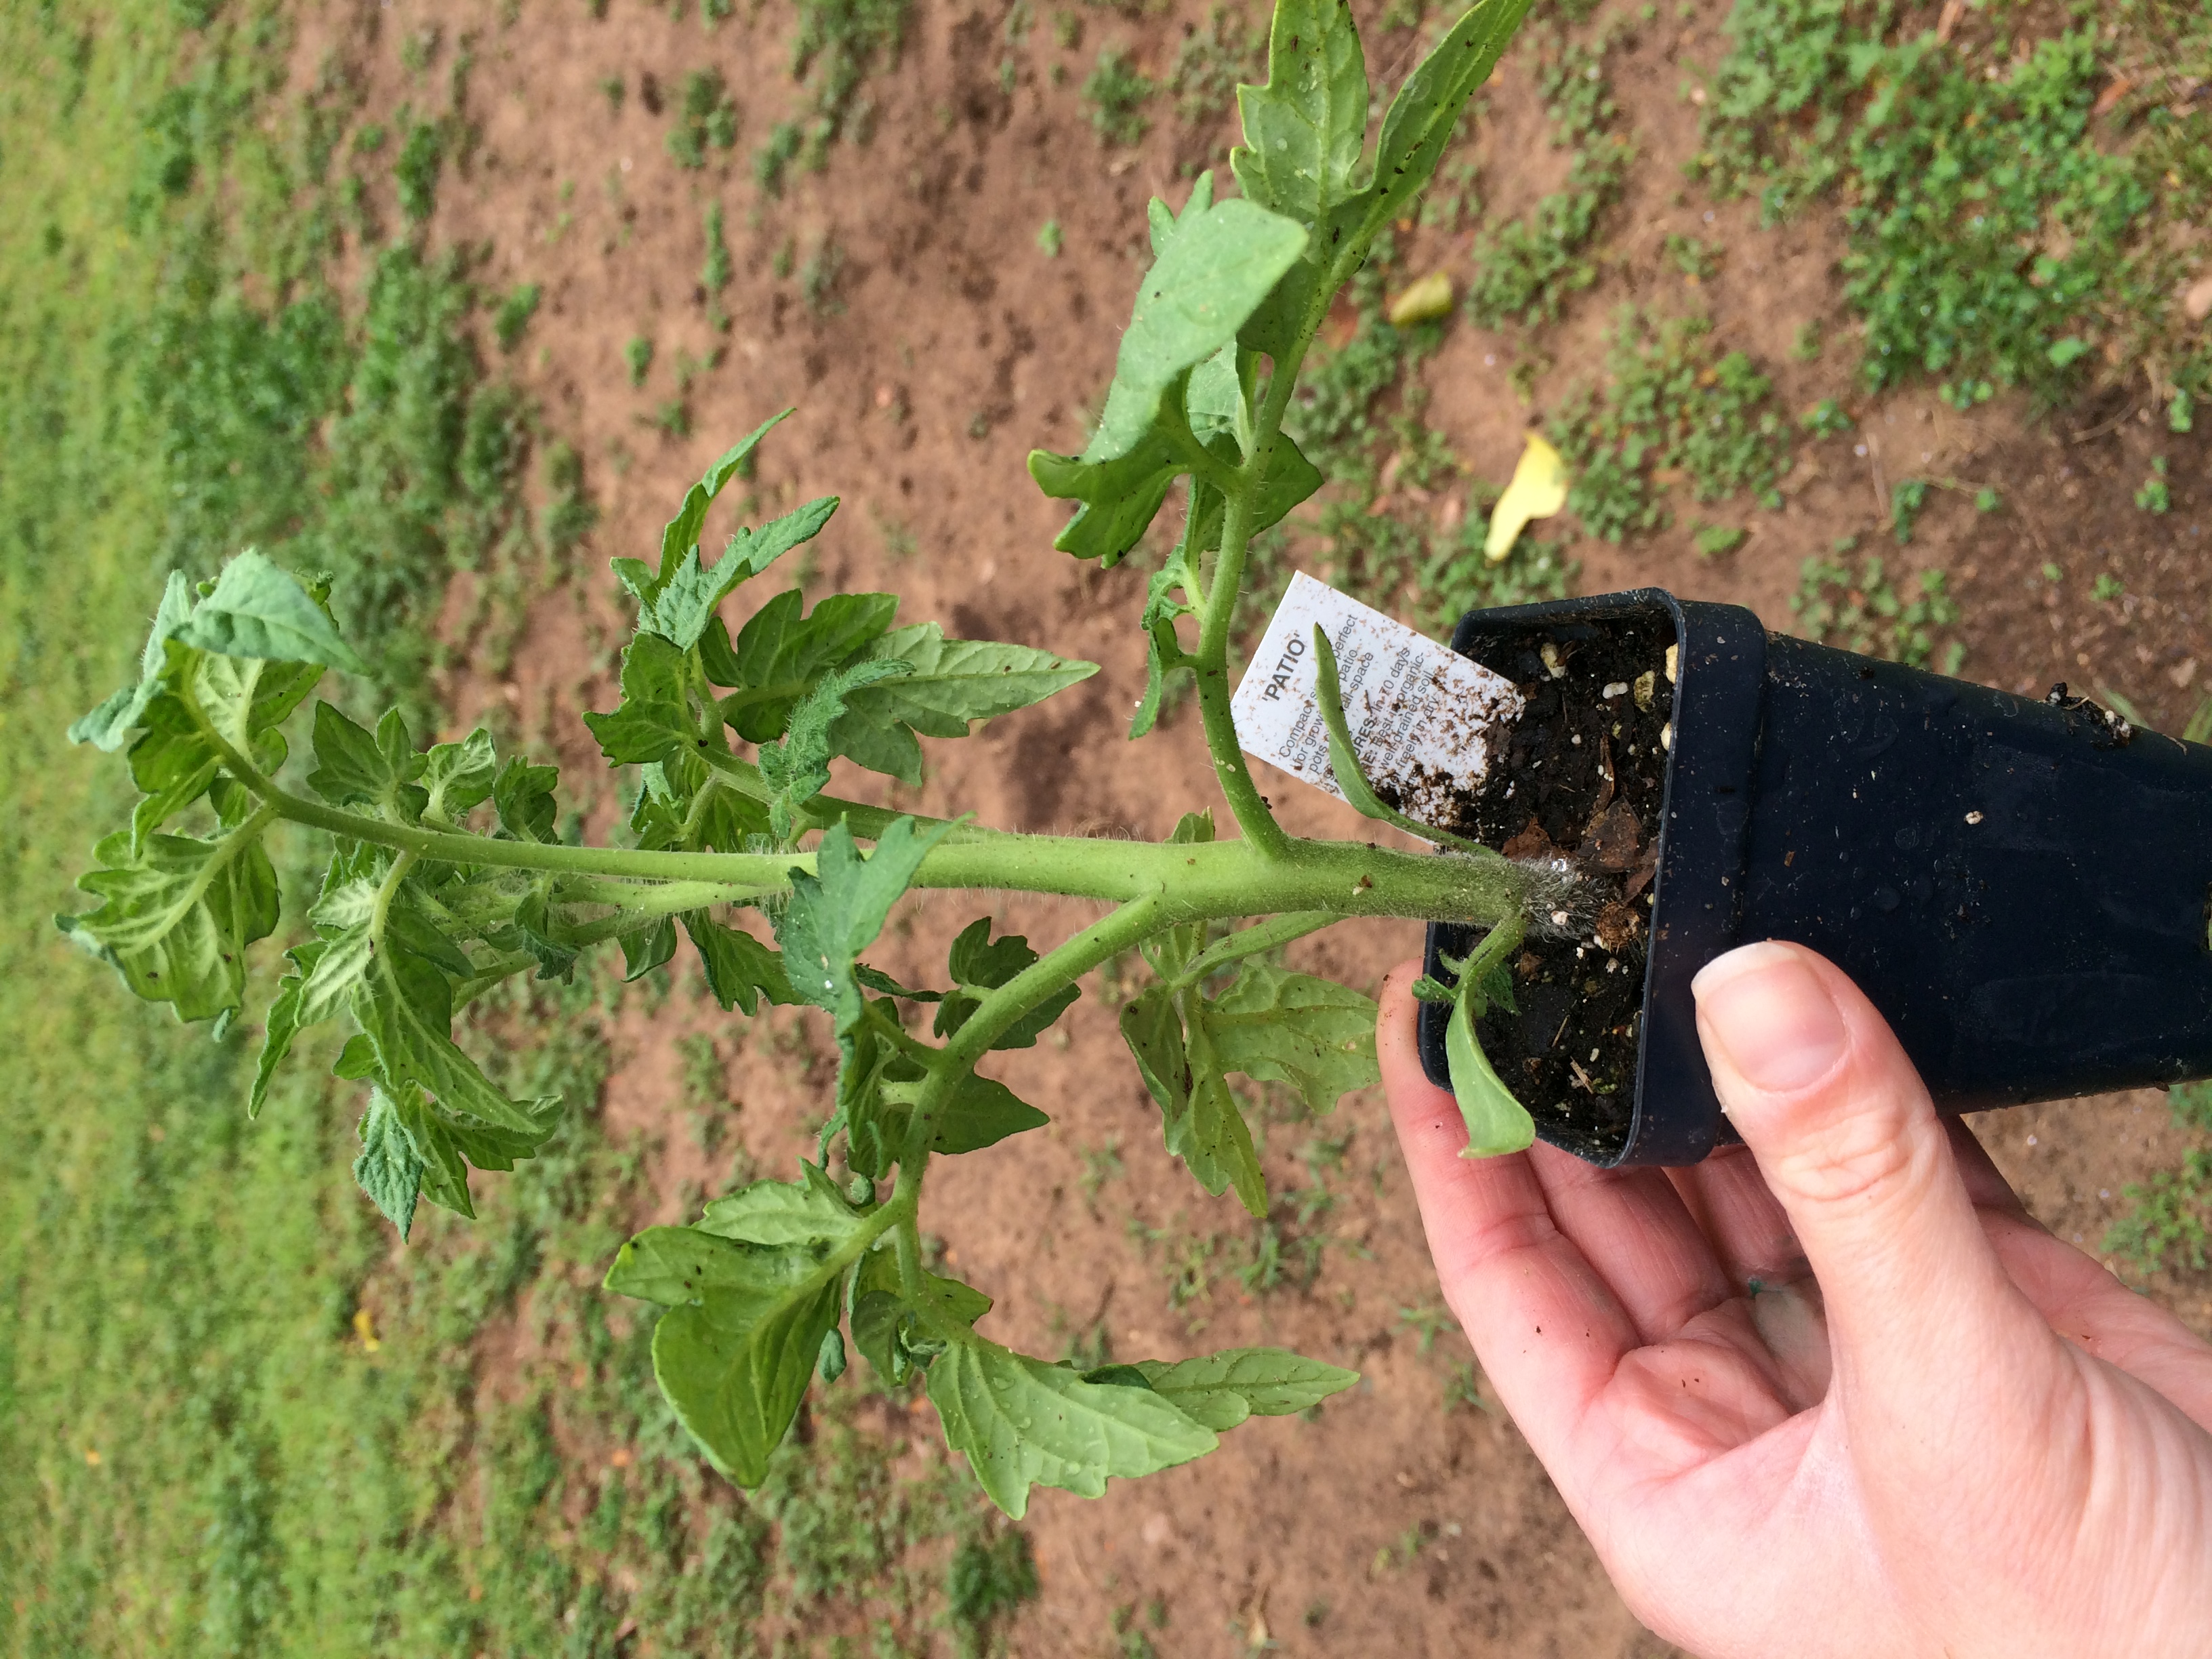
Transplant into the garden when the plant is about the length of its pot. Photo by Molly Jameson.
Whether you grew the seeds in pots yourself or acquired transplants elsewhere, there are certain practices you can follow to ensure your plant babies have a good start. Here are a few tips when it comes to transplanting into the garden:
What should be considered when purchasing transplants? When purchasing transplants, it is important to make sure the plant is healthy. Look for plants with strong stems, green leaves, and no signs of pest or disease damage. Ideally, the plant should not be much taller than the length of its pot, and should be about as tall as it is wide. Also, avoid vegetable plants that are already producing fruit, this is an indication they have been in their pot too long, prompting them to become stressed. When stressed, annuals often feel they need to hurry and produce seeds to carry on the next generation.
When should transplants be planted into the garden? For spring gardens, plant transplants once danger of frost has passed (late March in the Panhandle), when the transplant has had time to develop a strong root system, and when the transplant is about the length of its pot. If you are growing your seeds indoors or in a greenhouse, allow the plant to “harden-off” by placing the plants outdoors in partial shade for a few hours a day for about a week before transplanting.
What is the transplanting process?
- First, prepare your garden site with compost and other soil amendments.
- Water your plants very thoroughly just before planting to decrease transplant shock. The entire root system should be completely wet.
- Dig a hole that is at least double the width of the plant’s root ball.
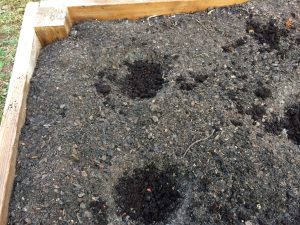
Add fresh compost or worm castings to each planting hole to give your plants an extra nutrient boost. Photo by Molly Jameson.
- Add one to two handfuls of fresh compost or worm castings to each hole. These soil amendments will improve soil health, introduce beneficial microbes, and provide a slow- release nutrient source for your growing seedlings.
- Avoid covering any leaves or stems under the soil surface. Remove these lower leaves and stems with sharp garden clippers to minimize the size of the wound.
- Avoid touching the stem and avoid disturbing the root ball when removing the transplant from its pot. Gently squeeze the pot to loosen the potting soil and turn the transplant sideways or upside down with the palm of your hand to gently “catch” the transplant.
- Unless the transplant is a tomato, plant it so that the soil level is about the soil level of the transplant, making sure the plant has good structure to decrease susceptibility of falling over as it grows.
- If transplanting a tomato, plant deeper than the soil level of the transplant, as tomatoes can grow what are called “adventitious” roots – roots that grow from their stem – that will improve overall root development.
- Make sure to cover up all roots, and water the soil around the plant thoroughly. Continue to water deeply, keeping the soil moist but not soggy, for the next three to four days while the plant becomes established. You can then begin to switch to a normal watering pattern.
- Always water the soil around the plant, not the plant leaves, throughout the season to decrease susceptibility to disease.
Remember: gardening is a science and an art! And just like art, there are many aspects that are open to interpretation. Have fun gardening – experiment and try new techniques. Keep a journal tracking all your gardening adventures. With time, this can become your road map to the sweetest of summer fruit.
by Larry Williams | Apr 7, 2016
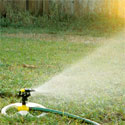
Watering to establish lawn
When watering to establish a lawn or when renovating (redoing, patching, reestablishing, starting over, etc.) a lawn, we normally call for 2-3 “mists” throughout the day for the first 7-10 days until roots get established. These are just 10 minute bursts. Then back off to once a day for about ½ hour for 7-10 days. Then go to 2-3 times a week for about 7 days. By then your lawn should be established.
Of course, if we are experiencing adequate rainfall, you may not need to irrigate. Rain counts. But in the absence of sufficient rain, you’ll need to provide enough water at the correct time to allow your new sod to root – hence, the above directions.
A well designed and correctly installed irrigation system with a controller, operated correctly, really helps to achieve uniform establishment. It can be very difficult or impossible and inconvenient and time consuming to uniformly provide sufficient water to establish a lawn with hose-end sprinklers, especially if the lawn is sizeable and during dry weather. Most people are not going to do the necessary job of pulling hoses around on a regular basis to result in a well established lawn.
There is no substitute or remedy for incorrect irrigation when establishing a brand new lawn or when renovating an entire lawn or areas within a lawn.
It would be wise to not invest the necessary time and money if the new lawn cannot be irrigated correctly. Taking the gamble that adequate (not too much, not too little) rainfall will occur exactly when needed to result in a beautiful, healthy, thick, lush lawn is exactly that – a gamble.
An irrigation system is nothing more than a tool to supplement rainfall. As much as possible, learn to operate the irrigation controller using the “Manual” setting. It is also wise and is state law to have a rain shutoff device installed and operating correctly. The rain shutoff device overrides the controller when it is raining or when sufficient rainfall has occurred. Rain shutoff devices are relatively inexpensive and easily installed. Also, a good rain gauge can be an inexpensive tool to help you monitor how much rain you’ve received. Rain counts.
Too much water will result in rot, diseased roots and diseased seedlings and failure. Too little water will result in the sod, seedlings, sprigs or plugs drying excessively and failure to establish. The end result at best is a poorly established sparse lawn with weeds. Or complete failure.
For additional information on establishing and maintaining a Florida lawn, contact your County UF/IFAS Extension Office or visit http://hort.ufl.edu/yourfloridalawn.
by Eddie Powell | Aug 12, 2014
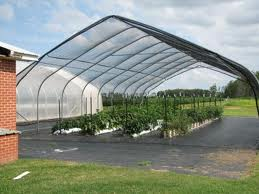
Shade House for early fall crop
Credits: UF/IFAS
In fall, many Florida homeowners enjoy growing their own vegetables but are faced with late summer heat issues. This happens during the first few days of August here in north Florida. Most cole crops are recommended to be planted for the fall as early as August 1, but they must be protected from the hot weather or they may need to be replaced if hot weather damages them. A diverse selection of both heat-resistant and tender plants should be planted in order to prevent total devastation of the garden by extremely hot weather.
The site selection for tender plants should be number one on your list when protecting from heat. Fall vegetable plants need a site with good air flow to protect them from the early season hot temperatures. Arranging susceptible plants along a shade barrier can protect them from direct hot sun, especially from afternoon sun. Poorly drained soils result in weak shallow roots which are more susceptible to drying out during a heat wave.
Plants grown with the correctly applied rate of nutrients will tolerate hotter temperatures better and recover from wilt injury faster than plants grown with little to no nutrients. Watering vegetable garden plants early in the day can help protect them. A well-watered soil will stay cooler than a dry soil and keep plants hydrated. However, saturated soil conditions can damage the root systems of most plants over a few days, so make sure the ground is well-drained.
Healthy vegetable plants are more resistant to heat than vegetable plants weakened by disease, insect damage, or nematode damage. Routine inspection for pests and implementation of necessary control measures are essential. Feel free to contact your local county extension office for information on pest identification and recommended controls.
Shade cloth coverings can help protect vegetable plants more from extreme hot temperatures during the beginning of fall gardening. Shade Cloth that extend to the ground and are not in contact with the vegetable plants foliage can lessen heat injury to the plant. If the vegetable plant foliage is in contact with the cover it is often dried out or injured because of heat transfer from cover the foliage can burn the leaves. One example of excellent plant covers is shade cloth or even an old trampoline cover. To learn more on heat protection of vegetable plants call your local UF/IFAS Extension Service
by Roy Carter | Jun 23, 2014
Summertime is vacation time for people, not plants! While getting ready for that long awaited trip, it’s easy to forget about your lawn, landscape, vegetable garden and house plants. A little time spent preparing your leafy friends for your absence could save you needless worry and hours of extra work when you get back.
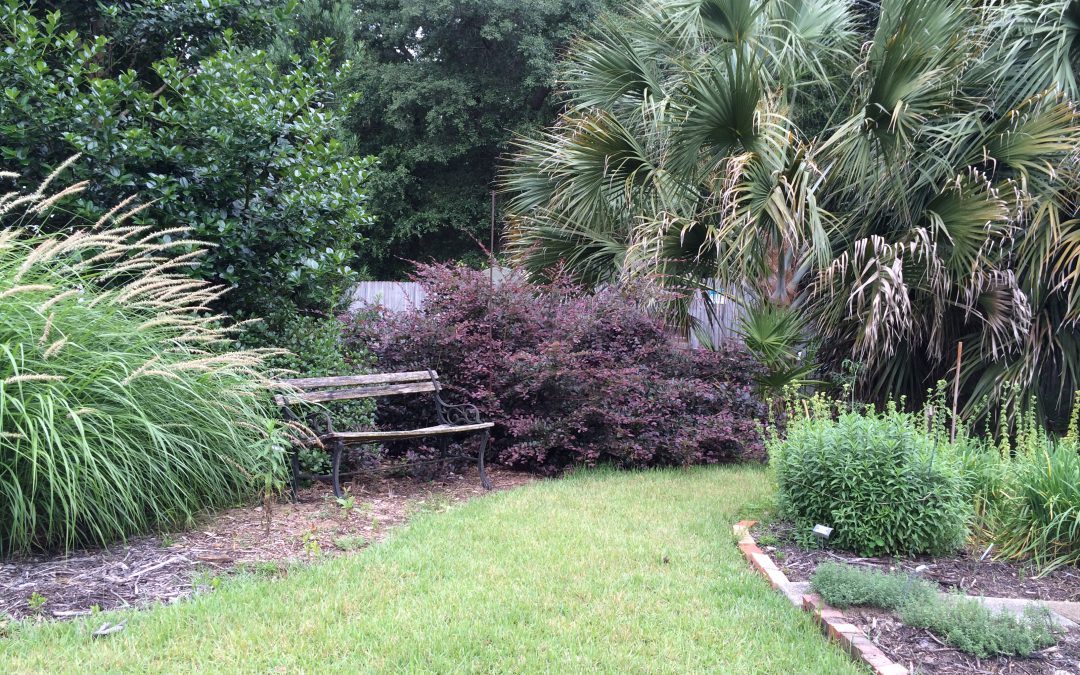
Prepare your landscape for your absence.
Photo by Mary Derrick, UF IFAS
A vacation may be relaxing and rejuvenating for you and your family, but it can be hazardous, even deadly, for your plants. Unless you make adequate preparations before leaving, you could return to vegetable disaster.
One of the first things you might do before leaving home is ask a neighbor to check your plants periodically while you’re gone. All plants need some care. During an extended vacation container grown plants require special attention and different species have different needs. Be sure you give your friend specific instructions for the care of each type.
If you can’t find someone to personally look after your plants while you’re away, there’s plenty you can do prior to departure to make sure you don’t come home to a limp landscape and sickly house plants. Outdoor container plants should be placed in a shady area to conserve moisture. Under a tree or on the north side of a building are good locations. A thick layer of mulch will help conserve moisture for landscape plantings. Mow your lawn just before leaving, cutting the grass a little closer than usual. An unkept lawn can encourage disease, and it’s a tell-tale sign that no one’s home.
Give lawn and landscape plants a heavy watering – especially recently planted beds, which will need extra moisture. Also, thoroughly spray or dust your plants to protect them from insects and diseases while you’re away. If you have flowering annuals, cut the blossoms before departing. If you don’t, they’ll soon stop blooming. Harvest all ripe or nearly ripe fruits and vegetables. Like flowers, they will continue to produce only if they’re picked frequently. Otherwise, they’ll go to seed.
Do a thorough job of weeding. If weeds are allowed to go to seed while you’re away, you can expect to encounter much more difficult problems later in the season – even next year – when the seeds sprout. Weeding eliminates a major source of competition for your landscape plants’ food and water which may be in short supply during your absence.
Plants kept indoors require special consideration. Before leaving home, place your house plants in a room which receives indirect sunlight. Direct exposure to the sun will dry the soil too quickly. Of course, you don’t want to put your plants in a room that’s too dark, either. Too little light will almost always result in leaf drop. And, just before you depart, be sure to water your house plants thoroughly. This is especially vital, because – unlike lawn grass and landscape ornamentals – house plants cannot benefit from any rain that may fall while you’re gone.
You’ll enjoy your vacation more by making sure your plants are well prepared for your absence.