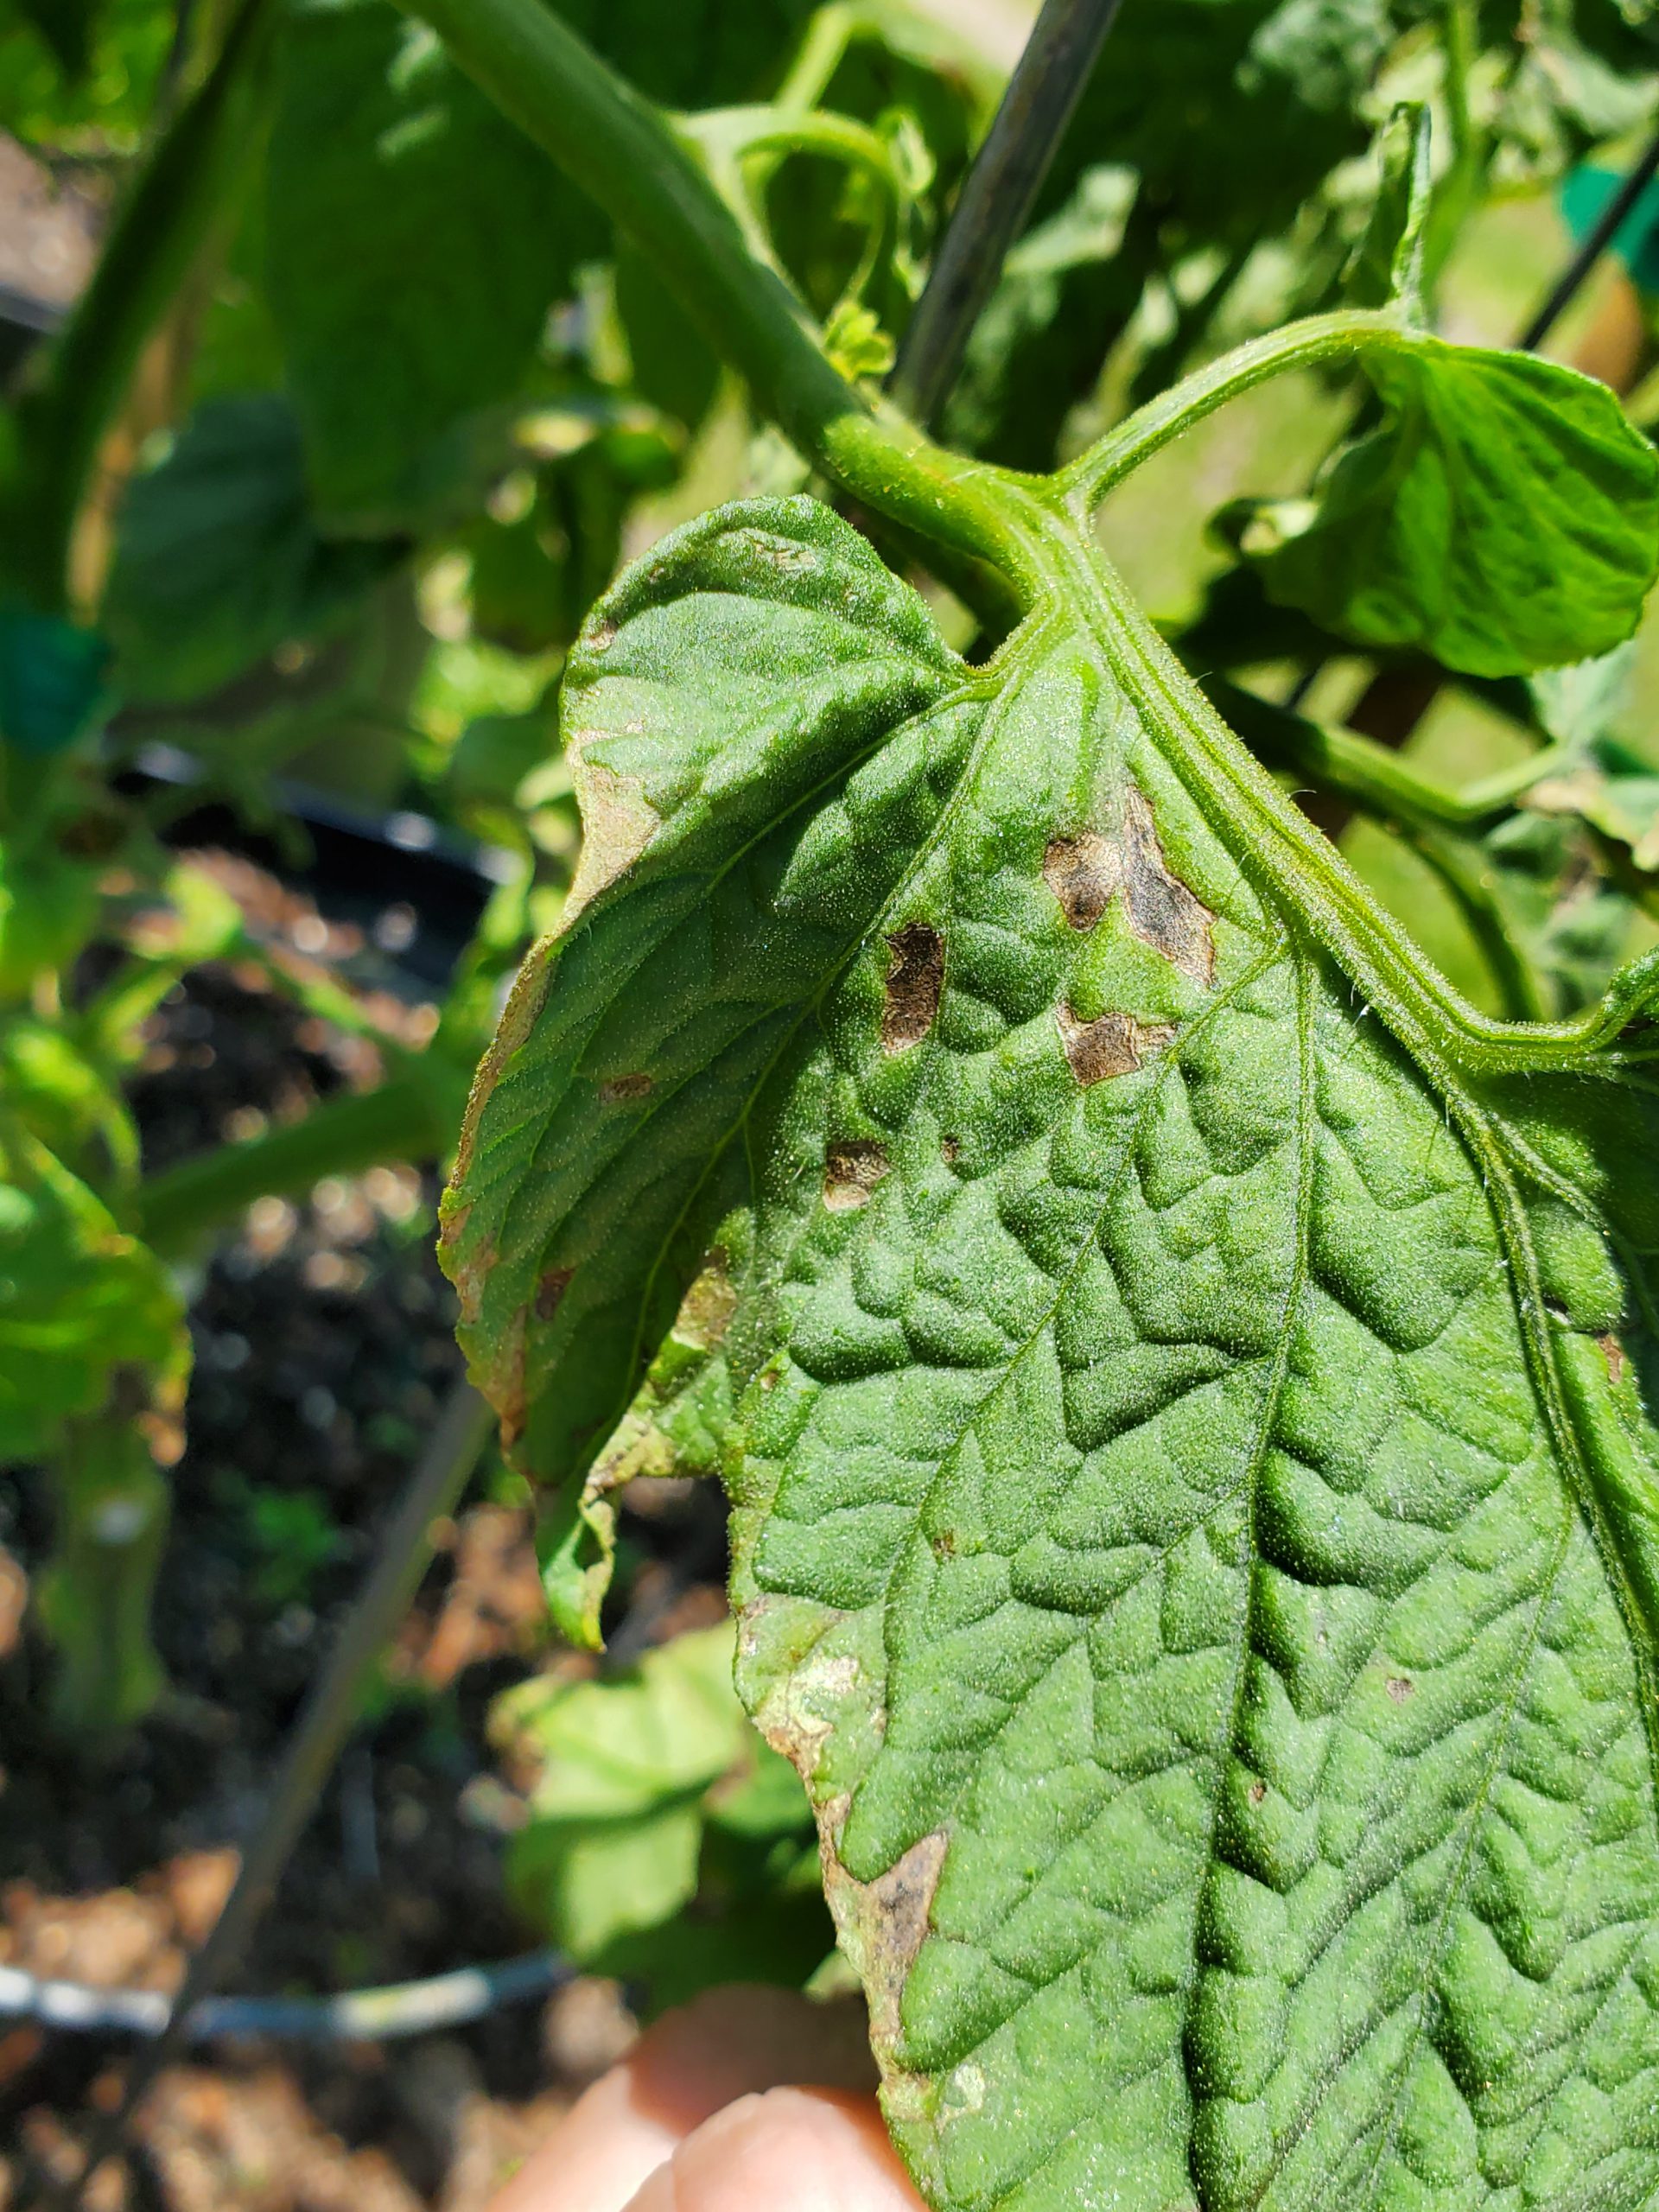
Early BLS symptoms appear on lower leaves. Photo courtesy of the author.
Tomatoes are among the most notoriously difficult vegetable species to grow in Florida. Even when you do everything right (choose disease resistant varieties, buy clean seed/healthy transplants, plant early, rotate crops, scout for insects, prune and support vines, etc), things can go wrong in a hurry. Bacterial Leaf Spot (BLS) caused by the pathogen Xanthomomas perforans, is one of those things. BLS often hitches a ride into gardens undetected on seed and transplants and presents itself as warm and humid weather arrives in late April/early May. Outbreaks typically happen in concurrence with the frequent heavy rainstorms that accompany these months and quickly wreak havoc on tomato plants.
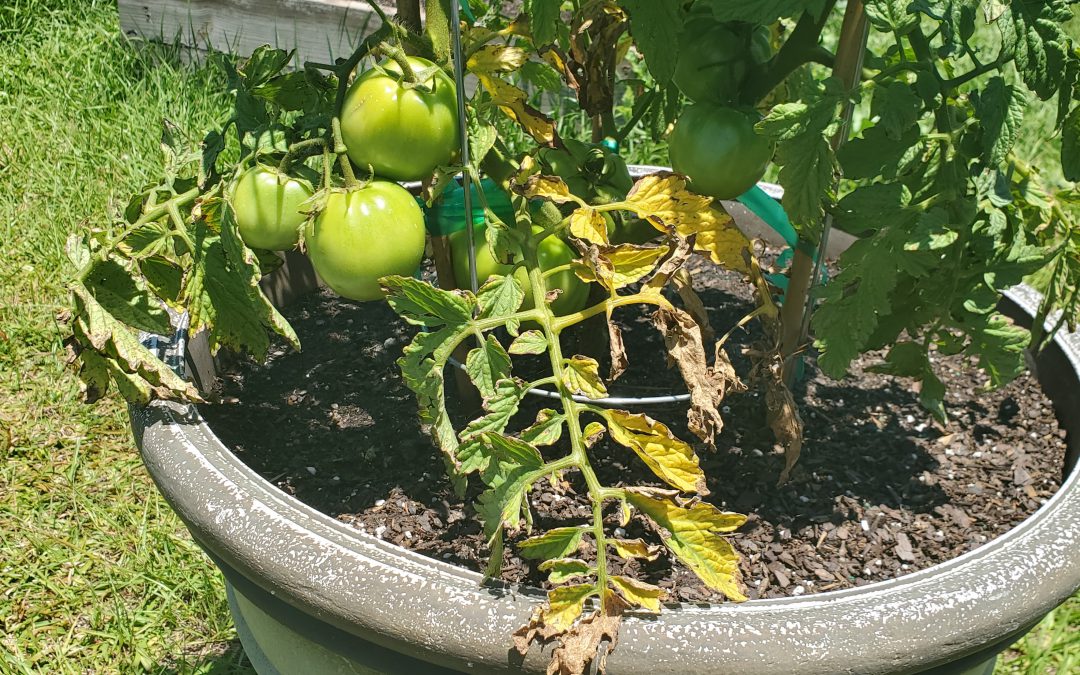
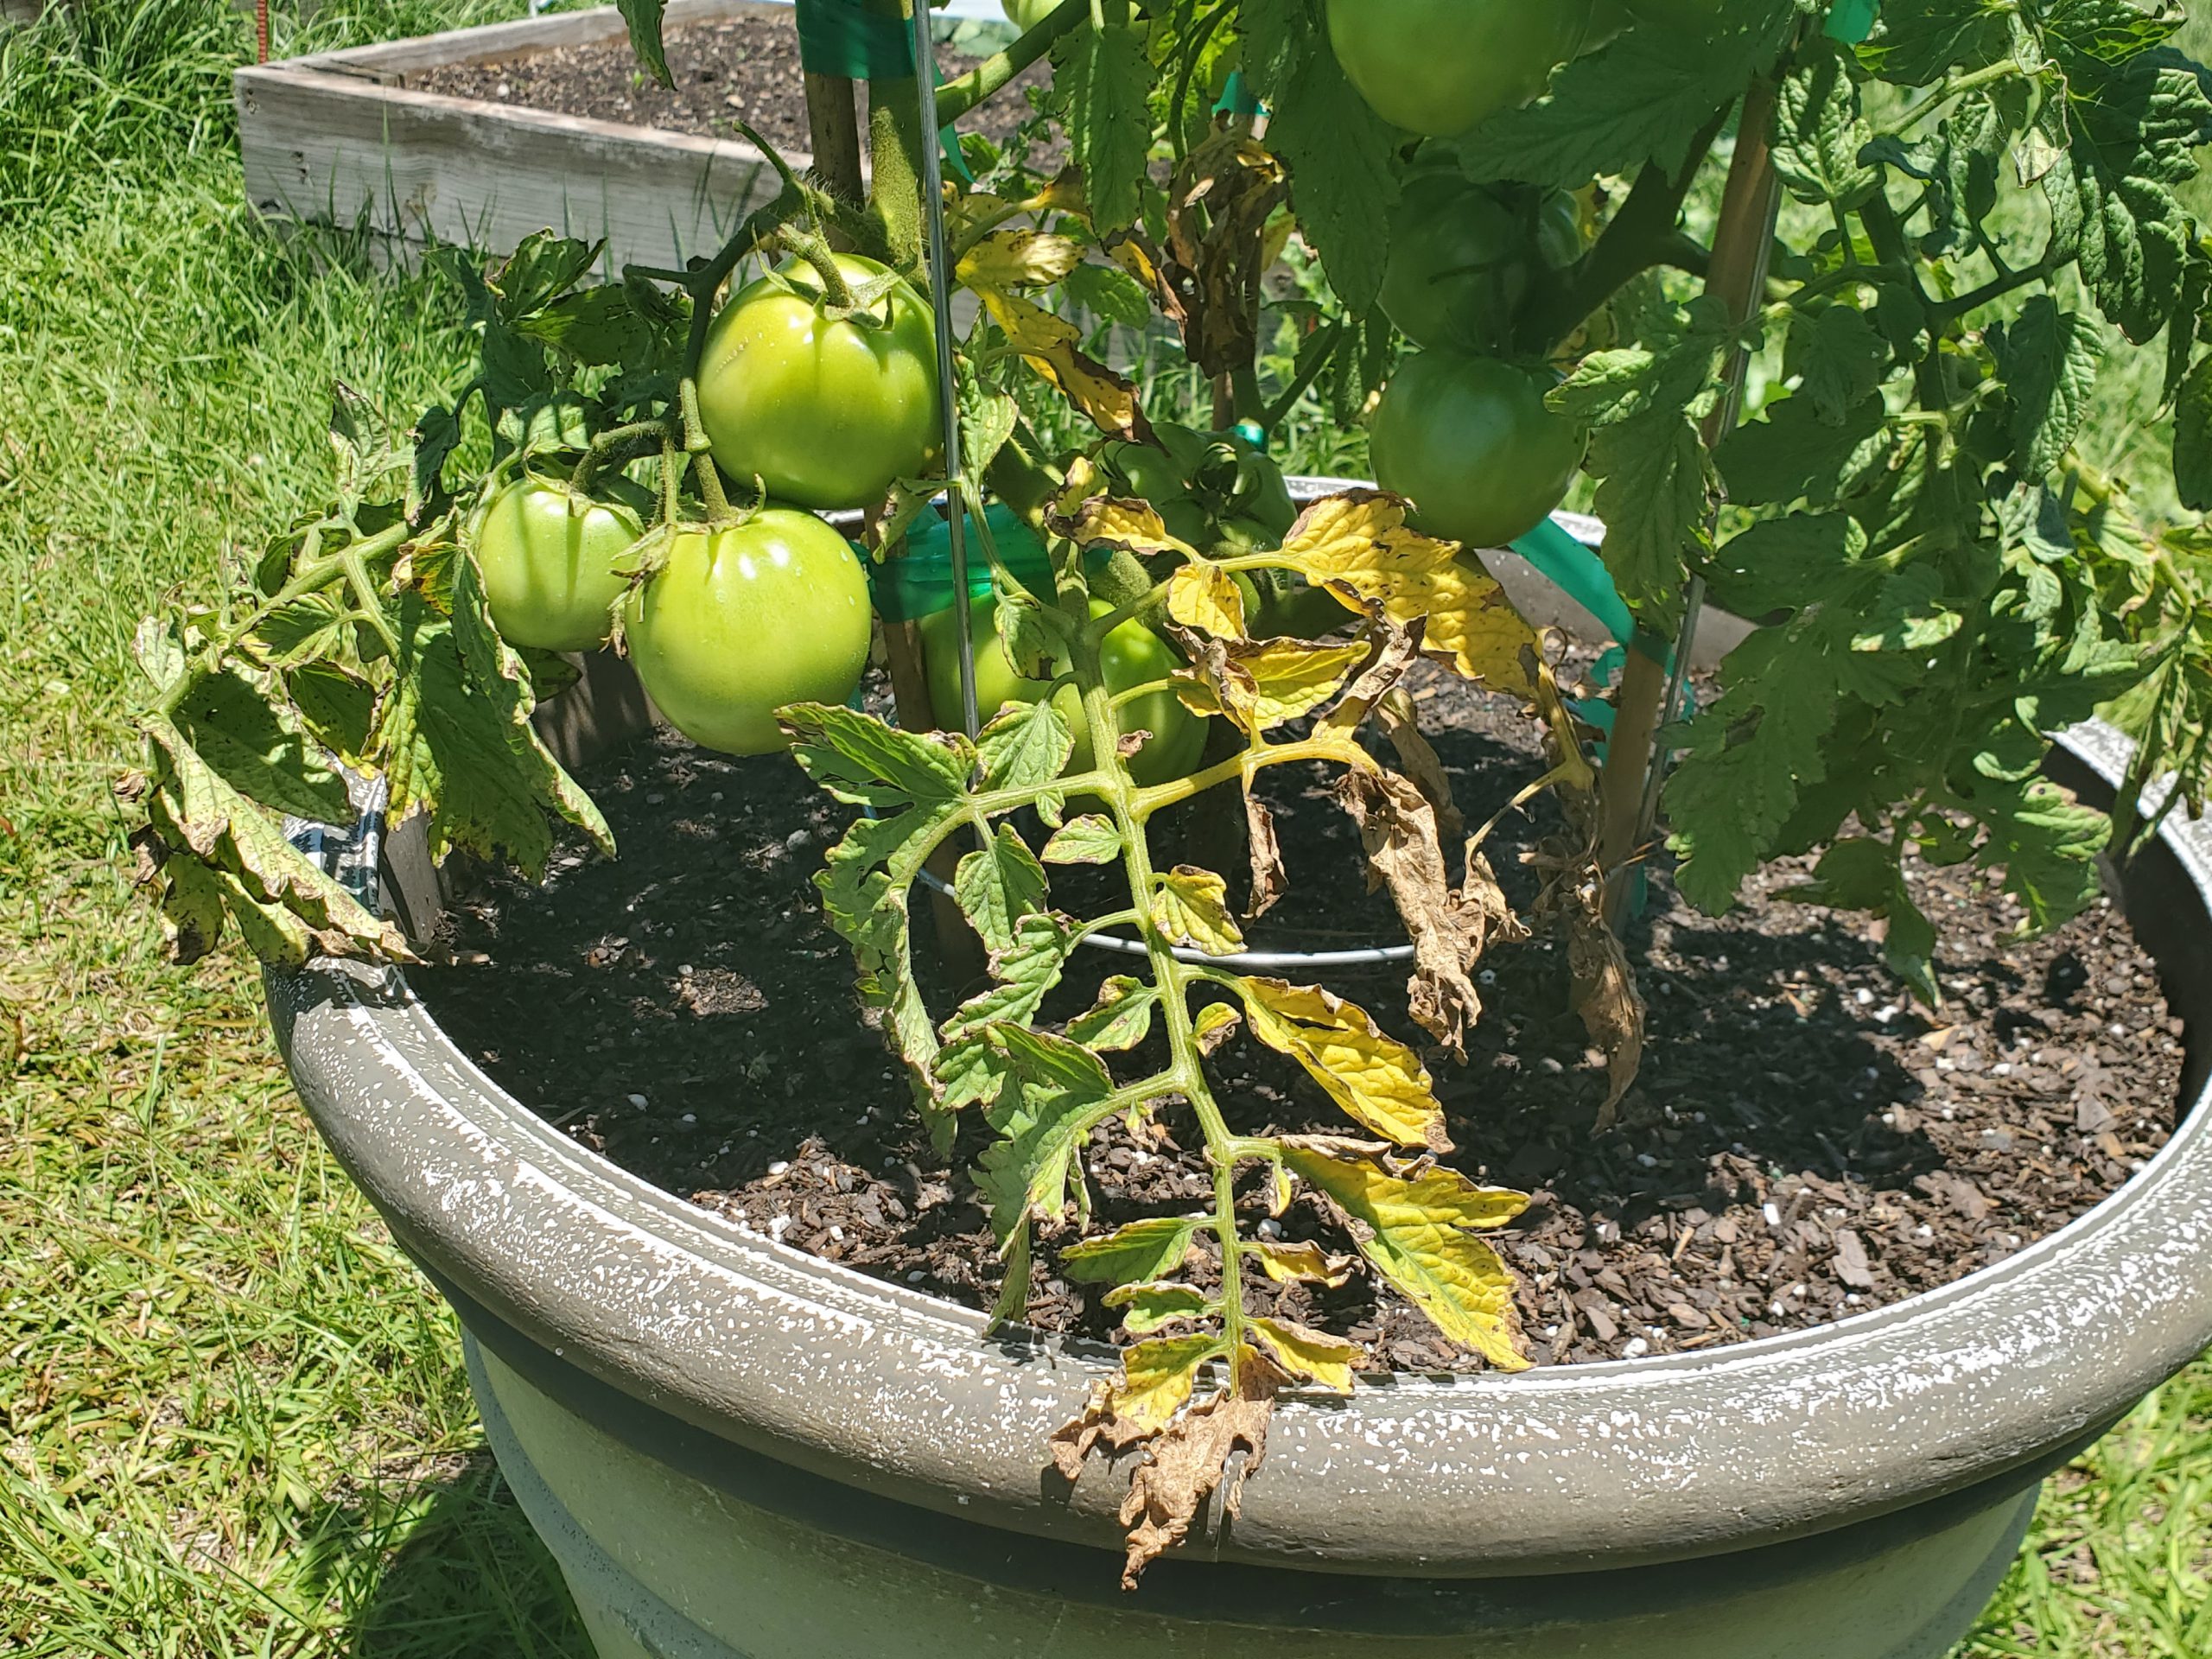
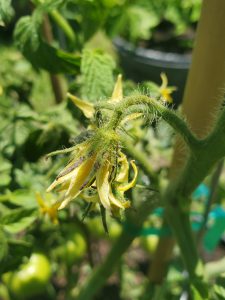
BLS occurrence, much worse in some springs than others, has exploded this year in home gardens. First noticed on the plant’s lower leaves, BLS pathogens enter through natural openings in leaves called stomata, manifest as small, “water-soaked” leaf lesions and then develop within days into dark circular spots, sometimes surrounded by a yellow halo. As conditions worsen, all these individual infections cause a general yellowing or “blighting” of entire leaves. Though the issue begins on tomato leaves, BLS can affect all parts of the plant, including stems, flowers and fruit too! It’s at this point, when blighted leaves become obvious and lesion developing on flower stalks cause both flowers and small fruit to drop, that most home gardeners notice that something is up.
Advancing progression of BLS with “blighted” leaves. Photo courtesy of the author.
Unlike with many other pathogens, gardeners don’t have an abundance of options to control BLS. However, taking the following preventative measures can reduce the pathogen’s impact and stave off disease progression until ripe fruit can be harvested.
Don’t irrigate overhead. Utilize drip/microirrigation or hand water beds and containers at soil level. This prevents the leaves from becoming wet; wet leaves become a perfect host for BLS.
Never work tomato plants when leaves are wet. No staking, pruning, tying, or anything else until plant tissue is dry. Working wet tomato plants is an excellent way to spread bacteria!
Sanitize pruning tools often and wash hands after working infected plants.
Maintain airflow in plants by planting at correct spacing and thinning interior leaves as necessary to facilitate quicker drying of the plant.
Prune lower leaves to at least 12” from the soil’s surface to prevent disease transmission from soil to leaves through splashing water.
Remove infected leaves (when plants are dry!) to slow disease progression.
Rotate crops and destroy infected plants to prevent buildup of BLS organisms in soil.
BLS lesions on tomato flowers. Photo courtesy of the author.
Preventative measures are best, but if your garden has a history of BLS and local weather forecasts call for warm/wet/humid weather, it is best to spray fungicides proactively to protect your crop. A weekly spray with a tank mixture of copper and mancozeb is effective at keeping BLS at bay. This is the only chemical spray combination proven to be effective in controlling BLS.
Unlike many common tomato pathogens that can be reliably avoided through planting resistant cultivars like ‘Big Beef’, ‘Celebrity’ and others, no varieties are resistant to BLS.
While BLS is an extremely destructive pathogen of both home and commercially grown tomatoes, growers can lessen the disease’s effects by following the preventative measures outlined above and spraying with a copper/mancozeb mix if necessary. Growing tomatoes this year hasn’t been easy, but it’s worth it to fight back and realize a harvest despite difficulties like BLS!
If bacteria have given you the blues or other garden issues are bringing you down, give your local UF/IFAS County Extension Agent a call! We’re here to help you be successful in all your horticultural endeavors. Happy gardening!
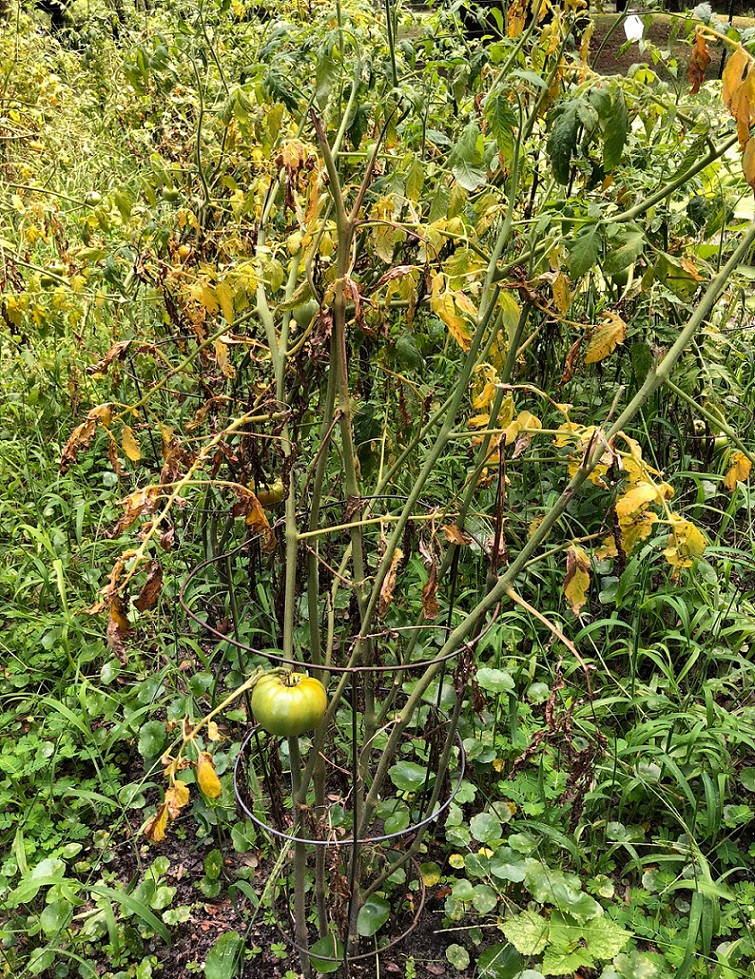
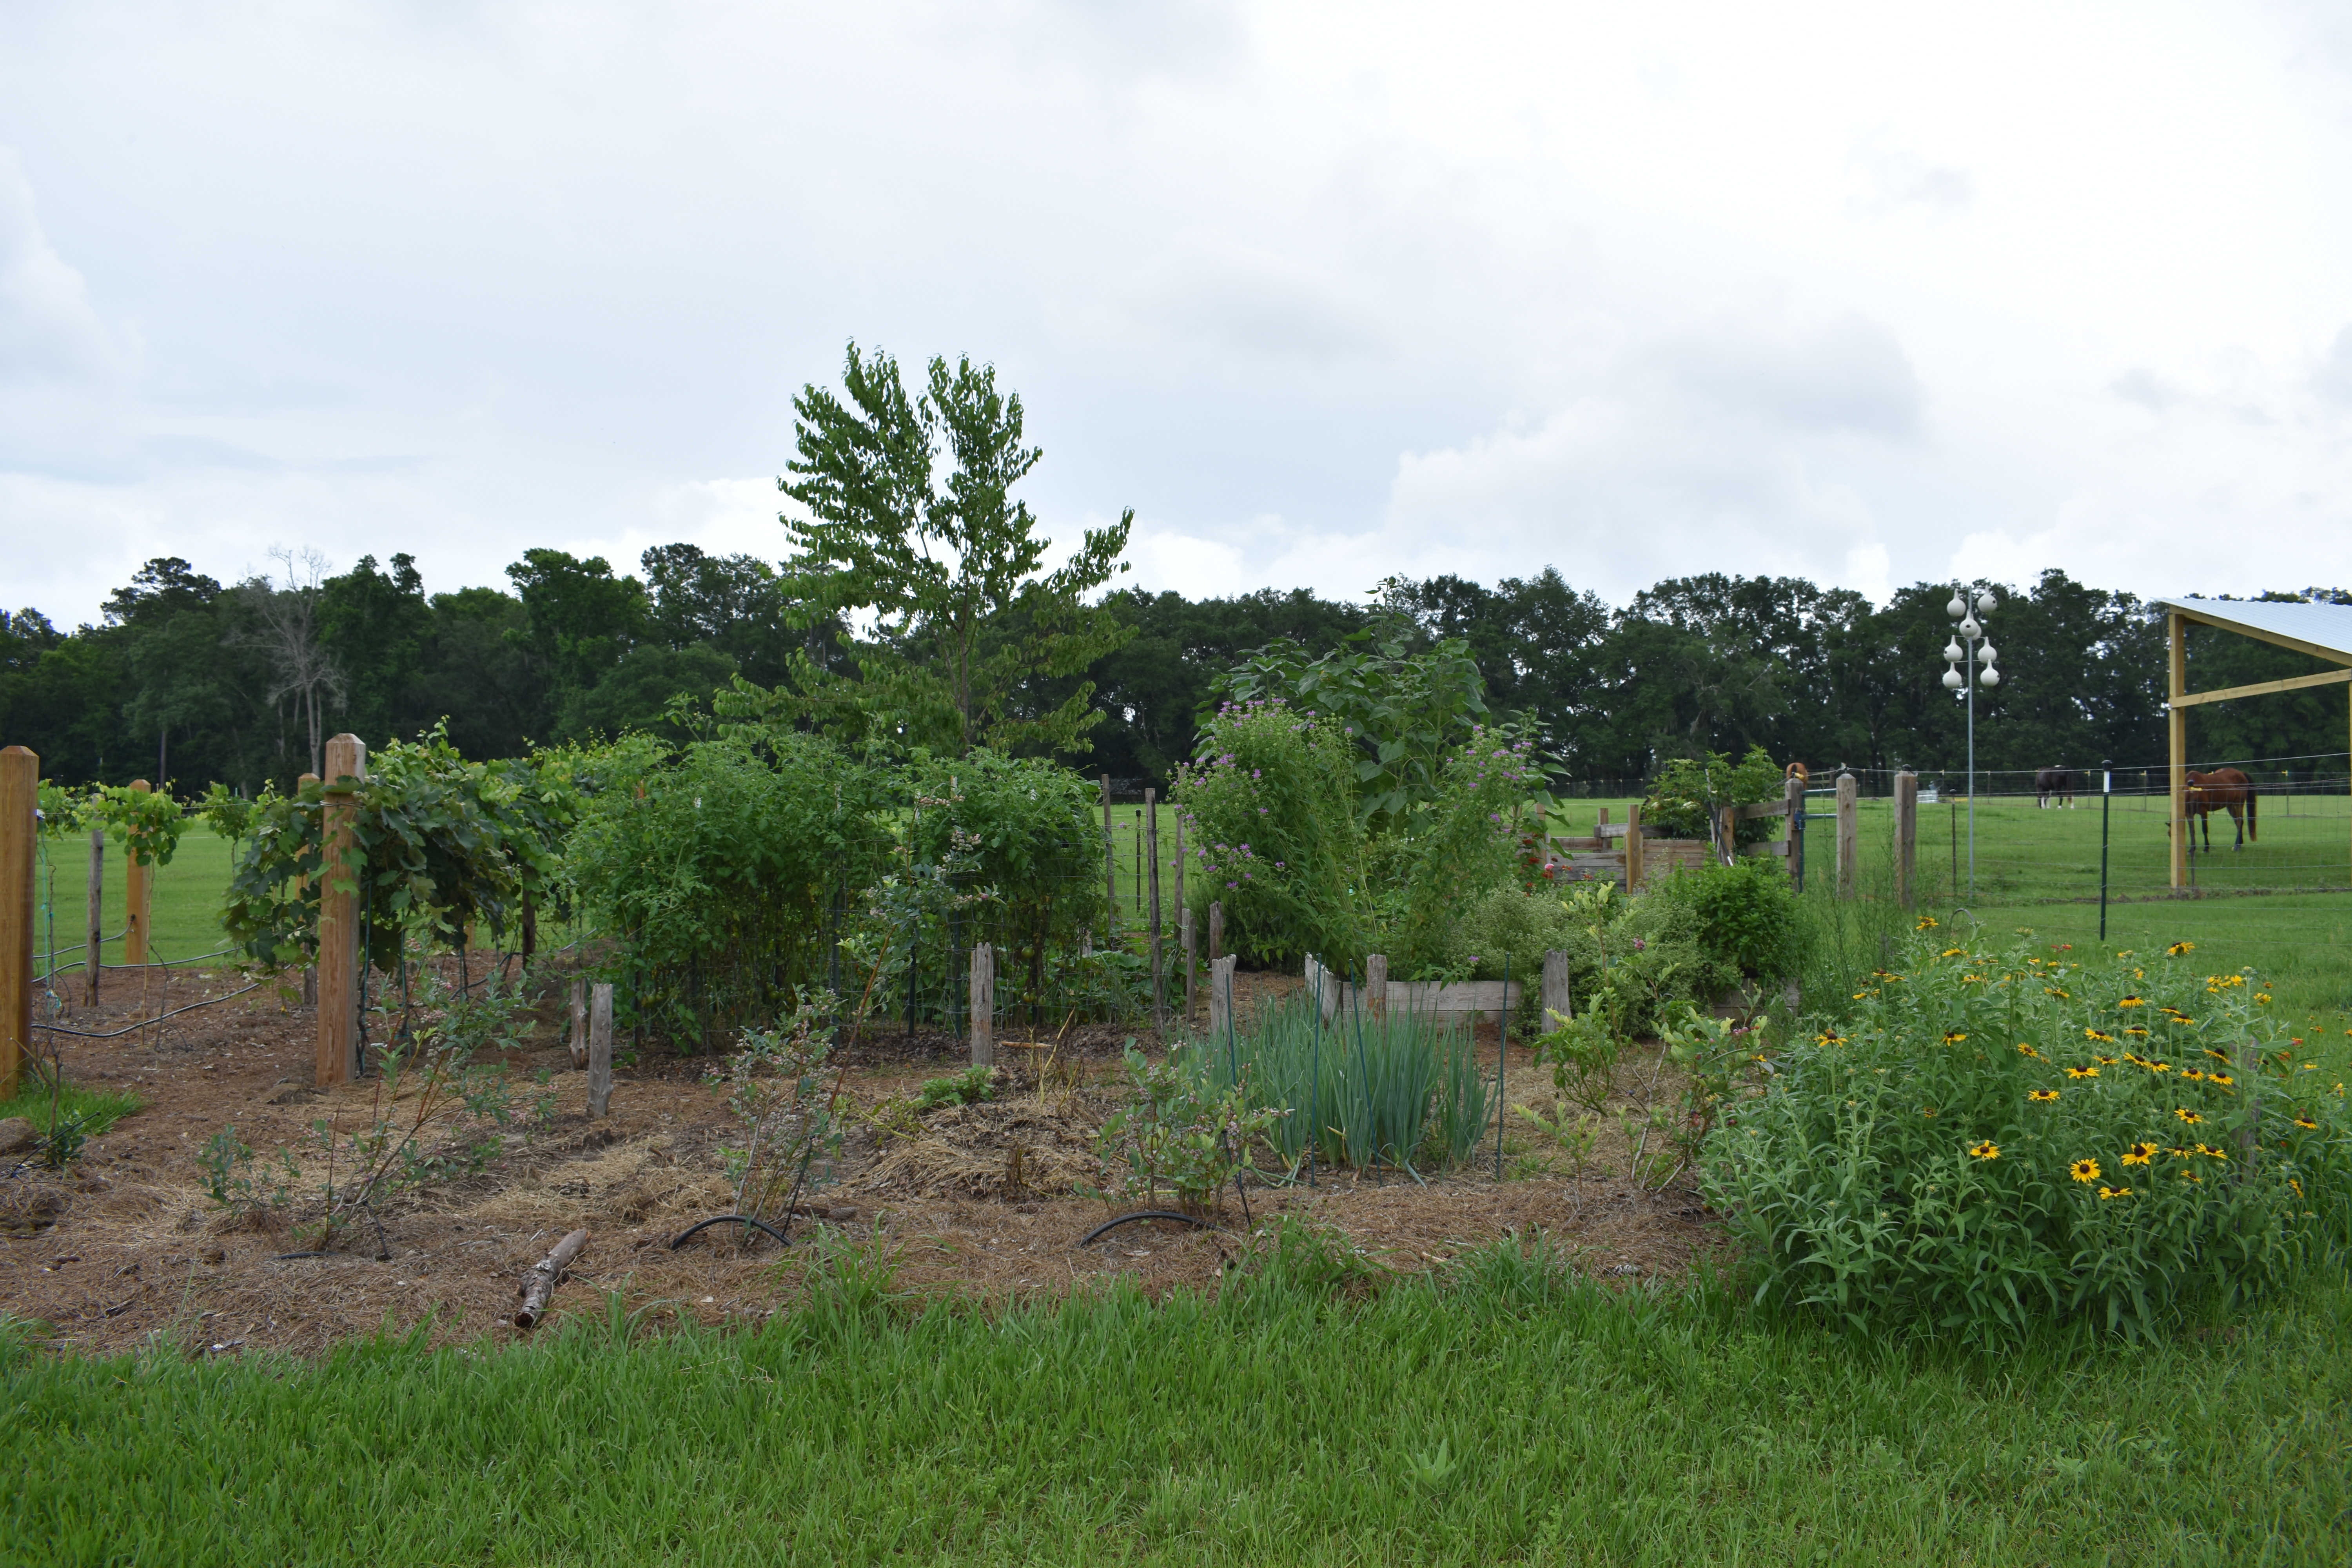
Recently, I received a call about a garden not producing the way it used to. After speaking with the homeowner, I decided to take a visit to see what was going on. On my visit, I could see that the tomatoes were stunted, yellow and wilting, the squash plants were flowering but not setting fruit, and the okra was stunted. After digging up some of the sick plants and examining the roots, the problem was as clear as day…root-knot nematodes.
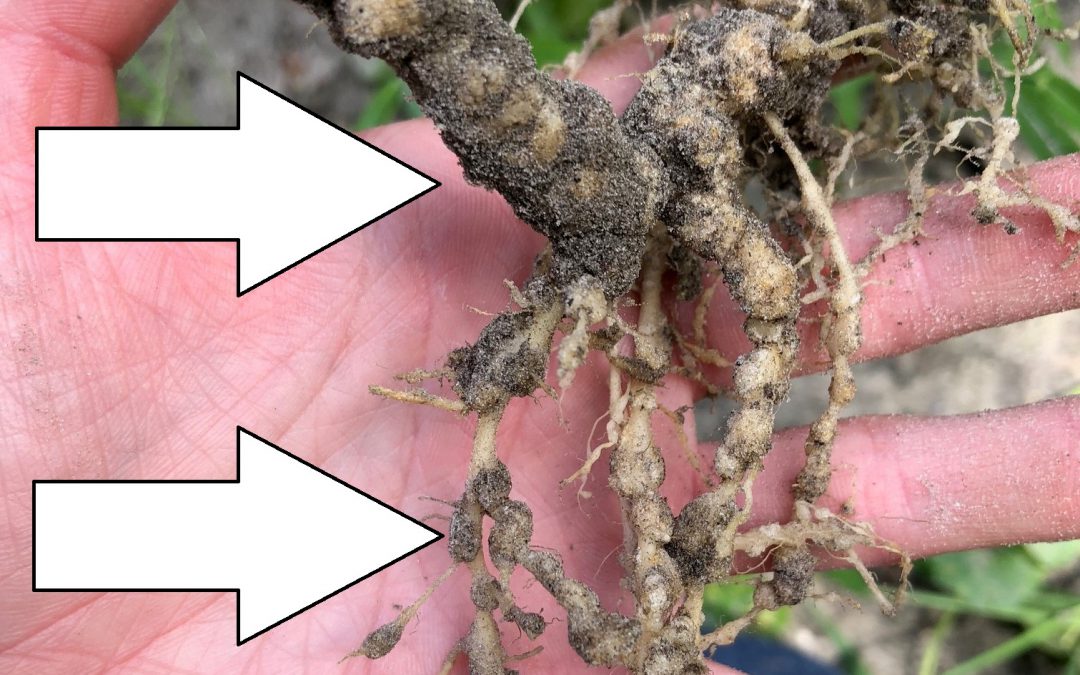
Galls on roots from root-knot nematodes
Root-knot nematodes are microscopic, unsegmented roundworms that live in the soil and feed on the roots of many common garden plants. Some of the most commonly damaged crops are tomatoes, potatoes, okra, beans, peppers, eggplants, peas, cucumbers, carrots, field peas, squash, and melons. Root-knot nematodes enter the root and feed, causing knots or galls to form. These galls are easily recognizable on the roots. If you’re inspecting the roots of beans or peas, be careful not to confuse nematode galls with the nitrogen-fixing nodules that are a normal part of the root system. As the nematodes feed, the root system of the plant becomes damaged and the plant is unable to take up water and nutrients from the soil. As a result, the plant may show symptoms of stunting, yellowing, and wilting.
What can I do about nematodes?
There are currently no nematicides labeled for use in the home garden but the best means of root-knot nematode management involves using a combination of strategies that make your garden less susceptible to attack.
Grow Resistant Varieties
Some varieties of crops are resistant to root-knot nematodes. This means is that a particular nematode can’t reproduce on the plant roots. When buying seed, read the variety label. The label may have ‘VFN’ written in capital letters. These letters indicate that the variety has resistance to certain diseases: V = Verticillium wilt; F = Fusarium wilt; and N = root-knot nematode. It’s best to use resistant varieties when root-knot nematodes are present.
Tomato plant showing signs of nematode damage – yellowing and wilting.
Sanitation
If you suspect you may have a nematode problem, be sure not to move soil or infected plant roots from an infected area to a clean area. Nematodes can easily be spread by garden tillers, hand tools, etc. so be sure to disinfect all equipment after use in problem areas.
Infected roots left in the soil can continue to harbor nematodes. After the crop is harvested, pull up the roots and get rid of them. Tilling the soil can kill nematodes by exposing them to sunlight.
Cover crops and Crop Rotation
Cover crops and crop rotation isn’t just a concept for farmers…gardeners need to implement the same practices! While this may take some planning, it is the most effective way to reduce pests and diseases.
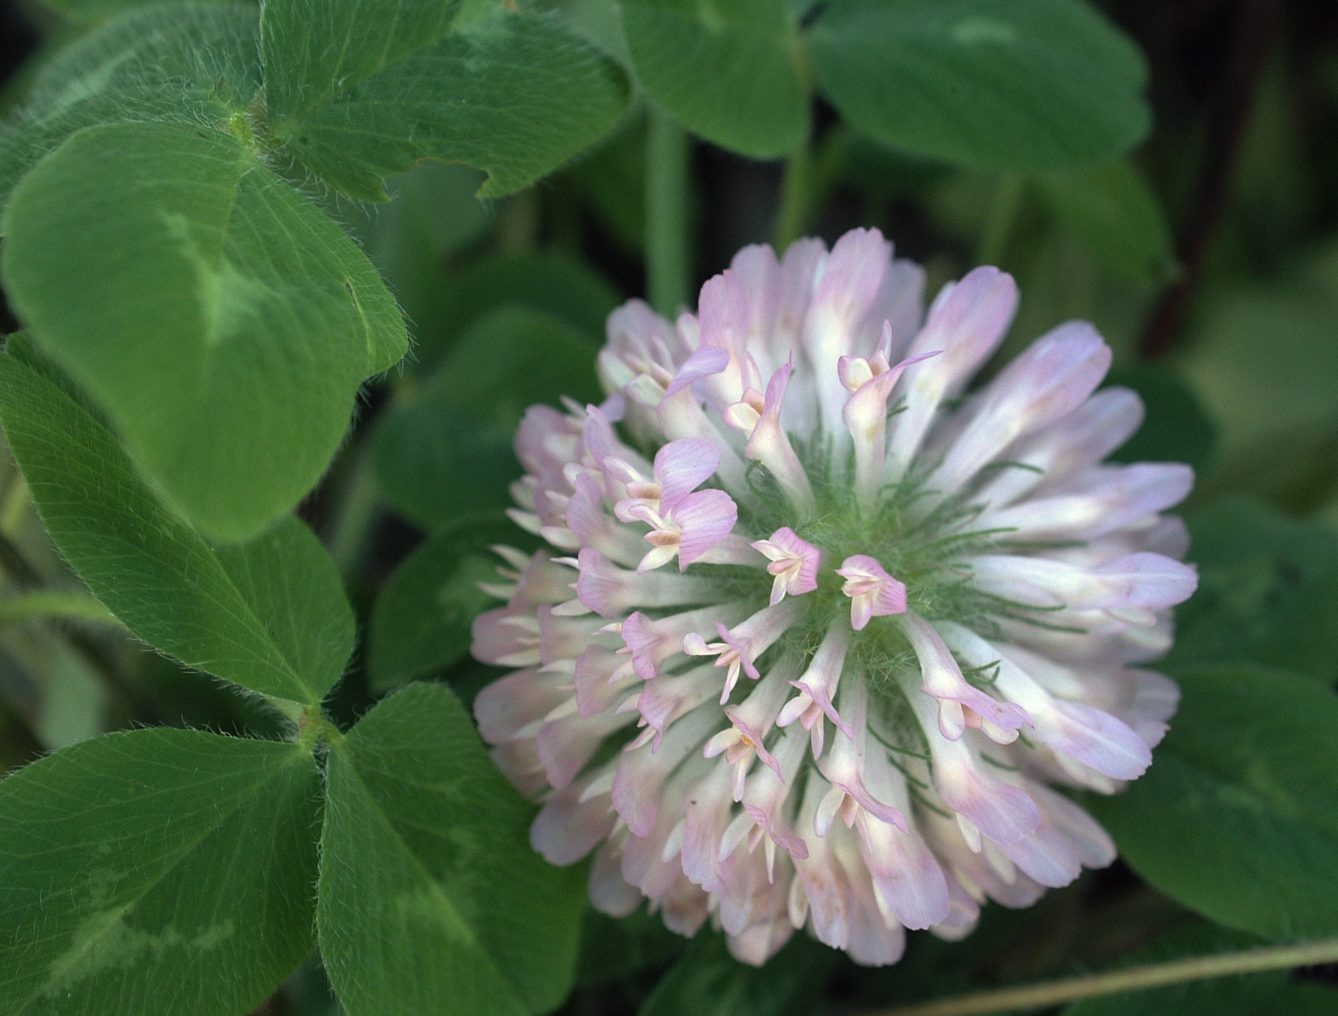
Cover crops are crops that are not harvested and are typically planted between harvestable crops. They help improve soil quality, prevent soil erosion, and help control pests and diseases. Selecting cover crops that aren’t susceptible to root-knot nematode attack is key. When growing a cover crop that nematodes can’t reproduce on, populations should decline or not build up to begin with. Grain sorghum and millet can be planted as a summer cover crop and rye in the winter. French marigolds have been shown to reduce nematode populations as well.
Another simple way to manage root-knot nematodes is by crop rotation. Crop rotation is the practice of not growing crops that are susceptible to nematode attack, in the same spot for more than one year. Crops that aren’t susceptible to attack are cool season crops in the cabbage family such as broccoli, cauliflower, Brussels sprouts, collards and kale.
Root-knot nematodes can wreck havoc on a garden so it’s important to take the necessary precautions to avoid them. It may require planning and patience but it will be worth it in the long run!
For more information on this topic, use the links to the following publications:
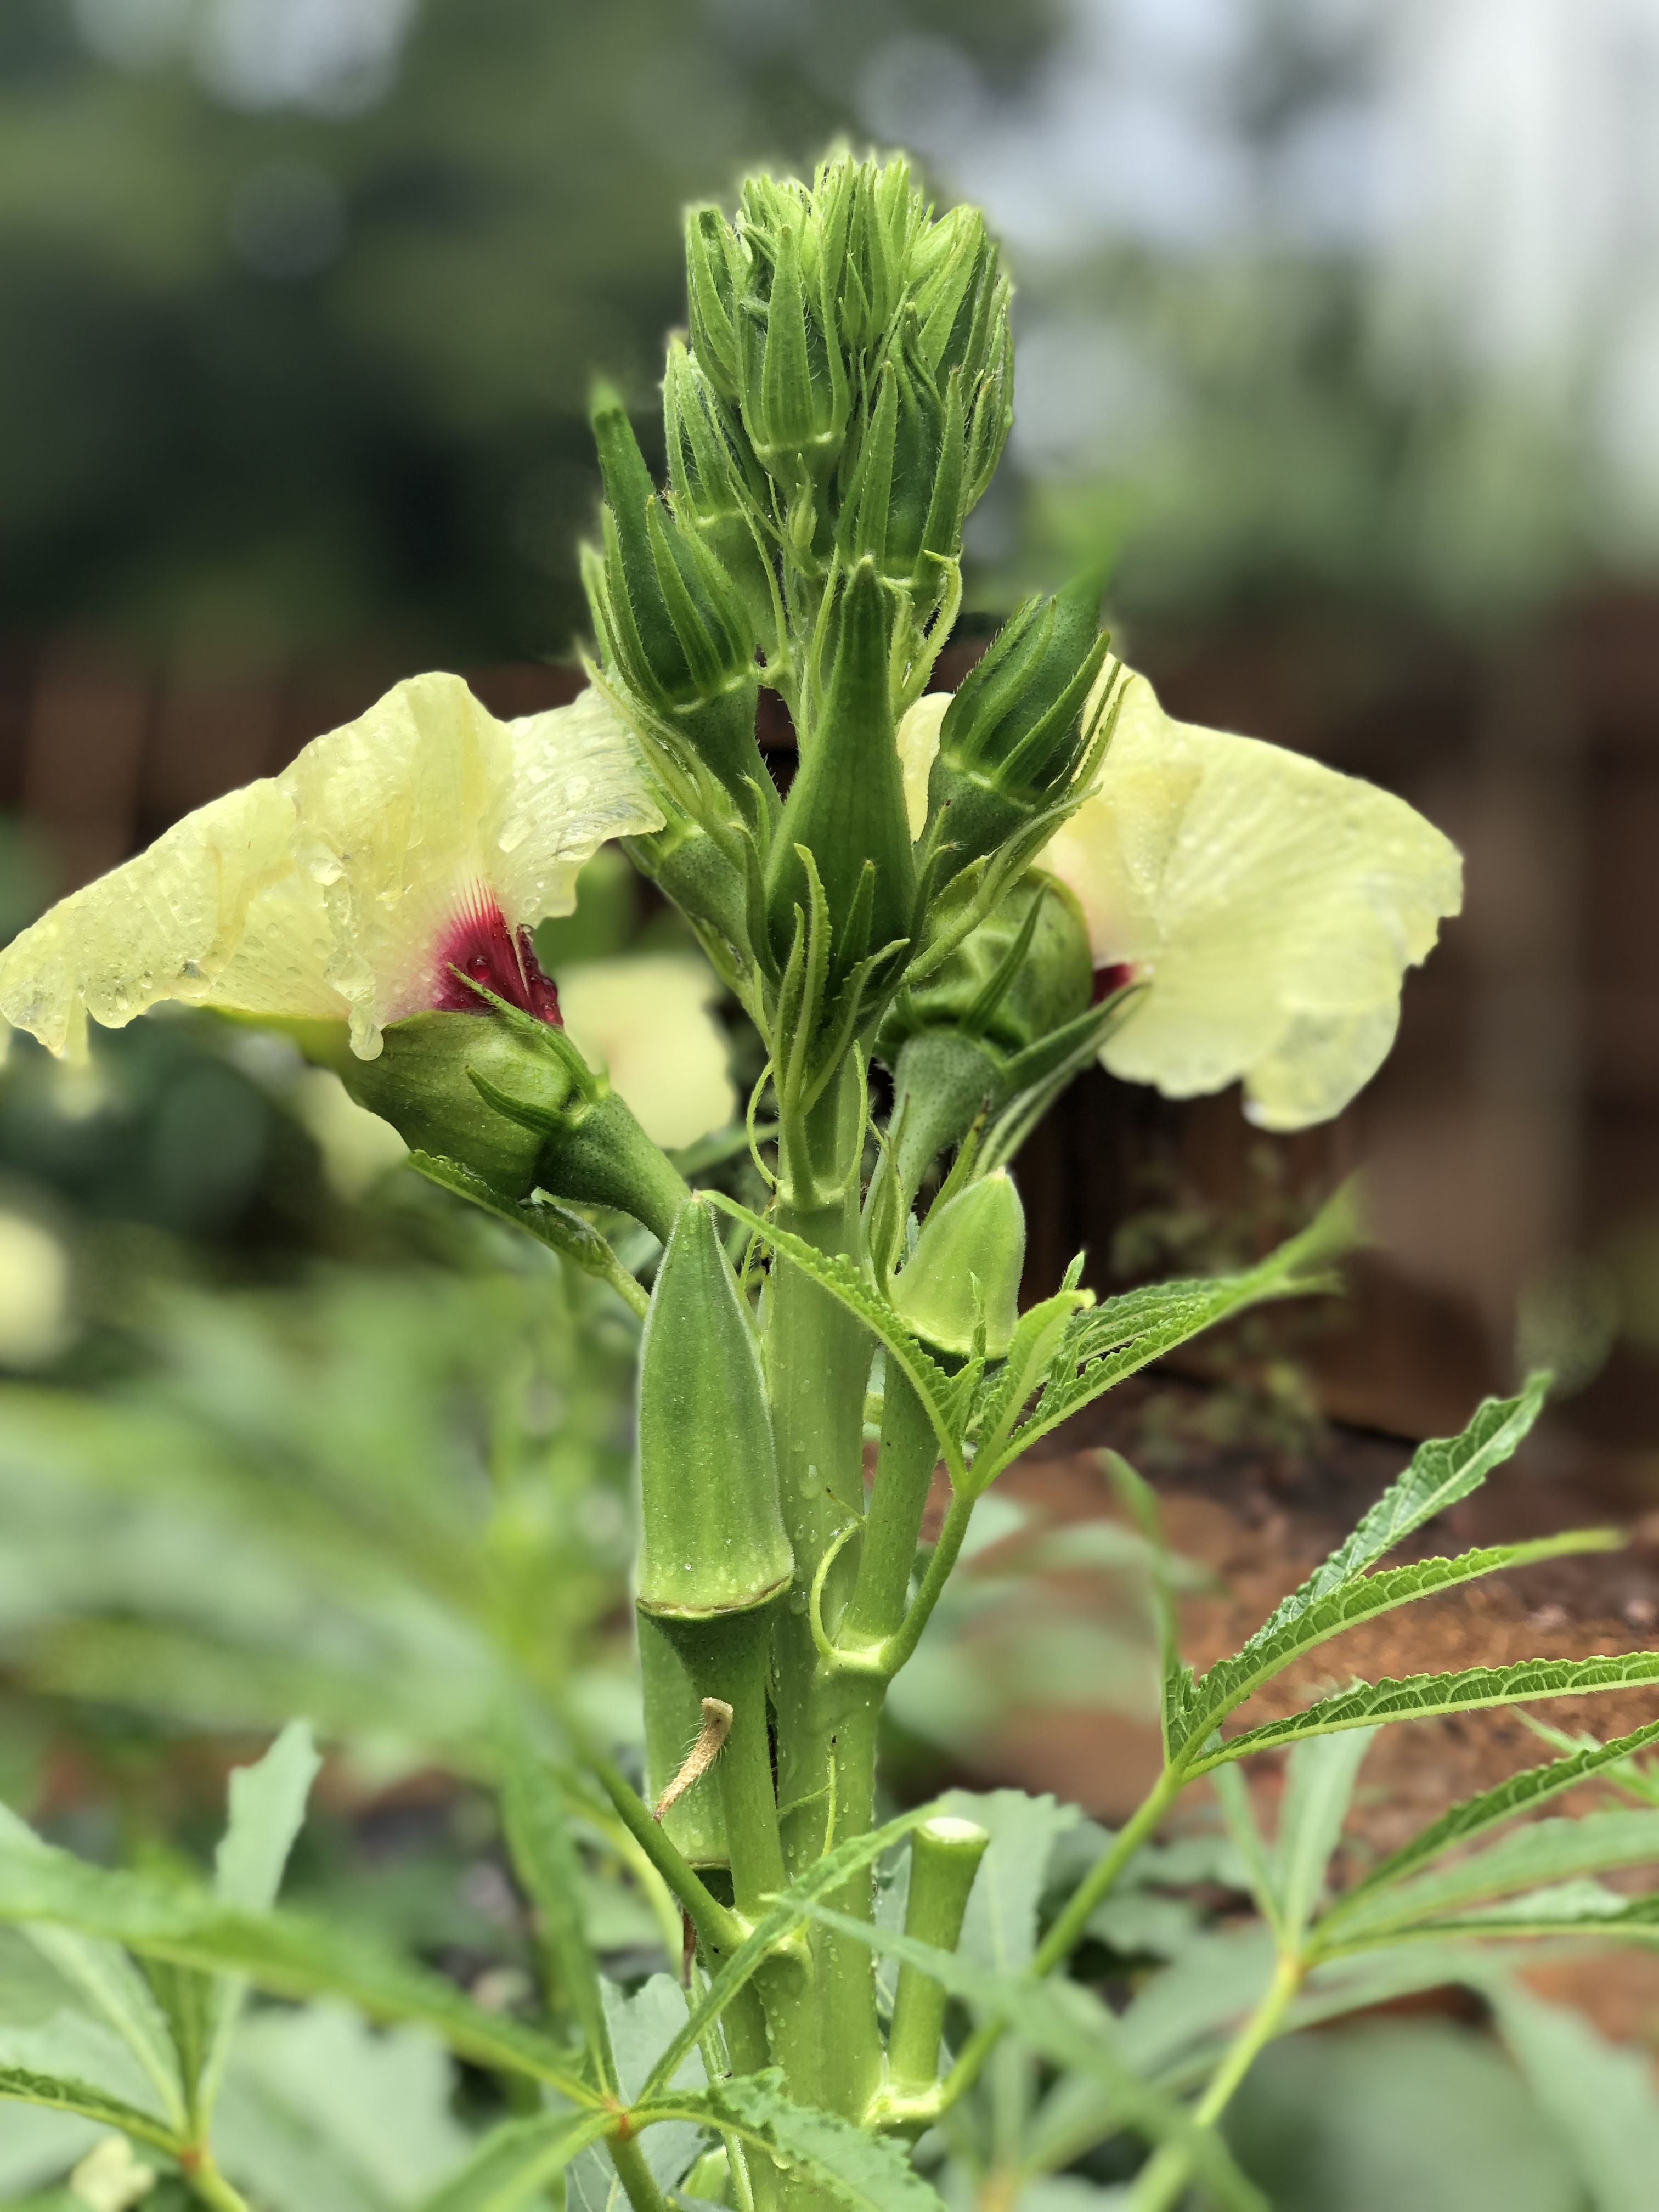
Though Okra (Abelmoschus esculentus) fruit isn’t much more than a thick green hull, slime and seeds and the plant itself is impossibly irritating to the skin, few plants are as integral to Southern heritage. In my mind, okra is among the best vegetables Panhandle gardeners can grow. Not only is it a gorgeous plant – Okra belongs to the Mallow family which also includes beauties like Hibiscus and Cotton – but it’s exceedingly versatile in the kitchen, excellent fried, grilled, roasted, boiled (though you have to acquire a taste for slimy textures to enjoy this method) and most famously, as a thickening agent in Cajun gumbo. Because of this exalted status in Southern culture, whether you enjoy eating okra or not, it’s almost mandatory here to include the plant in one’s garden. Most gardeners stick with the old standard varieties such as ‘Clemson Spineless’ or ‘Cowhorn’ and there is nothing wrong with them, however, these plants are almost too prolific for most gardens (growing upwards of 6-7’), especially for those of us growing in the close confines of raised beds. In the search for a less rambunctious but still ultra-productive cultivar, this summer I trialed ‘Jambalaya’, an F1 hybrid developed by Sakata Seed in 2012, with impressive results!
‘Jambalaya’ Okra in the author’s garden.
From my experience growing the cultivar this summer, ‘Jambalaya’ merits consideration in the garden, and is a must for raised bed gardeners, for two primary reasons. First, it was bred to be compact and is considered a dwarf cultivar. This is an awesome attribute, as I typically end the growing season picking okra from a small ladder! Most seed purveyors tout the plant as reaching a maximum height of 3-4’ and while this estimate might be a little conservative, I can attest that ‘Jambalaya’ is greatly reduced in height compared to the standard cultivars. The second advantage of growing this variety is that it begins producing very early relative to its peers and bears heavily. ‘Jambalaya’ fruit begin to ripen in about 50 days, about ten days to two weeks earlier than ‘Clemson Spineless’, a definite advantage if rotating behind a late maturing spring crop like potatoes as I typically do. Though ‘Jambalaya’ is a dwarf plant, in no way are yields reduced. My specimens have produced continuously since late-July and will continue to do so as long as adequate fertility and consistent harvesting are provided.
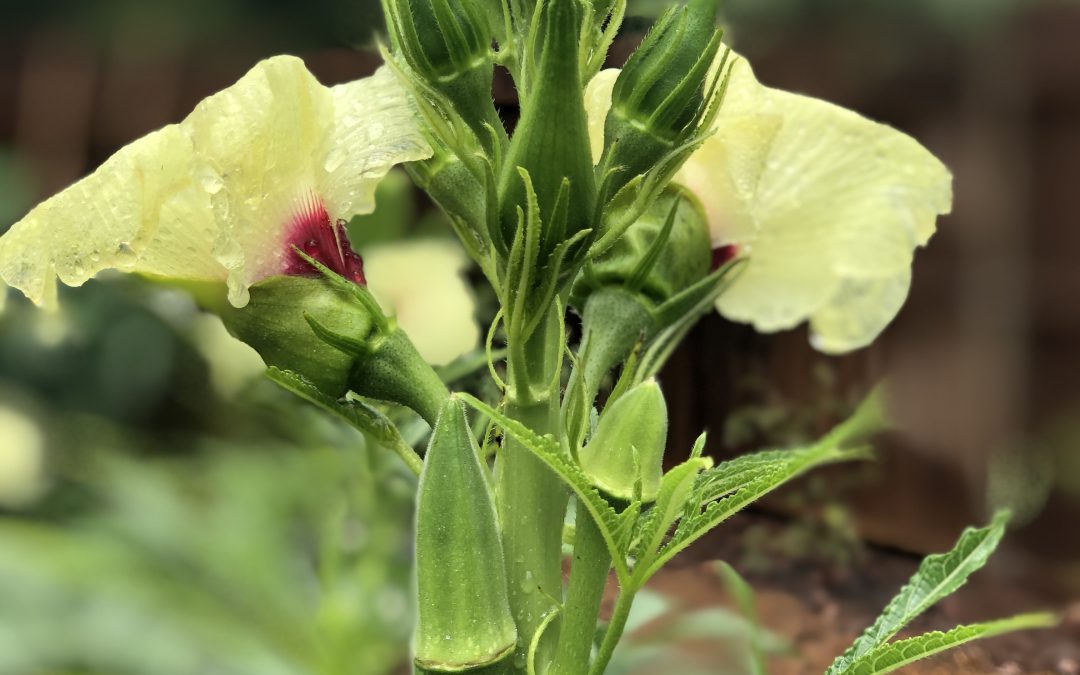
‘Jambalaya’ flower & fruit production.
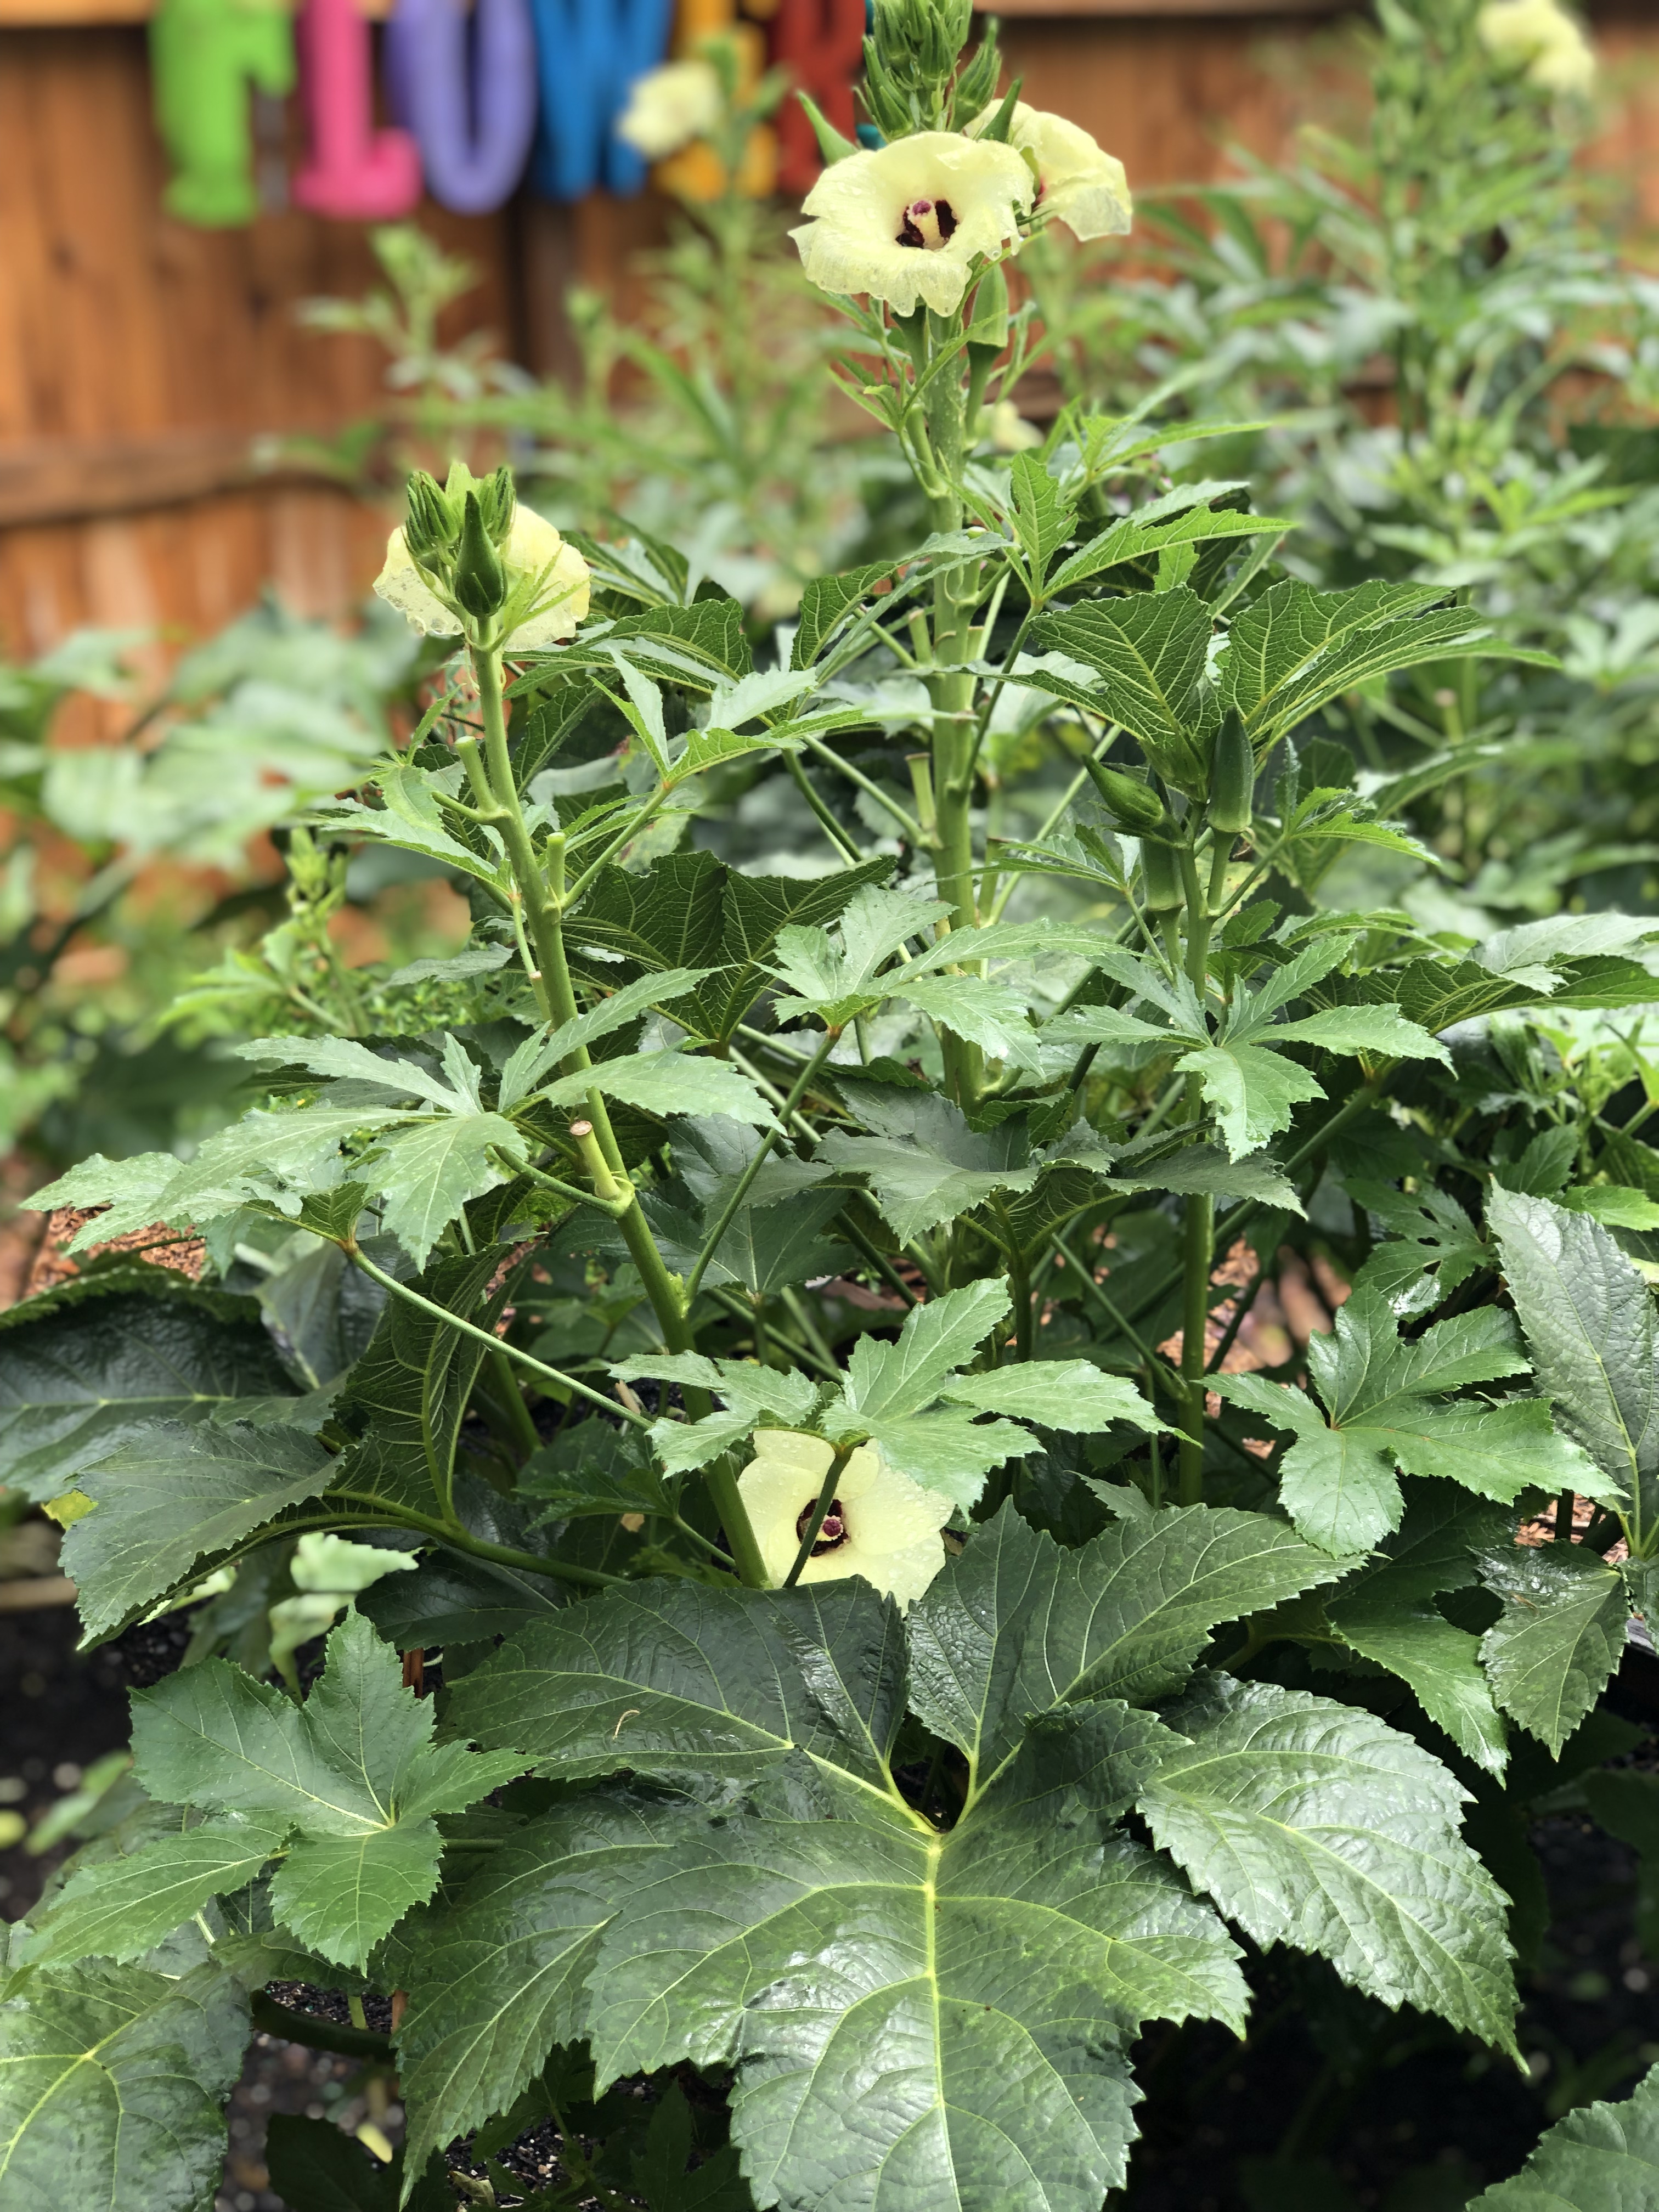
Like any other okra cultivar, ‘Jambalaya’ has a couple of basic requirements that must be met for plants to thrive. In general, all okra cultivars love Southern summers and patience sowing seed is recommended, allow the soil to warm to at least 70 degrees before planting. Okra also prefers full sun, at least 6 hours per day, any less and yields will be reduced and plants will stretch towards the light. Belonging to the Mallow family, okra requires consistent moisture, particularly when in the flowering and fruiting phase. Finally, it is critical to keep up with your okra harvest as the plants produce! Okra pods grow quickly and should be harvested when they are no more than 3-4” long and still tender, larger pods are tough to the point of being inedible!
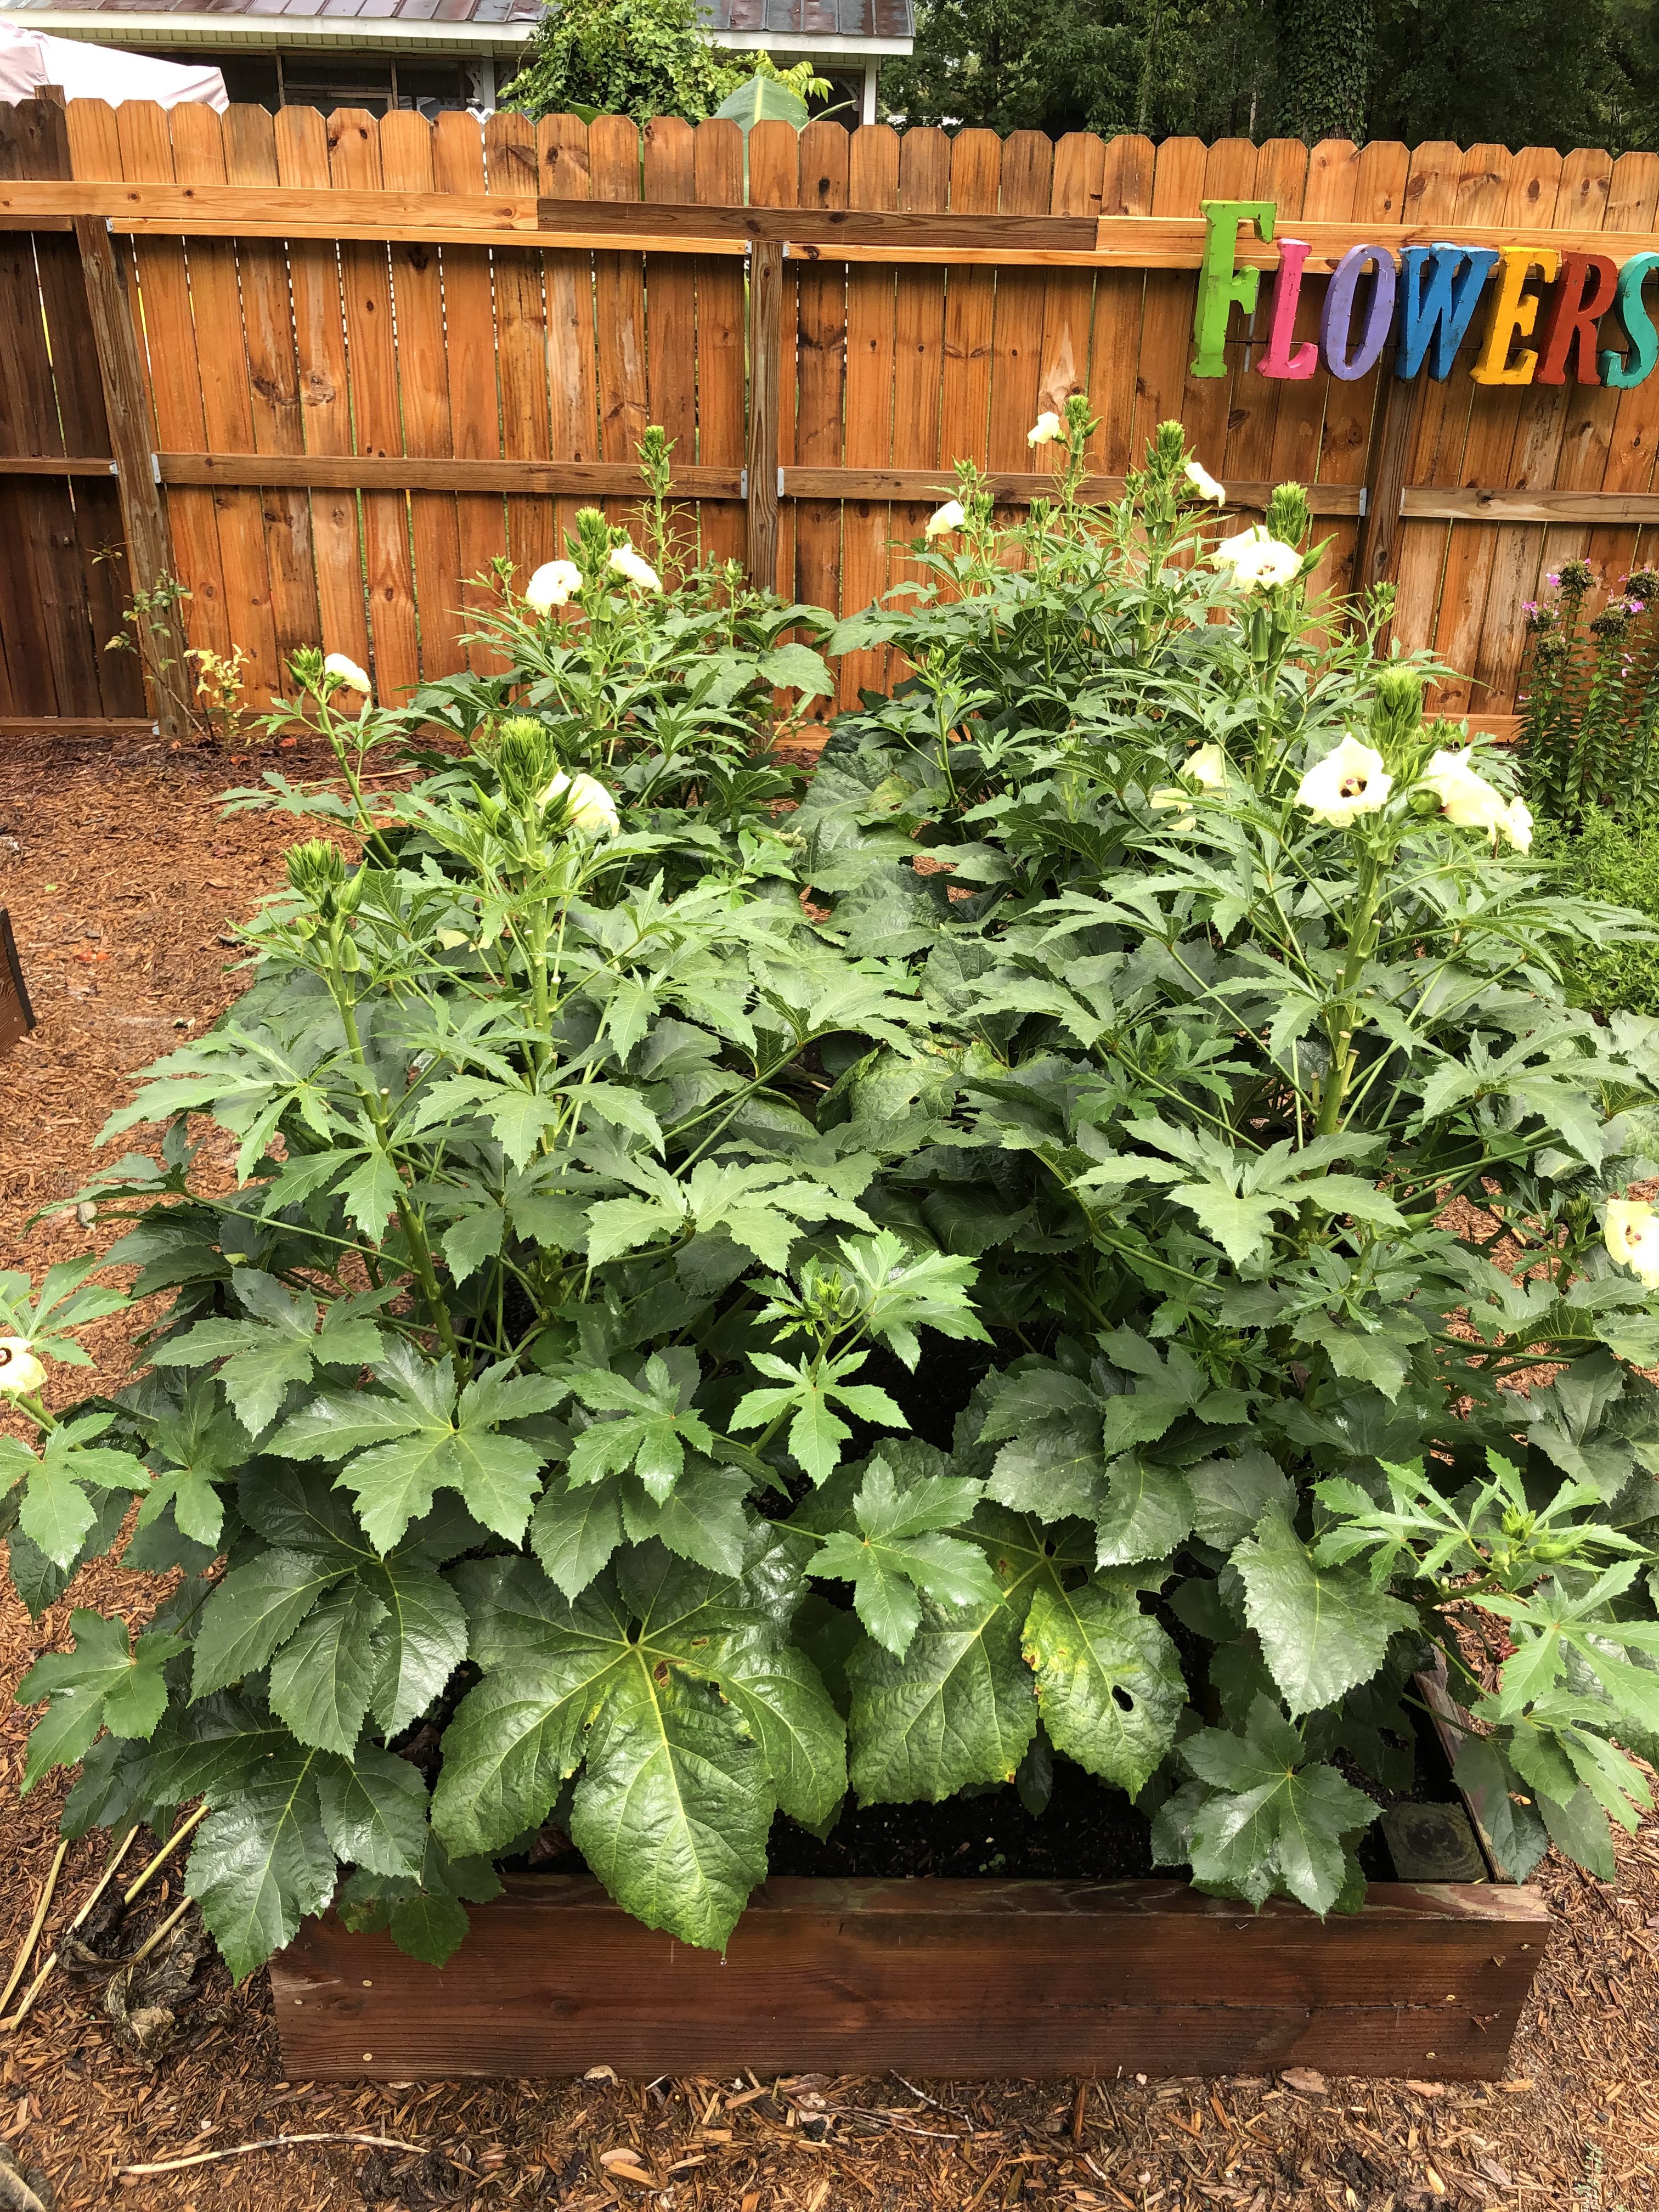
‘Jambalaya’ in the author’s garden.
Whether you’re new to the okra growing game or you’re a seasoned gumbo gardener, I highly encourage you to give ‘Jambalaya’ Okra a look next summer. While ‘Jambalaya’ is available through many seed sources, Johnny’s Selected Seeds sells a conveniently small package perfect for backyard gardeners, though they’ll be happy to provide larger quantities as well. In ‘Jambalaya’ you’ll find a nice compact plant that won’t outgrow your space, provide you a summer long harvest of tender green pods, and will rival the ornamentals in your landscape for the title of prettiest plant on your property! Happy gardening and as always, if you have questions about vegetable gardening or any other horticultural or agronomic topic, please contact your local UF/IFAS County Extension office!
Homeowners are always looking for methods to manage one of our most difficult pests in the vegetable garden. Learn about the science of how to properly use marigolds to deter nematodes against one our our favorite summer fruits In the Garden with UF IFAS Extension Escambia County.
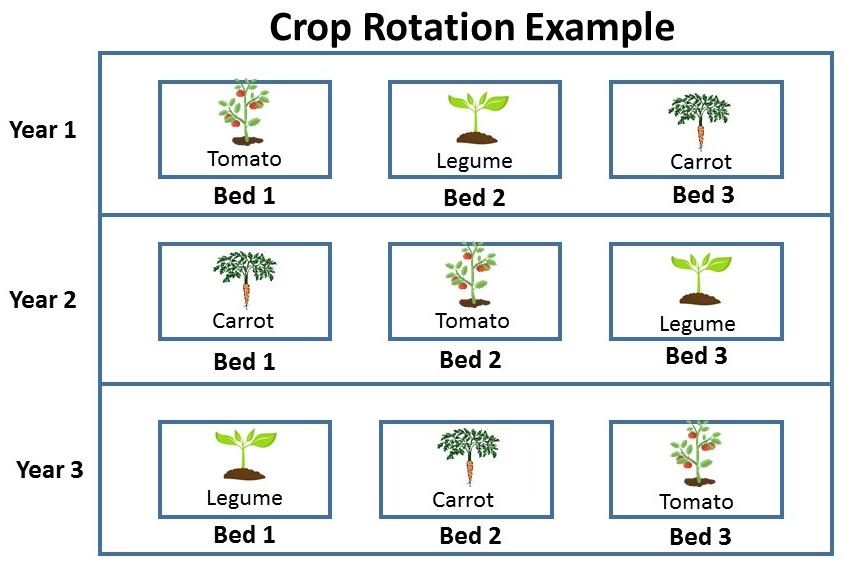
With spring on the horizon, many of us are planning or have already began to plant our spring gardens. If you’re still in the planning process like me, one very important thing to consider is the importance of crop rotation in the garden. Crop rotation is a concept that’s been used by farmers for many years but it’s a concept that gardeners need to adopt as well!
What is crop rotation?
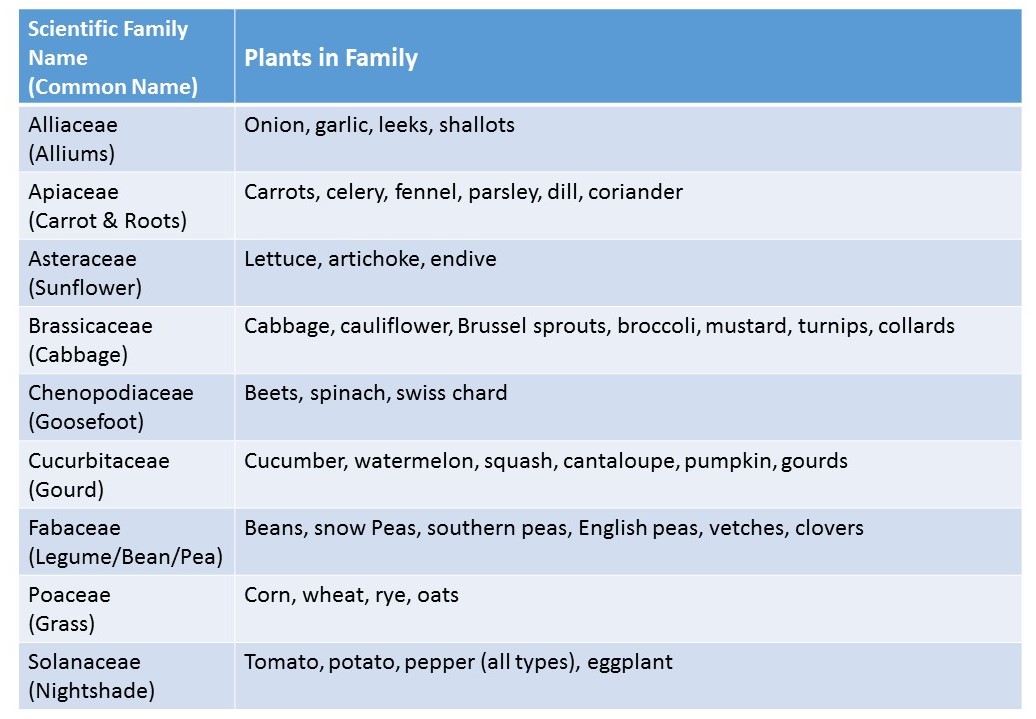
Crop rotation is a method used to reduce insect pests, disease and manage soil fertility by changing the planting location of vegetables within the garden each season. Each vegetable is grouped into a plant family. Vegetables in the same plant family typically are able to harbor the same kinds of insect pests and diseases, and have the similar nutrient requirements. When vegetables belonging to the same plant family are planted in the same location over and over again, pest populations can build up and productivity of the garden decreases. In addition, fertility issues can arise from planting the same crops, in the same area over again. Since different crops require different types and amounts of nutrients, crop rotation can help even out the loss of soil nutrients.
List of common vegetable families.
How should I plan for crop rotation in my garden?
First, consider the vegetables you would like to grow this season then group them by their families. Vegetable crops in the same family should NOT be planted in the same area year after year. For example, if squash is planted in a bed or one area of the garden one year, cucumbers or watermelons should not be planted in the same area of the garden the following year because these plants belong to the same family (Cucurbitaceae).
Divide your garden according to the number of plant families you want to grow. This could be in rows or even separate beds. From there, you will want to think about your ordering sequence. For example, if you are planting a legume (beans or peas) that fixes nitrogen back into the soil this spring, you’ll want to plant a heavy feeding crop like broccoli this fall. Heavy feeding crops can be followed by light feeding crops such as carrots or onions. Be sure to keep a gardening journal as a reminder of what is planted each year and season.
Crop rotation is one of the most effective methods we have to manage the many pests and diseases we have here in Florida. If you’re struggling with a particular pest or disease in your garden, consider using crop rotation to help manage it. For more information on crop rotations for the home garden, contact your local extension agent.
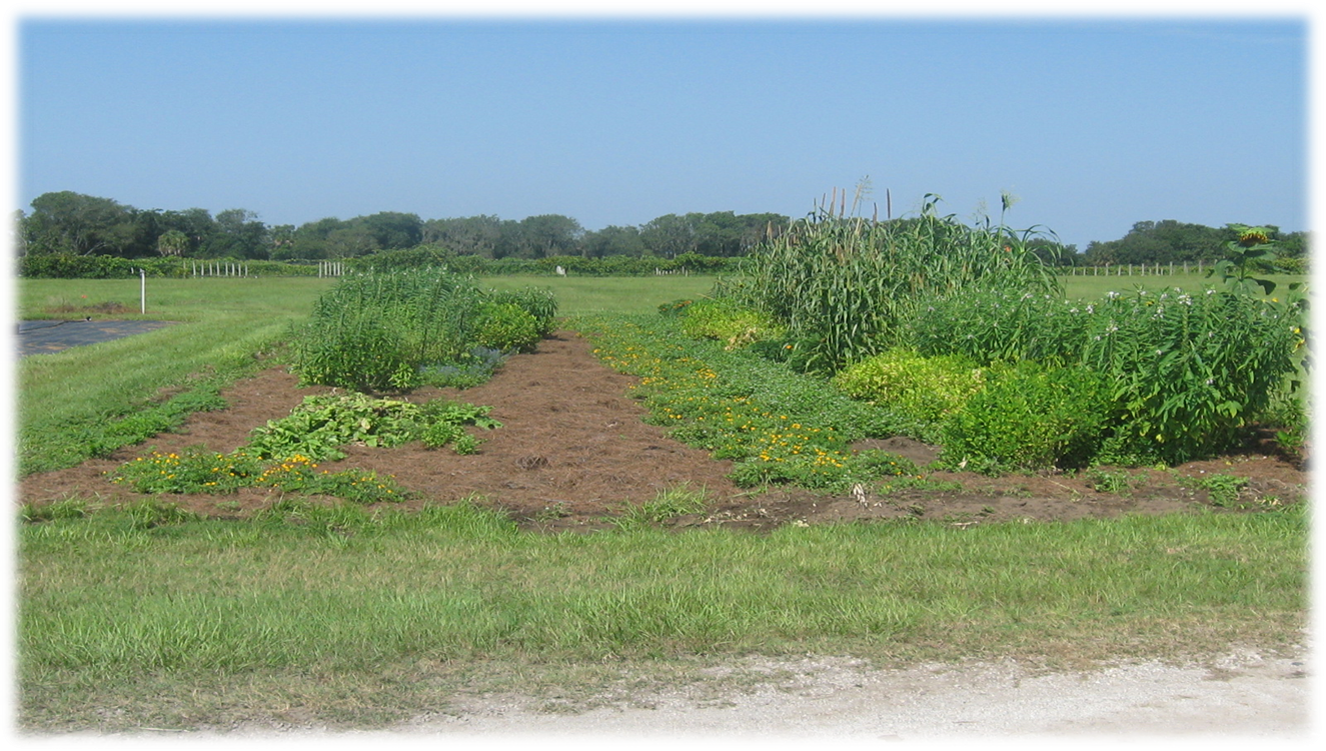
Many gardeners plant a spring vegetable garden with a number of different vegetable types, which is excellent because a diverse and varied garden is proven to improve soil health. Intercropping is a gardening practice of growing different crops in the same field. When planting a mixture of crops in the same field year after year, it is important to rotate the location of each type of vegetable. This is a practice known as crop rotation. Intercropping and crop rotation will help reduce insect pest populations, increase beneficial insect populations, and reduce weed populations .
Crop Diversity
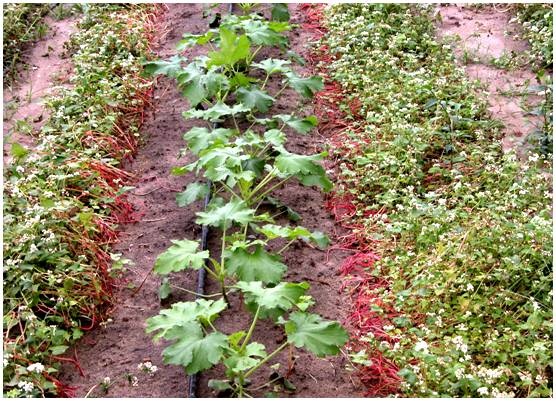
Including plants that pest insects don’t like to eat in a garden forces the pests work harder to find what they find palatable. Studies have found reduced whitefly numbers on squash plantings mixed with a crop of buckwheat when compared to squash planted alone. Another crop mixture that may be unintentional, but may be favorable, is a crapemyrtle stand along a garden’s edge. Crapemyrtles will attract the crapemyrtle aphid which will attract predatory insects. When the predatory insects run out of crapemyrtle aphids to eat, they will move to the vegetable garden and begin to hunt pest insects.
Squash with living mulch of buckwheat. Photo Credit: Oscar Liburd, UF/IFAS Extension
Trap Cropping
A trap crop is a plant that attracts a pest insect away from your food crops. Trap crops work best when planted at the garden’s edge, along a fence row, or in movable containers. A bare space, let’s say 5 feet or so, should be kept between trap crops and vegetable plantings. This will help keep the pests from moving desirable crops plants. When a large population of pests are found on the trap crop then it is time to spray them with insecticide, or cut the crop down and remove or destroy the debris. If trap crops are planted in containers, then it makes them much easier to remove from the garden when necessary.
Cover Crops and Green Manure
Soil organic matter can be increased by the use of green manure and cover crops. Cover crops are generally planted during the off-season, but they can be planted in between vegetable rows and tilled in at a designated time as a green manure. Both cover crops and green manure improve garden production by:
Suppressing weeds by competing for water, light, and nutrients;
Holding the soil in place and preventing erosion;
Scavenging for nutrients that can be utilized in future crops;
Reducing nematode populations;
Providing a habitat for beneficial insects.
A mixed plot of cover crops and trap crops. Photo Credit: Matt Lollar, UF/IFAS Extension – Santa Rosa County
A number of different crops can serve as cover crops or green manure crops. Most are legumes (bean family) or grasses. A few that should be tried are: