by Daniel J. Leonard | Apr 1, 2020
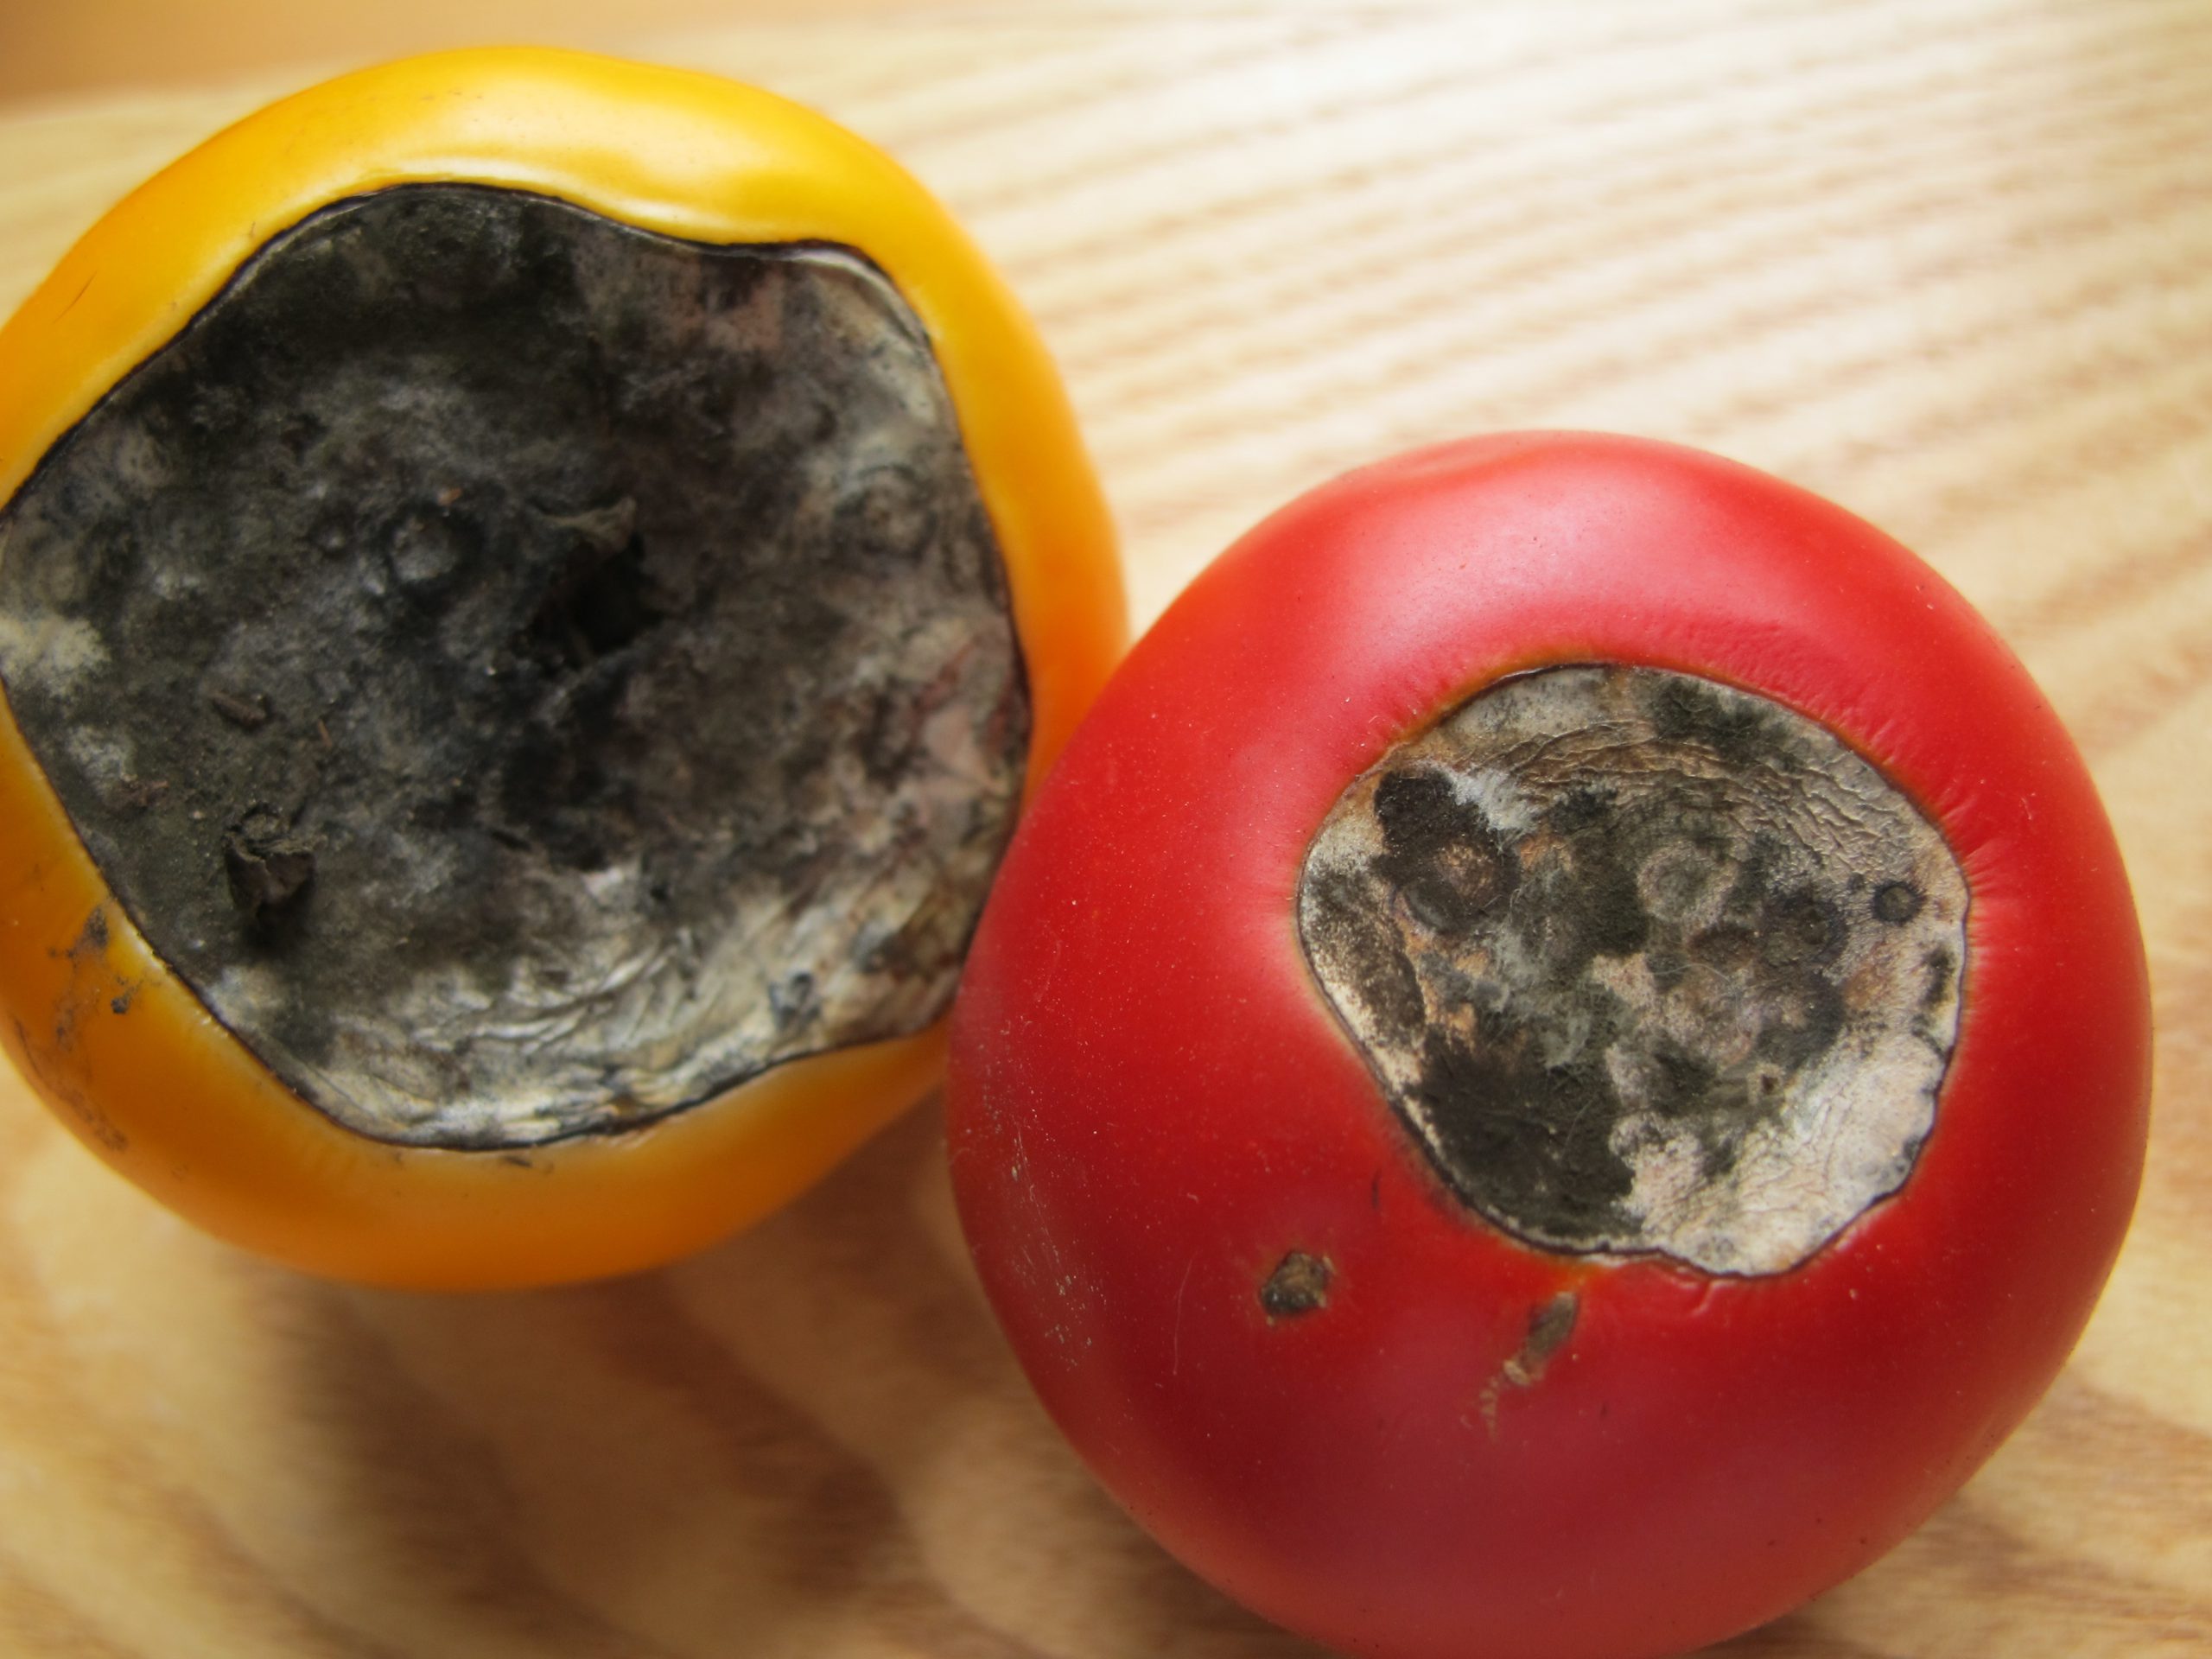
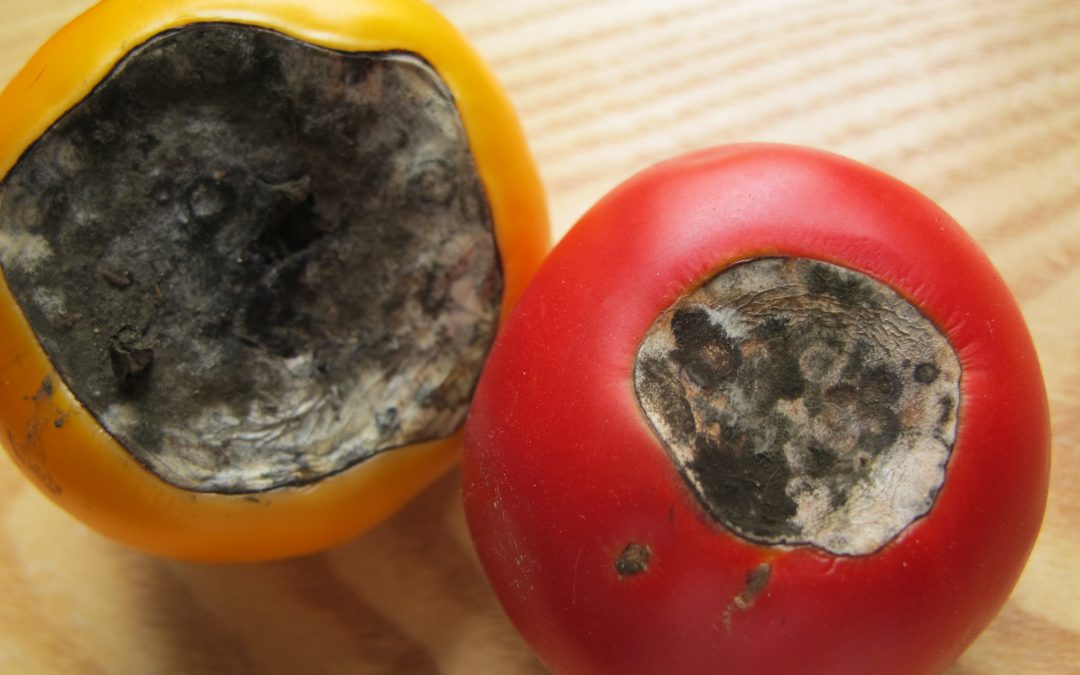
There aren’t many more frustrating things than growing seemingly healthy tomatoes, those plants setting an abundance of flower and fruit, and then, once your tomatoes get about the size of a golf ball, having the fruit rot away from the base. This very common condition, called Blossom End Rot (BER), is caused one of two ways: by either a soil calcium deficiency or disruption of soil calcium uptake by the plant. Fortunately, preventing BER from occurring and then realizing an awesome crop of tasty tomato fruit is relatively simple and home gardeners have a couple of possible preventative solution!
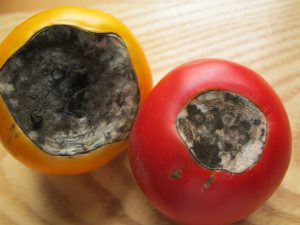
Blossom End Rot damage. Photo Courtesy Larry Williams, Okaloosa County Extension.
- Soil Test & Lime if Needed. The only way to really know if your soil calcium level is sufficient is through a soil test. A complete soil test through the UF Soil Lab or other lab measures both raw nutrient levels and pH. Testing for pH is especially critical. For calcium, either already in the soil or in a supplement you apply, to be available to tomato plants, soil pH needs to be between 6.0-7. In more “acidic” soil pH below 6, nutrients like iron and aluminum become more available to your tomato plants, outcompeting calcium for uptake into the roots. We don’t want that. If your soil test indicates a pH below 6, it will give a lime recommendation somewhere between 3-5 lbs/100 ft sq of garden area to raise the pH to the sweet spot between 6.0-7.0 where your tomatoes will thrive.
- Use a Non-Lime Calcium Supplement. If you’ve had your soil tested and your pH is fine, adding more lime as a calcium supplement isn’t helpful. Using lime as an additional calcium source can actually lift pH above that 6.0-7.0 zone and cause other problems. At this point, once pH is where we want it, I like to add a non-lime calcium supplement. There are lots of options here. Traditional fertilizers labeled for tomatoes and veggies tend to have a good calcium content in the 6-10% range and work great. However, if you’re into organic gardening or just don’t need the extra nutrient value of a complete fertilizer, Gypsum is a good calcium supplement and is widely available. Regardless of which non-lime source you choose, apply at planting or shortly after and follow label rates for best results.
- Water Properly. Consistent watering is key in helping ward off BER. Though we know BER is generally

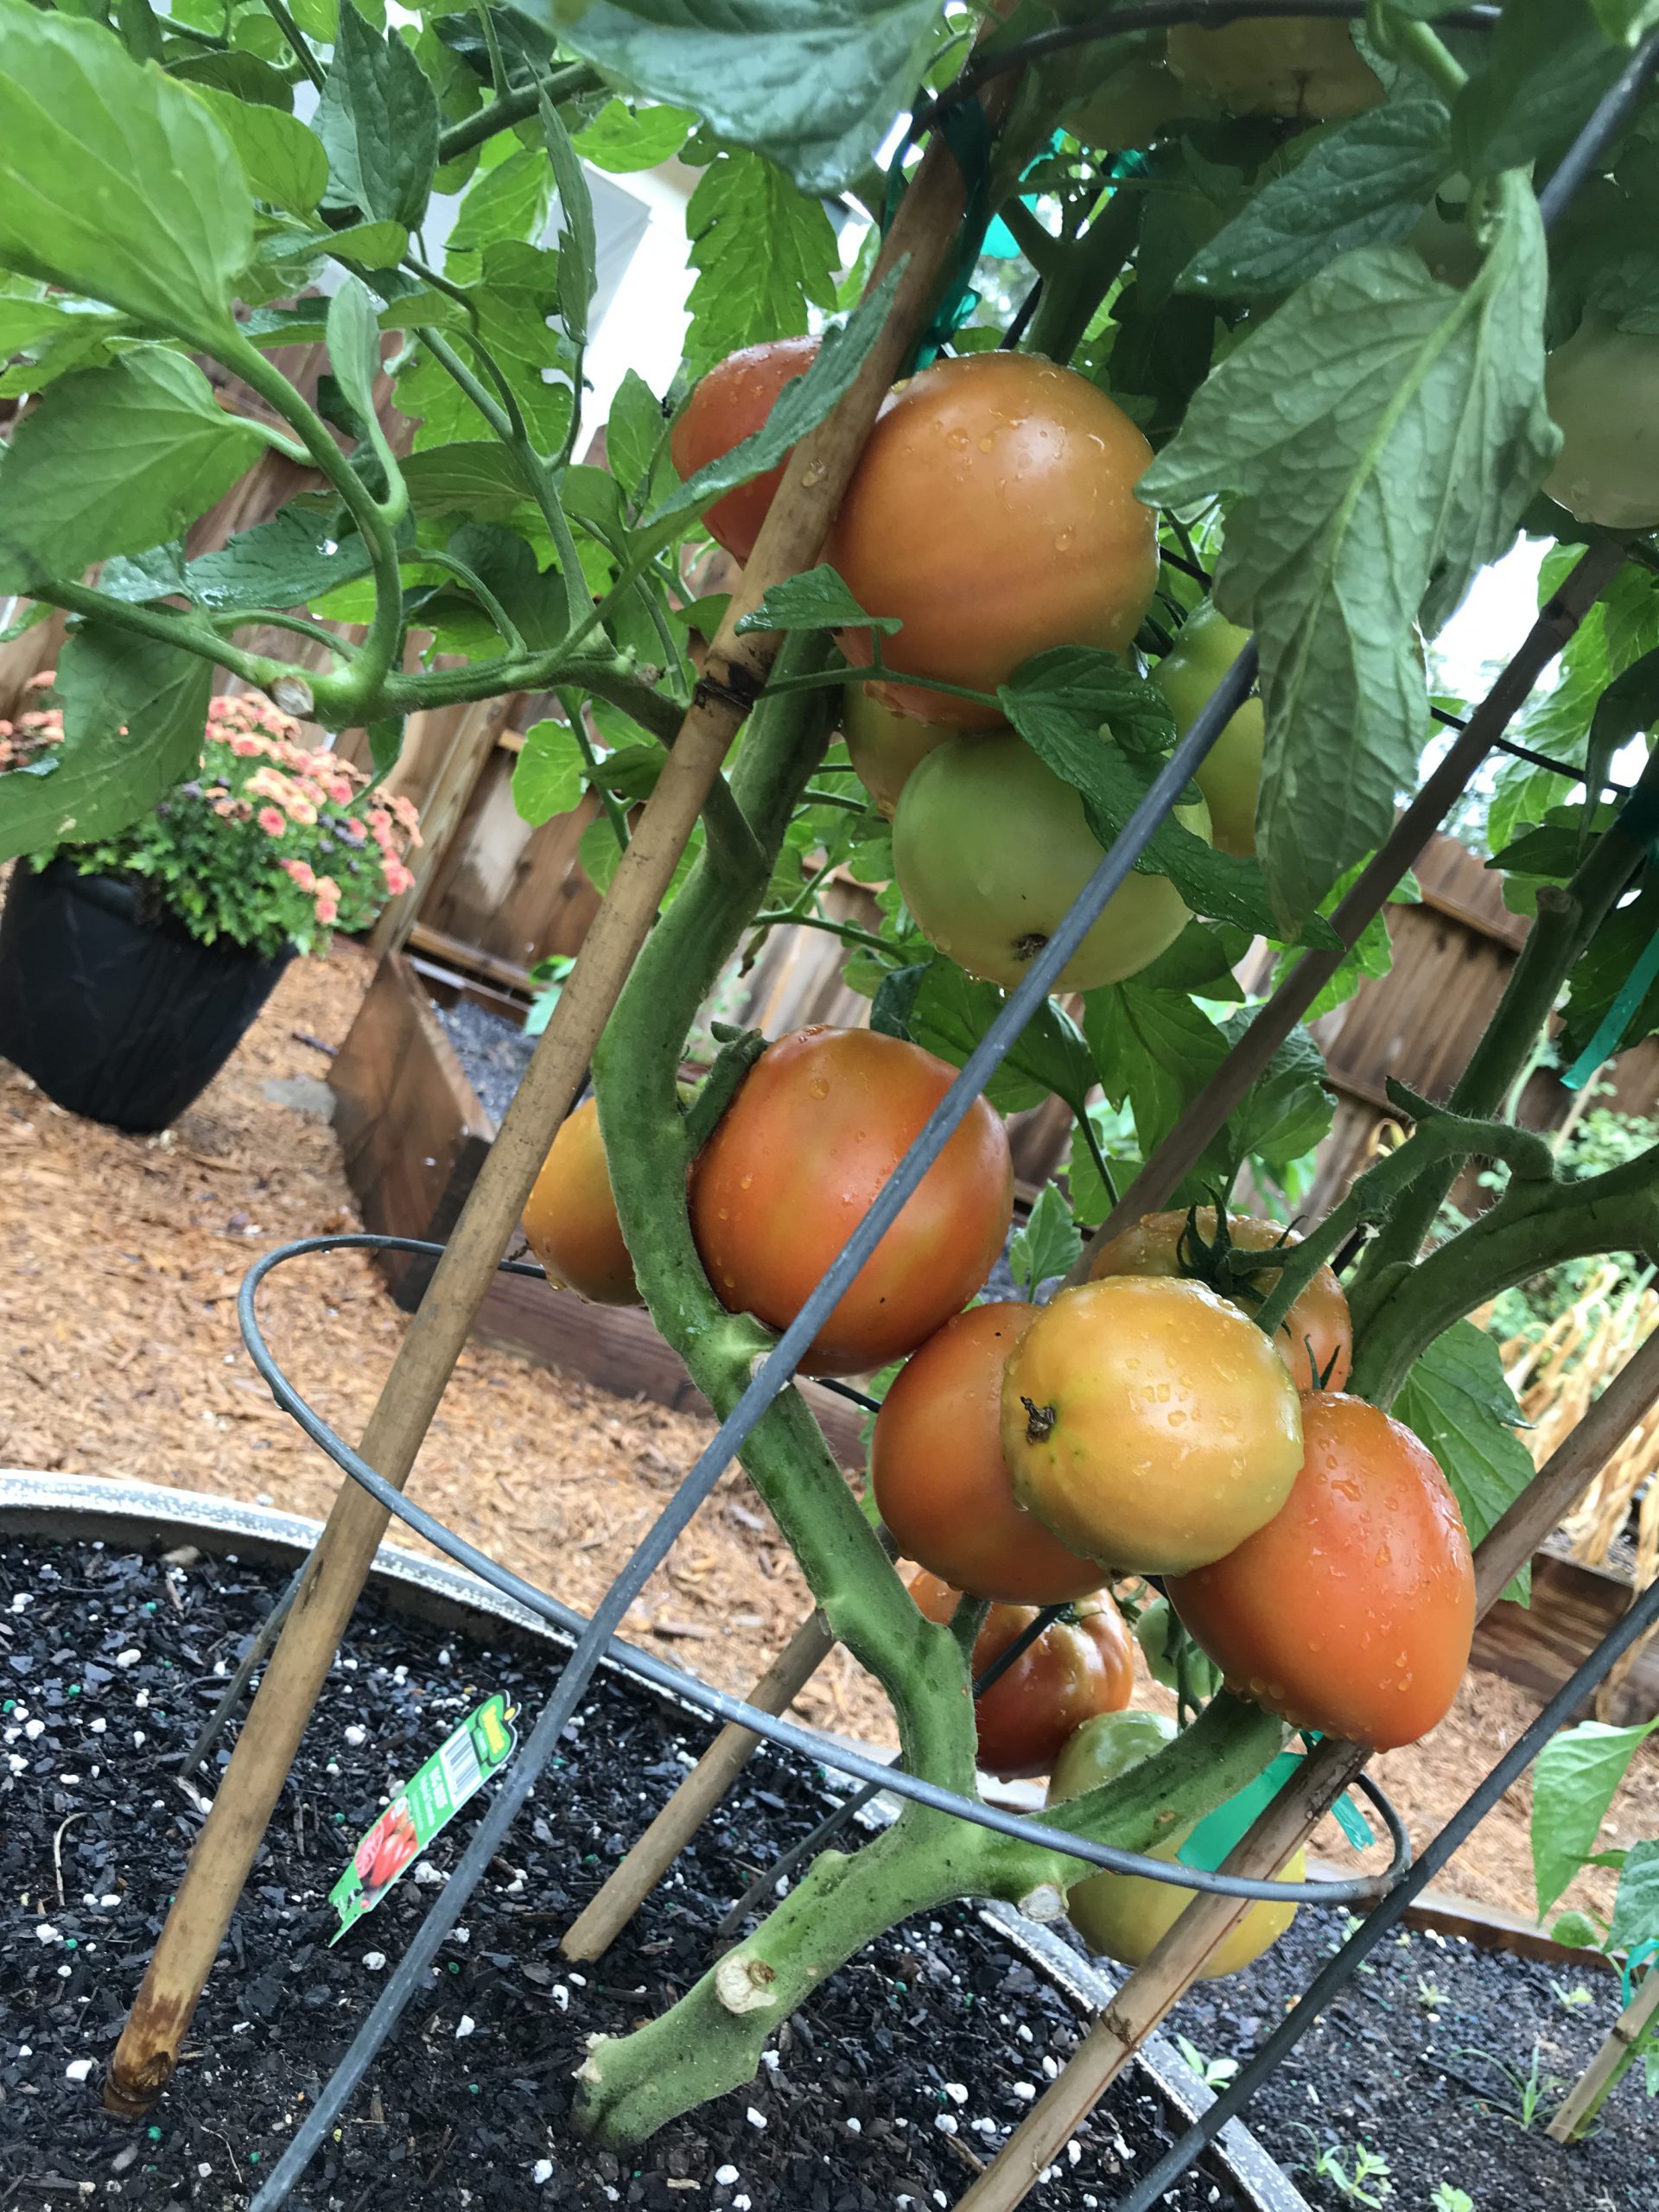
Healthy ‘Big Beef’ tomatoes grown in 2019 with a pH of 6.5, amended with Gypsum at planting, and watered regularly each day! Notice no BER. Photo courtesy the author.
caused by calcium deficiency, it can be induced by creation of distinct wet and dry periods from non-regular watering, interfering with calcium uptake and availability to the plant. So, while you may have adequate soil calcium, if you don’t water correctly, the condition will happen anyway! It’s also good to keep in mind that mature tomato plants use large quantities of water daily, so during the heat of summer, plants in containers may need to be watered multiple times daily to maintain consistently moist soil. Think about it, you don’t drink 8 glasses of water when you wake up and then never drink again throughout a hot day. A tomato is no different. Allowing your plants to wilt down before providing additional water ruins productivity and can induce BER.
Blossom End Rot, while one of the more destructive fates of tomatoes, is totally preventable by a little legwork early in the growing game from you! Soil test and change pH with lime if needed, add a shot of calcium through a tomato blend fertilizer or non-lime supplement like gypsum, and water regularly! Do these three things and you’ll be well on your way to a great crop of early summer tomatoes. If you have any questions about tomato blossom end rot or any other horticulture or agricultural topic, please don’t hesitate to reach out to us at the UF/IFAS Calhoun County Extension Office. Take advantage of this beautiful spring weather and get in the garden today! Happy gardening.
by Evan Anderson | Feb 27, 2020
This time of year, owners of woody plants might notice that leaf canopies are thin. Fruit and ornamental trees, shrubs, and bushes might have shed some leaves over the winter or thinned out due to disease, cold damage, or other problems. When this happens, it can call more attention to the stems of these plants, which may sport a fuzzy, frilly growth on them. More than once I’ve heard people ask, “What is this growing on my plant and how do I stop it from killing it?”.
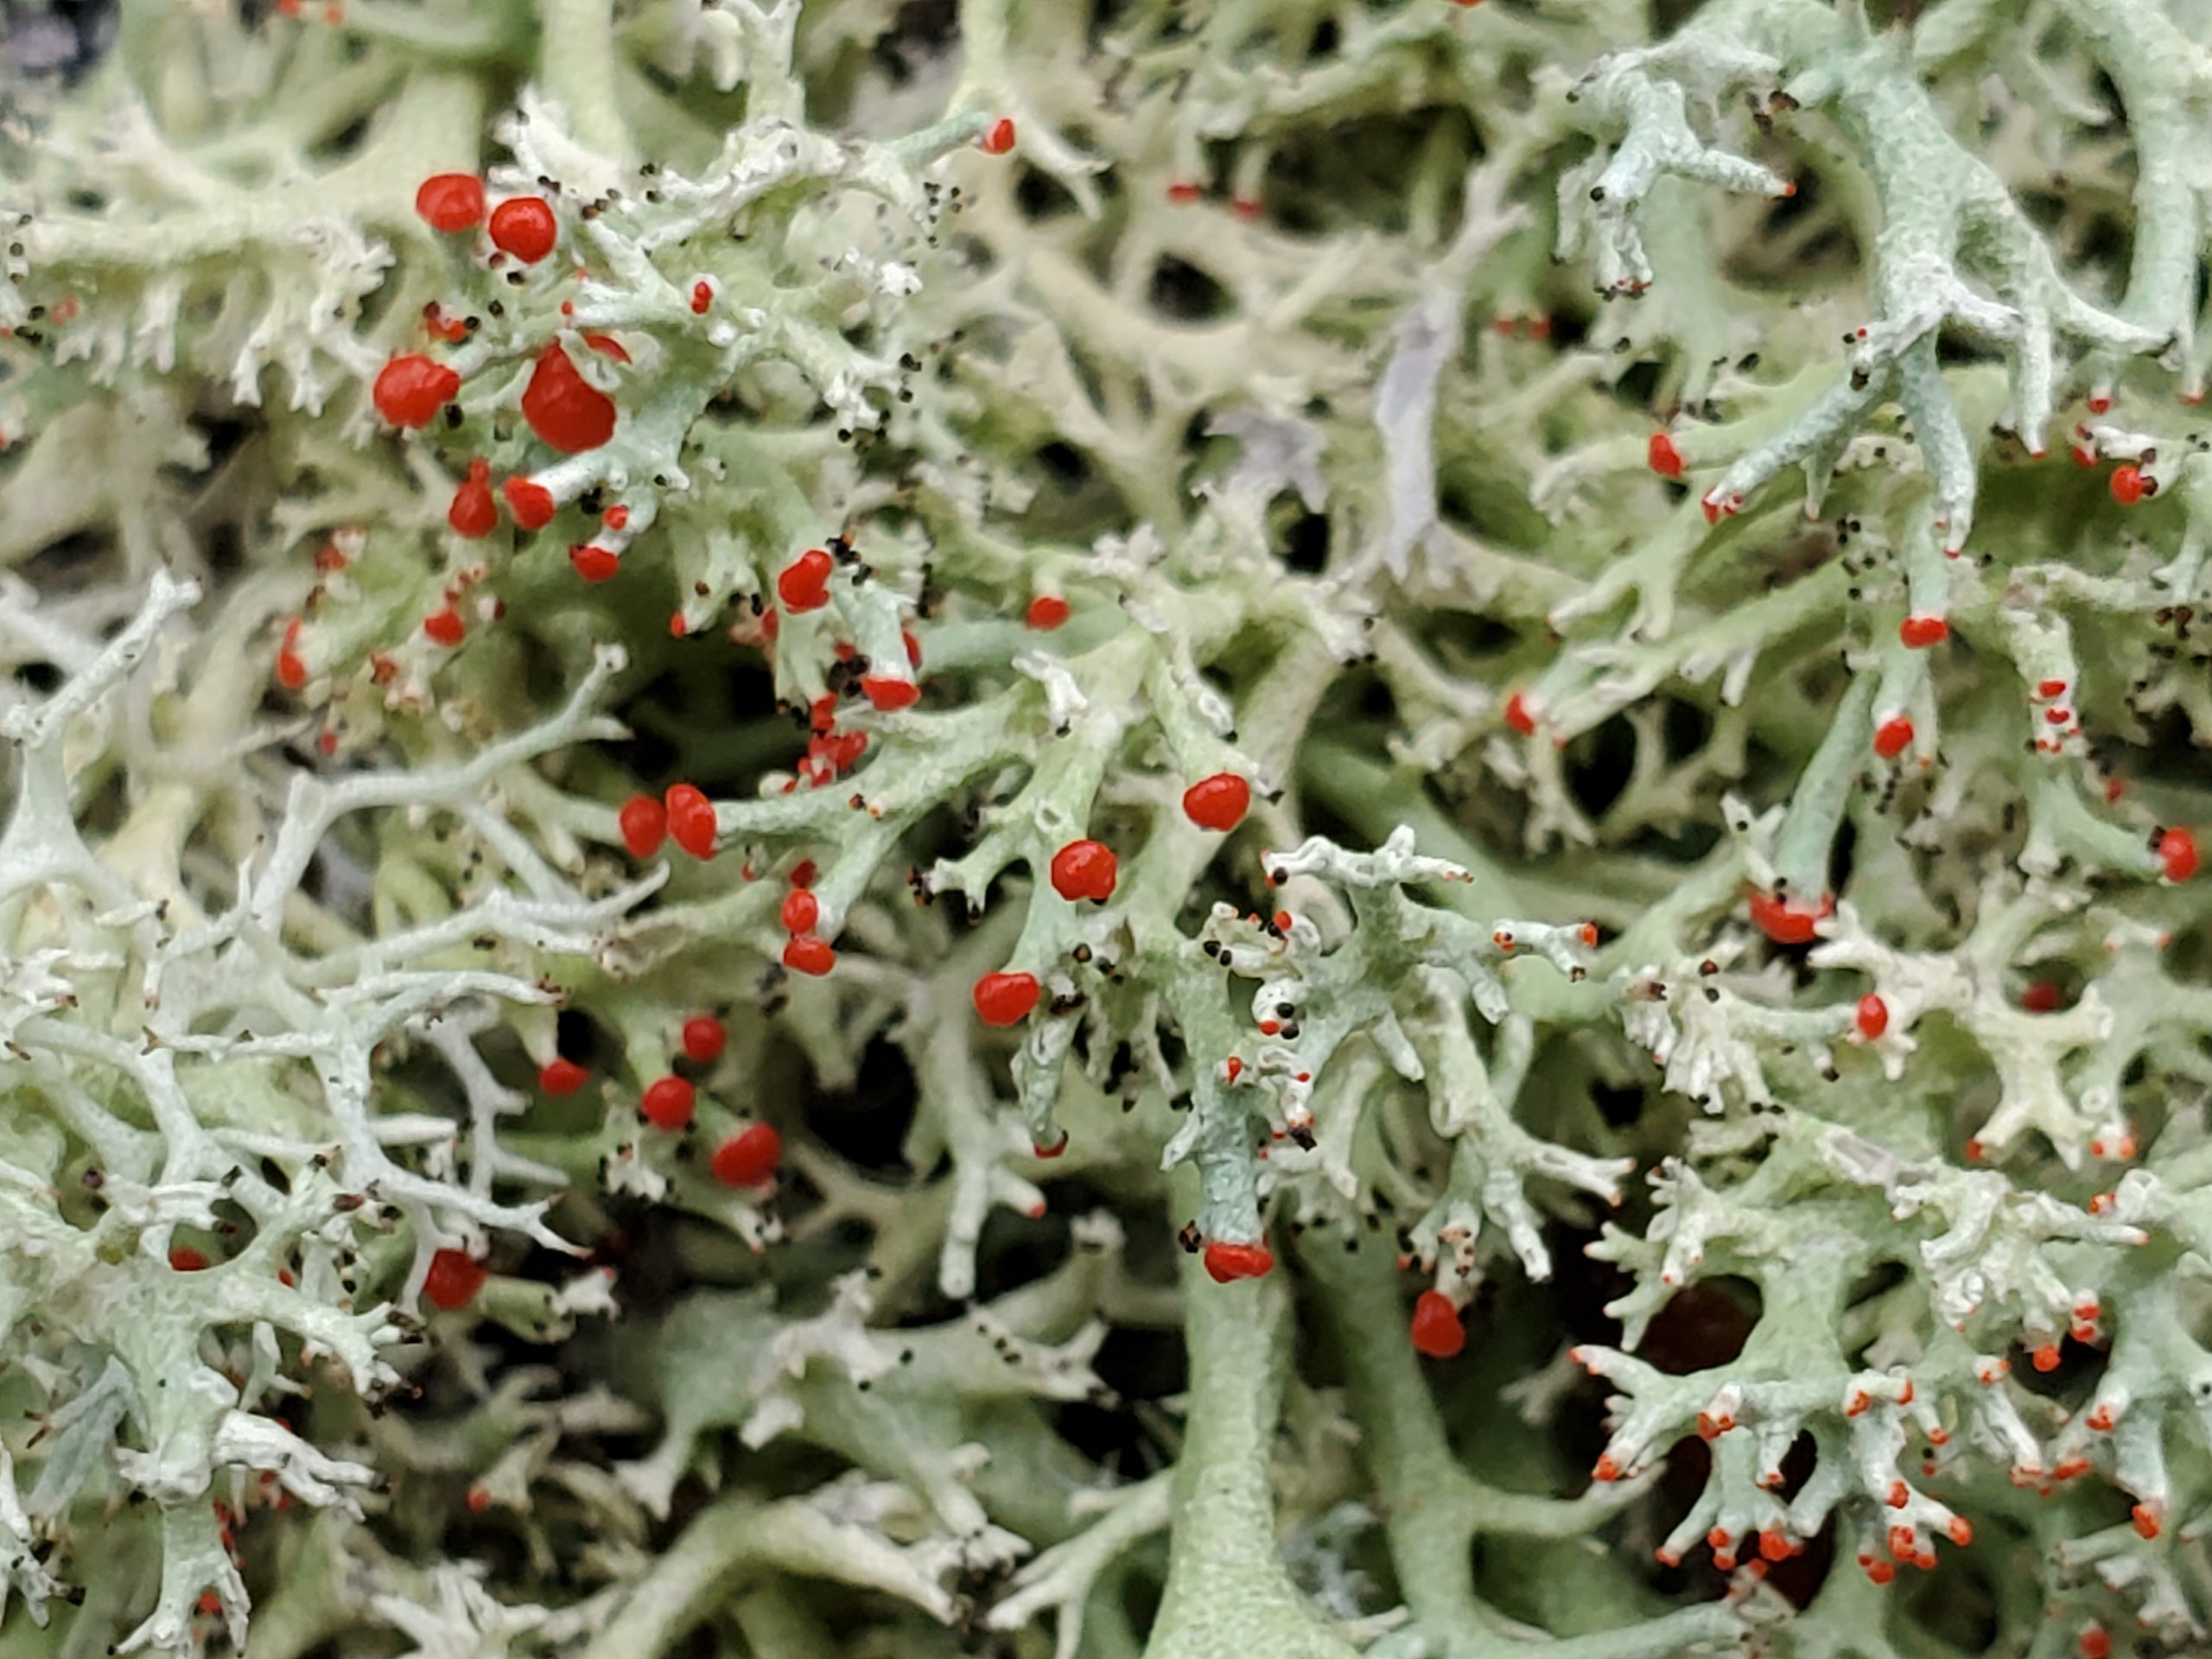
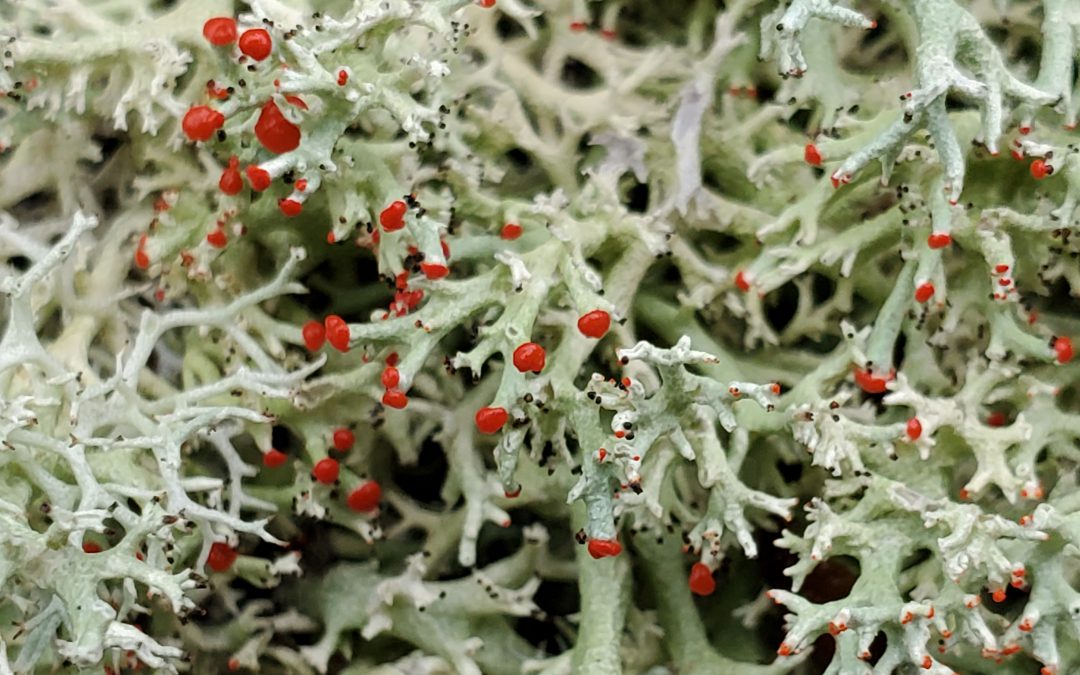
Red Tipped Lichen – Image Credit Evan Anderson UF / IFAS Extension
Lichen is the fuzzy growth in question, and the good news is that it doesn’t harm the plant it grows on. Lichen is an organism that’s a combination of fungus and either algae or cyanobacteria. The algae photosynthesizes and produces energy to share with the fungus, which provides protection and support. Thankfully, they’re pretty self-contained, and don’t need to steal nutrients or water from whatever they’re growing on. That means they can grow just about anywhere – on rocks, fence posts, tree bark, or on the ground (if you’ve seen deer moss growing in the woods, that’s a lichen!). Again, they are NOT parasitic and do NOT hurt plants.
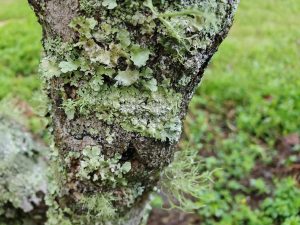
Lichen on Tree Trunk. Image Credit Evan Anderson, UF / IFAS Extension
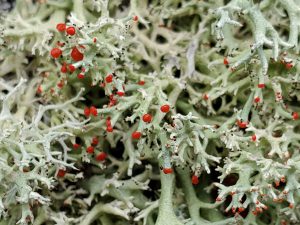
It’s common to find lichens growing in many different forms and colors. One alarmed tree-owner brought me a branch decorated with a round blotch that had a bright reddish edge. A Christmas Wreath lichen had found a home on her tree, and while the red rings it forms may look alarming, they’re just as innocuous as other lichens. There may be multiple forms of lichen growing in close proximity on a branch, as well. Flat, wavy, rippled, filamentous, bushy, and powdery looking lichen might all mix together to make a strange (or beautiful) looking collection on a tree.
by Daniel J. Leonard | Jan 23, 2020
Cruciferous vegetables, mostly cool-season annuals in the Brassicaceae (formerly Cruciferae) family, are part of a healthy diet, prized for their high fiber content and unique sulfur-containing compounds known as glucosinolates. This vegetable family includes things many of us love (or love to hate) like Brussels sprouts, cabbage, cauliflower, collards, kale, mustard, turnips, bok choy, and Chinese cabbage. They’re also commonly grown in Panhandle gardens. However, as anyone who has grown these species knows, some are easier than others. For example, kale and radish are among the easiest of all plants to grow. But get beyond the basics and folks often run into difficulty with species like broccoli and cabbage. The high rainfall/humidity and frequent warm spells experienced here during the growing season often lead to serious pathogen problems, dooming my garden in years past. However, this winter, thanks to a couple of new cultivars, ‘Capture’ Cabbage and ‘Burgundy’ Sprouting Broccoli, I’ve enjoyed a plentiful supply of tasty crucifers!
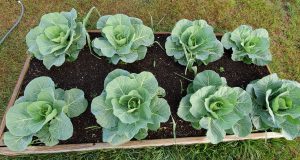
4’x 8′ raised bed planted with ‘Capture’ on 24″ centers.
‘Capture’ Cabbage, developed by Bejo Seeds of California as a mid-season “white” fresh market cabbage for the South, has been an outstanding performer in my garden this year. Touted as highly resistant to Black Rot and Fusarium Yellows (by far the two most devastating pathogens of Cabbage), I had to try it for myself. I planted seeds 24” apart in my standard 4’ wide x 8’ long x 12” deep raised beds filled with mushroom compost and aged pine bark. Seedlings were fertilized once about three weeks after germination with a general purpose 10-10-10 fertilizer. The plants that developed have been extremely vigorous (I’m glad I paid attention to plant spacing guidelines on the seed packet!) and have not shown ANY evidence of disease, even through an unusually warm and wet winter that would have hammered older susceptible varieties. My plants have begun to develop heads and should be ready for harvest and the kitchen in just a couple more weeks! If you’ve had problems getting a cabbage from germination to head formation and harvest without serious disease pressure, give ‘Capture’ a try next fall!
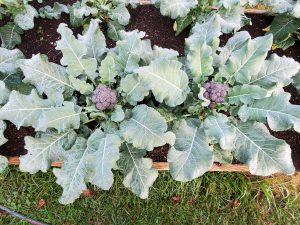
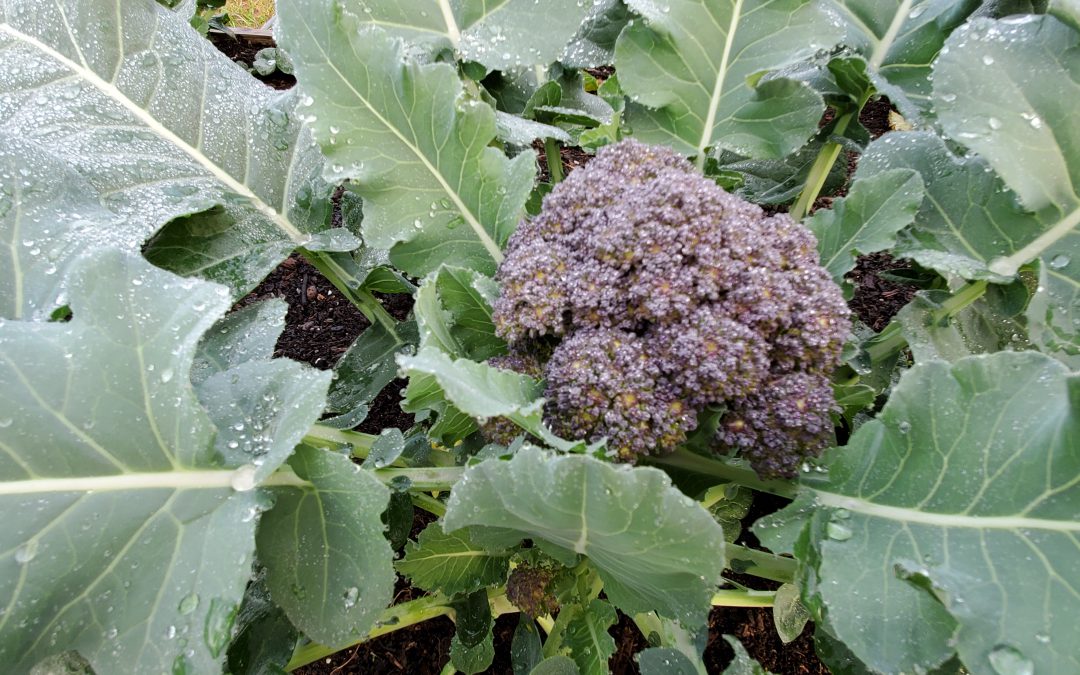
‘Burgundy’ Broccoli in the author’s raised bed garden.
‘Burgundy’ Broccoli, developed by Elsom Seeds in the United Kingdom, is a unique variety sure to turn heads in your garden. True to its name, the prolific florets are a deep, purple color. Though the central “head” on ‘Burgundy’ is quite small, that’s not the primary feature anyway. Considered a “sprouting” broccoli, this cultivar puts out an abundance of side shoots that make ‘Burgundy’ sort of a cut-and-come-again broccoli, allowing for a long harvest window. Another advantage from a disease avoidance perspective is the short maturity time (the time from planting seeds to having harvestable shoots) of around 40 days! For perspective, a “regular” heading broccoli has a maturity of around 60 day, lots more time for problems to happen. In the same growing conditions described above for cabbage, ‘Burgundy’ performed amazingly well for me, growing strong, healthy stalks, large, unblemished leaves and an abundance of purple shoots with a nice flavor profile!
If you want to enjoy homegrown broccoli and cabbage but disease pressures have made your previous efforts unproductive, give ‘Capture’ Cabbage and ‘Burgundy’ Broccoli a try! These two selections have made it easier than ever to enjoy unique, homegrown, healthy cruciferous veggies. Keep these and other quality, disease-resistant cultivars in mind when planning your winter garden in 2020!
by Matt Lollar | Sep 7, 2019
A couple weeks ago, I was on a site visit to check out some issues on Canary Island Date Palms. The account manager on the property requested a site visit because he thought the palms were infested with scale insects. He noticed the issue on a number of the properties he manages and he was concerned it was an epidemic. From a distance, lower fronds were yellowing from the outside in and the tips were necrotic. These are signs of potassium deficiency with possible magnesium deficiency mixed in.
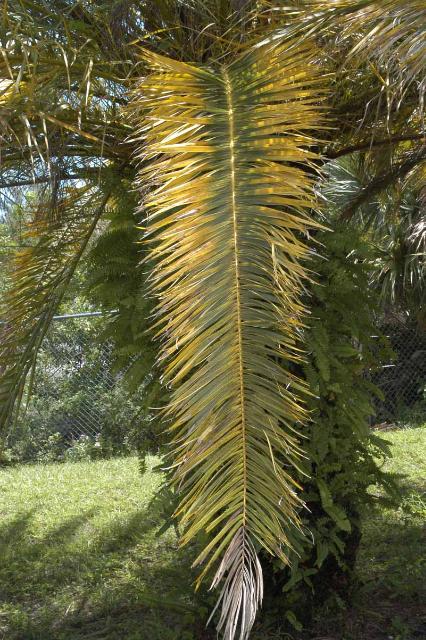
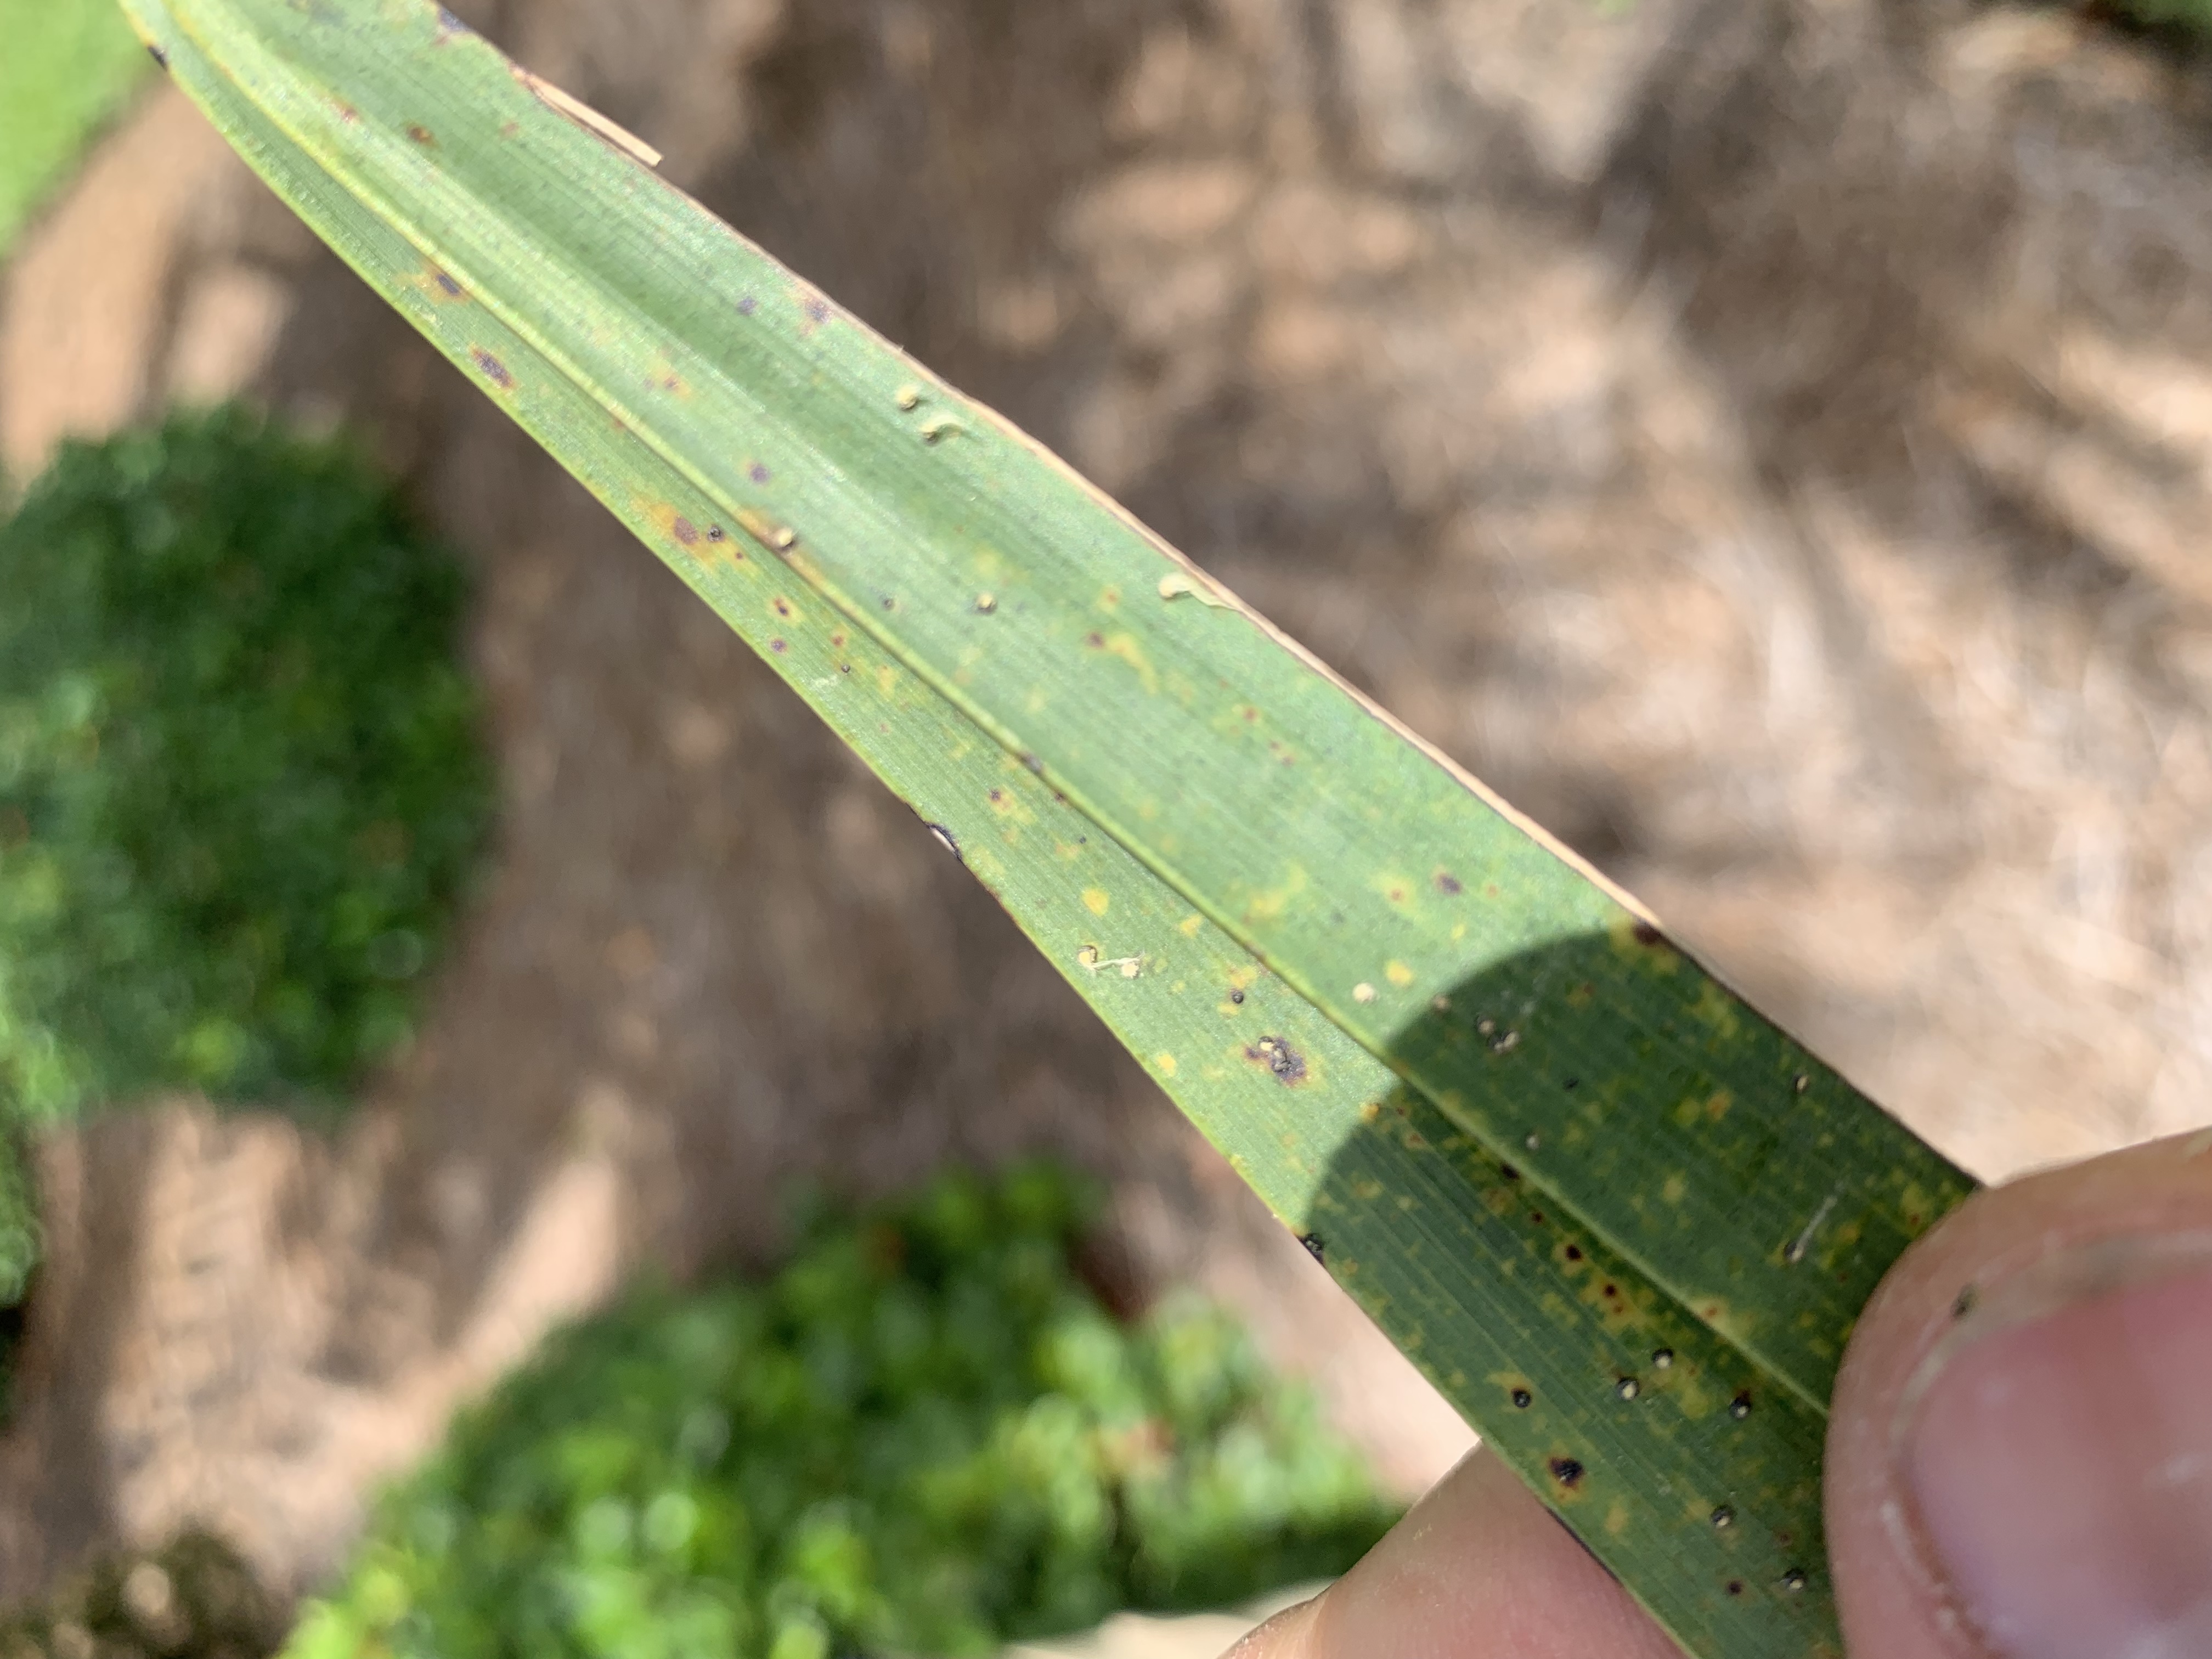
Transitional leaf showing potassium deficiency (tip) and magnesium deficiency (base) symptoms. Photo Credit: T.K. Broschat, University of Florida/IFAS Extension
Nutrient deficiencies are slow to correct in palm trees. It’s much easier to prevent deficiencies from occurring by using a palm fertilizer that has the analysis 8N-2P2O5-12K2O+4Mg with micronutrients. Even if the palms are part of a landscape which includes turf and other plants that require additional nitrogen, it is best to use a palm fertilizer with the analysis previously listed over a radius at least 25 feet out from the palms. However, poor nutrition wasn’t the only problem with these palms.
Upon closer look, the leaflets were speckled with little bumps. Each bump had a little white tail. These are the fruiting structures of graphiola leaf spot also known as false smut.

Graphiola leaf spot (false smut) on a Canary Island Date Palm. Photo Credit: Matt Lollar, University of Florida/IFAS Extension – Santa Rosa County
Graphiola leaf spot is a fungal leaf disease caused by Graphiola phoenicis. Canary Island Date Palms are especially susceptible to this disease. Graphiola leaf spot is primarily an aesthetic issue and doesn’t cause much harm to the palms infected. In fact, the nutrient deficiencies observed in these palms are much more detrimental to their health.
Graphiola leaf spot affects the lower fronds first. If the diseased, lower fronds are not showing signs of nutrient deficiencies then they can be pruned off and removed from the site. All naturally fallen fronds should be removed from the site to reduce the likelihood of fungal spores being splashed onto the healthy, living fronds. A fungicide containing copper can be applied to help prevent the spread of the disease, but it will not cure the infected fronds. Palms can be a beautiful addition to the landscape and most diseases and abiotic disorders can be managed and prevented with proper pruning, correct fertilizer rates, and precise irrigation.
by Carrie Stevenson | Aug 1, 2019

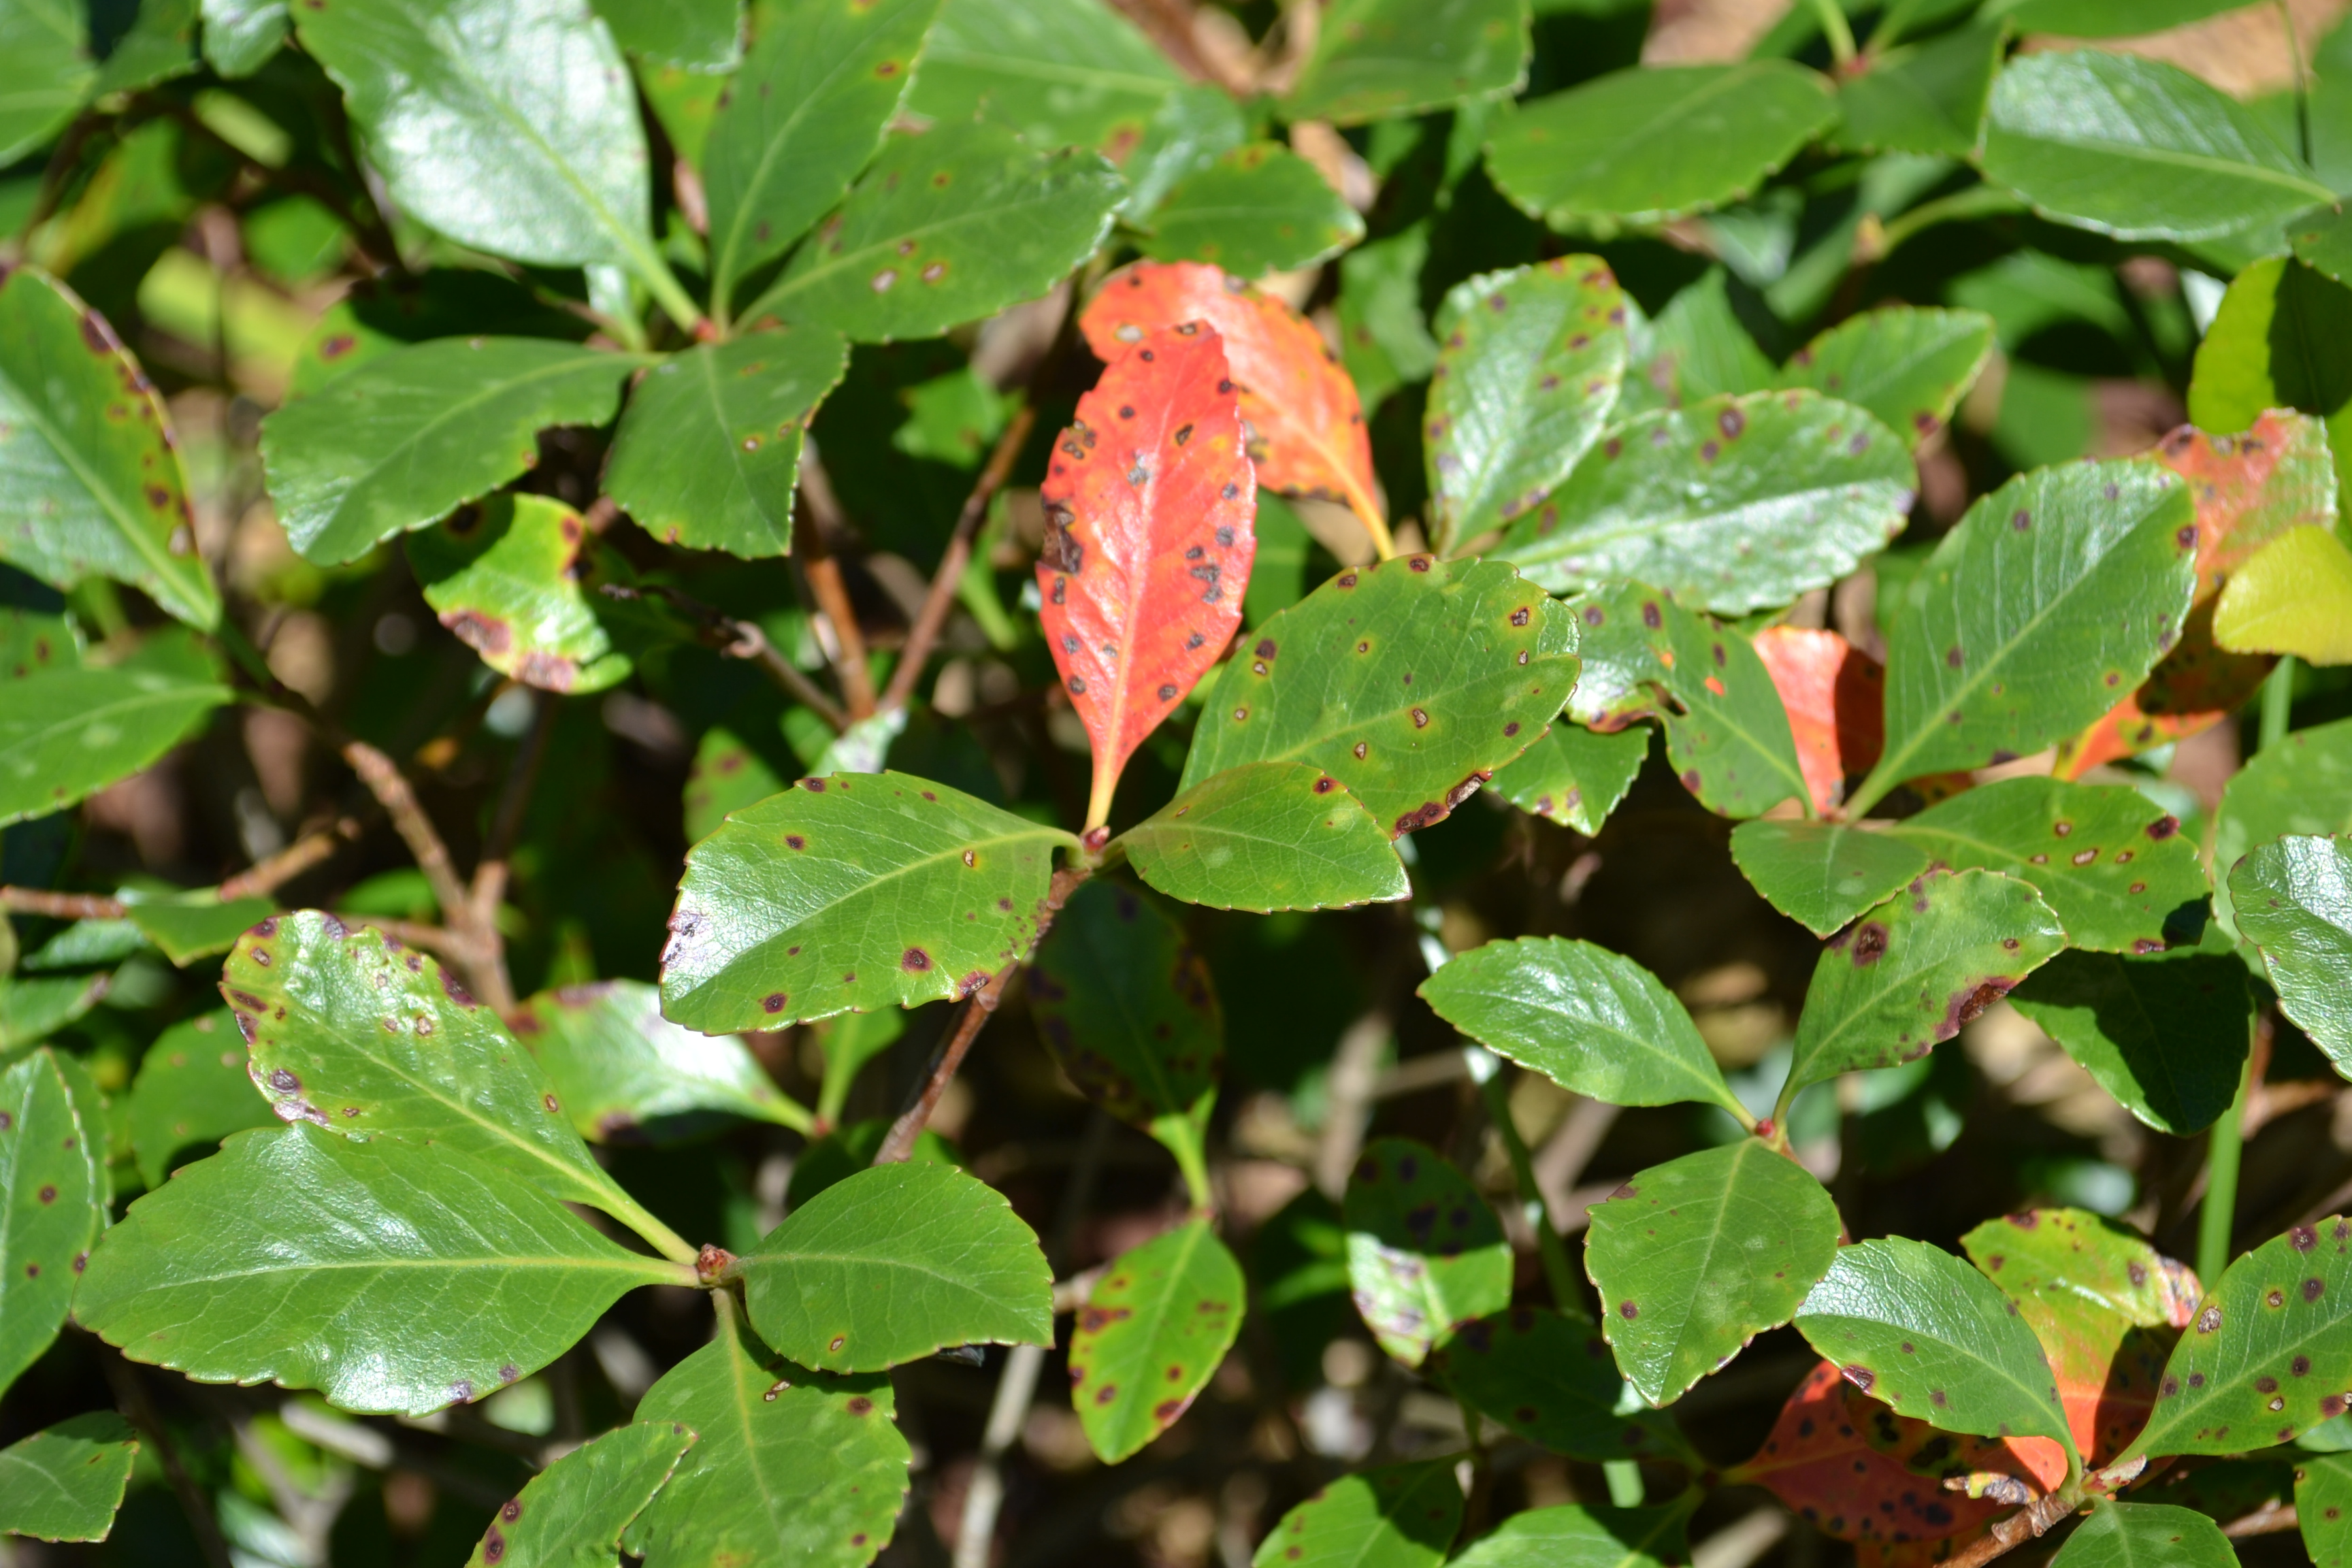
Reddish, round spots are the first sign of Entomosporium Leaf Spot on Indian Hawthorn. Photo credit: Beth Bolles, UF IFAS Extension
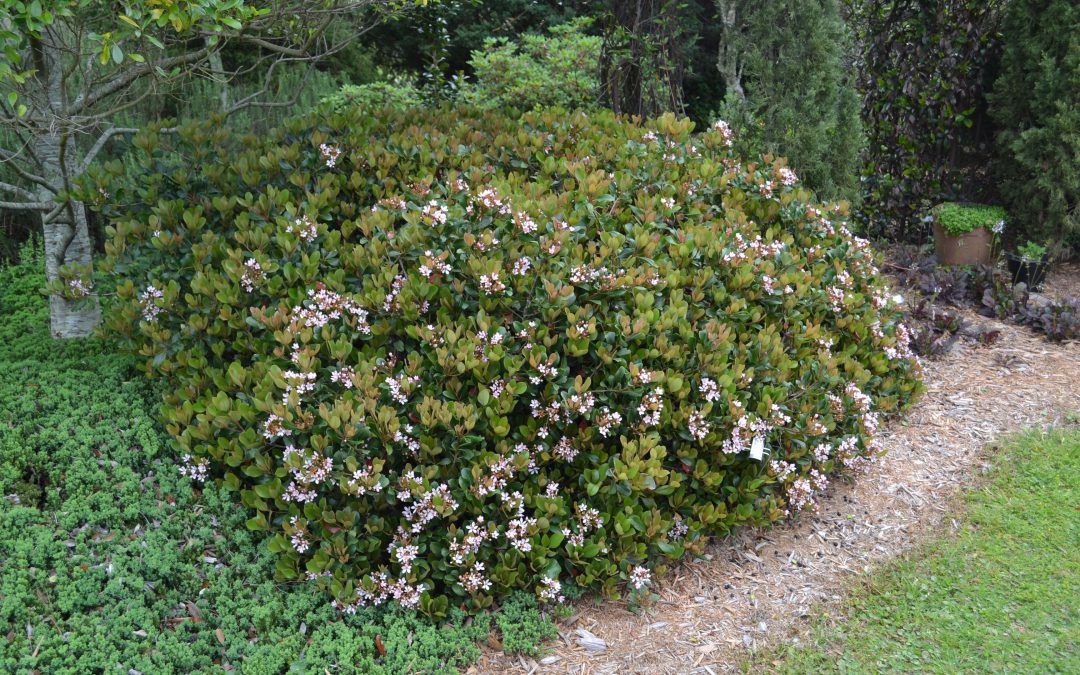
Indian hawthorn (Rhaphiolepis spp.) is one of those great evergreen shrubs with such a reputation for hardiness that most folks tend to plant it and not worry about it. Indian hawthorn is not a Florida native, but is adapted to our weather conditions and is widely used in home landscapes throughout the Southeast.
However, it is important that homeowners and landscape managers pay attention to them, particularly during the warm, often wet weather growing season. During such conditions, the plant is vulnerable to Indian hawthorn leaf spot, caused by a fungus called Entomosporium mespili. Several years back, this fungus spread through the once-popular red-tip plant (Photinia fraser), to the extent that this species is now rarely used.
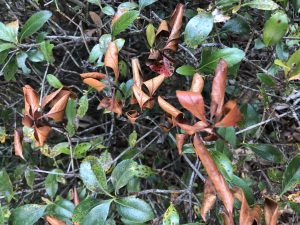
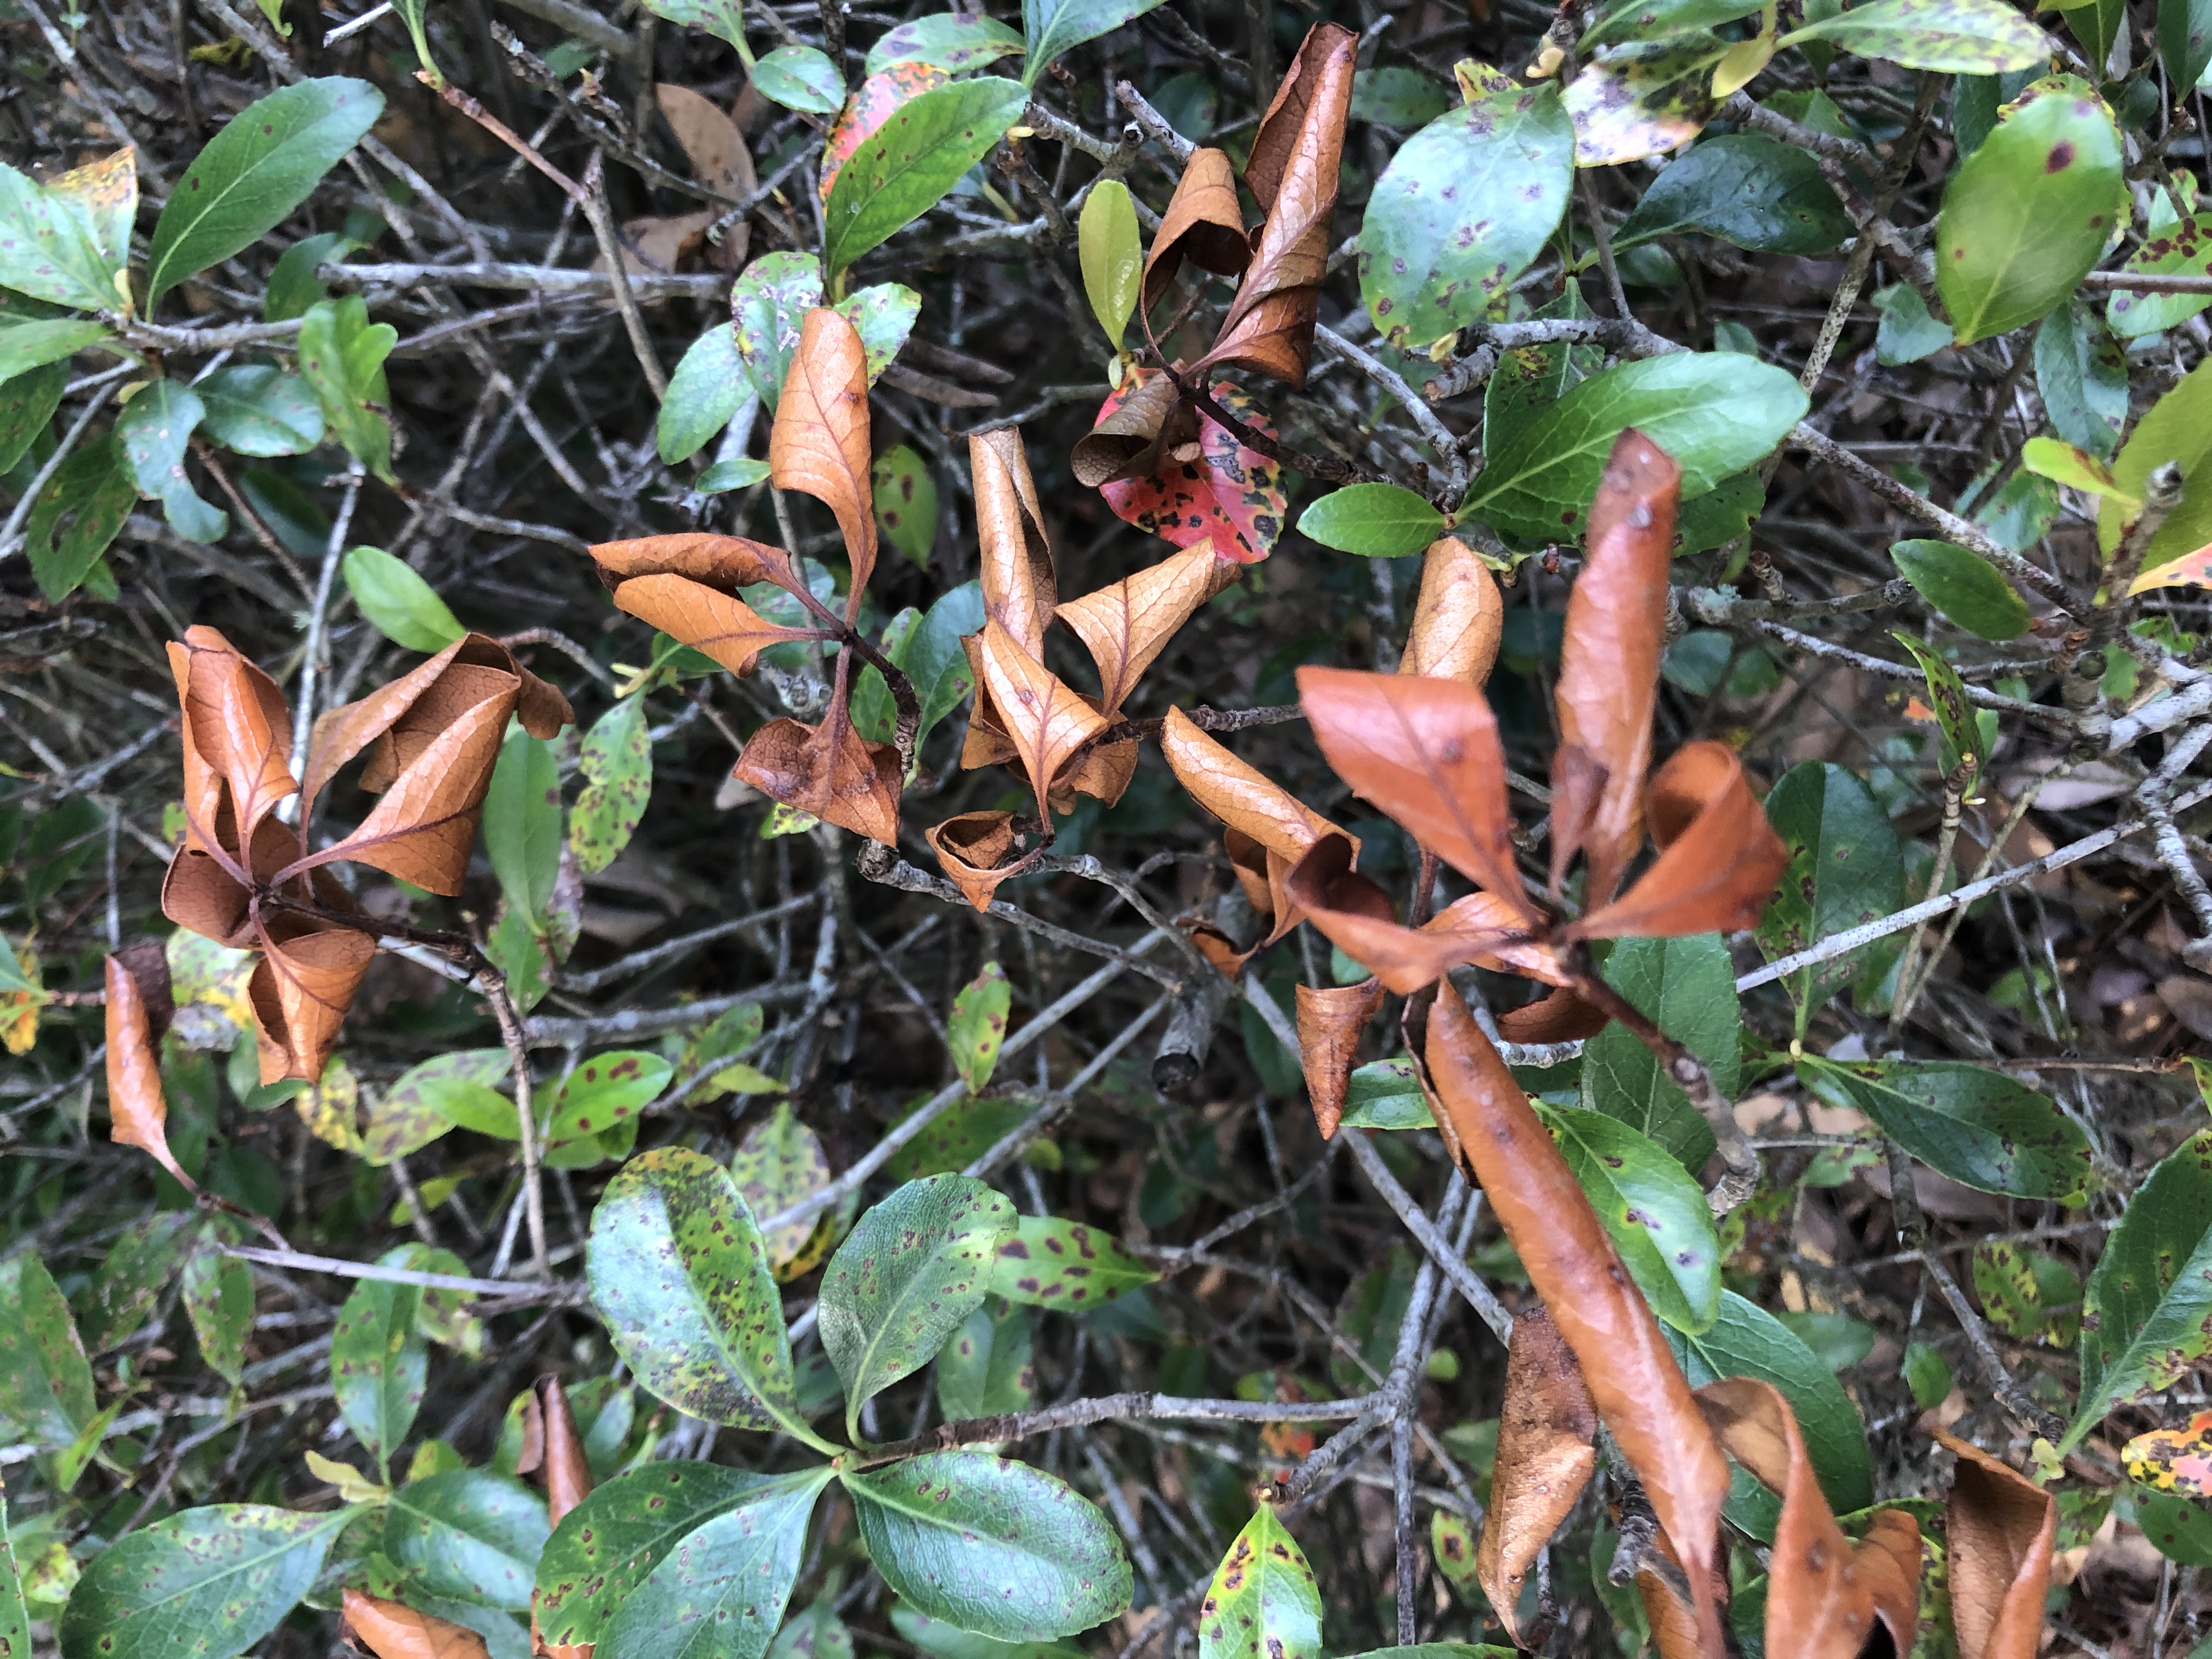
An Indian hawthorn plant heavily affected with leaf spot fungus can be covered with round circles on the green leaves, eventually leading to plant death. Photo credit: Carrie Stevenson, UF IFAS Extension
Symptoms of leaf spot fungi include small, circular red spots on young leaves, which then expand into larger patches. On older leaves, the spots are gray in the middle with red/maroon borders. Eventually, leaves can drop and entire plants may defoliate and die. The disease typically spreads through rainwater or overhead irrigation.
To manage the disease, it is best to create space between a sick plant and a healthy one to allow better air circulation. This will allow leaves to dry off after rainfall events and prevent expansion of spores. Be sure not to overwater, prune, or fertilize shrubs that show signs of the disease, as this encourages growth—the fungus thrives particularly well on young, vigorously growing leaves.
For leaf spot problems that become difficult to manage with just cultural practices, fungicides containing chlorothalonil, myclobutanil, or propiconazole may be used. Always follow label instructions when using chemical management and apply in the spring or fall. In addition, dead or dying plants should be removed and replaced with cultivars showing resistance to Entomosporium leaf spot, including Eleanor Tabor, Indian Princess, Gulf Green, Betsy, Blueberry Muffin, Georgia Petite, Olivia, and Snow White.
by Matt Lollar | Aug 1, 2019
Large patch Rhizoctonia solani (known as brown patch in cool season grasses) is a common disease of many turfgrass species. It usually occurs during the cooler months from October through May when temperatures are below 80 degrees Fahrenheit. However, signs and symptoms of large patch and other Rhizoctonia diseases can be observed throughout the summer. Less common Rhizoctonia species that occur during the summer months are Rhizoctoni zeae and Rhizoctonia oryzae. Extended periods of turf wetness from excessive rainfall or overwatering provide ideal conditions for the disease to develop and spread.

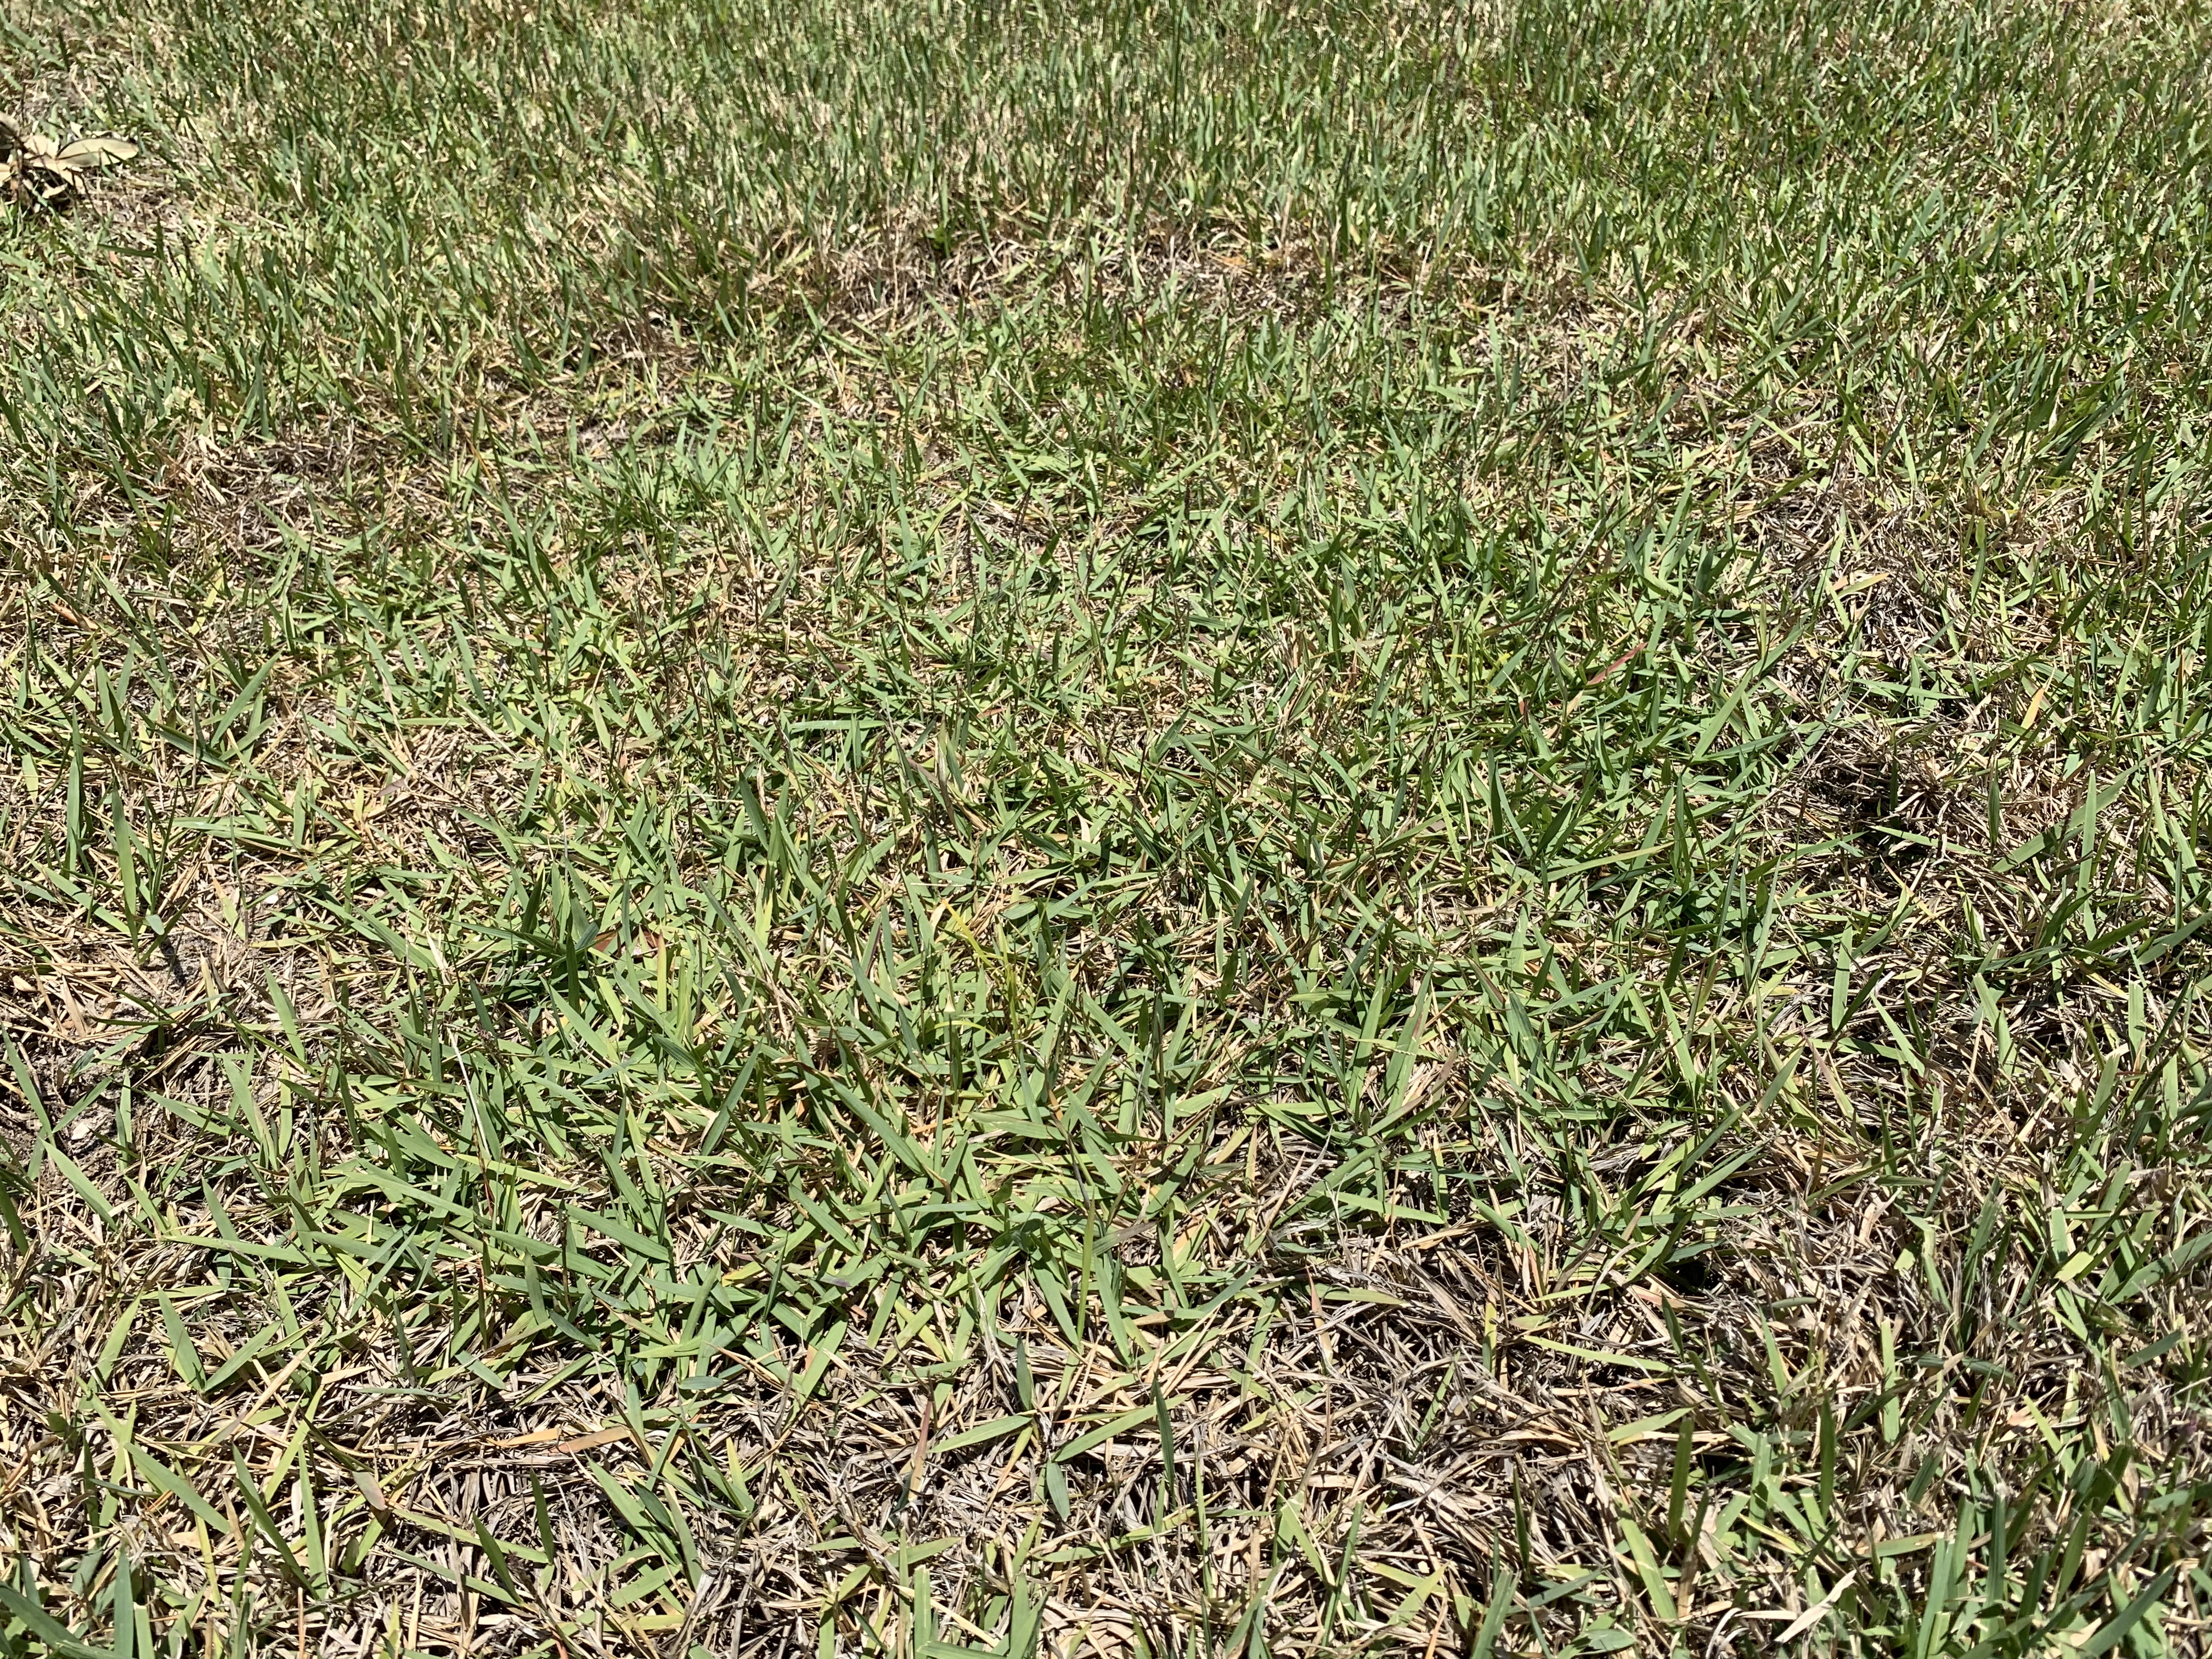
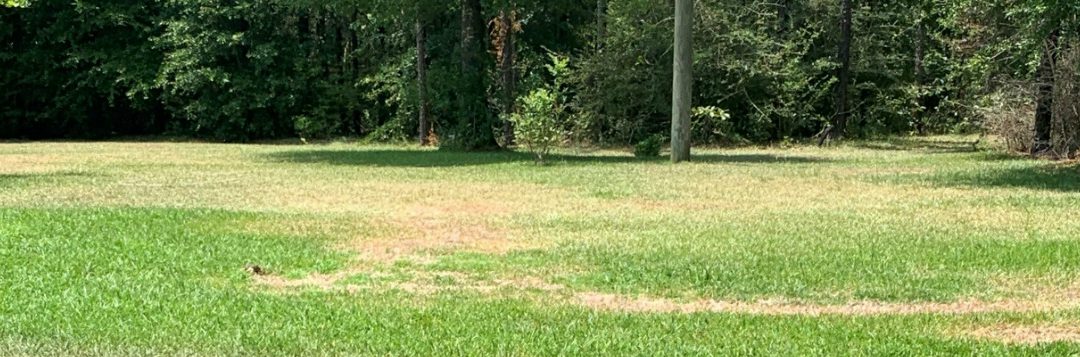
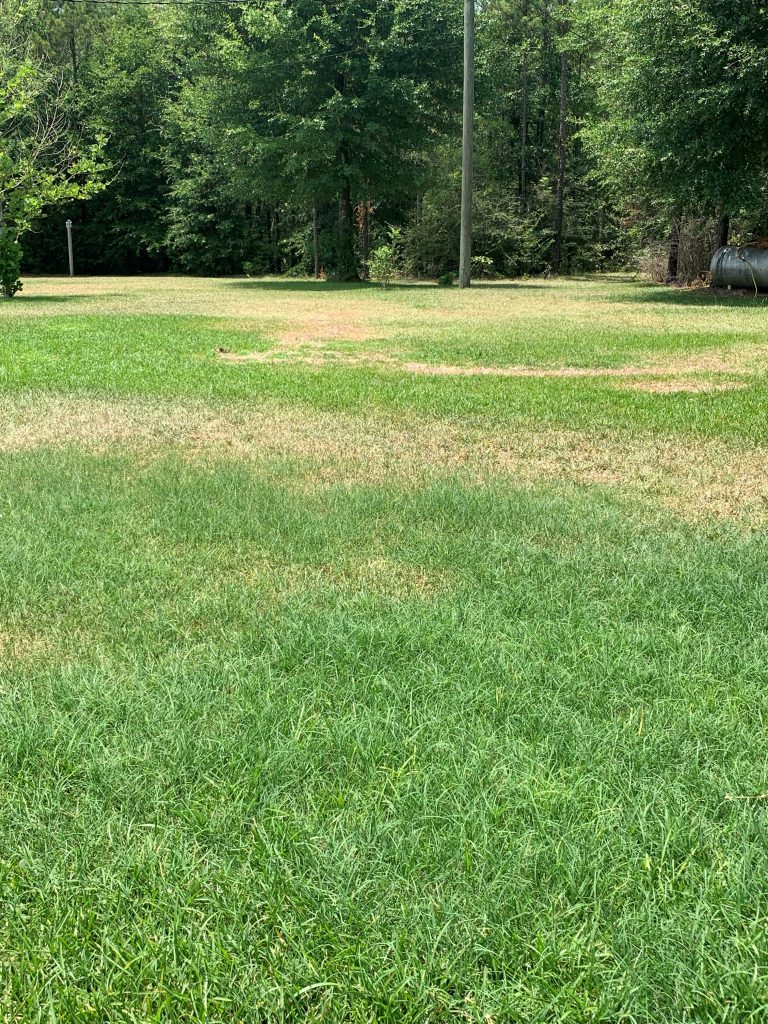
Rhizoctonia in a zoysiagrass lawn. Photo Credit: Matt Lollar, University of Florida/IFAS Extension – Santa Rosa County
This summer in Santa Rosa County, Rhizoctonia has been positively diagnosed in both St. Augustinegrass and zoysiagrass lawns and suspected in a number of centipedegrass lawns. The disease usually starts as small, yellow patches (about a foot in diameter) that turn reddish brown, brown, or straw colored as the leaves start to die. Patches often expand to several feet in diameter. It is common to see rings of yellow or brown turf with otherwise healthy turf in the center. The fungus infects portions of the blades closest to the soil, eventually killing the entire leaf. Grass blades can easily be pulled off their stems, but roots are not affected by the disease.
Rhizoctonia in a St. Augustinegrass lawn. Photo Credit: John Atkins, University of Florida/IFAS Extension – Santa Rosa County
Overwatering and excessive fertilization can both contribute to the development of Rhizoctonia disease. Improper timing of fertilizer application can also promote disease development. In the Florida Panhandle, turfgrass is actively growing from April to October. Slow-release fertilizers are recommended to allow for a more even distribution of nutrients over the course of multiple months. Recommended fertilizer rates are based on turfgrass species, geographical location, and fertilizer analysis. Please refer to the UF/IFAS Publication: “Urban Turf Fertilizer Rule for Home Lawn Fertilization” for rate recommendations.
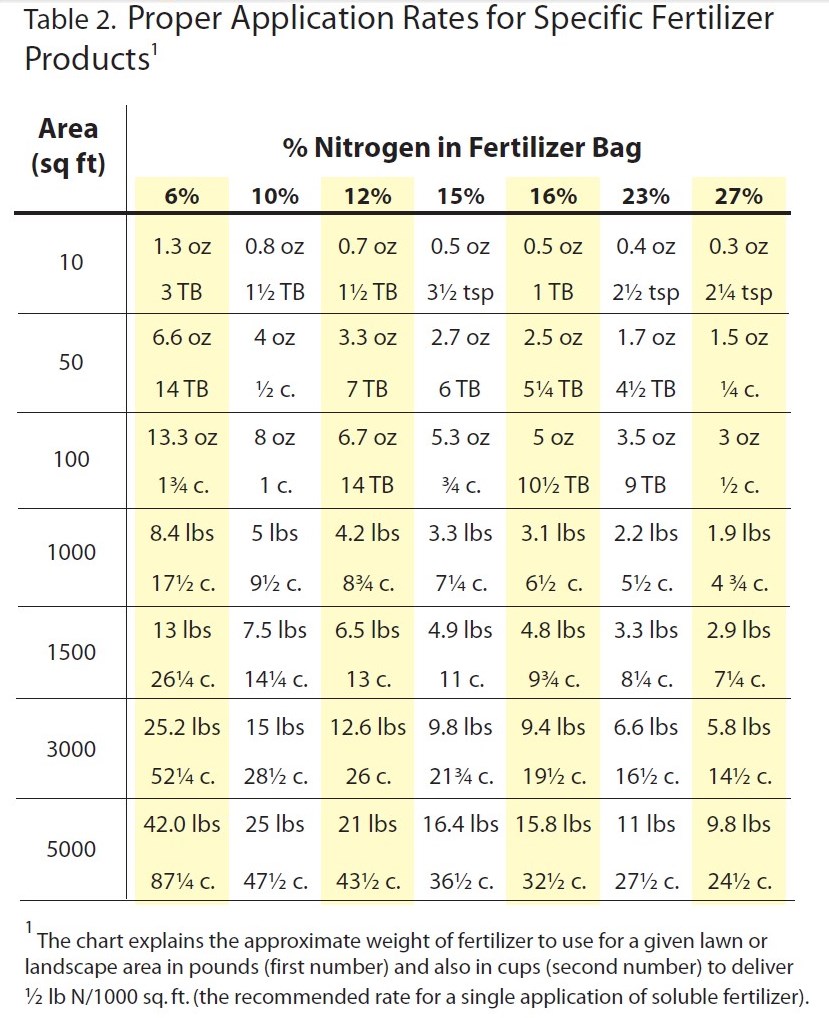
Chart excerpted from Florida-Friendly Landscaping publication.
If large patch or another Rhizoctonia disease is confirmed in your lawn, then chemical controls are necessary to keep the disease from spreading. Fungicide products containing the active ingredients azoxystrobin, chlorothalonil, fludioxonil, flutolanil, iprodione, mancozeb, metconazole, myclobutanil, polyoxin D, propiconazole, thiophanate-methyl, thiram, triadimefon, trifloxystrobin, or triticonazole are viable options for keeping the disease from spreading. For best results, follow the fungicide label for application instructions. It’s important to not only treat the affected areas, but also the healthy turf surrounding these areas in order to keep the diseased spots from growing in size.
Unfortunately, turf diseases are often not noticed until large patches of declining and dead turf are noticed. In these cases when large dead patches exist in the lawn, it is usually necessary to resod these areas. As with most problems that arise in the landscape, good cultural practices are the most proactive way to mitigate the chances with turfgrass diseases. The UF/IFAS Florida Friendly Website provides up-to-date solutions and recommendations for caring for Florida landscapes.