by Daniel J. Leonard | Apr 22, 2021
With the traditional planting date of Good Friday behind us, the home tomato gardening season in the Panhandle is in full swing. While tomatoes are the most persnickety veggie we grow, there are several practices you can adopt to help you succeed: selecting an adapted variety; regularly scouting for insects and disease; and watering and fertilizing appropriately. However, the most overlooked practice for success gardeners can adopt is proper pruning.

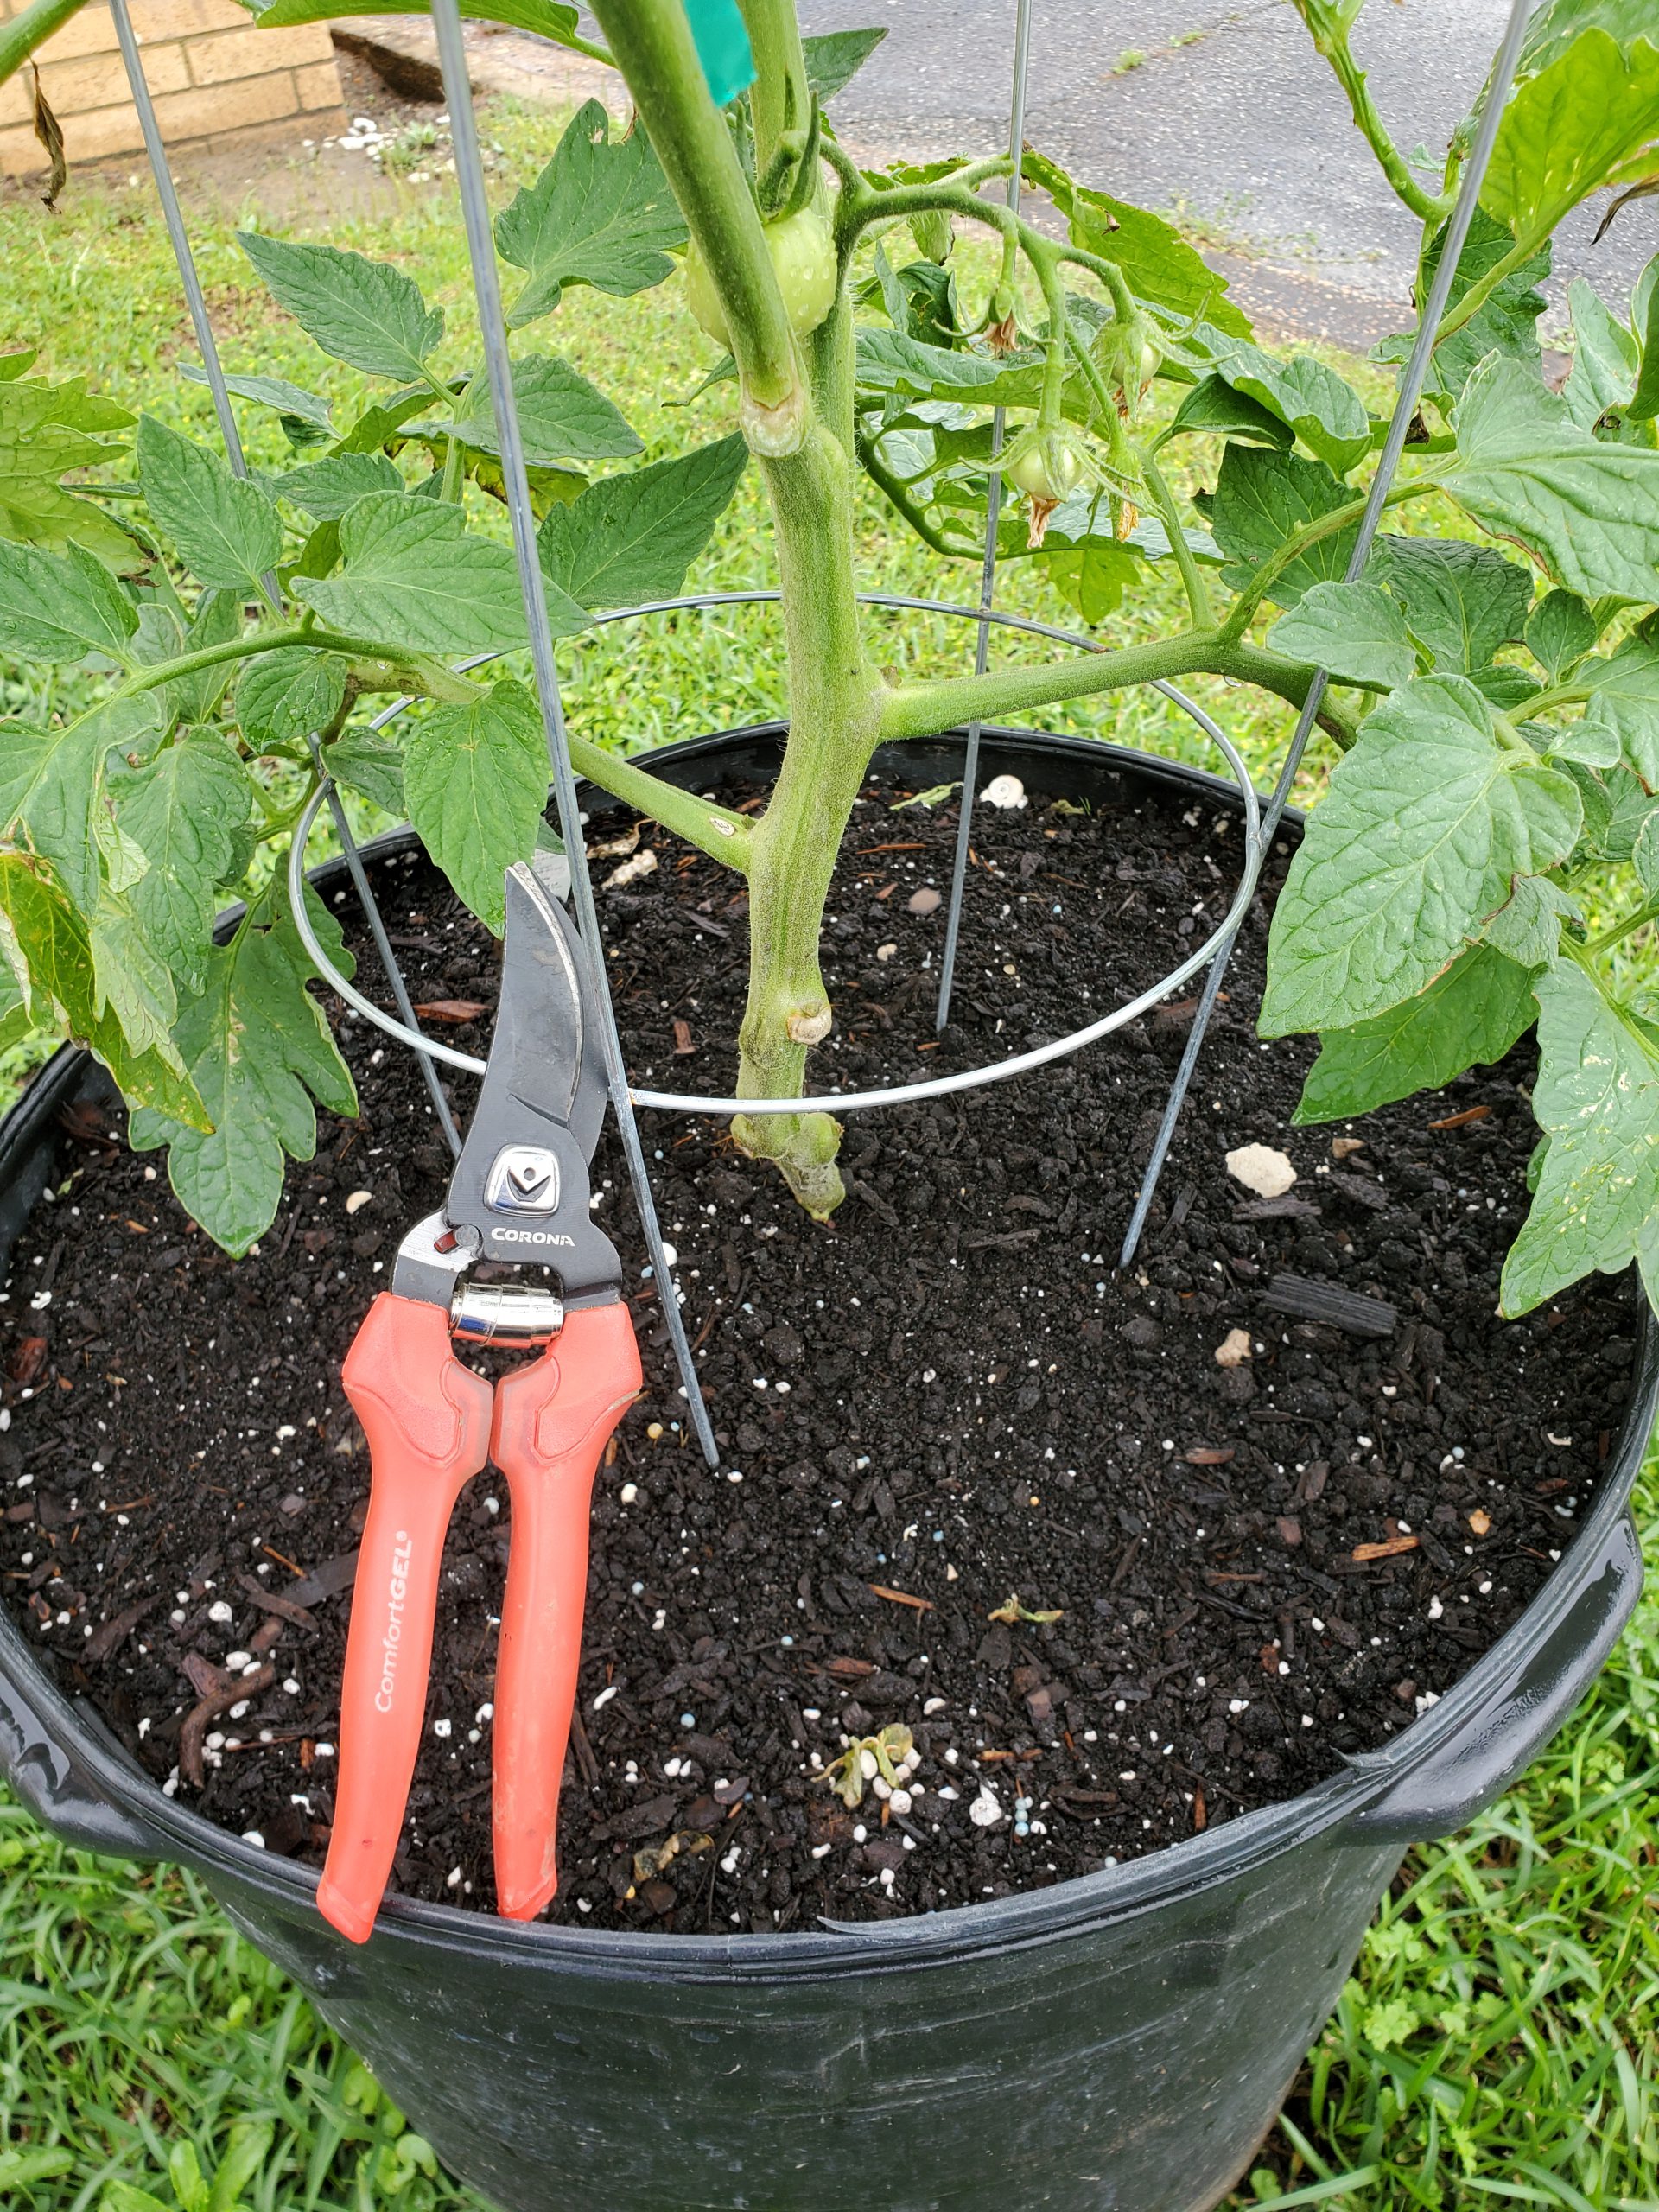
‘Big Beef’ Tomato with lower leaves removed. This is an excellent disease reduction practice. Photo courtesy of Daniel Leonard.
Correct pruning does a couple of positive things for tomatoes. First, it reduces the incidence of disease by preventing leaf contact with the soil, opening the interior of the plant, and allowing better airflow. This is important as many plant pathogens reside in the soil and only need a splash of water to travel onto plant leaves. Also, densely foliaged plants trap warm, moist air in their canopies, creating a perfect environment for disease to flourish. Letting the plant canopy “breathe” through pruning prevents that negative environment from forming! Second, correct pruning of “suckers” (extra growth points that can develop into shoots) helps tomato plants develop optimum yield and fruit quality. By removing suckers, more water, nutrients, airflow, and light are directed to the main stems, where the majority of tomato fruit production occurs. Failing to remove suckers (especially on indeterminate varieties) can result in reduced yields, increased disease, and generally messy plants!
With the reasons for pruning tomatoes established, the next step is learning exactly what to prune and how to do it in a sanitary matter.
- Get rid of any foliage that could encounter the soil, generally all leaves occurring on the lower 12-16″ of the plant. All kinds of nasty tomato destroying diseases, like Early Blight and Bacterial Leaf Spot, reside in the soil and are just waiting to be splashed onto your plants – don’t let that happen.
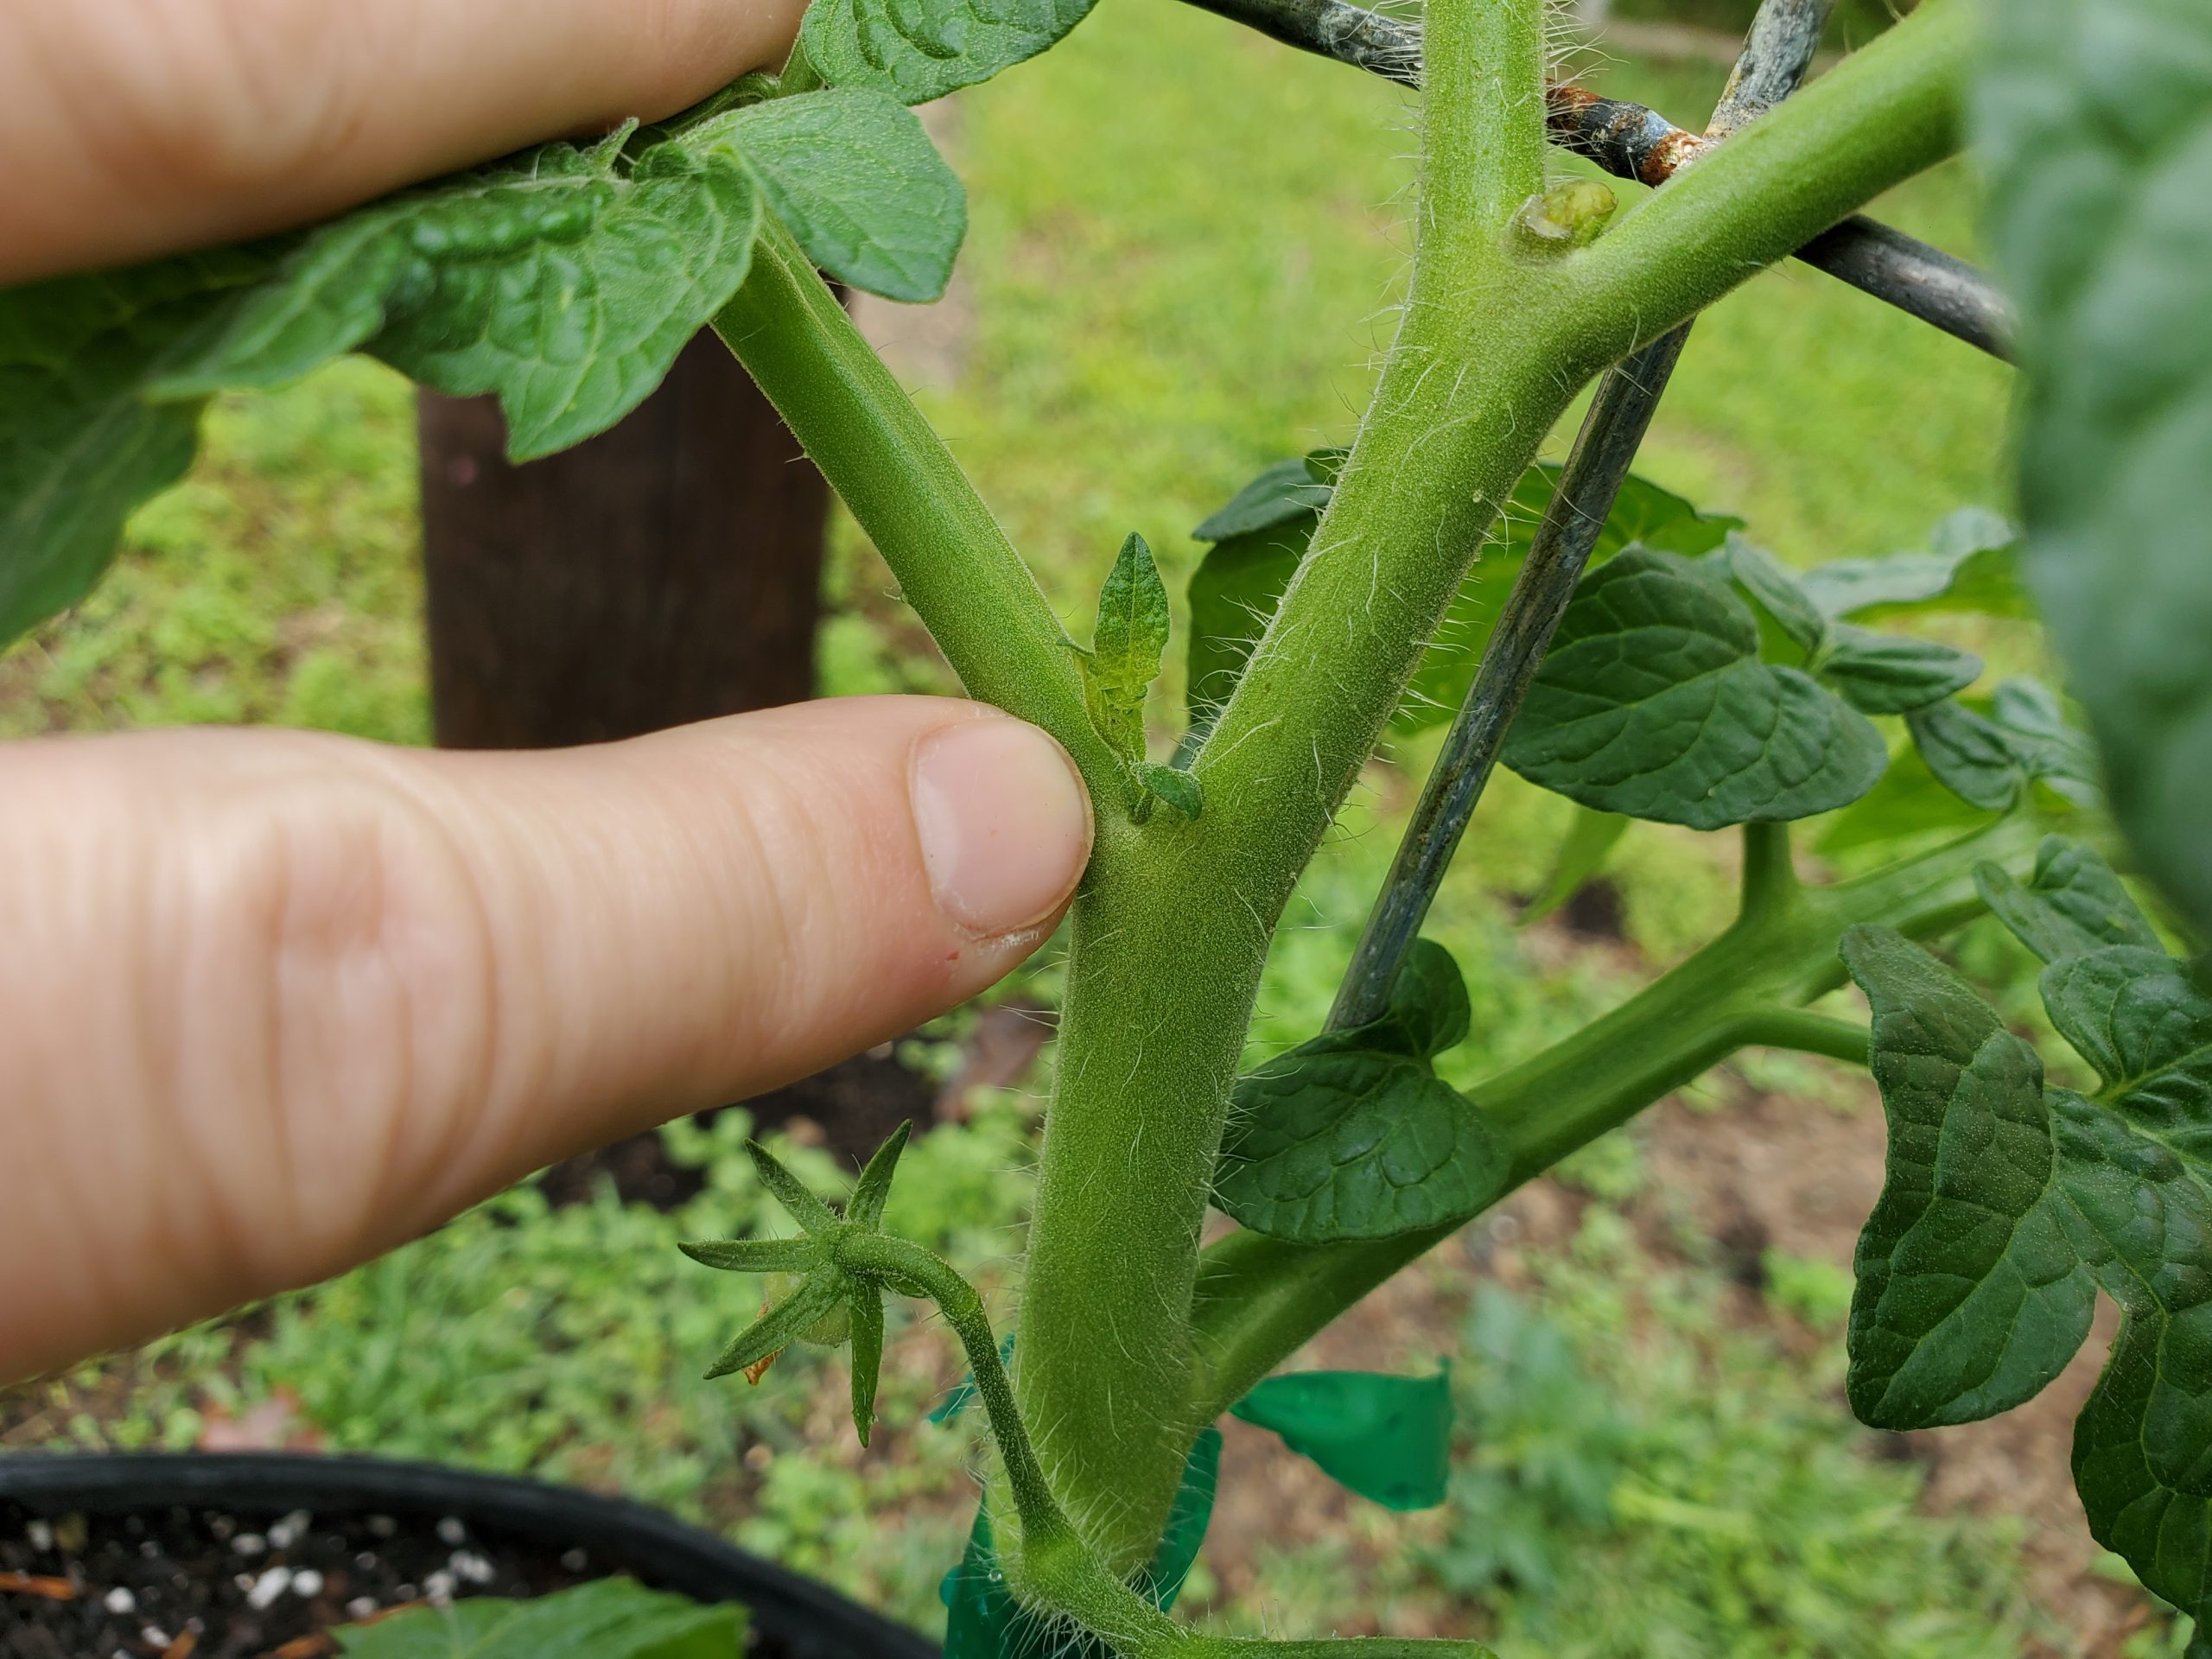
- Determine how many primary shoots you want your plant to have. Leave enough lower suckers to achieve that number (generally just one, two, or three as more than 3 primary stems gets hard to manage), and prune or pinch out all the rest. To prevent stress from pruning, be diligent in removing suckers when they are still small, 2” or less.
- Always clean and disinfect your pruners before making a cut on a tomato plant. This is best accomplished by rinsing the blades with warm soapy water, drying, and following with by a quick alcohol spray. A 10% bleach solution will also work, but if not thoroughly rinsed after, bleach can corrode pruner blades and other working parts. If you make cuts on a plant that appears diseased, repeat the sanitizing process before you begin pruning another plant as “dirty” pruners are an easy way to spread pathogens in the garden.
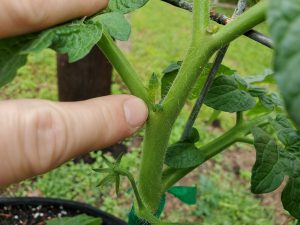
Developing vegetative “sucker” that will need to be removed. Photo courtesy of Daniel Leonard.
While tomatoes are indeed a difficult vegetable to grow, learning to prune them correctly will greatly help to make this a successful season. If you just keep leaves off the ground, suckers pinched, and pruners cleaned, you’ll be well on your way to less disease, prettier plants, and more tomatoes to pick. For more information on growing tomatoes and any other horticultural topic, please contact your local UF/IFAS County Extension office. Happy Gardening!
by Mary Salinas | Mar 18, 2021
The weather is warmer and plans and planting for spring vegetable gardens are in full swing. Last week many vegetable gardening topics were addressed in our Gardening in the Panhandle LIVE program. Here are all the links for all the topics we discussed. A recording of last week’s webinar can be found at: https://youtu.be/oJRM3g4lM78
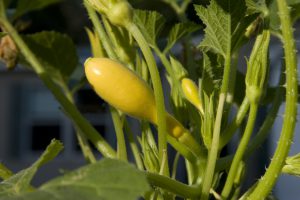
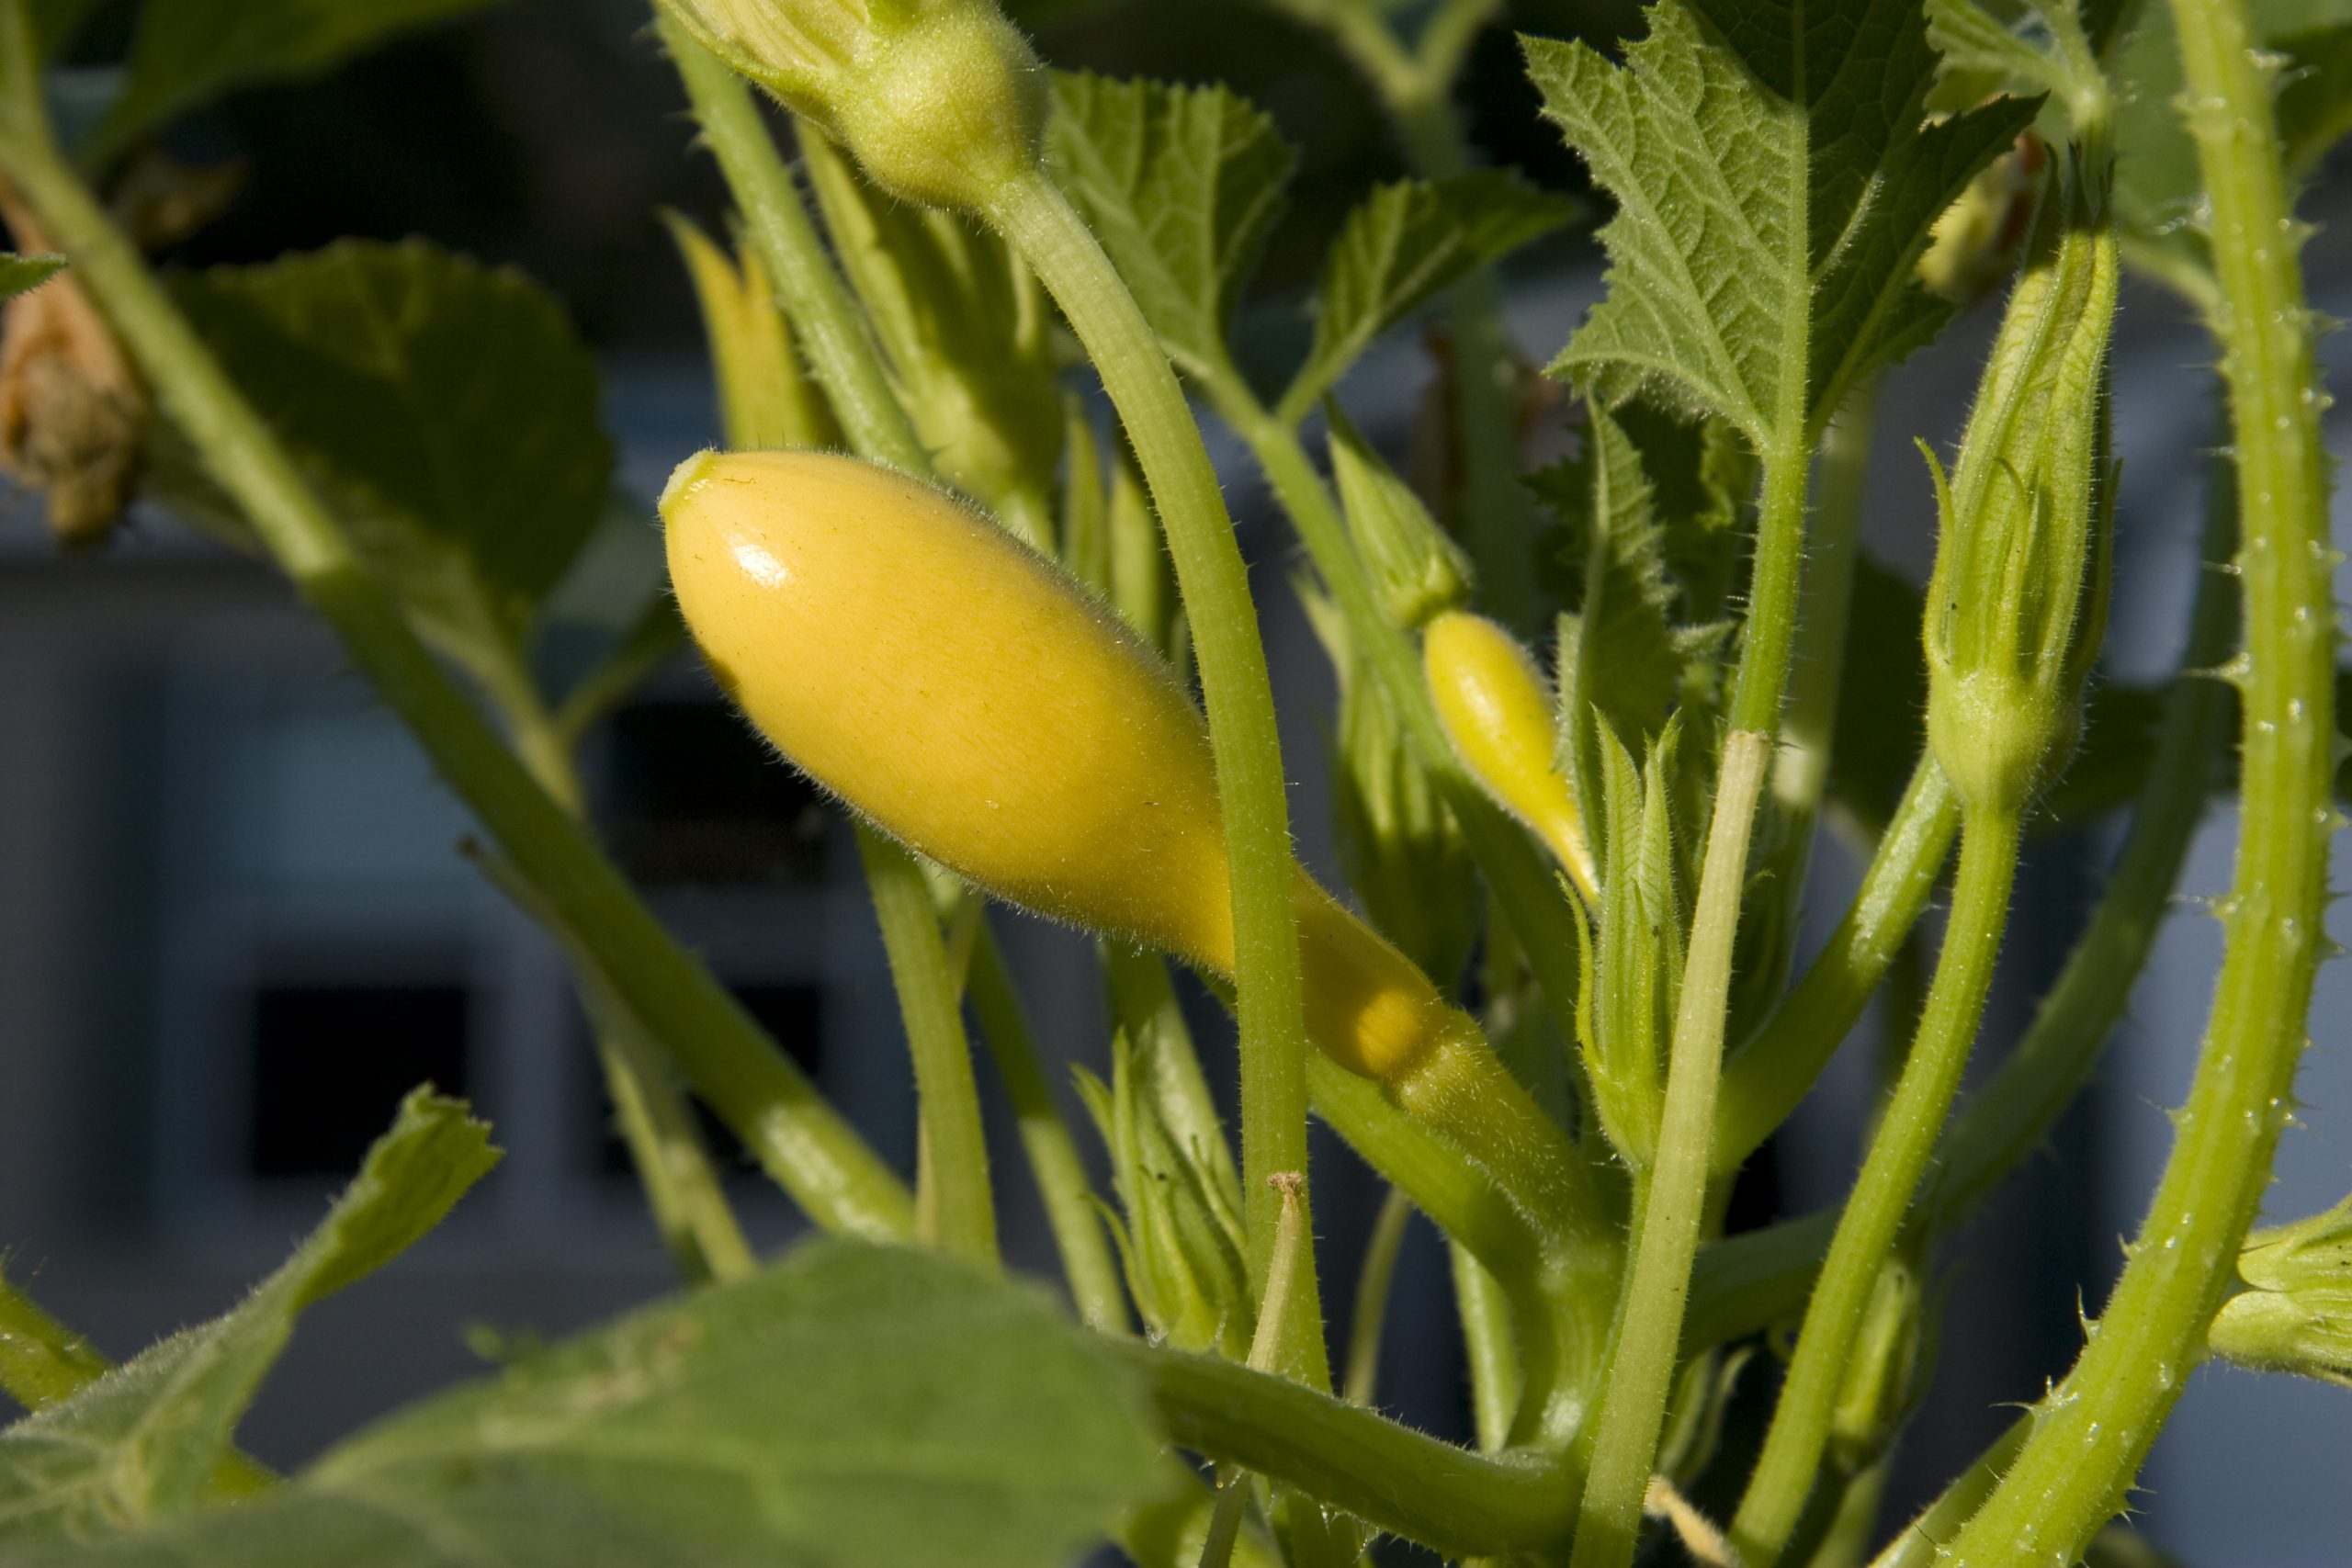
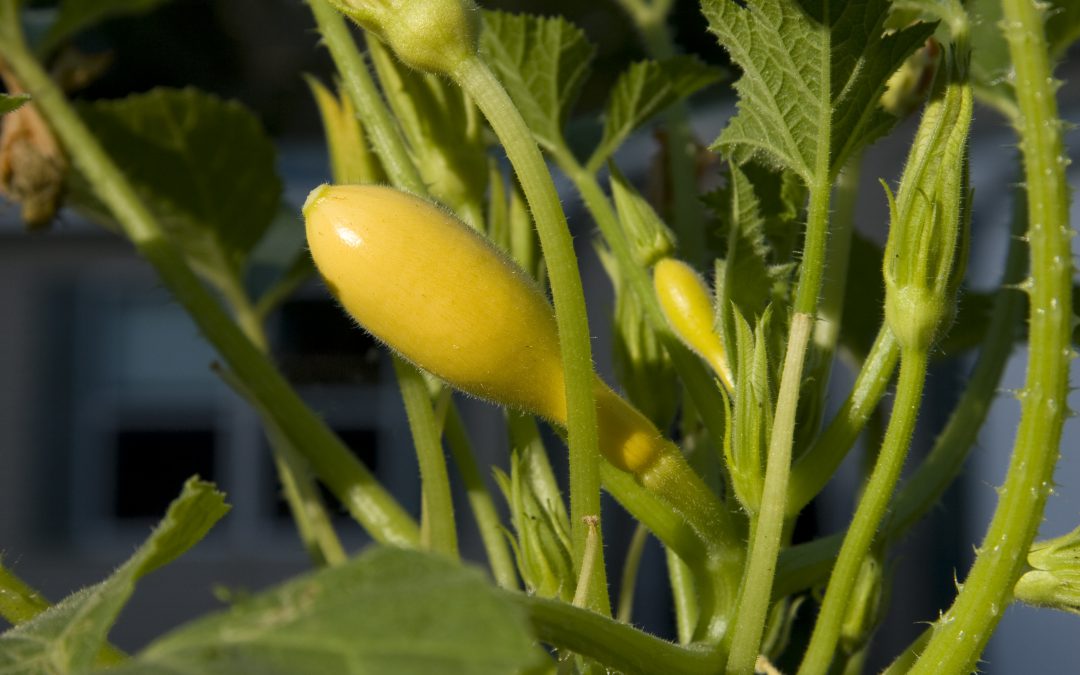
Home grown Squash. Gardening, vegetables. UF/IFAS Photo by Tom Wright.
Getting Started
The place to start is with UF’s ever popular and comprehensive Florida Vegetable Gardening Guide https://edis.ifas.ufl.edu/pdffiles/VH/VH02100.pdf
Many viewers expressed interest in natural methods of raising their crops. Take a look at Organic Vegetable Gardening in Florida https://edis.ifas.ufl.edu/pdffiles/HS/HS121500.pdf
The Square Foot Vegetable Planting Guide for Northwest Florida helps plan the layout of your garden https://sfyl.ifas.ufl.edu/media/sfylifasufledu/leon/docs/pdfs/Vegetable-Square-Foot-Planting-Guide-for-Northwest-Florida-mcj2020.pdf
Maybe you would like the convenience of starting with a fresh clean soil. Gardening in Raised Beds can assist you. https://edis.ifas.ufl.edu/ep472 Also see Gardening Solutions Raised Beds: Benefits and Maintenance https://gardeningsolutions.ifas.ufl.edu/design/types-of-gardens/raised-beds.html
Here is a guide to Fertilizing the Garden https://edis.ifas.ufl.edu/vh025
The Florida Panhandle Planting Guide will help you decide what to plant and when: https://www.facebook.com/SRCExtension/posts/4464210263604274
The Ever-Popular Tomato
To start your journey to the best tomatoes, start with UF/IFAS Gardening Solutions – Tomatoes https://gardeningsolutions.ifas.ufl.edu/plants/edibles/vegetables/tomatoes.html
If you are looking to grow in containers: https://sfyl.ifas.ufl.edu/media/sfylifasufledu/leon/docs/pdfs/Container-Gardening-Spacing-Varieties-UF-IFAS-mcj2020.pdf
Vegetable grafting is gaining in popularity, so if interested, look at this Techniques for Melon Grafting: https://edis.ifas.ufl.edu/hs1257
Blossom end rot occurs when irrigation is irregular and the calcium in the soil does not get carried to the developing fruit. The U-Scout program has a great description of this common problem: https://plantpath.ifas.ufl.edu/u-scout/tomato/blossom-end-rot.html
Our moderators talked about some of their favorite tomato varieties. Josh Freeman is partial to Amelia, a good slicing tomato. Matt Lollar shared some of the best tomato varieties for sauce: Plum/Roma types like BHN 685, Daytona, Mariana, Picus, Supremo and Tachi. For cherry tomatoes, Sheila Dunning recommended Sweet 100 and Juliette.
Whatever variety you choose, Josh says to pick when it starts changing color at the blossom end and bring it indoors to ripen away from pests.
Garden Pest Management
Let’s start with an underground pest. For those of you gardening in the native soil, very tiny roundworms can be a problem. Nematode Management in the Vegetable Garden can get you started: https://edis.ifas.ufl.edu/pdffiles/NG/NG00500.pdf
Leaffooted bugs are quite a nuisance going after the fruit. Here is how to control them: http://extension.msstate.edu/newsletters/bug%E2%80%99s-eye-view/2018/leaffooted-bugs-vol-4-no-24
Cutworms are another frustration. Learn about them here: https://nwdistrict.ifas.ufl.edu/hort/2020/02/27/cutworms-the-moonlit-garden-vandals/
Maybe your tomatoes have gotten eaten up by hornworms. https://gardeningsolutions.ifas.ufl.edu/care/pests-and-diseases/pests/hornworm-caterpillars.html
There are beneficial creatures helping to control the pest insects. Learn to recognize and conserve them and make for a healthier environment. Natural Enemies and Biological Control: https://edis.ifas.ufl.edu/pdffiles/IN/IN12000.pdf
If the beneficials are not numerous enough to control your pests, maybe a natural approach to pest control can help. Natural Products for Managing Landscape and Garden Pests in Florida: https://edis.ifas.ufl.edu/in197
Fungal and bacterial problems can also plague the garden. Go to Integrated Disease Management for Vegetable Crops in Florida for answers: https://edis.ifas.ufl.edu/pdffiles/PP/PP11100.pdf
Get control of weeds early and consult Controlling Weeds by Cultivating & Mulching https://hgic.clemson.edu/factsheet/controlling-weeds-by-cultivating-mulching/
Companion planting is a strategy that has been around for ages and for good reason: https://www.almanac.com/companion-planting-chart-vegetables Some good flowering additions to the garden that Sheila talked about are bee balm, calendula, marigold, nasturtiums, chives, and parsley.
And Some Miscellaneous Topics…
Peppers are another popular crop. Get some questions answered here: https://aggie-horticulture.tamu.edu/archives/parsons/vegetables/pepper.html
When can we plant spinach in Northeast Florida? http://blogs.ifas.ufl.edu/nassauco/2017/07/15/q-can-plant-spinach-northeast-florida/
Figs are a great fruit for northwest Florida. Get started here: https://edis.ifas.ufl.edu/pdffiles/MG/MG21400.pdf and with this https://aggie-horticulture.tamu.edu/extension/homefruit/fig/fig.html
by Matt Lollar | Mar 4, 2021
Plant with Purpose: Written by Rachel Mathes
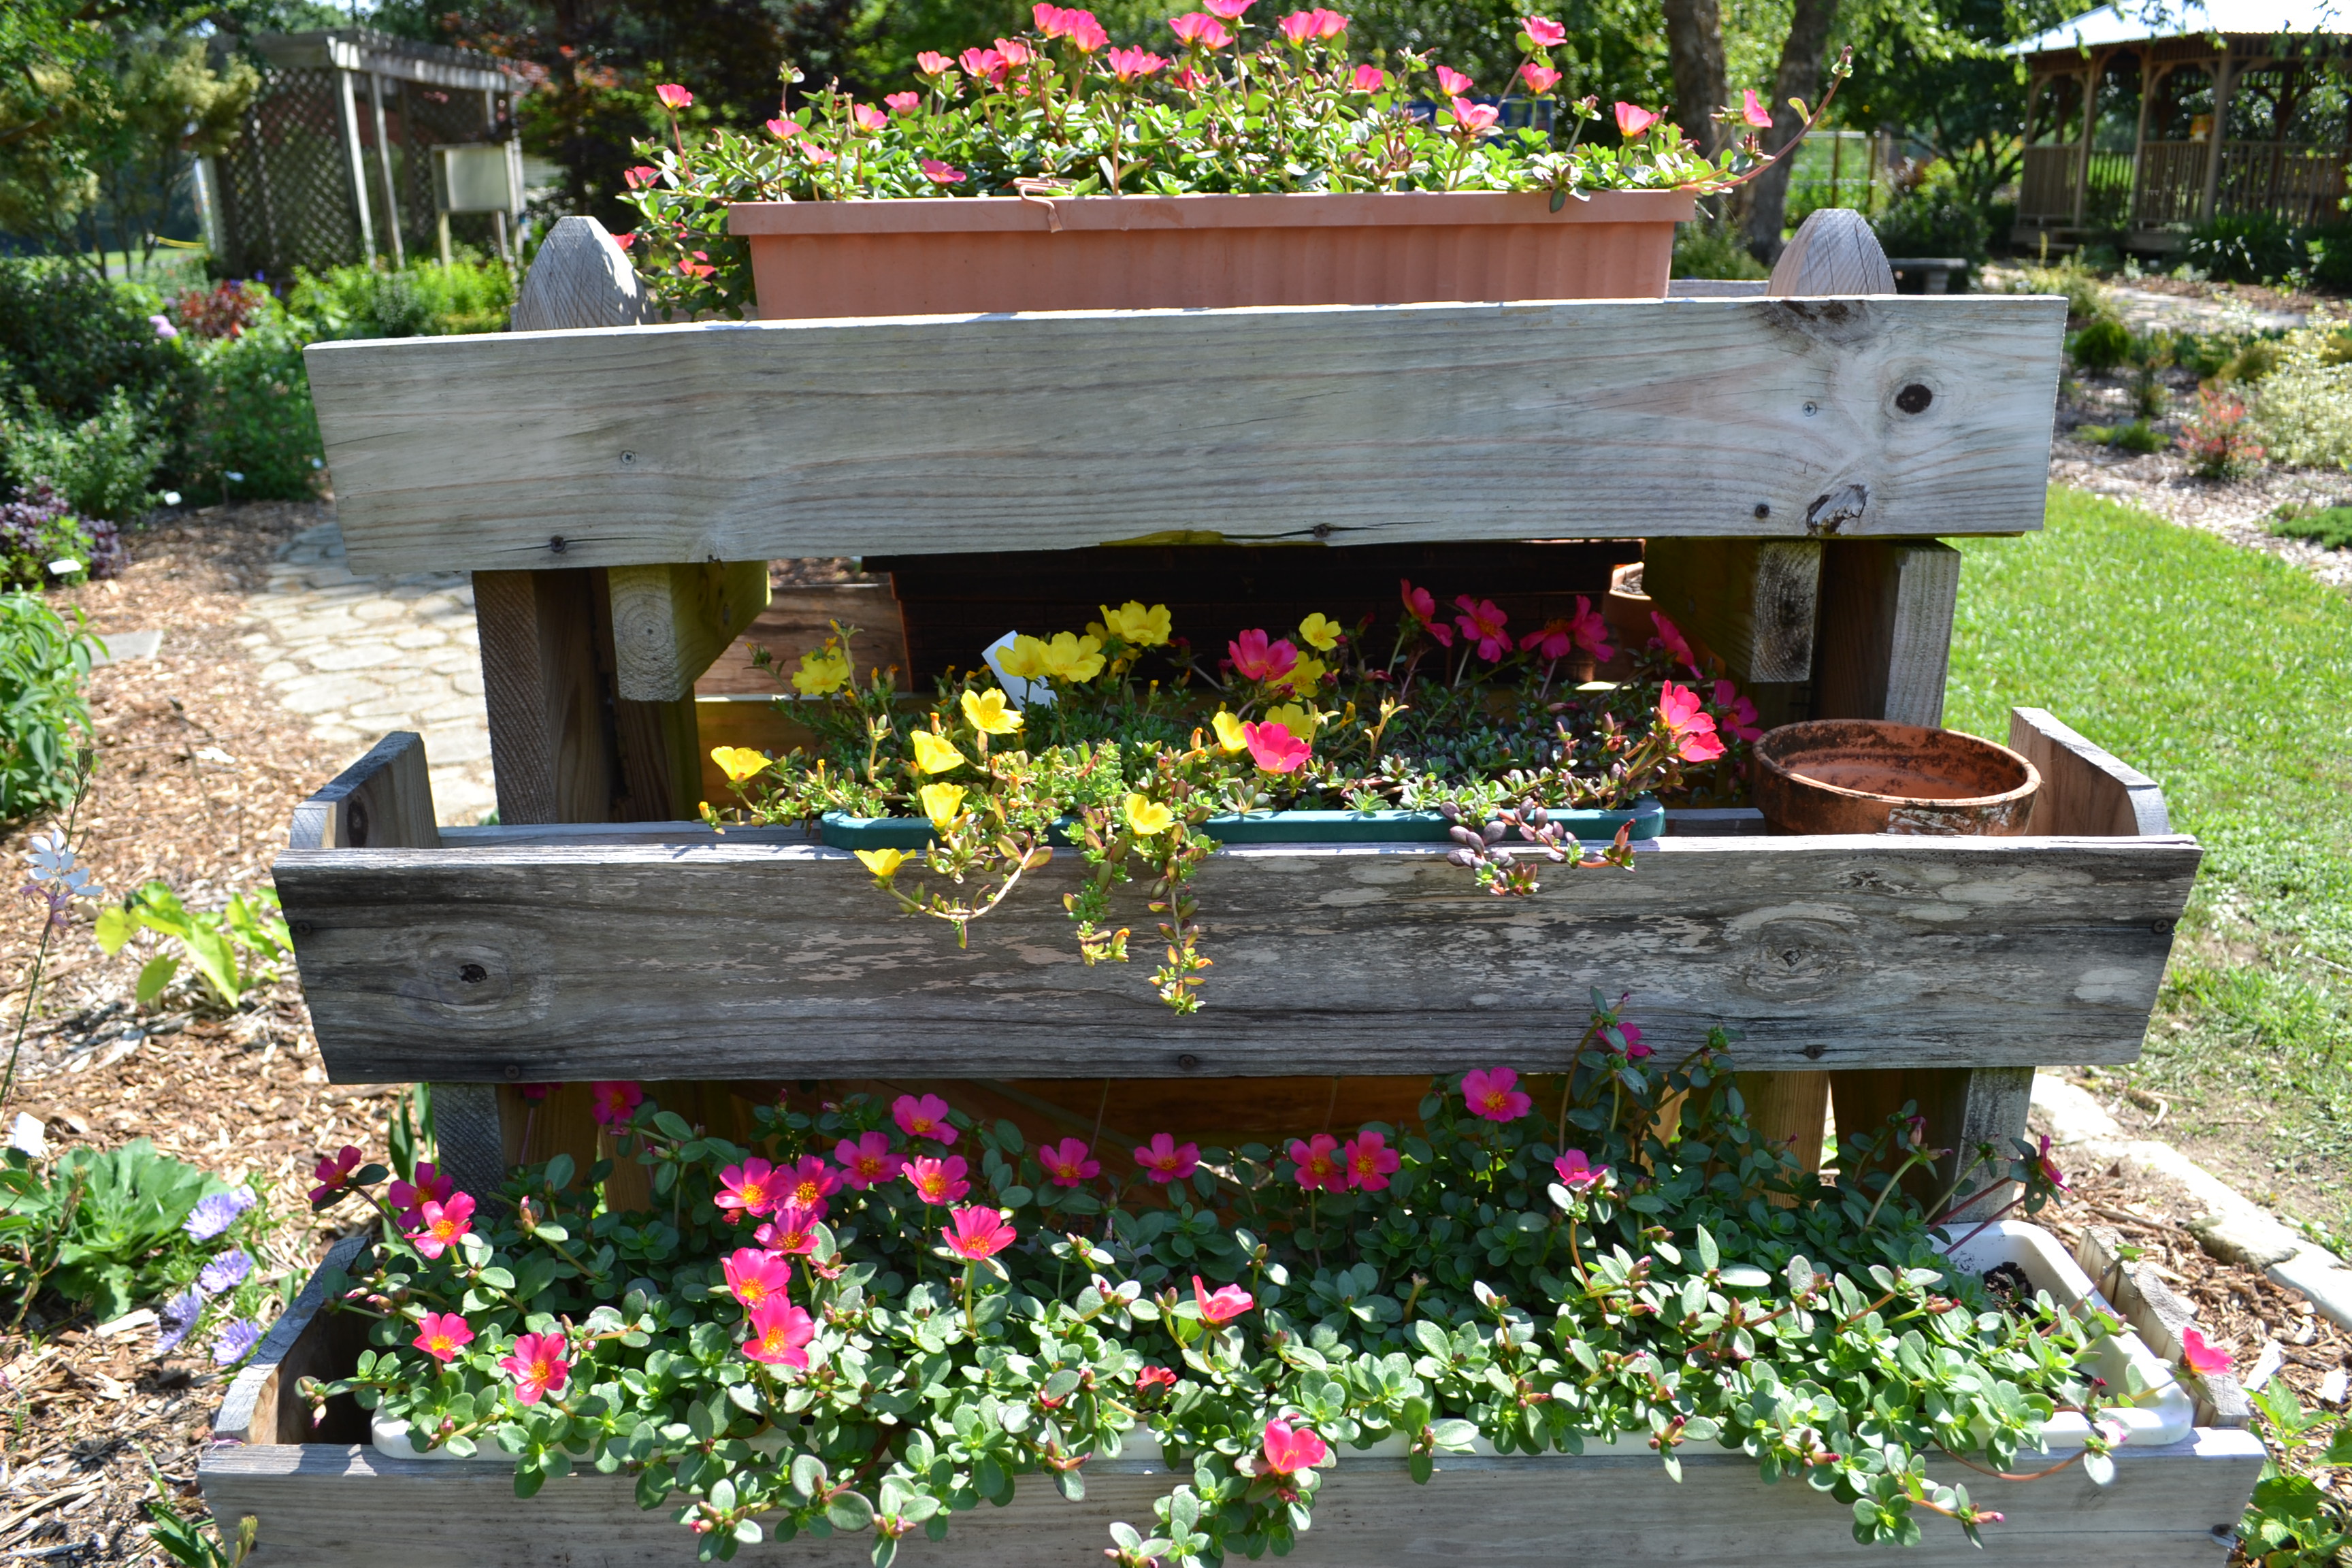
Last spring, we were all ready to host another Open House and Plant Sale on Mother’s Day weekend. When the realities of the pandemic became clear, we canceled the event for the safety of everyone involved. We typically have more than 500 visitors and dozens of volunteers on site. This year we are happy to announce we have adapted our annual fundraiser to a monthly learning and growing opportunity for the whole community.
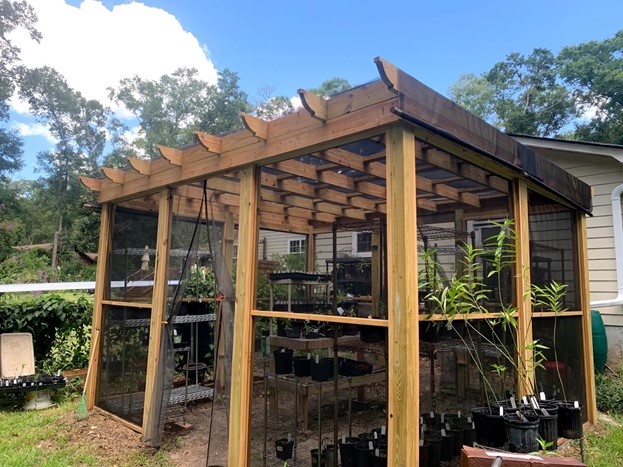
Master Gardener Volunteer Jeanne Breland is growing native milkweed in her monarch exclusion fortress for a Plant with Purpose talk and sale in the spring. Previous years’ milkweed have been eaten by monarch caterpillars before the sale so Jeanne has built her fortress to get the best results. Photo by Rachel Mathes
Our Master Gardener Volunteers will be teaching Thursday evening classes on particular plant groups throughout the year in our new series: Plant with Purpose. Topics will range from milkweed to shade plants to vegetables and herbs for different seasons. Attendees can attend the talks for free and grow along with us with the purchase of a box. These boxes are modeled after community supported agriculture (CSA) boxes you can purchase from local farms. Buyers will get a variety of the plants discussed in the plant lesson that week. For example, in our first event, Growing a Pizza Garden, we will have two tomato plants, two pepper plants, and one basil plant available for $20. Throughout the year, prices and number of plants will vary depending on the topic.
We hope with this new model of presentations and plant sales will enable us to remain Covid-safe while still bringing horticulture education to the community. Classes will be held on Thursday evenings from 6-7 pm via Zoom. Register on our Eventbrite to get the Zoom link emailed to you before each talk. Plant pick up will be the following Saturday from 10 am to noon. Master Gardener Volunteers will load up your plant box in a contact-free drive thru at the UF/IFAS Leon County Extension Office at 615 Paul Russell Rd.
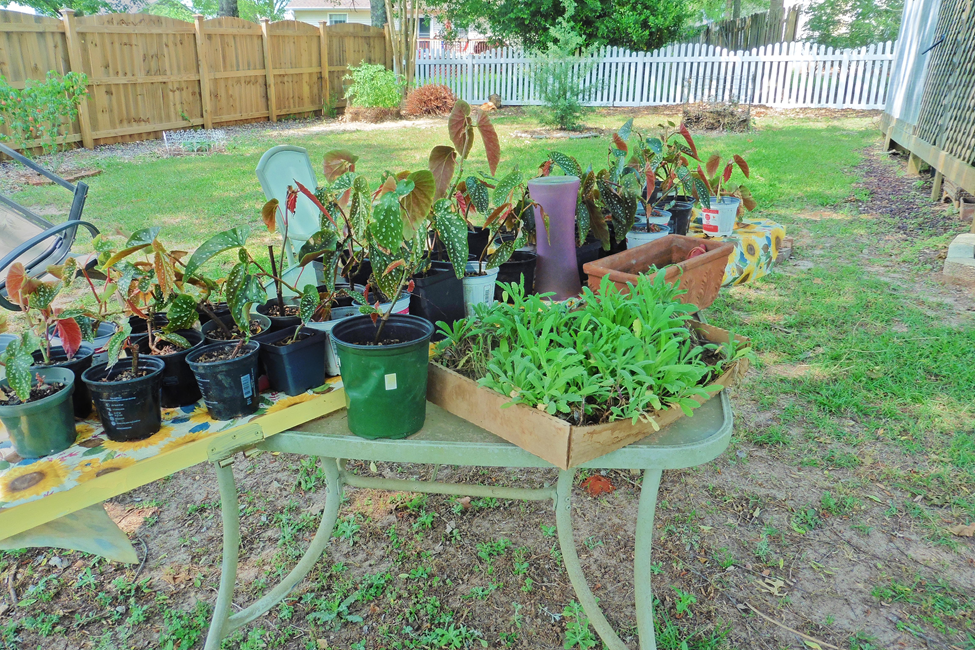
Propagation of angel wing begonia and other plants by Joan Peloso, Master Gardener Volunteer.
Master Gardener Volunteers are already growing plants for you to purchase throughout the year. Landscape plants, herbs, vegetables, shrubs and even trees will be available later in the year. Funds raised from this series help fund our Horticulture programming. Some notable programs that will benefit from Plant with Purpose include our Demonstration Garden, 4-H Horticulture Club, the Veterans’ Garden Group at the VA Tallahassee Outpatient Clinic, and various school gardens we help support throughout Leon County.
In the last year, we have adapted many of our programs to meet virtually, and even created new ones like our Wednesday Webinar series where we explore different horticulture topics twice a month with guest speakers from around the Panhandle. While we still can’t meet in person to get down in the dirt with all of our community programs, we hope that the Plant with Purpose series will help fill the hole left by our cancelled Open House and Plant Sale. Join us for the first installment of Plant with Purpose on Thursday March 18th from 6-7pm. Pick up for purchased plant boxes will be Saturday March 20th from 10am-noon.
To register for this event and other events at the Leon County Extension Office, please visit the Leon County Extension Office Events Registration Page.
by Matthew Orwat | Feb 25, 2021
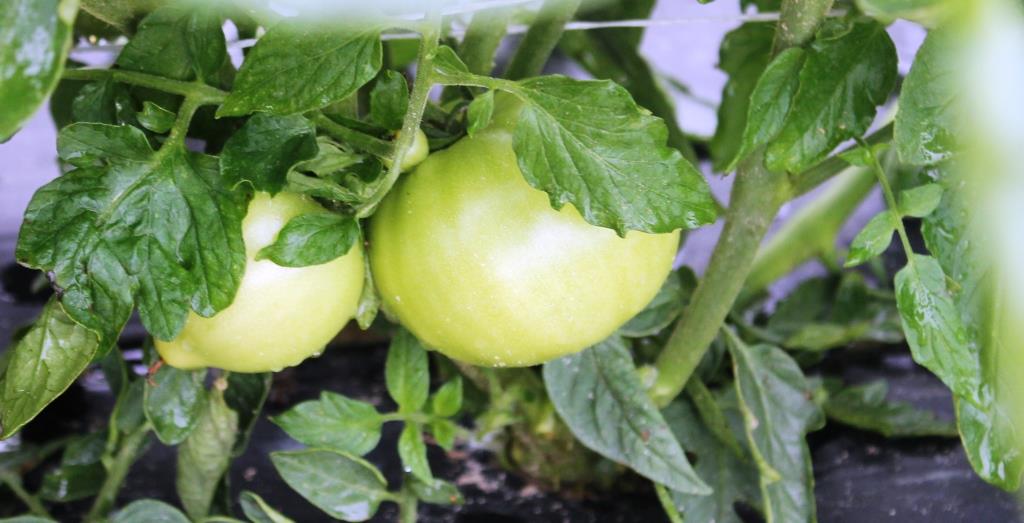
Tomatoes ripening on the vine – Image Credit Matthew Orwat UF/IFAS Extension
It is late-February, so the spring growing season is just around the corner. Now is the time to be thinking about which tasty tomatoes you want to plant in your home garden! Although tomatoes are a favorite kitchen staple, they prove challenging to grow in the Florida Panhandle climate.
While many tomato diseases can kill plants, damage fruit, and reduce yields, genetic resistance or tolerance to select diseases exist. The following are three of the most common diseases and viruses home gardeners face, for which resistant and tolerant varieties exist.
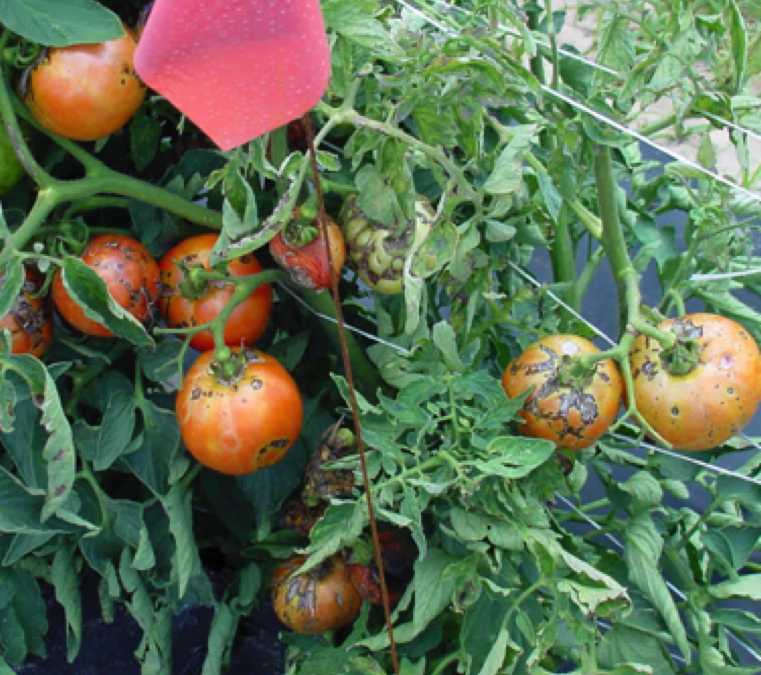
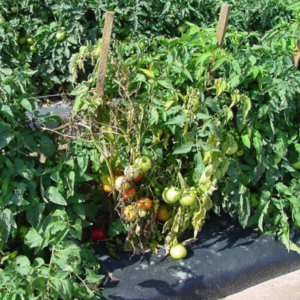
Tomato spotted wilt affects tomatoes, and numerous other vegetables, ornamentals, field crops and weeds. The disease can cause significant yield losses of tomato. Image Credit UF/IFAS Plant Pathology UScout Site
Tomato Spotted Wilt (TSW) is a viral disease which is transmitted by thrips, a species of insect that is very small and not always visible when checking the garden for insect pests. They love to feed on the sugary juices of the tomato flowers, and while feeding, they have the opportunity to transmit the virus through their piercing and sucking mouth parts. Lots of different symptoms may occur with TSW. Initially growers will notice light or dark brown spots on leaves of affected tomatoes, next wilting or stunting will occur, along with brown or purple streaks on the stems. Finally, fruit will exhibit unsightly brown rings throughout. The good news is that home gardeners can get a head start on this disease by planting resistant cultivars. When shopping for seed or transplants, growers should look for plants listed with the codes TSW or TSWV, because these have demonstrated resistance to Tomato Spotted Wilt Virus.
Another viral disease often found in the tomato garden is Tomato Yellow Leaf Curl (TYLC) Virus. TYLC first appeared in Miami in 1997 and was brought to Florida by infected whiteflies. Much like TSW, TYLC is spread from plant to plant by feeding whiteflies. As the name indicates, TYLC symptoms include curled leaves and stunted growth. Infected plants produce little to no fruit. Strategies to reduce the possibility of virus transmission to the garden include reducing the population of weedy plants, which may harbor whiteflies. Fortunately, resistant cultivars are available in plant catalogs, and are denoted by TYLC to indicate resistance.
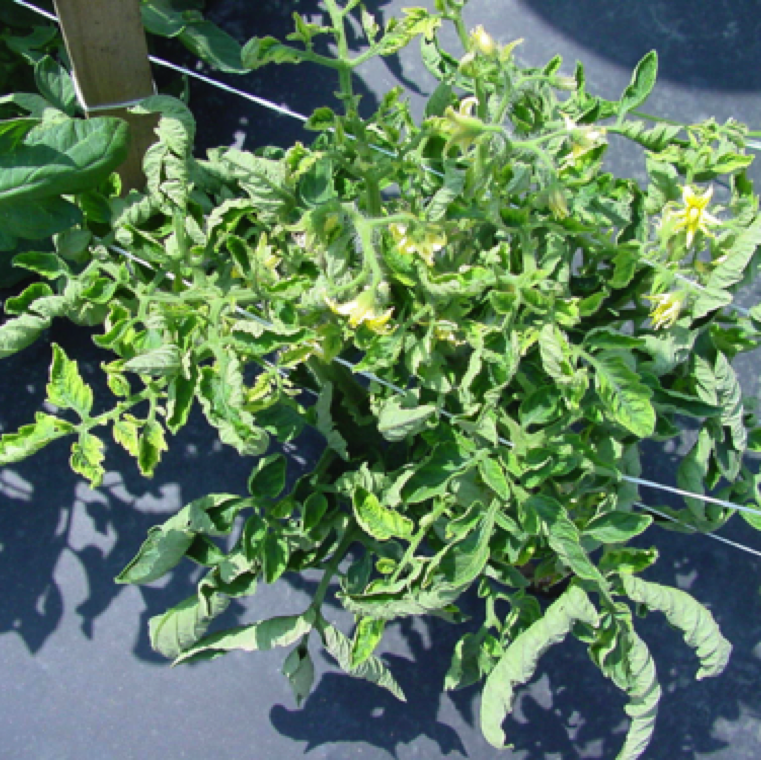
Spread of TYLC is by the feeding of TYLCV infected adult whiteflies. Mechanical or seed transmission is not known to occur. Upward curling and yellowing of the leaves is an early symptom. Credit: UF/IFAS Plant Pathology UScout Site
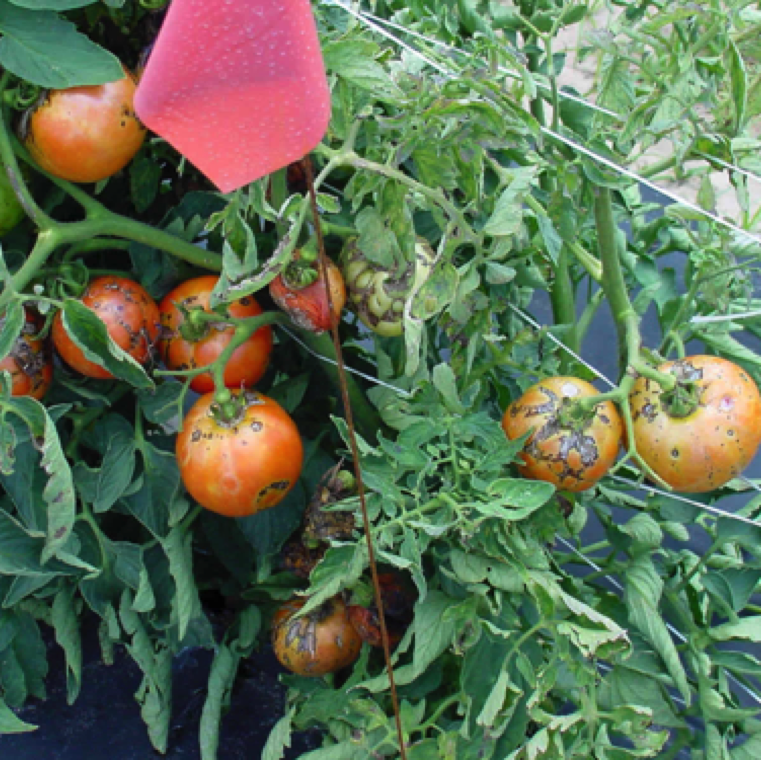
Blighting of leaves and wilting of part or entire plant can expose fruits to sunscalding thereby further affecting yield of affected plants in production. Credit: UF/IFAS Plant Pathology UScout Site
Fusarium Wilt is one of the oldest diseases to affect tomatoes in the state of Florida and is caused by the fungal pathogen Fusarium oxysporum f.sp. lycopersici races 1, 2, or 3. This pathogen is often present in regional soils and moved by wind. Once it enters the roots of tomato plants, fusarium wilt proliferates and clogs the vascular system, much like a clog in the plumbing of a building. Thus, the primary symptom is the wilting of the plant, which will first be noticeable on hot days, despite adequate irritation. Once infected, there is no cure, and infected plants should be removed and destroyed to stop the spread. The good news is that resistant cultivars are available to the various fusarium races. They are usually denoted as F-R 1, 2, or 3 in seed catalogs. Additionally, look for plants labeled VFN. These cultivars are resistant to a different kind of wilt, called verticillium, as well as fusarium and nematodes.
Fortunately, the UF / IFAS publication “Tomato Varieties for Florida—Florida “Red Rounds,” Plums, Cherries, Grapes, and Heirlooms” by Monica Ozores-Hampton and Gene McAvoy has provided us with a handy chart of tomato varieties with disease resistance. Codes in the columns indicate disease resistance to specific pathogens. While there is no single tomato variety resistant to all possible disease pathogens, planting different varieties with several different types of resistance will allow growers to hedge against attack by a number of potential disease problems. Some of the more common disease resistant tomato varieties planted in this area are ‘Quincy’, ‘Bella Rosa’, ‘Amelia’, ‘Tasti-Lee’, ‘BHN 602’, and ‘Volante’.
For a further look at the various diseases of tomato, the EDIS publication “A Series on Diseases in the Florida Vegetable Garden: TOMATO” offers more detail. Another resource UF/IFAS offers for disease diagnosis is the NFREC U-Scout website. U-Scout provides information on more than 40 potential disease issues in tomato. Additionally, any plant disease can be diagnosed through your County Extension Office or by submitting samples to the Plant Pathology Clinic, at the North Florida Research and Education Center, for only $30/sample for basic services.
by Daniel J. Leonard | Sep 28, 2020
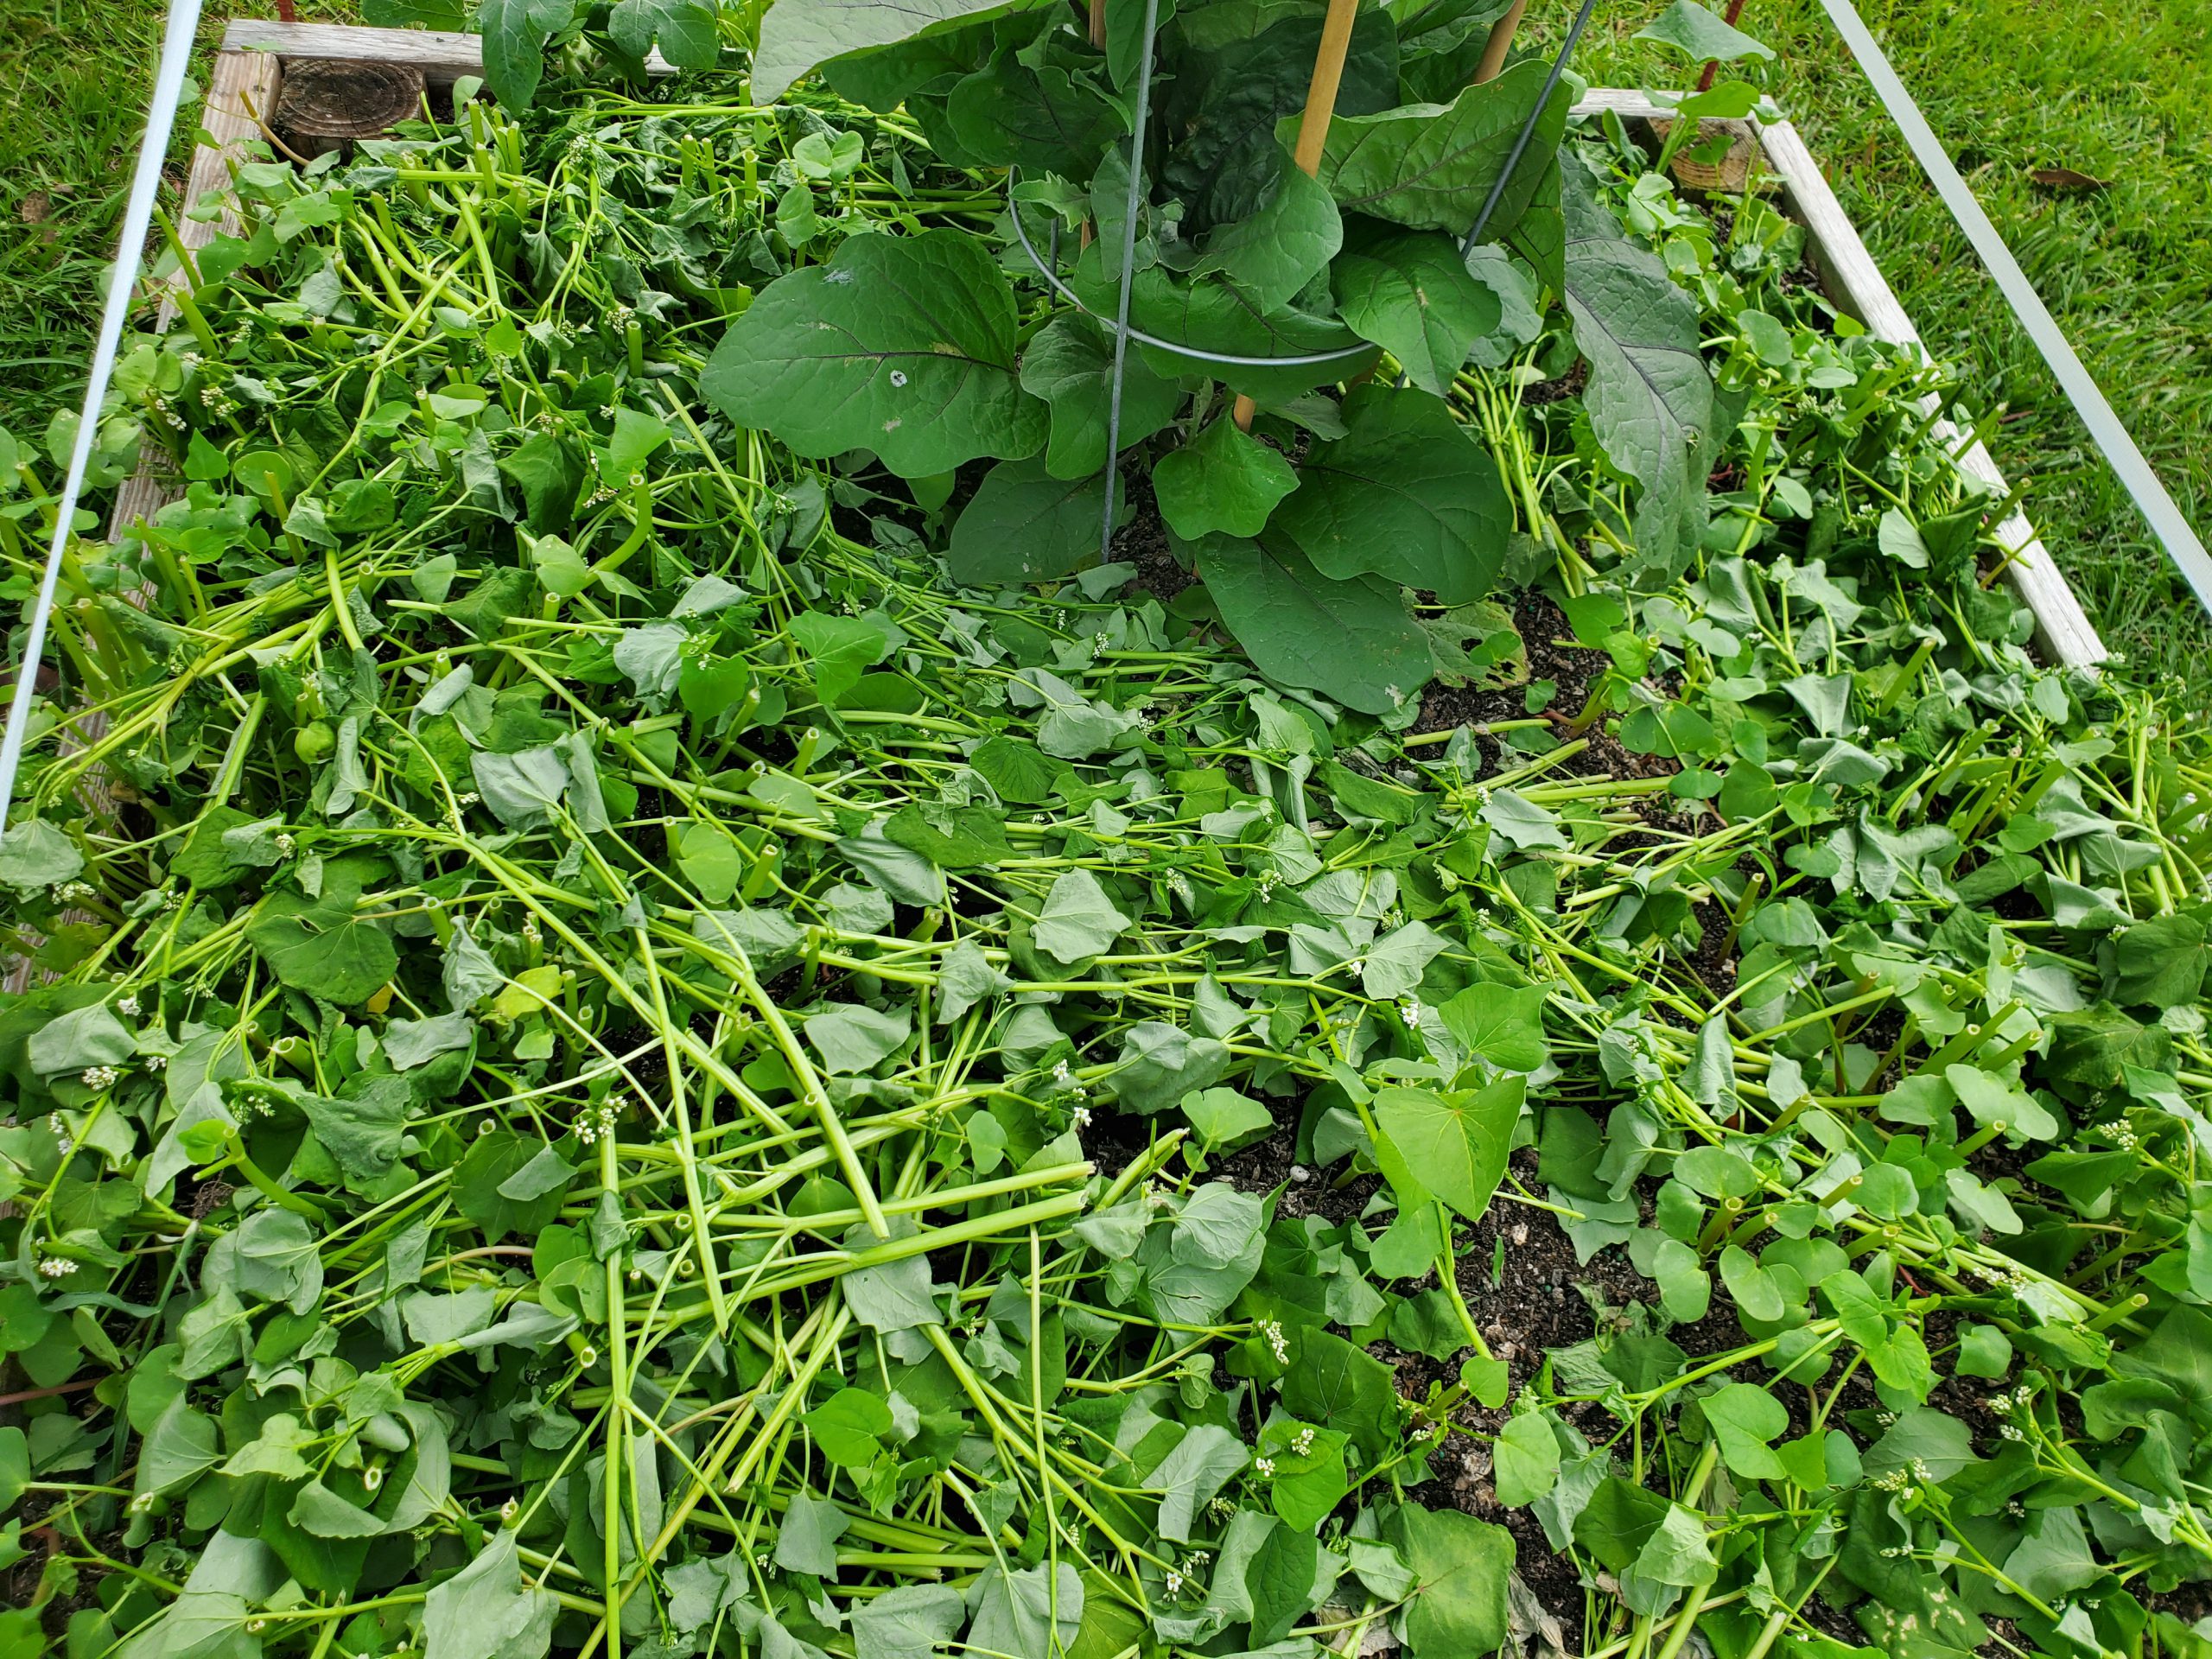
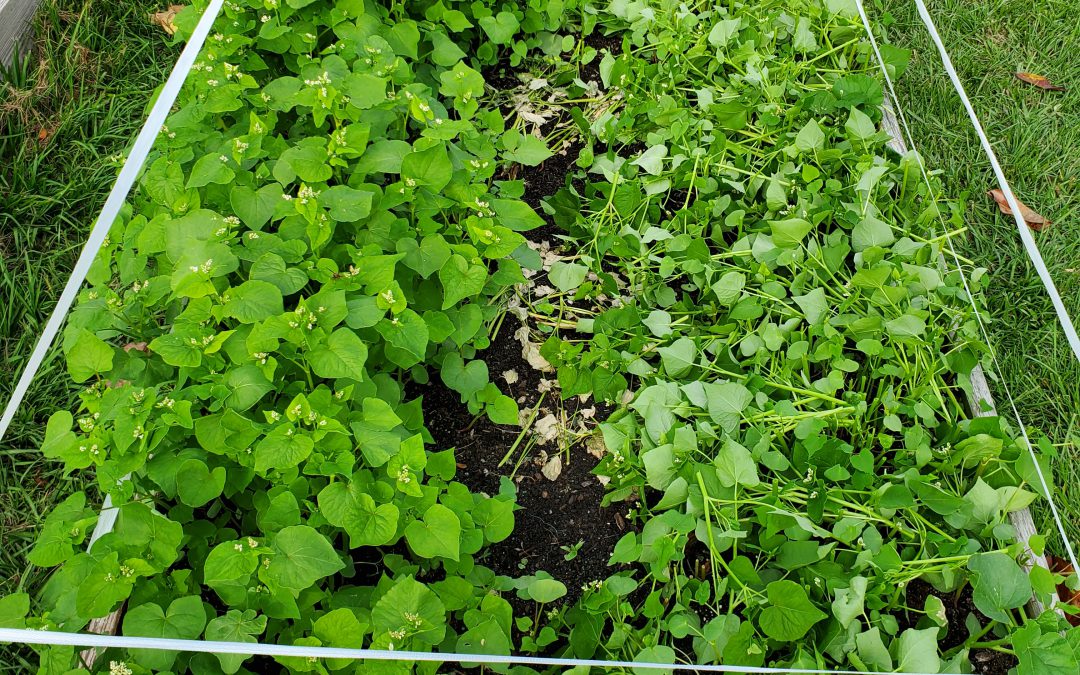
2020 has not been the most pleasant year in many ways. However, one positive experience I’ve had in my raised bed vegetable garden has been the use of a cover crop, Buckwheat (Fagopyrum esculentum)! Use of cover crops, a catch-all term for many species of plants used to “cover” field soil during fallow periods, became popular in agriculture over the last century as a method to protect and build soil in response to the massive wind erosion and cropland degradation event of the 1930s, the Dust Bowl. While wind erosion isn’t a big issue in raised bed gardens, cover crops, like Buckwheat, offer many other services to gardeners:
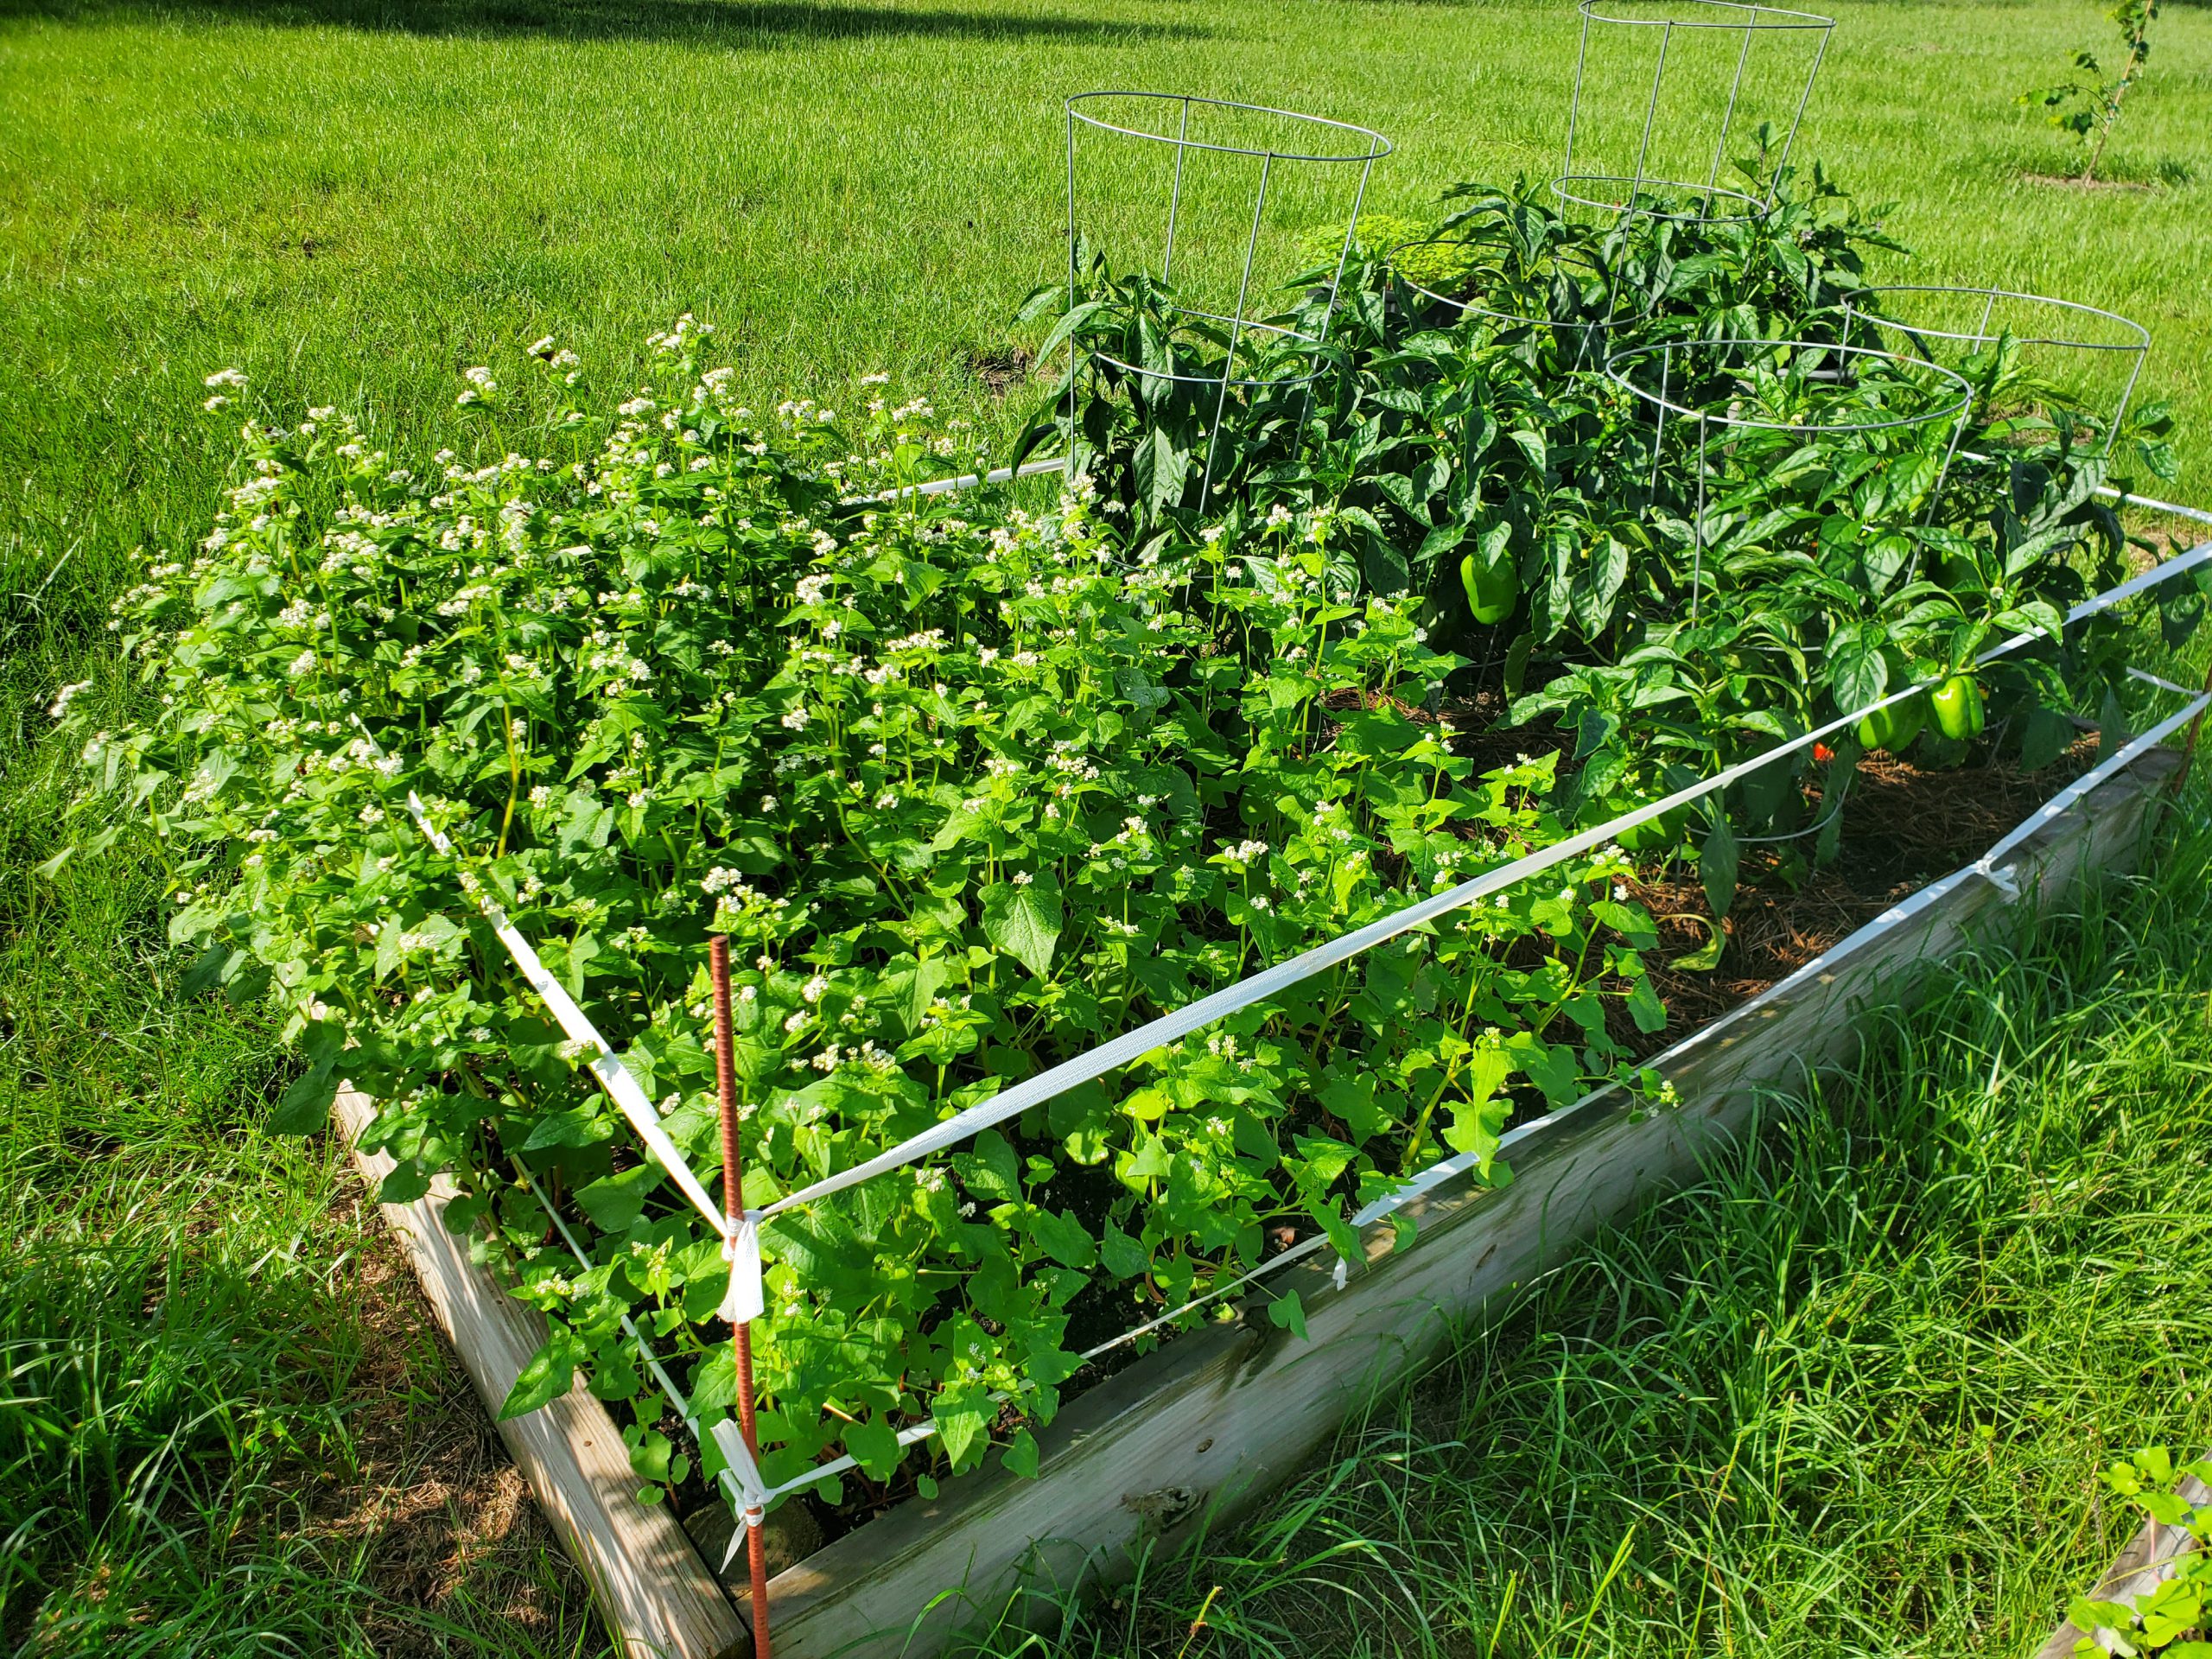
Buckwheat in flower behind summer squash. Photo courtesy of Daniel Leonard.
- Covers, like Buckwheat, provide valuable weed control by shading out the competition. Even after termination (the cutting down or otherwise killing of the cover crop plants and letting them decompose back into the soil as a mulch), Buckwheat continues to keep weeds away, like pinestraw in your landscape.
- Cover crops also build soil. This summer, I noticed that my raised beds didn’t “sink” as much as normal. In fact, I actually gained a little nutrient-rich organic matter! By having the Buckwheat shade the soil and then compost back into it, I mostly avoided the phenomena that causes soils high in organic matter, particularly ones exposed to the sun, to disappear over time due to breakdown by microorganisms.
- Many cover crops are awesome attractors of pollinators and beneficial insects. At any given time while my Buckwheat cover was flowering, I could spot several wasp species, various bees, flies, moths, true bugs, and even a butterfly or two hovering around the tiny white flowers sipping nectar.
- Covers are a lot prettier than bare soil and weeds! Where I would normally just have either exposed black compost or a healthy weed population to gaze upon, Buckwheat provided a quick bright green color blast that then became covered with non-stop white flowers. I’ll take that over bare soil any day.
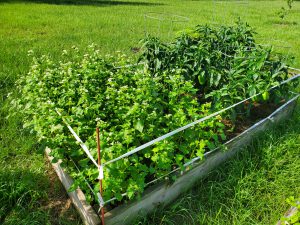
Buckwheat cover before termination (left) and after (right) interplanted with Eggplant. Photo courtesy Daniel Leonard, UF/IFAS Calhoun County Extension.
Now that I’ve convinced you of Buckwheat’s raised bed cover crop merits, let’s talk technical and learn how and when to grow it. Buckwheat seed is easily found and can be bought in nearly any quantity. I bought a one-pound bag online from Johnny’s Selected Seeds for my raised beds, but you can also purchase larger sizes up to 50 lb bags if you have a large area to cover. Buckwheat seed germinates quickly as soon as nights are warmer than 50 degrees F and can be cropped continuously until frost strikes in the fall. A general seeding rate of 2 or 3 lbs/1000 square feet (enough to cover about thirty 4’x8’ raised beds, it goes a long way!) will generate a thick cover. Simply extrapolate this out to 50-80 lbs/acre for larger garden sites. I scattered seeds over the top of my beds at the above rate and covered lightly with garden soil and obtained good results. Unlike other cover crops (I’m looking at you Crimson Clover) Buckwheat is very tolerant of imperfect planting depths. If you plant a little deep, it will generally still come up. A bonus, no additional fertilizer is required to grow a Buckwheat cover in the garden, the leftover nutrients from the previous vegetable crop will normally be sufficient!

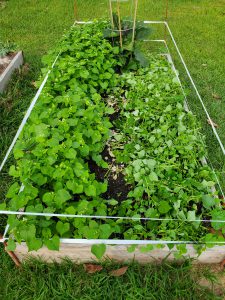
Buckwheat “mulch” after termination. Photo courtesy of Daniel Leonard, UF/IFAS Calhoun County Extension.
Past the usual cover crop benefits, the thing that makes Buckwheat stand out among its peers as a garden cover is its extremely rapid growth and short life span. From seed sowing to termination, a Buckwheat cover is only in the garden for 4-8 weeks, depending on what you want to use it for. After four weeks, you’ll have a quick, thick cover and subsequent mulch once terminated. After eight weeks or so, you’ll realize the plant’s full flowering and beneficial/pollinator insect attracting potential. This lends great flexibility as to when it can be planted. Have your winter greens quit on you but you’re not quite ready to set out tomatoes? Plant a quick Buckwheat cover! Yellow squash wilting in the heat of summer but it’s not quite time yet for the fall garden? Plant a Buckwheat cover and tend it the rest of the summer! Followed spacing guidelines and only planted three Eggplant transplants in a 4’x8’ raised bed and have lots of open space for weeds to grow until the Eggplant fills in? Plant a Buckwheat cover and terminate before it begins to compete with the Eggplant!
If a soil building, weed suppressing, beneficial insect attracting, gorgeous cover crop for those fallow garden spots sounds like something you might like, plant a little Buckwheat! For more information on Buckwheat, cover crops, or any other gardening topic, contact your local UF/IFAS County Extension Office. Happy Gardening!
by Matt Lollar | Aug 24, 2020
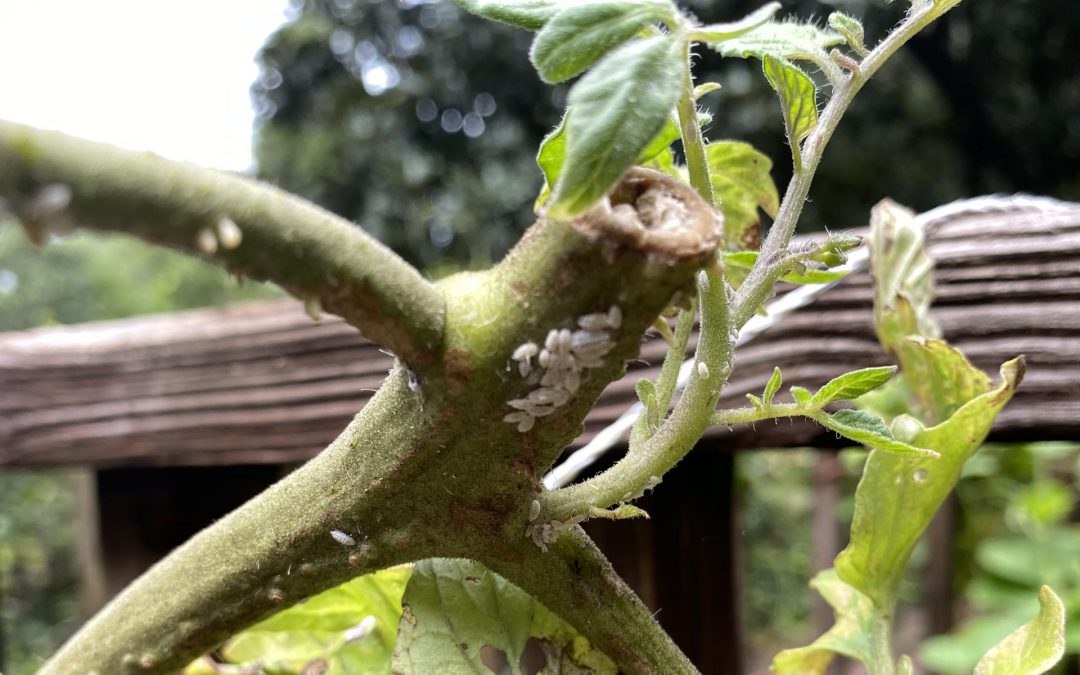
A common question for gardeners at the end of the season is if one should till the soil or use no till practices. Opinions vary regarding this question, even among Extension Agents. However old crops harbor insects, both good and bad. This phenomenon was noticed on some recently cut back tomato plants. The intention was to cut the leftover spring garden tomatoes back to encourage fall production. Instead, a host plant for mealybugs was provided.
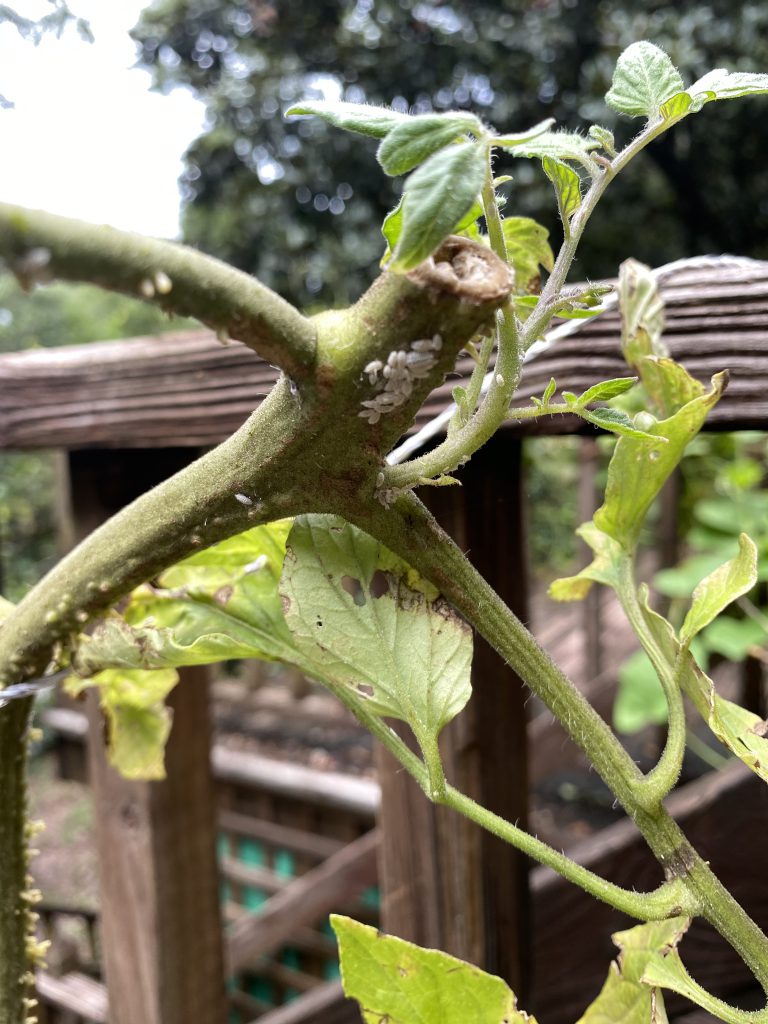
Mealybugs on a tomato plant. Photo Credit: Matt Lollar, University of Florida/IFAS Extension – Santa Rosa County
Mealybugs are soft-bodied insects that possess a covering of flocculent, white, waxy filaments. They are about 1/8 inch in length and usually pinkish or yellowish in color. Mealybugs have piercing-sucking mouthparts which they use to siphon fluids from the leaves, stems, and sometimes roots of many ornamental and vegetable plants. Mealybug damage produces discolored, wilted, and deformed leaves.
One very common example of an insect pest likely to claim residence in your garden’s crop residue, are squash bugs. They like to overwinter on squash, cucumber, and other cucurbit crop residue. If you choose to not till your garden and leave a portion of last seasons crop in your garden, then you should consider applying an insecticide to your spent crop at the end of the season. A product containing a pyrethrin or pyrethroid as an active ingredient would be a good broad spectrum insecticide to control any pest that may reside on plant residue. More information on pyrethrins and pyrehtroids can be found at the EPA webpage: Pyrethrins and Pyrethroids. If you choose to apply an insecticide, it is important that you follow the information on the label regarding pollinator protection. Another option is to plant a trap crop on the edge of your garden to help attract pest insects away from your desired crops. More information on trap crops can be found in the EDIS Publication: Intercropping, Pest Management and Crop Diversity.
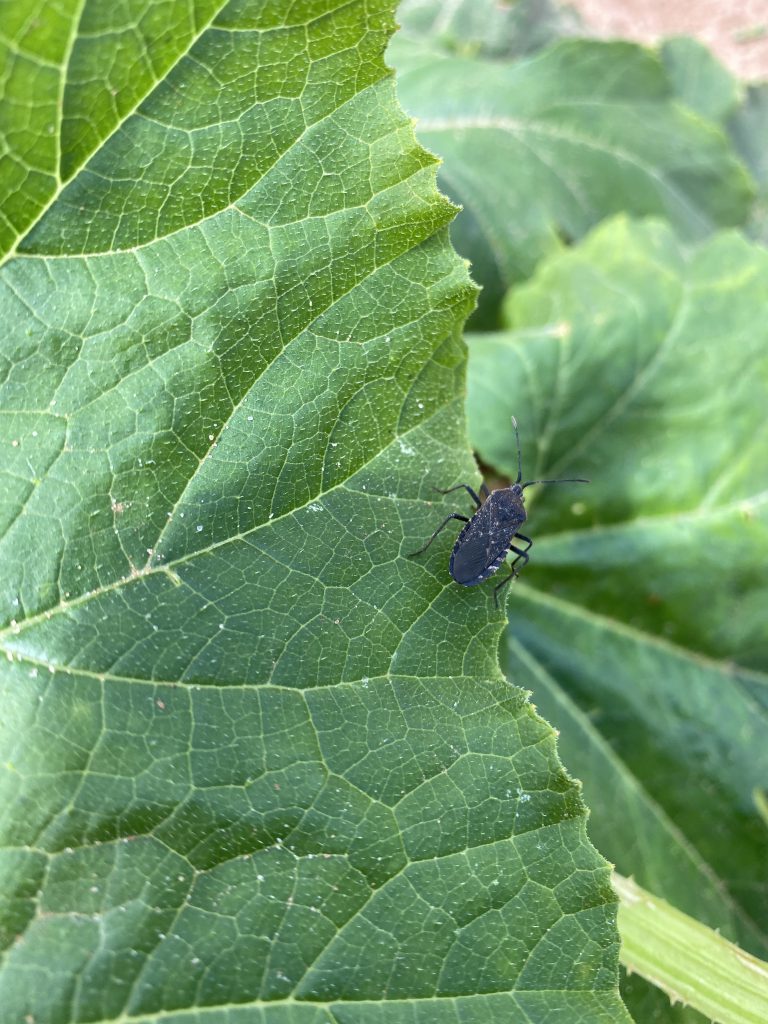
An adult squash bug on a zucchini leaf. Photo Credit: Matt Lollar, University of Florida/IFAS Extension – Santa Rosa County
So the answer to the till or no till question is…it depends. It is really up to the gardener. Yes, the residue from crops will add nutrients and organic matter to your soil, but it could also increase pest pressure in your garden. If you don’t plan to remove crop residue and don’t plan to till, then keep an eye out for what could be hiding in your garden.