Applying the right amount of water to the lawn when the turf actually needs water is not always the easiest task for busy homeowners. UF IFAS Extension Escambia County Master Gardener Volunteer Greg Leach shares information about a soil moisture monitoring system that attaches to a home sprinkler system. This can help you apply water to the turf when it is actually needed by measuring soil moisture availability.
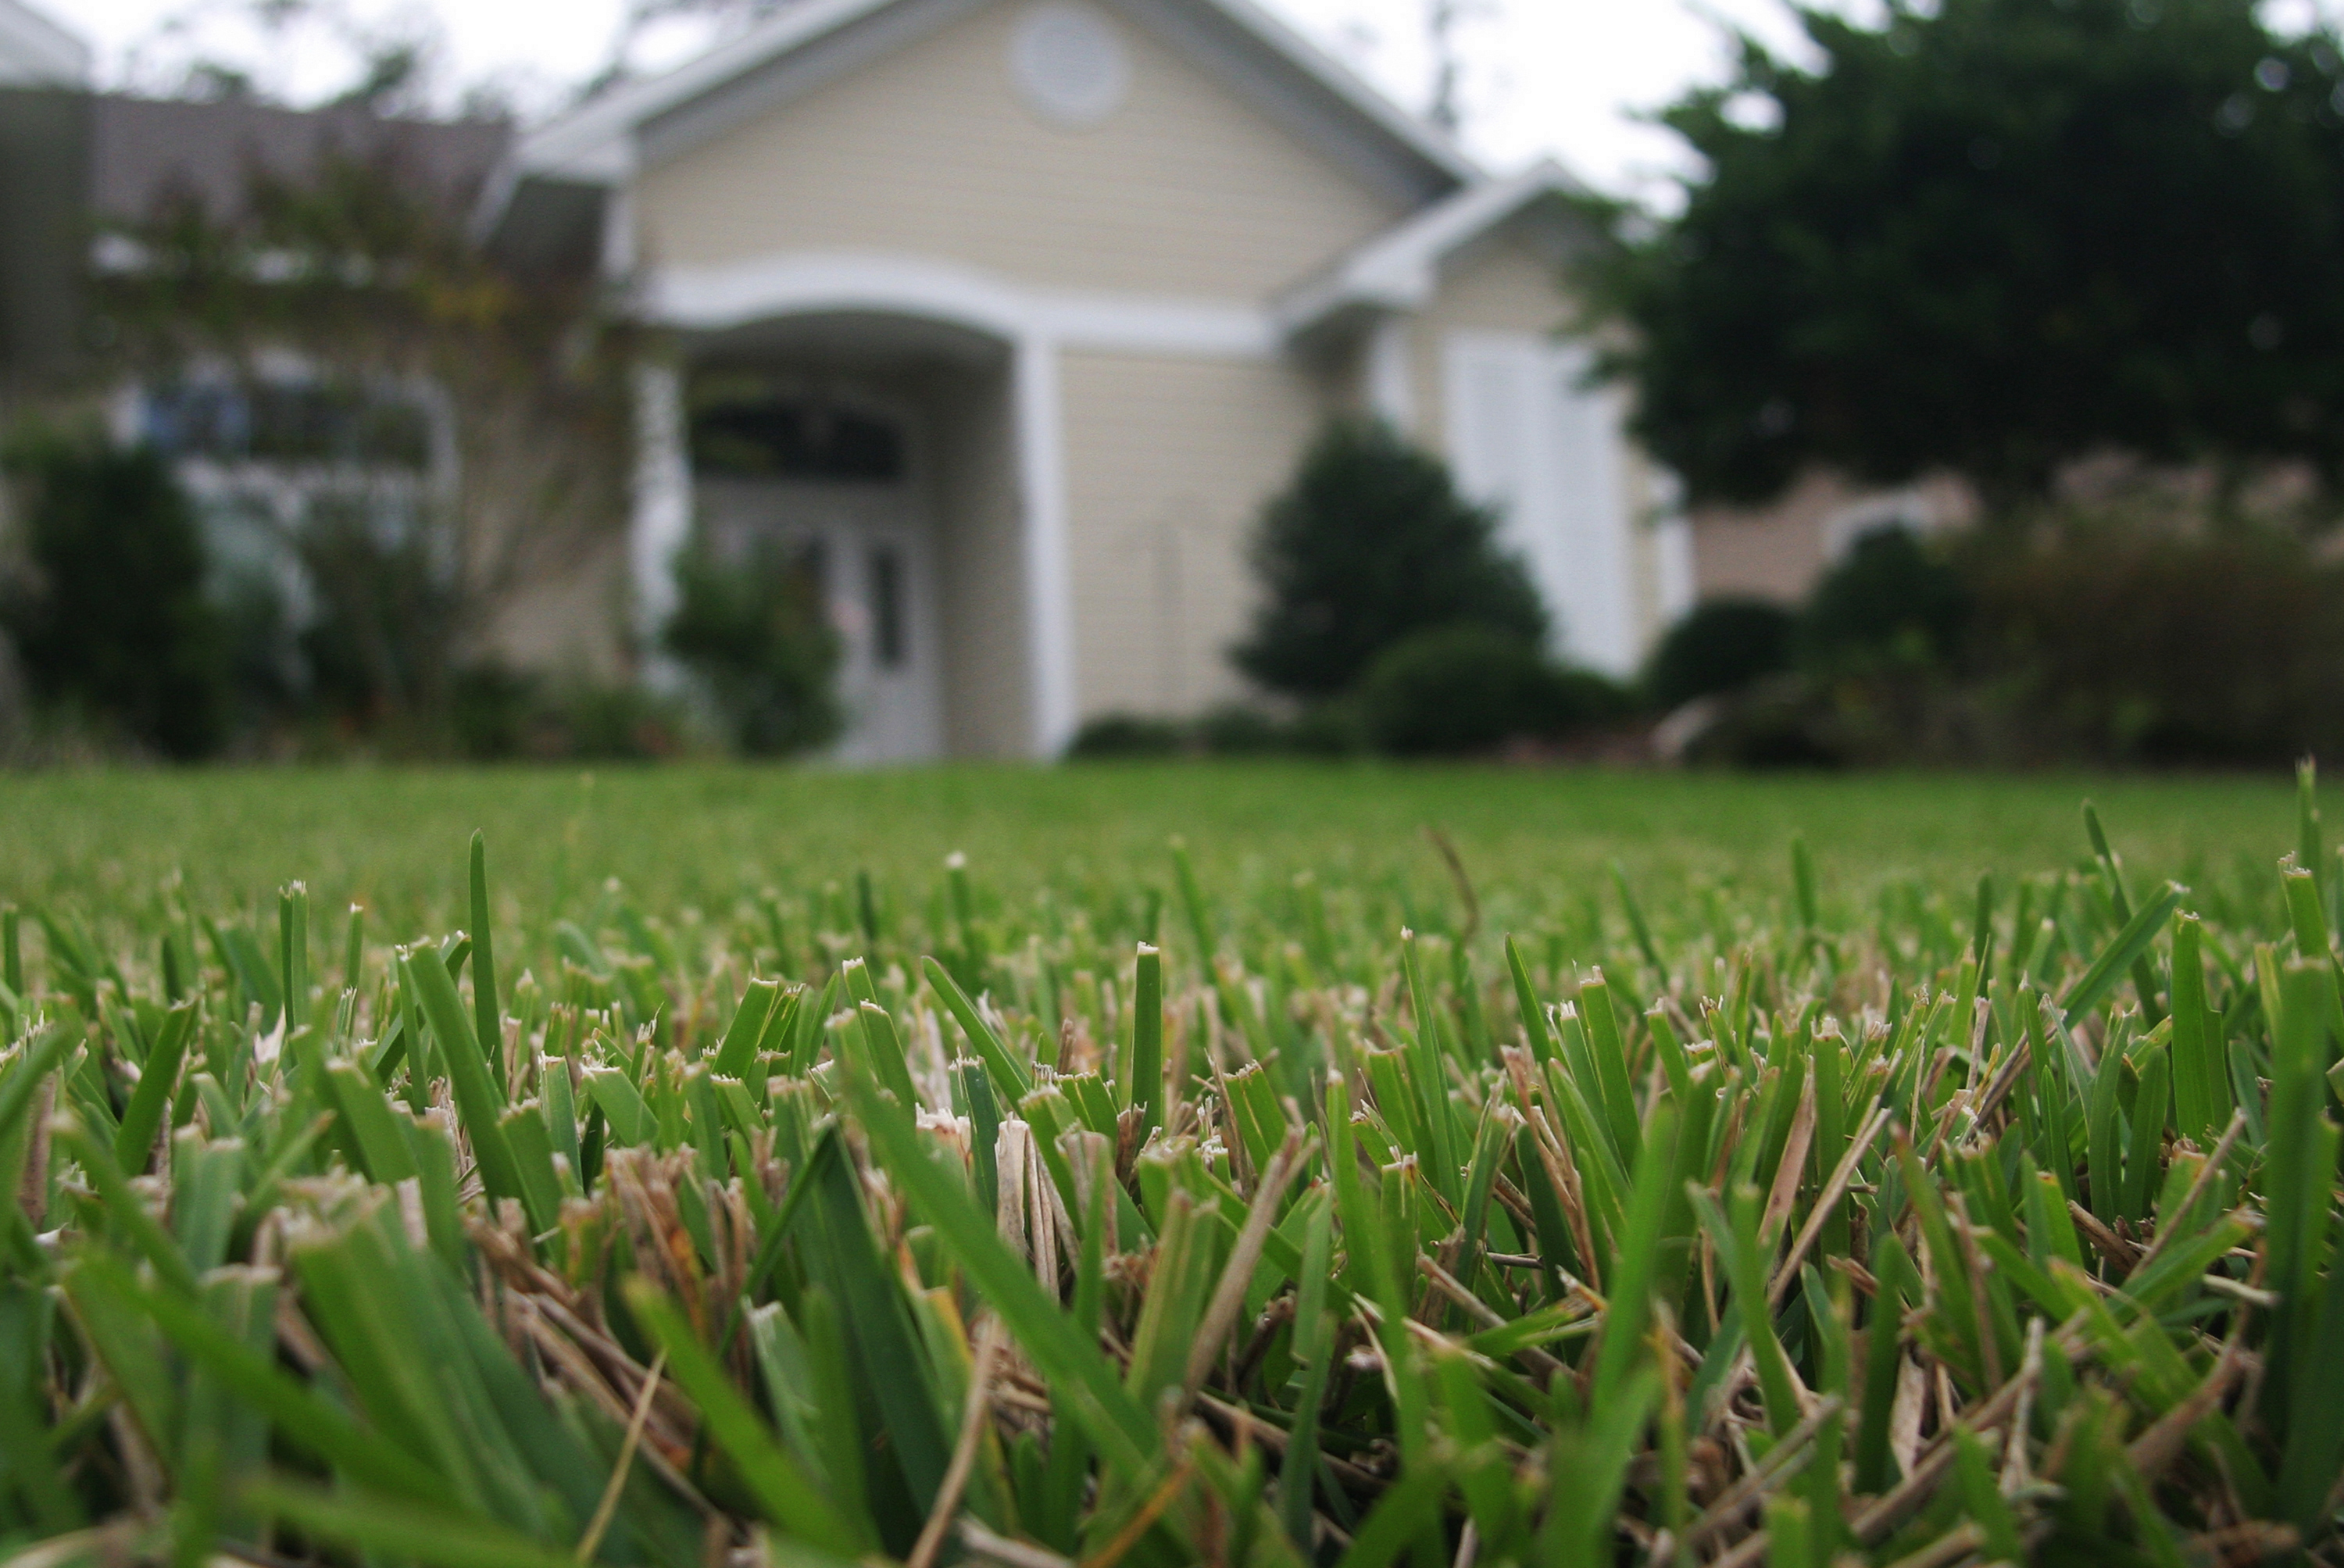
I’ll be the first to admit that North Florida lawns are frustrating. With time, most people discover this.
Why are lawns so difficult here? The answer involves a combination of factors.
We are not far enough north to benefit from the better soils. Florida is known for sandy, low fertility, low water holding capacity soils. Some areas of the country enjoy richer soils with better water and nutrient holding capacities. These better soils result in a more favorable lawn root environment with roots being more competitive and resilient.
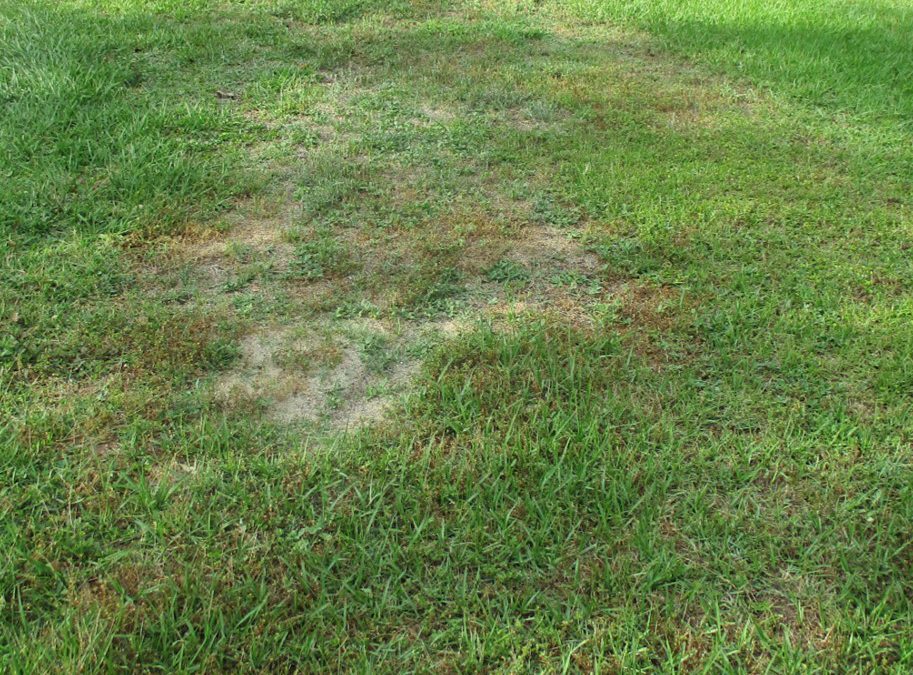
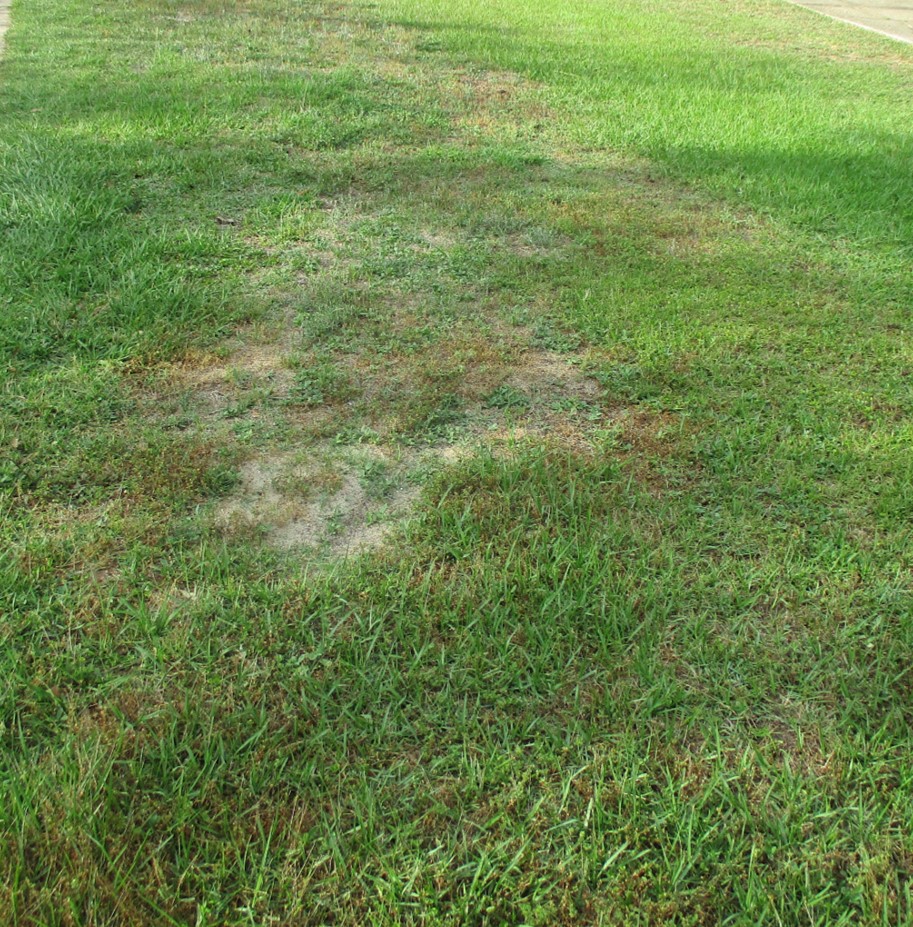
Something else happens in more northern areas. The heavier soils and colder temperatures (sometimes resulting in the soil freezing) are natural means of inhibiting and/or controlling certain soil dwelling pests. For example, nematodes are not nearly the concern in northern lawns. Many people that move to our area have never heard of these microscopic roundworms that play havoc in our low fertility, warm, sandy soils. After a lawn has been in place for a number of years, allowing the nematode population to reach a threshold, the lawn begins to decline. And we have few legal, effective chemical control options for nematodes in Florida lawns.
Declining area in lawn due to ground pearl. Photo credit: Larry Williams
Some other soil dwelling pests that northerners don’t have to deal with include ground pearls, small scale-like insects that bother centipedegrass roots. Mole crickets are not a pest much north of Central Alabama. Years ago, a representative with the company that manufactured the once popular mole cricket insecticide Oftanol told me that in the absence of the state of Florida, they would not sell enough Oftanol to keep it on the market. Take-all Root Rot, a common soil dwelling fungus, plays havoc in our Florida lawns and it is difficult to control.
We are not far enough north to use the more trouble-free northern grasses to create a permanent lawn. These include bluegrasses, fescues and perennial ryegrass. At best, these grasses can be used to overseed our lawns during the cooler fall and winter months to create a temporary winter lawn. But they will not survive our hot, wet summers.
We are not far enough south to benefit from the lack of freezing temperatures during winter. A late freeze that occurred on April 8 a number of years ago resulted in much lawn injury. I saw lawns with seventy percent kill from this late freeze. This is something that typically does not happen in Central and South Florida.
We deal with saltwater issues, high humidity, hurricanes and tropical storms, an array of lawn insects and diseases and extremes in rainfall and temperatures.
It’s no wonder most people become dissatisfied with their lawns. Perhaps we should lower our expectations and enjoy the natural flora and fauna of our state.
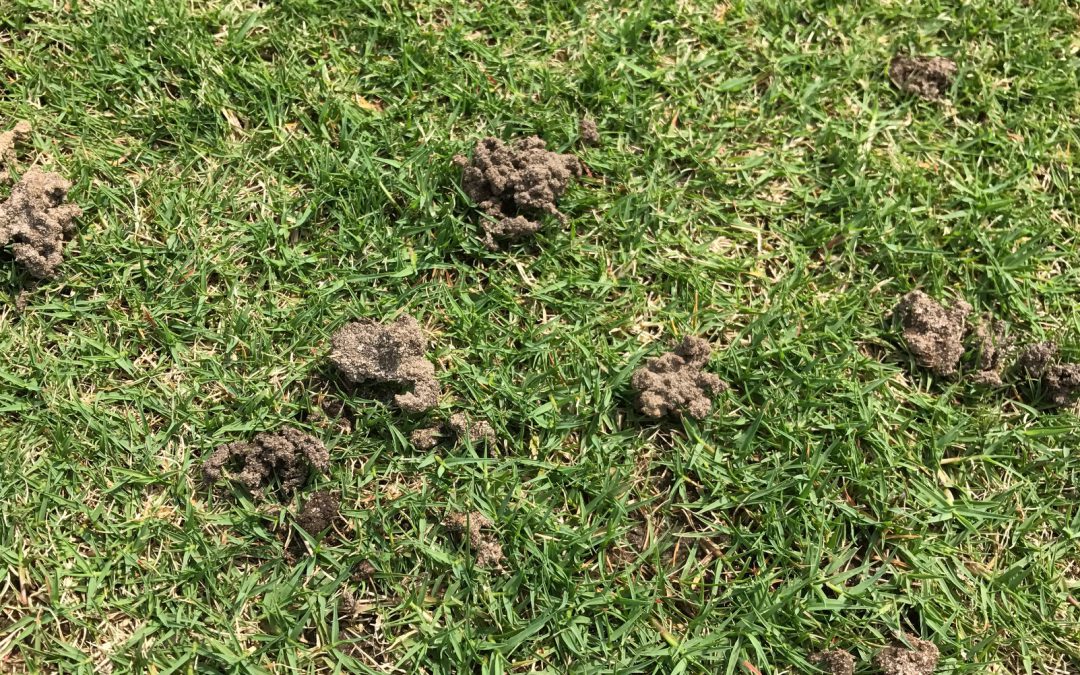
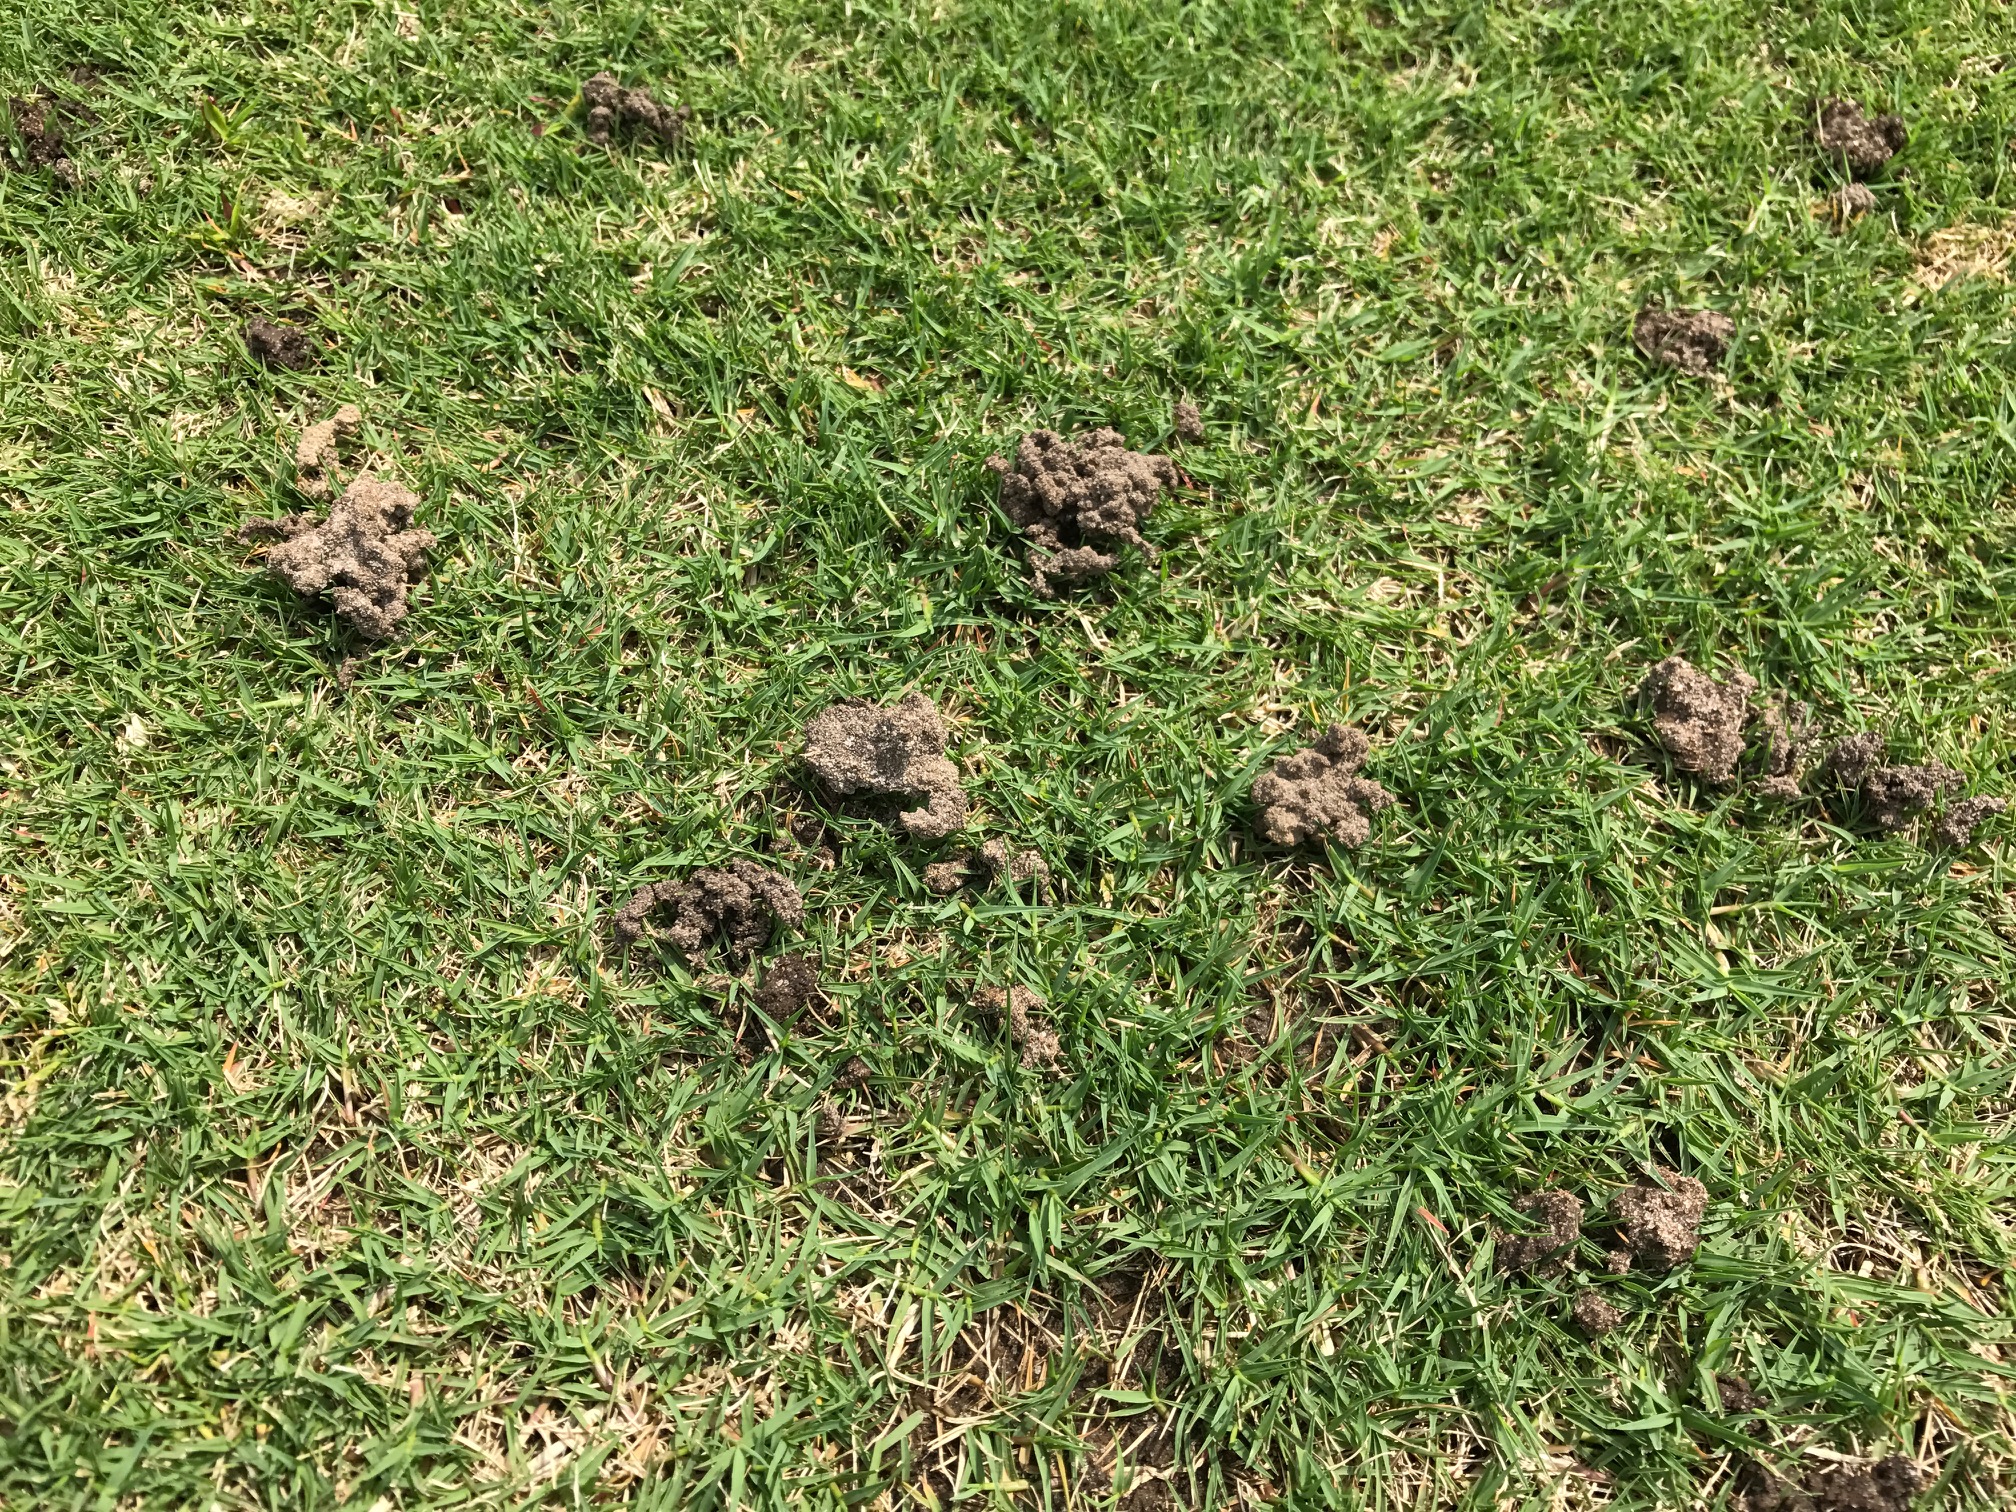
Worm mounds in bermudagrass. Photo credit Mary Salinas, UF IFAS Extension.
The April 8 program of Gardening in the Panhandle LIVE! was focused on turfgrass, quite a popular topic in the springtime as the weather warms and turf comes out of winter dormancy. Here are some of the questions asked of our University of Florida experts and the links to resources they shared.
Q. How well do new turfgrass varieties thrive against weeds?
A. A healthy and properly maintained lawn is your best defense against weeds and other pests. Additionally, ProVista is a new cultivar of St Augustinegrass that can tolerate glyphosate so it makes it much easier to kill weeds in the lawn. ProVista is not yet widely available in the panhandle.
Q. What to do about bare spots in St Augustine turf in shade?
A. Rough up the ground and put ½ to 1” compost and let the grass fill in or plant plugs. St. Augustinegrass for Florida Lawns: https://edis.ifas.ufl.edu/lh010
Q. When is the best time to overseed? I have a centipede lawn that’s 15-16 years old and I’m trying to bring it back to health.
A. Be sure to be following good practices and centipedegrass should not fail. Overseeding may not be the best option. Centipedegrass for Florida Lawns: https://edis.ifas.ufl.edu/lh009
Q. How do I repair lawn areas ruined by piled up Hurricane Sally debris?
Gallery, with the active ingredient isoxoben, has always been the best product to control chamberbitter. Another product, Gemini, adds prodiamine with isoxoben and also provides good control.
Q. How do you get dollar weed under control?
A. Control irrigation. Dollarweed loves lots of water so make sure you are not overwatering. See: https://edis.ifas.ufl.edu/ep389
Q. I used Image to help control Bahia in Centipede. Anything else that we can use?
A. Metsulfuron methyl, 3 applications every 21 days
Q. Which postemergence herbicide is safe and effective for reducing oxalis in a lawn?
A. First you need to determine which fungus, if any, is responsible. Key to Identification of Landscape Turfgrass Disease: https://edis.ifas.ufl.edu/lh064
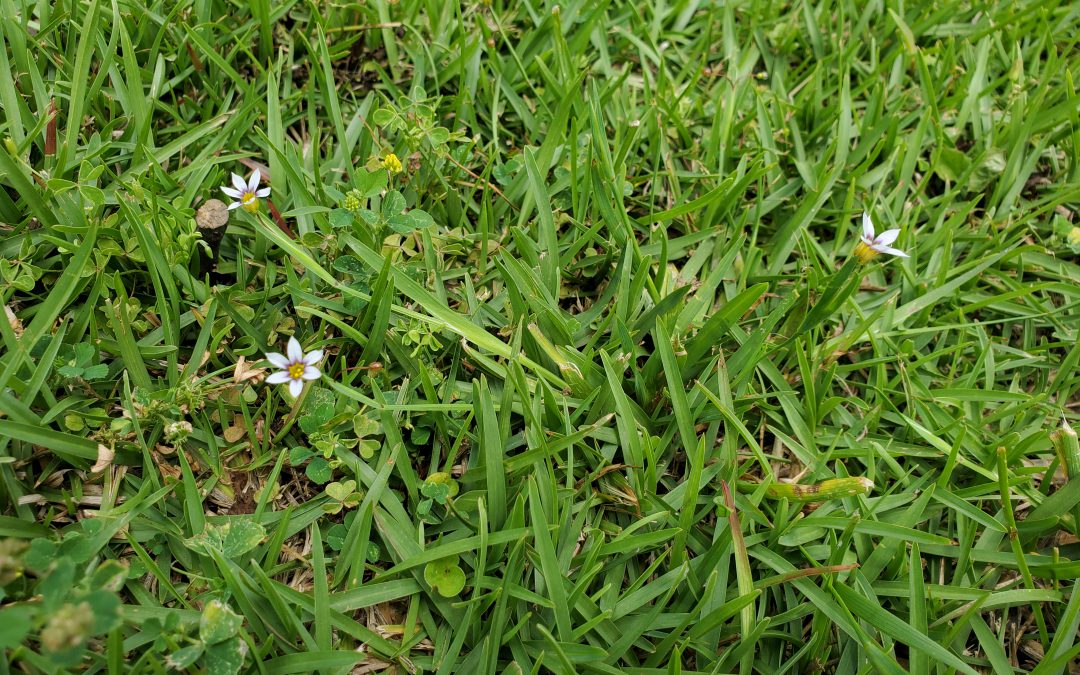
The line separating what is a weed and what isn’t often comes down to where the “weed” is growing and who is managing the area it’s growing in. Blue Eyed Grass (Sisyrinchium rosulatum), one of the most complained about lawn weeds this winter/spring falls squarely in that category! Native plant enthusiasts and homeowners looking to add native wildflowers to their landscape value the plant for its low maintenance, star-shaped blue blossoms in spring. Professional and home turfgrass managers, however, loathe the plant as it masquerades as grass to the untrained eye, looks messy in the cool months, and can displace turf during spring green up. While Blue Eyed Grass can be a pretty landscape plant, our focus today is on learning why it is such an annoying weed in turfgrass areas and exploring control options if it becomes a problem!
Blue Eyed Grass (Sisyrinchium rosulatum) in a Centipedegrass lawn in late March. Photo courtesy of Daniel Leonard.
For starters, Blue Eyed Grass (BEG) is not even a grass, though it does look an awful lot like one! It is actually a member of the Iris family and is more closely related to spring beauties like Gladiolus, Iris, and Crocus than any turfgrasses. The flowers, appearing late March through April, are a dead giveaway that we aren’t dealing with a grass, as are the flat leaves arranged in bunched fan-shaped rosettes. BEG is considered a winter annual plant in Florida, meaning it sprouts from seed in the fall, grows through the winter, then flowers and sets seed in the spring. Because it grows while lawn grass is dormant, it is very noticeable during its entire lifespan. Though BEG can tolerate a range of soil types, it prefers to grow in moist areas, making it right at home in Panhandle lawns and landscapes in the winter as we experience regular to excessive rainfall throughout our cool season.
All the above characteristics make BEG an annoying weed in lawns. It hides in turfgrass very well until the turf goes dormant in the dead of winter, leading most homeowners to ignore it until it becomes a problem in the spring. At this point, BEG is nearing maturity and is more difficult to control without damaging the turfgrass. BEG also thrives in our climate and can outcompete poorly managed turfgrass, especially if the lawn exhibits the soggy, compacted conditions that heavy lawn foot traffic and winter/spring rainfall cause. So, what is a homeowner to do?
The first step in controlling BEG is maintaining a healthy turf. Ensure you’re treating your turf well during the growing season by fertilizing appropriately, mowing frequently at the correct height, and irrigating properly. Sending turf into the dormant season stressed by poor growing season management is an invitation to winter weeds. Other cultural practices that can help mitigate troublesome winter weeds like BEG are periodic mowing during the cool season to prevent weeds from going to seed and being diligent about not frequently driving on, parking cars on, or otherwise excessively compacting the soil, a common cause of unhealthy turfgrass.
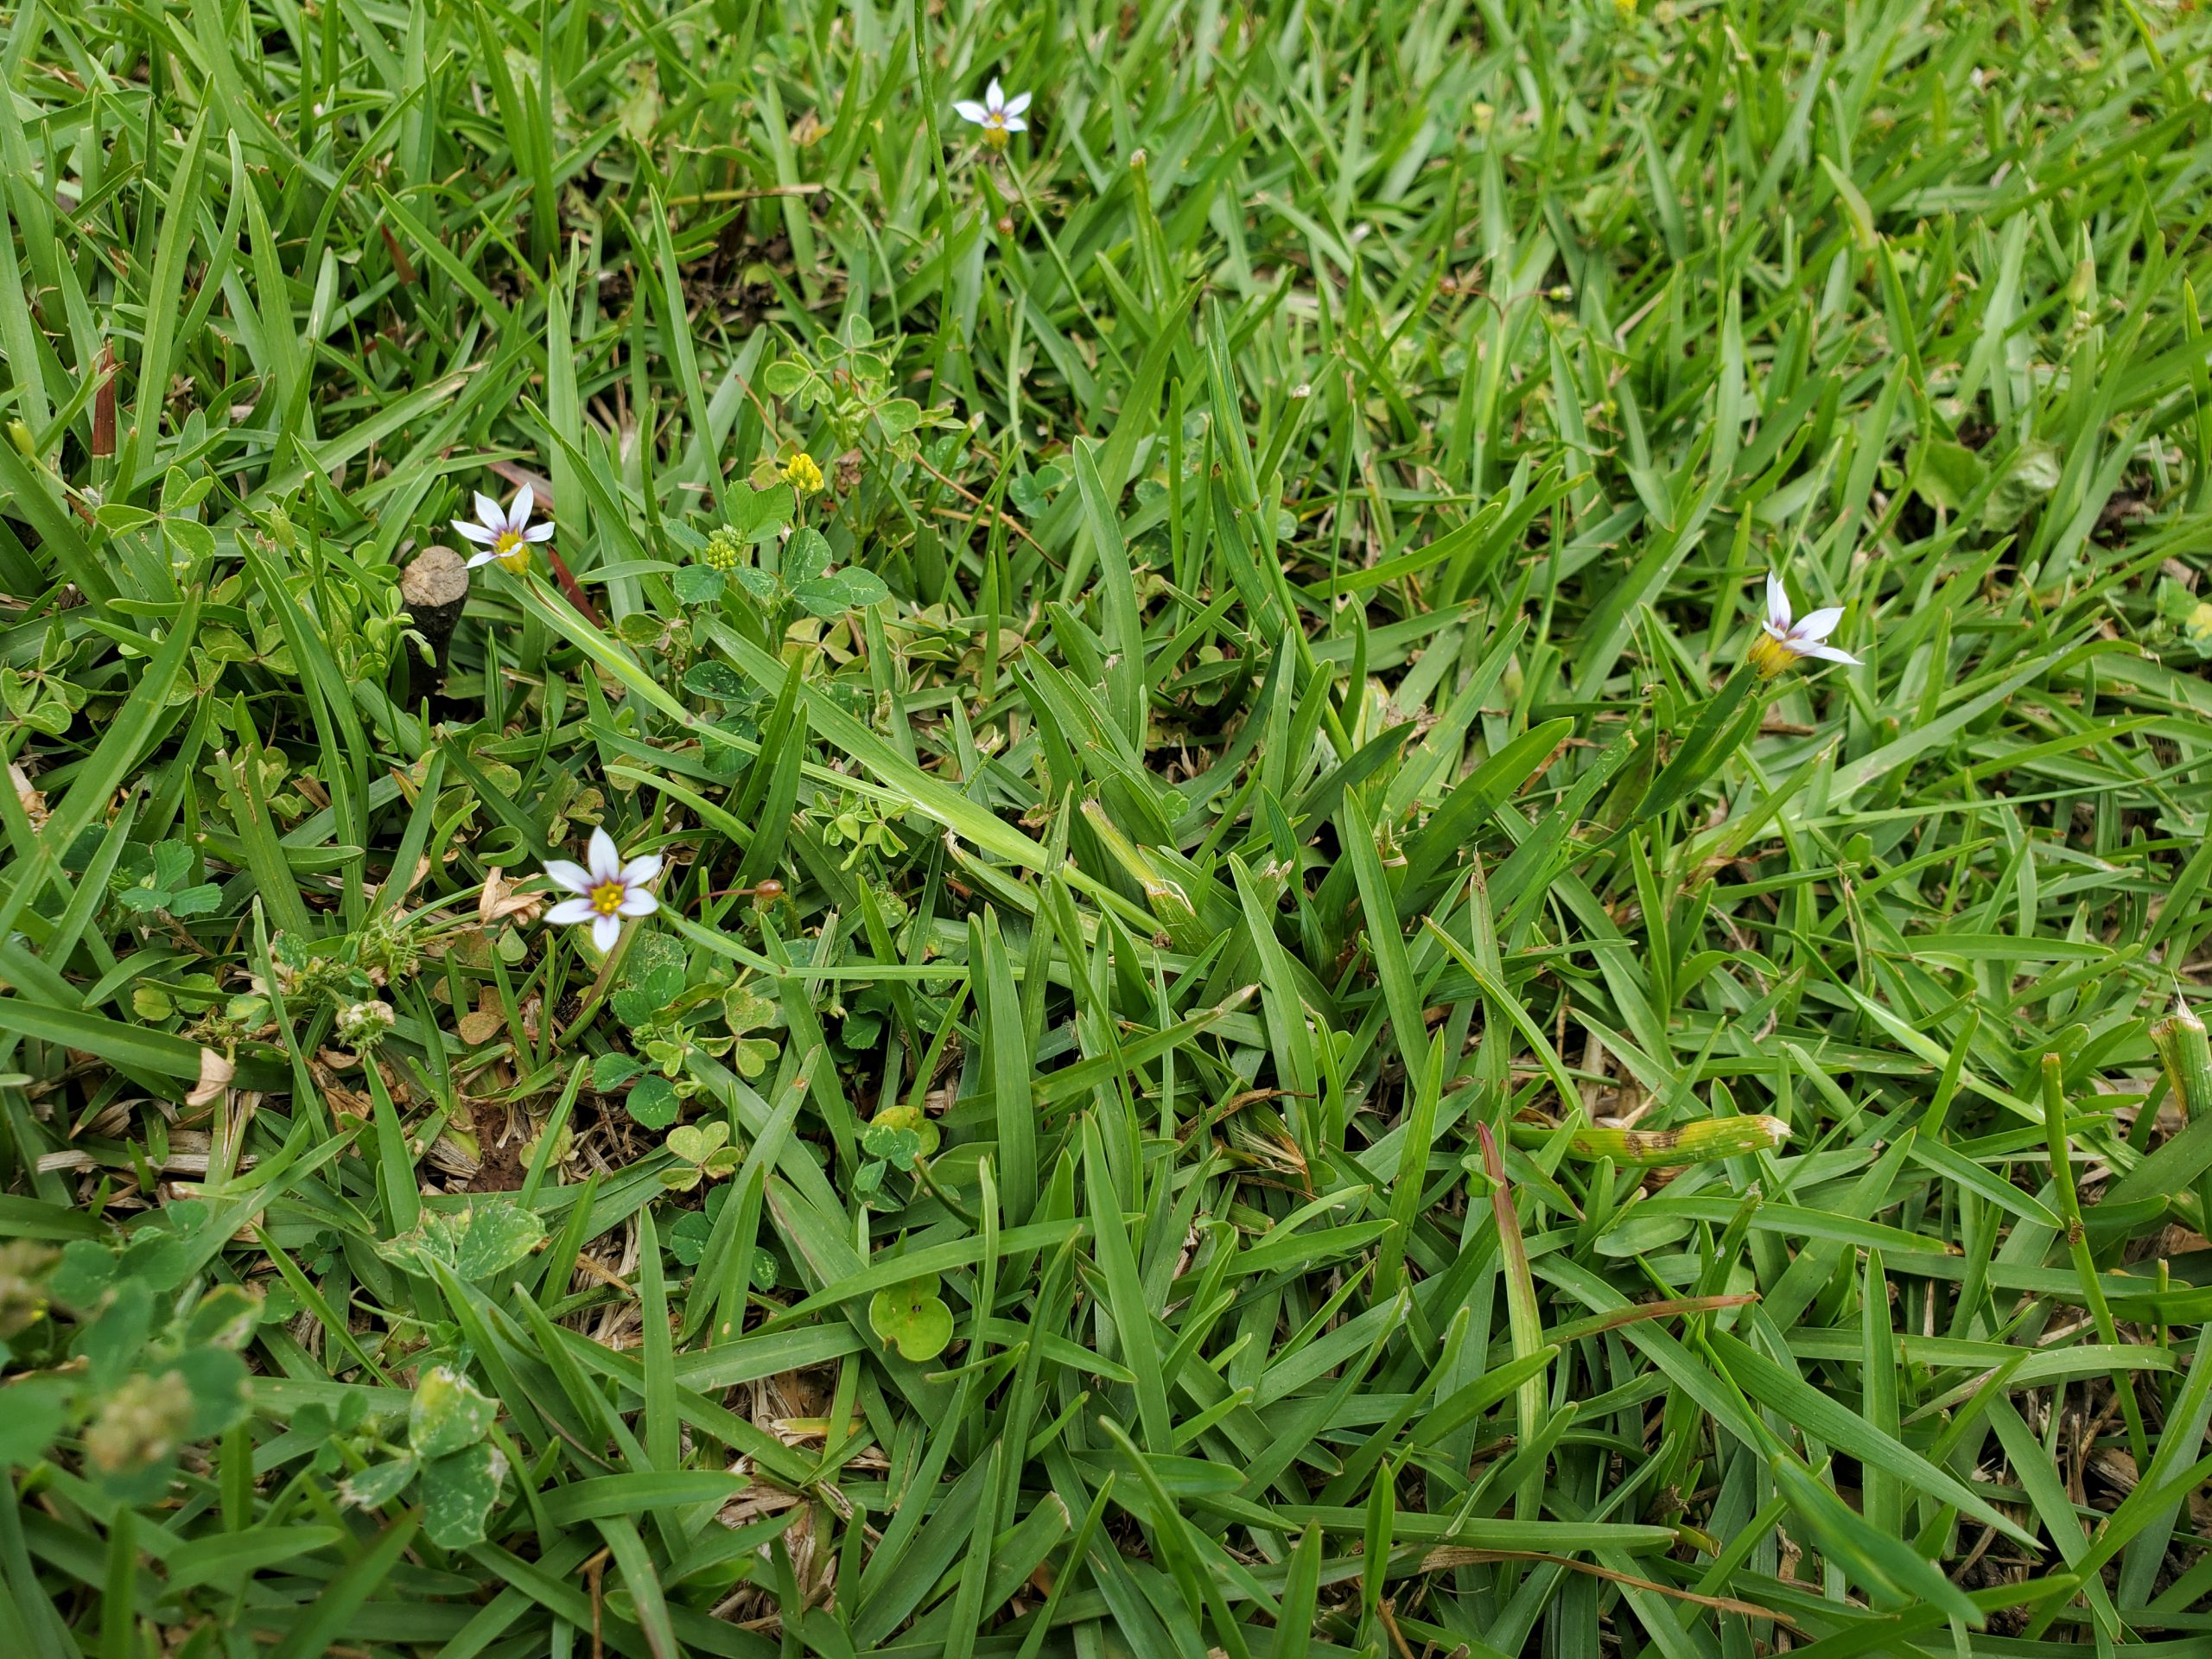
Blue Eyed Grass clump brought into the Calhoun County Extension office for identification and control recommendations in February 2021. Photo courtesy of Daniel Leonard.
After implementing the above cultural practices in your lawn management regime, you may also need chemical herbicides to achieve a clean cool season lawn. There are two basic options for BEG control. First, a fall (mid-late October) application of a pre-emergent herbicide like dithiopyr, prodiamine, or pendimethalin can be very effective at preventing winter weeds from occurring at all. If you happen to miss this fall pre-emergent application, a timely post-emergent application of 2,4-D or other general broadleaf herbicides works nicely as well. (BEG and other cool season weeds are best controlled with post-emergent herbicides in December and January before they mature and begin to set seed. Plan applications accordingly!)
While Blue Eyed Grass can be an attractive addition to the landscape, it is never welcome in turfgrass! To prevent this and weeds from becoming a problem, use smart cultural practices to maintain a healthy turf and make timely herbicide applications when needed. For more information on controlling Blue Eyed Grass and other winter weeds, contact your local UF/IFAS Extension office!
As a boy in a small town in Georgia we had a St. Augustinegrass lawn. My dad started the lawn before I was born. That lawn was still doing fine when I left for college at age seventeen. I don’t remember weeds in the lawn during summer months. I do fondly remember winter “weeds” in that lawn.
To see clumps of winter annuals in our yard and in neighbors’ yards was a natural part of the transition from winter to spring. They added interest to what
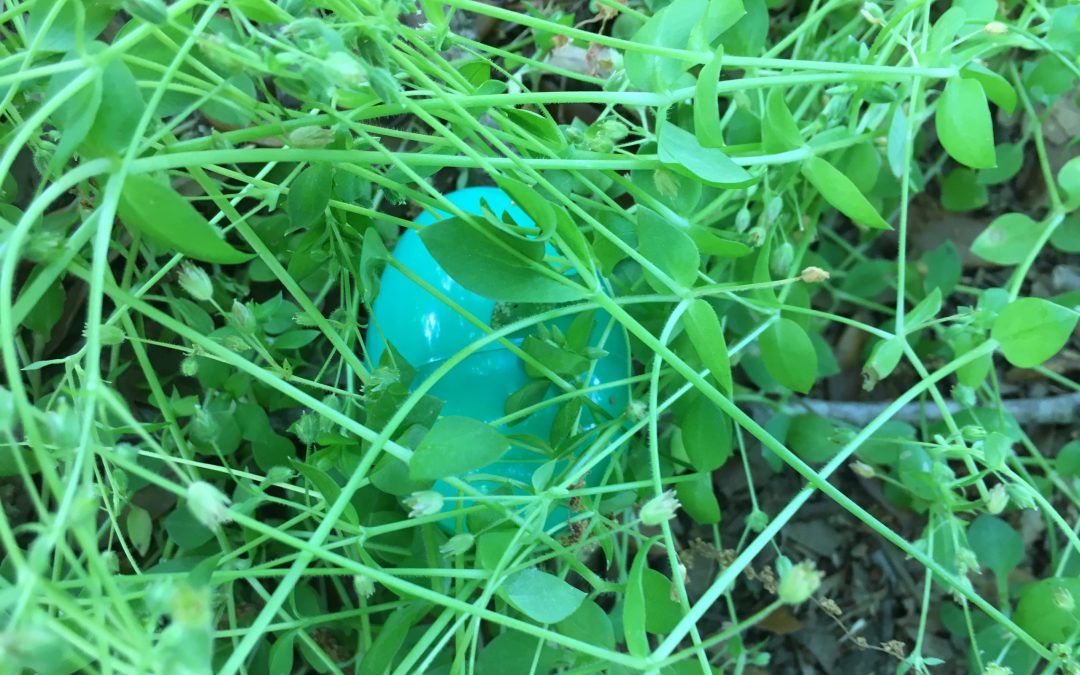
Blue Easter egg hidden in chickweed. Photo credit: Larry Williams
would have been a plain palette of green. It was expected to see henbit with its square stiff stems holding up a display of small pinkish purple flowers in late winter and early spring. A clump of henbit was a great place to hide an Easter egg, especially a pink or purple one.
Wild geranium, another common winter annual, offered another good hiding place for Easter eggs with its pink to purple flowers. Large clumps of annual chickweed would nicely hide whole eggs. Green colored eggs would blend with chickweed’s green leaves.
Pink Easter egg hidden in crimson clover & hop clover mix. Photo credit: Larry Williams
Crimson clover with its reddish flowers, hop clover and black medic with their bright yellow flowers were good hiding places for Easter eggs. Plus clovers add nitrogen back to our soils.
I never remember my dad using any weed killer, he rarely watered. The lawn was healthy and thick enough to be a deterrent to summer weeds. But during fall and winter as the lawn would naturally thin and go dormant, winter annual weeds would run their course.
I’ve heard that the sense of smell provides our strongest memories. I remember the first mowing of the season with the clean smell of chlorophyll in the spring air. It was refreshing. Once mowed and as the heat took its toll, by late April or mid-May, these winter annual weeds were gone. What was left was a green lawn to help cool the landscape as the weather warmed. The lawn was mowed high as St. Augustine should be, played on and typically not worried with.
Most people have winter weeds in their lawns that let us know spring is near. Perhaps we worry too much with these seasonal, temporary plants that may have wrongly been labeled as weeds. Besides, how long have we been doing battle with these weeds and they are still here. Most lawns have countless numbers of winter annual seeds awaiting the cooler temperatures and shorter days of early winter to begin yet another generation. By May they are gone.
Our trees and vines are flowering and lawns are starting to green up naturally, but one glance at the calendar and it is still early spring. The last official frost date for the Florida panhandle can be into April depending on location. We know our day time and night time temperatures are still fluctuating every other day. We also know the stores and nurseries are stocked with shelves and pallets of fertilizer. So the big question is when can I fertilizer my lawn?
Overseeded ryegrass on a centipedegrass lawn.
My answer after years of practice is always it depends, but my non-scientific rule of thumb to homeowners is wait until you mow three weeks in a row and make sure you’re past the last frost dates for your area. If you need to mow three weeks in a row for height, then your lawn is actively growing and most likely we are into a temperature range good for fertilizer applications. If you apply fertilizer to a lawn that is dormant, the fertilizer will not be taken up by your roots and it can leach below the root zone wasting money while not improving the lawn and possibly causing environmental concerns.
With that said, there are some factors to consider. We always recommend doing a soil test first. This can be done in advance of spring. Your test results might indicate having sufficient nutrients in the soil, so not applying would save you money and the lawn would still look good. The soil test will also indicate what nutrients are in excess or lacking, then you can apply only the nutrients needed.
I have found that fertilizer is still very much misunderstood. When I ask homeowners whether they consider fertilizer to be medicine or a stressor, most will answer medicine and we all know if a little medicine is good, then a bit more is better. However, it is more accurate to think of fertilizer as a chemical stressor. If my lawn is unhealthy, then I force my lawn to grow and it can further weaken my plants. Think of it like this, if you’re not feeling well at night before you go to bed, should you consume one of those big energy drinks? Not if you want to sleep and hopefully feel better in the morning. Apply fertilizer when the lawn is ready and capable of having a positive response when spring fully arrives.
Wakulla County Extension office mixed species turf.
Here are some items you should know before you fertilize the lawn. Fertilizers used in Florida should have a license number that begins with F followed by a series of numbers. It is important to check your fertilizers before you apply. You need to know what type of turfgrass you have in your lawn. We have a lot of bahiagrass and centipedegrass lawns in the panhandle. Each will require a different regiment. You are only allowed to apply one pound of nitrogen per 1,000 square feet per application and you should never apply more than the recommended rate. I always refer to a childhood fable “The Tortoise and the Hare” when thinking about plant health. Slow and steady makes for a better lawn in the long run. This means you need to measure your lawn, understand how to calculate the nitrogen and then apply correctly with the right equipment and spreader patterns. We also recommend very little phosphorus (the middle number on the fertilizer bag 15-0-15) for Florida lawns. Our soils are usually sufficient and this is another item your soil test results will confirm.
Remember, your local Extension office is always here to help especially making sure you treat the lawn right. Think before you apply because your long-term goal is improving the lawn quality.
The Florida Fertilizer Label (https://edis.ifas.ufl.edu/ss170) and General Recommendations for Fertilization of Turfgrasses on Florida Soils (https://edis.ifas.ufl.edu/lh014). T. W. Shaddox, assistant professor; UF/IFAS Fort Lauderdale Research and Education Center, Ft. Lauderdale, FL 33314
Homeowner Best Management Practices for the Home Lawn (https://edis.ifas.ufl.edu/ep236). Laurie E. Trenholm, professor, Extension turfgrass specialist, Environmental Horticulture Department; UF/IFAS Extension, Gainesville, FL 32611.
Bahiagrass for Florida Lawns (https://edis.ifas.ufl.edu/lh006). L. E. Trenholm, professor, turfgrass specialist, Department of Environmental Horticulture; J. B. Unruh, professor, turfgrass specialist, UF/IFAS West Florida Research and Education Center; and J. L. Cisar, retired professor, turfgrass specialist, UF/IFAS Ft. Lauderdale REC; UF/IFAS Extension, Gainesville, FL 32611.
Centipedegrass for Florida Lawns (https://edis.ifas.ufl.edu/lh009). J. B. Unruh, professor, turfgrass specialist, UF/IFAS West Florida Research and Education Center; L. E. Trenholm, associate professor, turfgrass specialist, Environmental Horticulture Department; and J. L. Cisar, professor, turfgrass specialist, UF/IFAS Ft. Lauderdale REC; UF/IFAS Extension, Gainesville, FL 32611.