by Carrie Stevenson | Feb 18, 2020

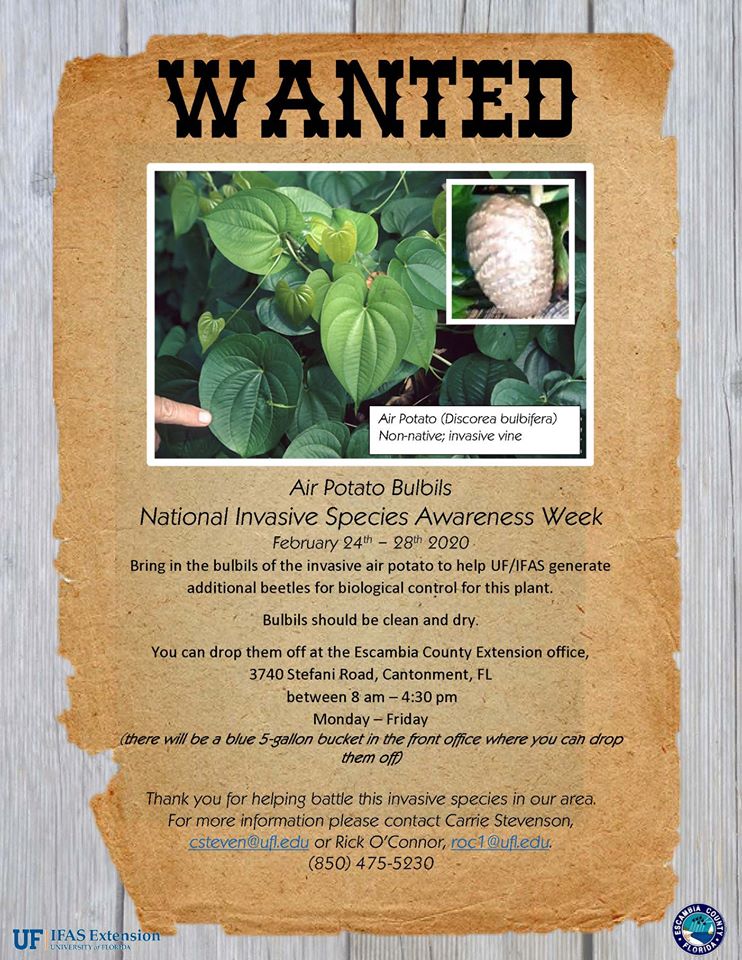
Several Extension offices in the Panhandle are collecting air potato bulbils for National Invasive Species Week. Photo credit: Esther Mudge, Escambia County
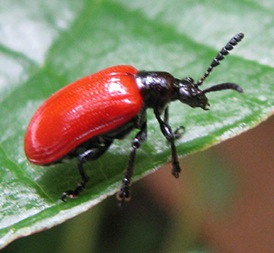
The non-native invasive air potato vine (Discorea bulbifera) has wound its way throughout Florida, from pine forests and creek floodplains to backyards. Their heart-shaped leaves are most noticeable in the spring and fall, where they can take over large areas, not unlike their fellow invasive vine, kudzu. In the fall, the plant produces a potato-like tuber called a bulbil, which grows above ground on the vine. The bulbils drop in the winter and then produce new vines the following spring.
The vine’s growth has been uncontrolled or kept back by herbicide for years, until researchers discovered a biological control insect known as the air potato leaf beetle (Liloceris cheni). In the vine’s native Nepal and China, the beetle controls growth by surviving on the leaves of the air potato, its sole food source. After extensive study, the USDA approved the use of these beetles in Florida to control the air potato vine population here. UF IFAS Extension offices statewide have participated in these beetle release programs, providing thousands of beetles to homeowners and property owners seeking to manage the invasive vine using a chemical-free technique. Left alone, air potato vines can smother full-sized trees, blocking the sunlight and causing them to collapse under the weight of the intertwined vines.
From 2012-2015, beetles were able to reduce air potato vine coverage and bulbil density by 25-70% (depending on location and density of beetle population). The active beetle-production phase of a UF IFAS grant has ended, but researchers are committed to the goal of reducing this nuisance species statewide.
To assist with this process, several Extension offices in the Panhandle are sponsoring a bulbil collection during National Invasive Species Week (NISAW, February 23-29). This effort will serve two important roles: to remove bulbils from the natural environment and to provide a seed source for university researchers seeking to grow air potato vine in a controlled environment, sustaining a continued population of air potato beetles for distribution.
For more information on Air Potato Vines and Leaf Beetles, visit https://bcrcl.ifas.ufl.edu/airpotatobiologicalcontrol.shtml or contact your local County Extension office.

by Sheila Dunning | Jan 13, 2020
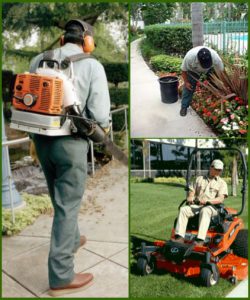 No previous experience or accreditation it required to be a landscaper in the state of Florida. So when homeowners are searching for service providers, it is important that they question potential companies about their skills. One good measure is completion of voluntary certifications such as the Florida Nursery, Growers and Landscape Association (FNGLA) Certified Horticulture Professional (FCHP). The FCHP program has been the industry’s standard for measuring horticulture and landscape knowledge since 1984. The training is also useful for property managers, homeowner associations and retail garden center employees, or anyone that wants to know more about Florida’s plants and their care.
Plants are complex and variable living things that range from microscopic to the largest of living organisms. With steady population growth in the state of Florida, environmental damage risks created by the use of improper products and practices has continually risen. State and federal natural resource protection agencies have restricted certain horticultural practices, as well as, fertilizer and pesticide application. It takes scientific knowledge to maintain lawns and landscapes, not just a “green thumb” in order to keep plants healthy while reducing contamination to the soil, air and water that we all need.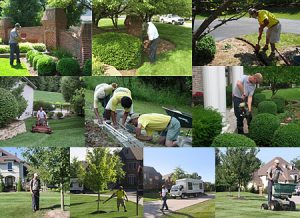
The Florida Certified Horticulture Professional training covers 16 areas, including identification, fertilization, irrigation, pest management, safety and business practices. Lecture and hands-on activities are utilized at each session. The 70-hour course will enhance anyone’s knowledge and will provide the basis for professionals to deliver a skilled service to clientele.
If you are a green industry worker or a concerned citizen interested in attending a FCHP preparatory course, there is an opportunity here in Crestview. Beginning Thursday, January 16, 2020 and continuing for 10 weeks to March 19, 2020, the Okaloosa County Extension office will be providing training for $175, which included the newest hard copy manual. Contact Sheila Dunning, 850-689-5850, sdunning@ufl.edu for more information.
by Matt Lollar | Jan 13, 2020
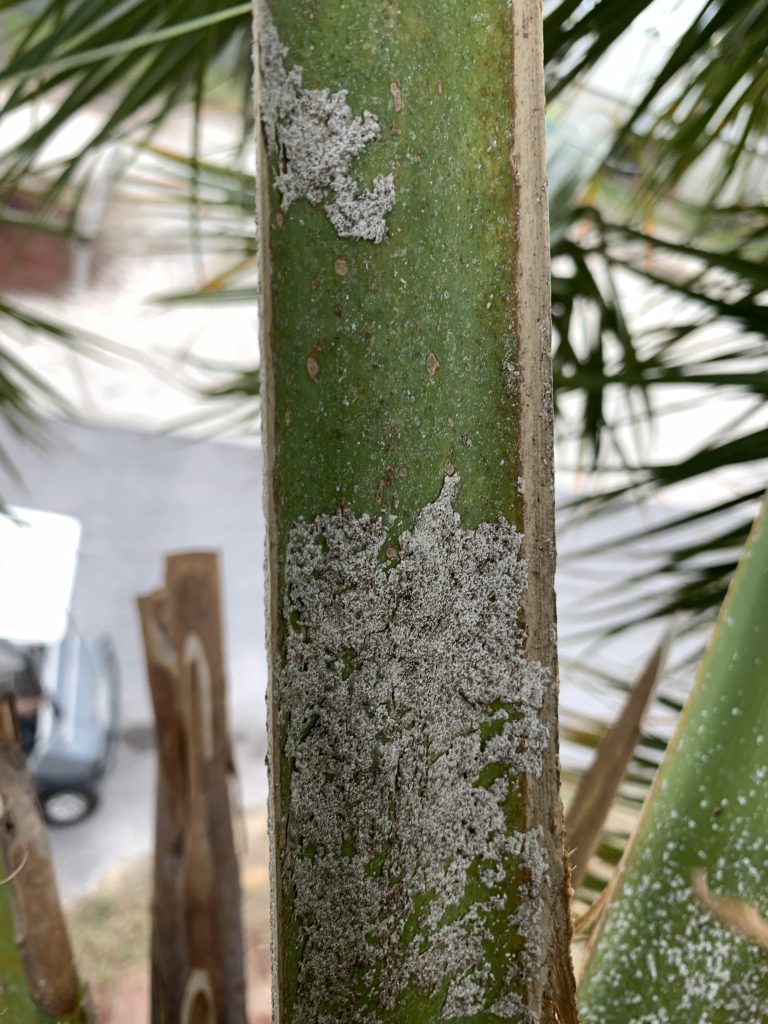
Scale insects on a cabbage palm (Sabal palmetto). Photo Credit: Matt Lollar, University of Florida/IFAS Extension – Santa Rosa County
This week I was on a couple site visits to look on some cabbage palms (Sabal palmetto) and some banana shrubs (Michelia figo). The palms had a white, waxy substance on their frond petioles and the banana shrubs had white specs on the tops of their leaves. Upon further investigation, I realized the waxy substance and specs were both different species of scales. Scale insects are serious pests of a number of ornamental plants. Here in Florida there are 13 different families of scales with the most common being armored scales, soft scales, and mealybugs. Scales have piercing-sucking mouthparts which they use to siphon fluids from the leaves, stems, and sometimes roots of many ornamental plants. Heavy infestations cause extensive leaf yellowing, premature leaf drop, branch dieback, and eventually plant death.
Scale Biology
The life cycle of a scale begins with eggs being laid beneath wax coverings or beneath the adult female. Eggs typically hatch in 1 to 3 weeks. The newly hatched nymphs, called crawlers, move around a plant until they find a spot to feed. Once a feeding site is located, their piercing sucking mouthparts are inserted into the plant and the crawlers begin to feed and grow. The males of many scale species develop wings as adults and fly to other plants to reproduce.
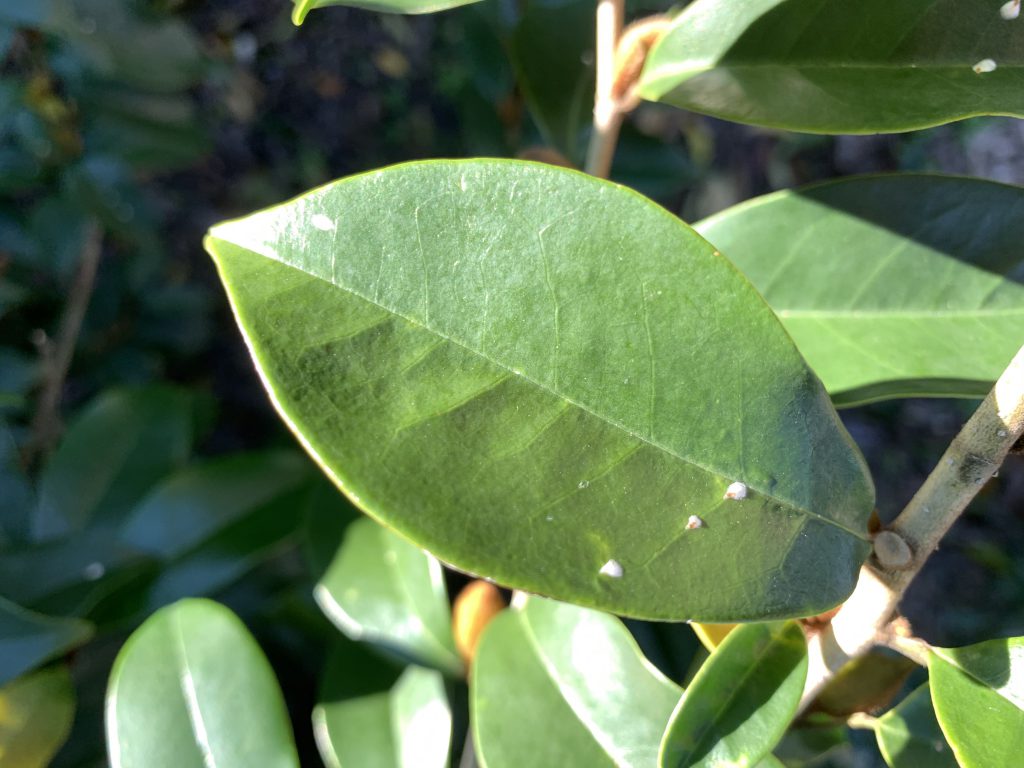
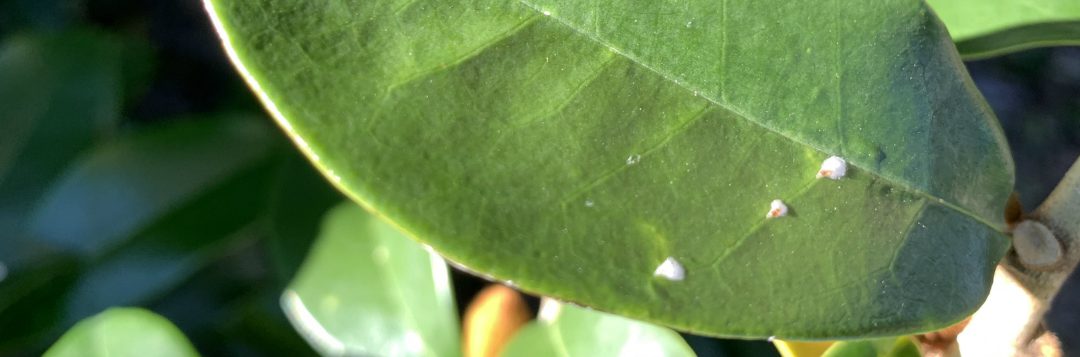
Magnolia white scales on a banana shrub (Michelia figo). Photo Credit: Matt Lollar, University of Florida/IFAS Extension – Santa Rosa County
Armored Scales
Armored scales get their armor by secreting a waxy covering over their bodies that is not attached. The scale lives under this covering and uses it as a protection to feed under. Armored scales can be almost any color or shape and range anywhere from 1/16 to 1/8 inch in diameter. For females, these shapes range from circular to oval to long and slender. The males typically have coverings that are more elongate and smaller than the females. As adults, the males are tiny, winged, gnat-like insects and are rarely seen.
Gloomy scale (Melanaspis tenebricosa) with armored covering removed. Photo Credit: A. G. Dale, University of Florida/IFAS
Soft Scales
Similar to armored scales, soft scales secrete a waxy covering, but it is attached to their bodies. Soft scales can be a number of colors, shapes, and sizes and range anywhere from 1/8 to 1/2 inch in diameter. Their shapes vary from spherical to nearly flat.

Population of adult and immature tuttle mealybugs (Brevennia rehi) on a blade of zoysiagrass. Photo Credit: Lyle J. Buss, University of Florida/IFAS
Mealybugs
Mealybugs are soft-bodied insects that possess a covering of flocculent, white, waxy filaments. They are about 1/8 inch in length and usually pinkish or yellowish in color. Mealybugs have piercing-sucking mouthparts which they use to siphon fluids from the leaves, stems, and sometimes roots of many ornamental plants. Mealybug damage produces discolored, wilted, and deformed leaves.
Scale and Mealybug Management
- Cultural Control – Plant inspection prior to purchase or installation is the first line of defense against a scale or mealybug population. Make sure to inspect the undersides of leaves and plant stems. Infested sections of plants can be pruned and plant material should be cleaned from the planting area and discarded. Also, you can increase air flow and decrease humidity by proper installation and pruning. Over-fertilizing can also increase pest populations.
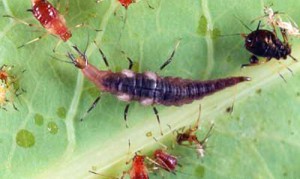
Larva of a brown lacewing. Credits: Lyle Buss, University of Florida.
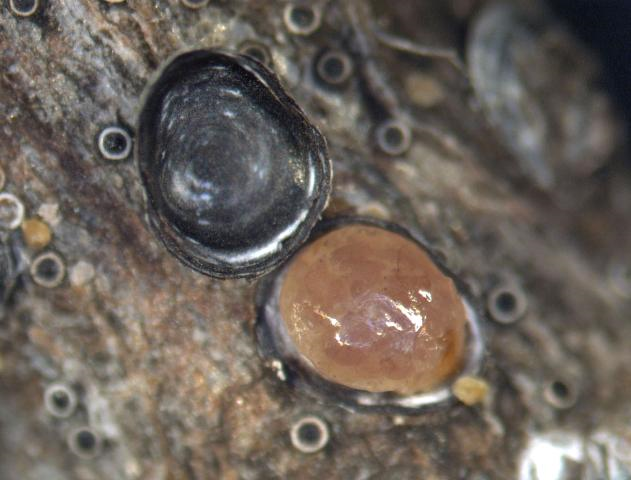
- Biological Control – Predators, such as ladybugs and green lacewings, are usually present in large enough numbers to suppress scales and mealybugs to a desirable threshold. However, broad-spectrum insecticides and bad weather can reduce predator numbers. Look for signs of predation by inspecting dead scales for jagged holes in their waxy coatings. If predation signs are present, use more selective chemical controls and oils as opposed to broad-spectrum products.
- Chemical Control – Timing is everything when it comes to managing scale and mealybug insects. Crawler activity is more pronounced with the flush of new plant growth in the spring. Before application, prune infested plant parts off first to promote greater penetration of insecticides into the foliage. Dormant Oils are often used in the winter to smother scale insects. These are good choices to implement because they don’t harm non-target or beneficial insects. Care must be taken to read the label and use them at the correct temperature, since use in hot weather may burn foliage. Contact products (acephate, bifenthrin, carbaryl, etc.) must be applied to inhibit the crawler stages of these insects and systemic products (acetamiprid, imidacloprid, thiamethoxam, etc.) can be used on the sessile growth stage. Plants should be sprayed thoroughly to the point of drip or “run off” from leaves, twigs, and stems. Repeated applications may still be necessary even if the timing is right, as crawler populations are often large and crawlers like to hide under old waxy scales. Systemic drenches are also a viable option. With good spray coverage, horticultural oils can kill scales at all stages of growth. Refer to the product label for phytotoxicity and temperature guidelines. Even after successful treatment, the outer coatings of the scales may remain on the plant material for weeks, which can be unsightly. The best way to determine if scales are dead is to squeeze them. They will be dry when squeezed if they are dead and they will ooze liquids if they are living (they were at least alive to the point of being squashed).
For insect identification and additional information on scale control, please see:
A Guide to Scale Insect Identification
UF/IFAS Featured Creatures
Your County Extension Office
by Daniel J. Leonard | Nov 8, 2019
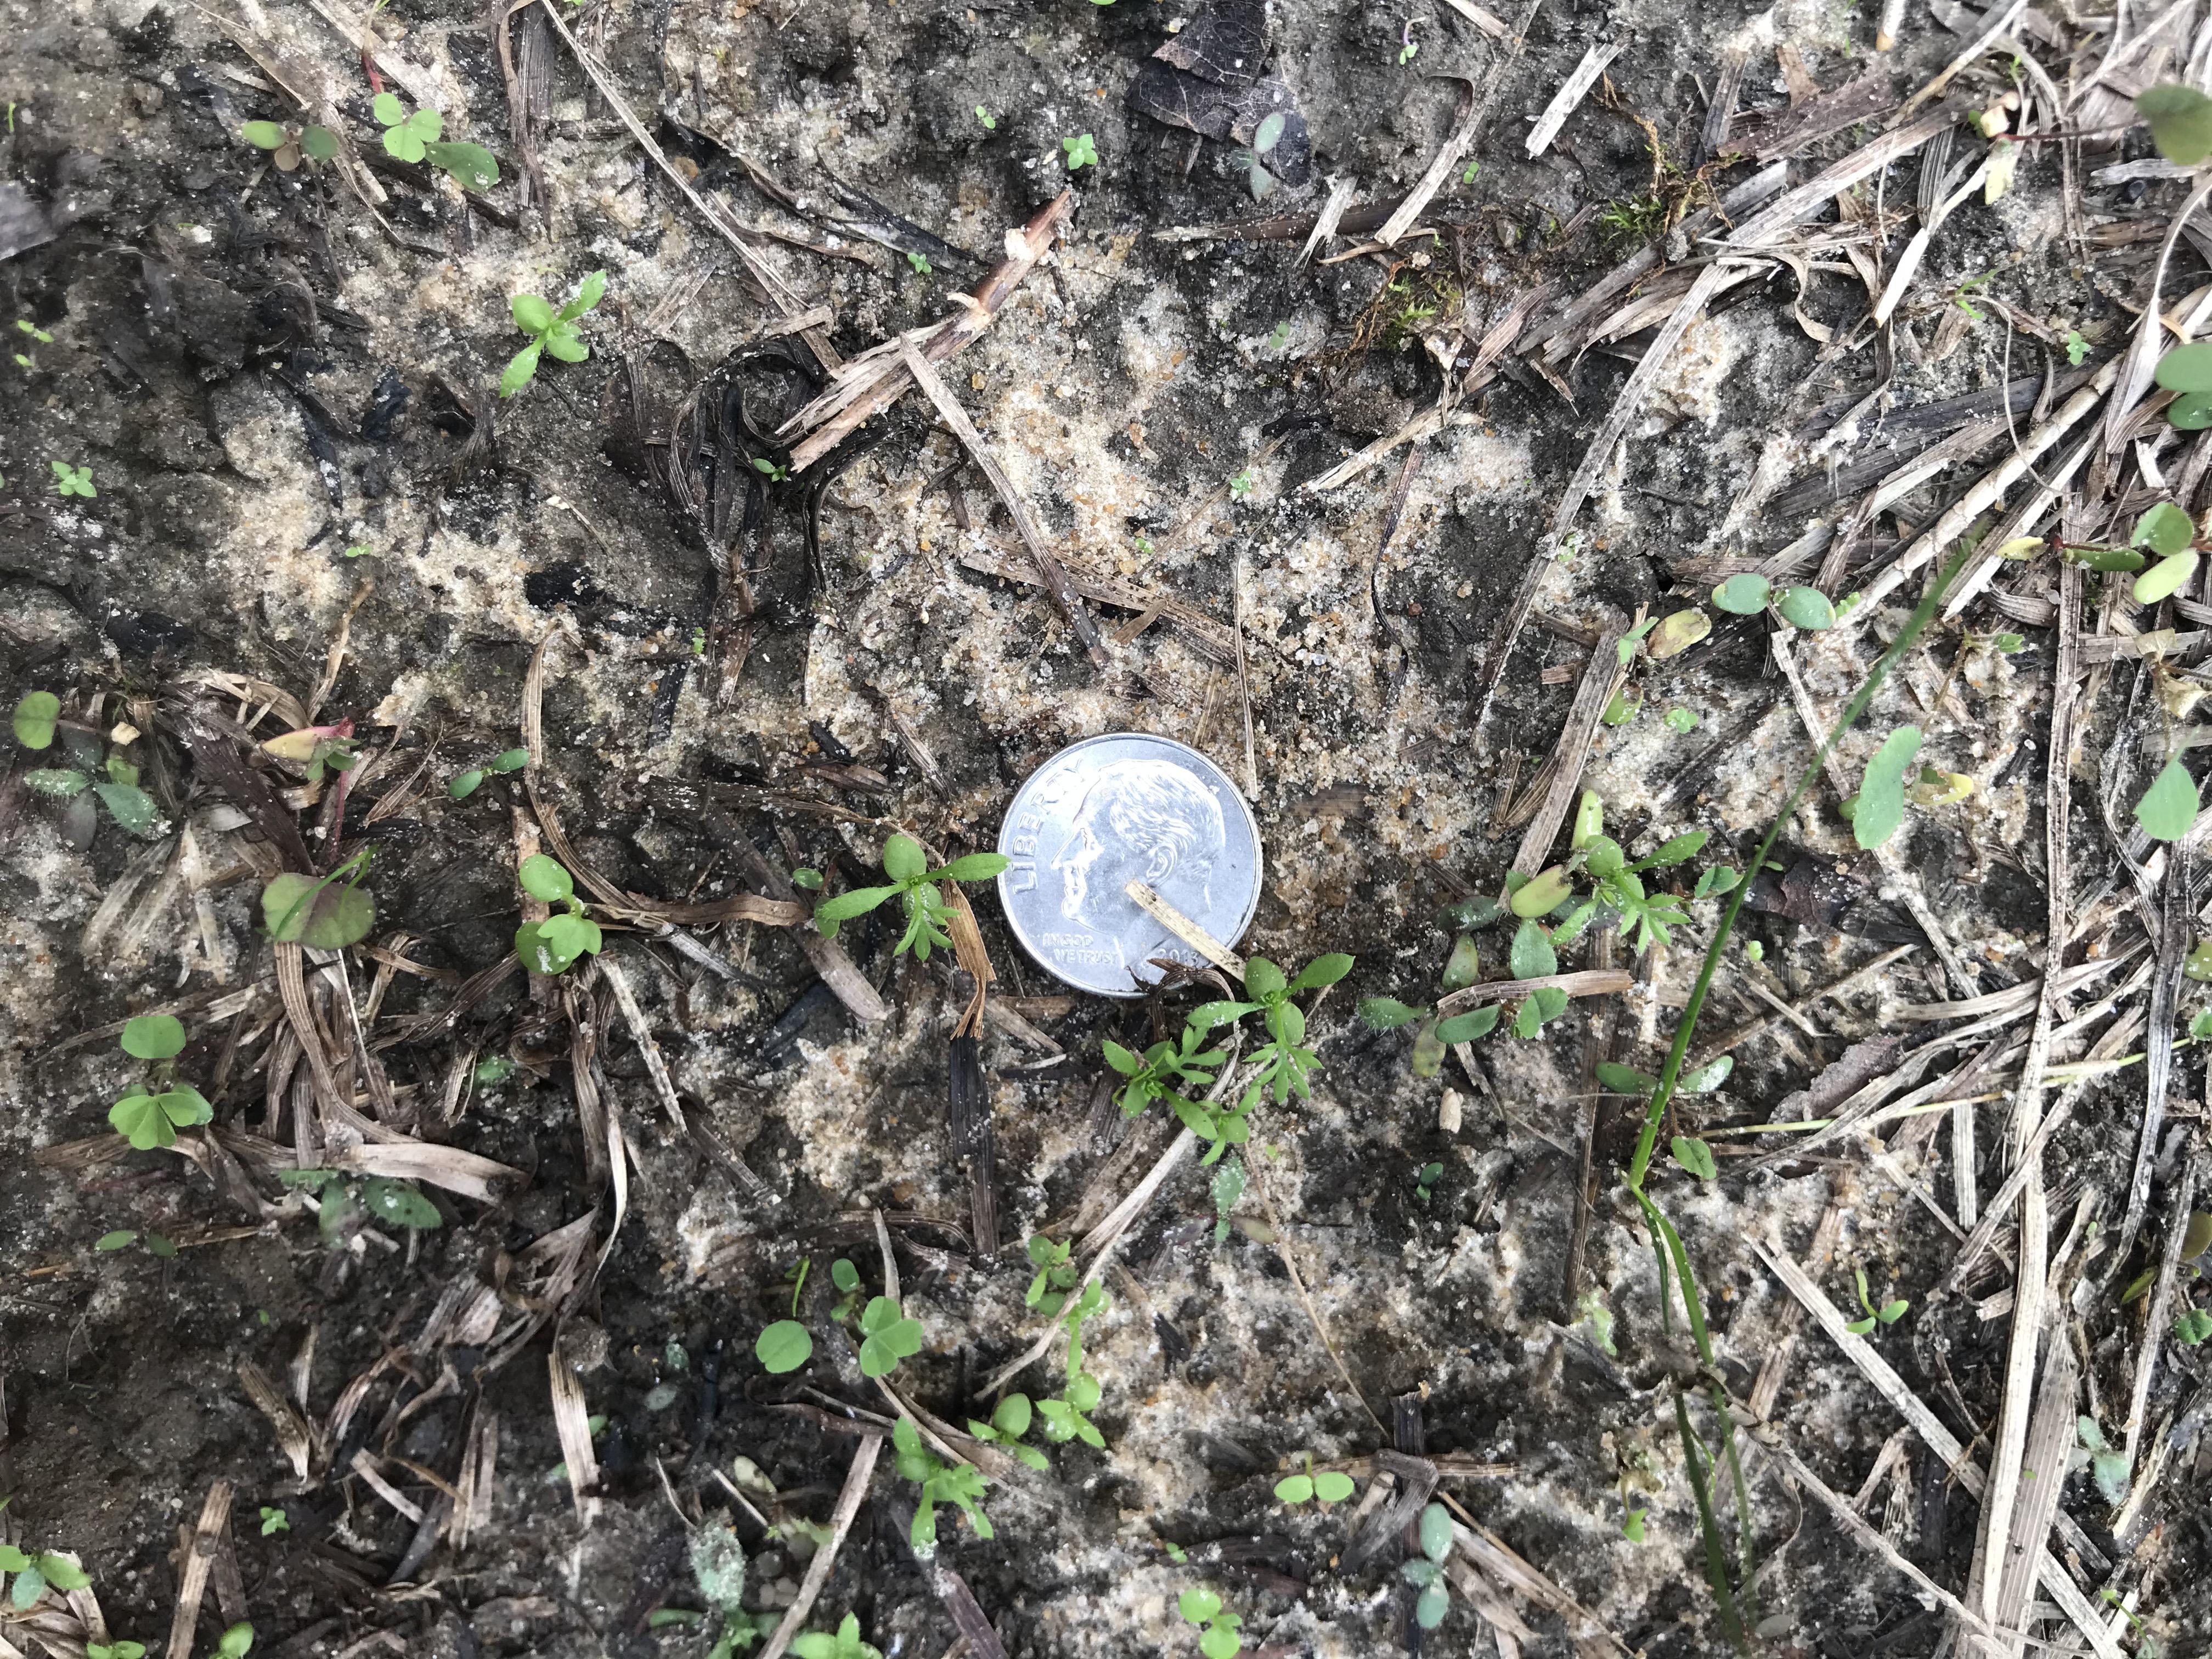
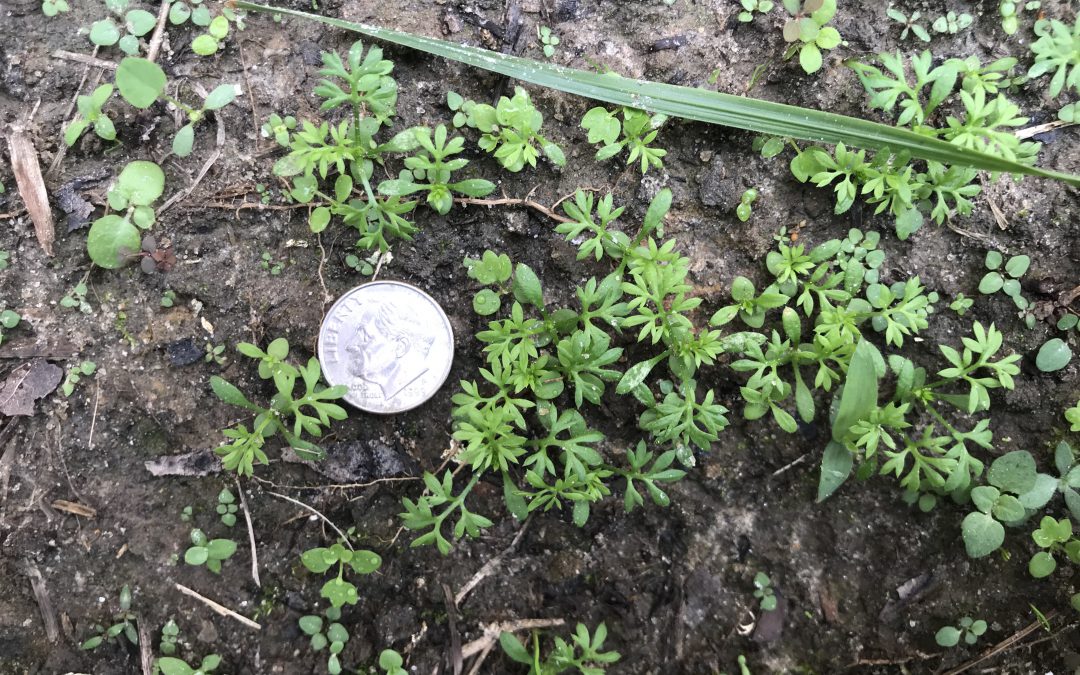
Most lawn weeds are annoying, appearing in unwanted places and numbers, but few actually cause physical harm like the pest plant Lawn Burweed (Soliva sessilis)! This infamous small, spreading winter weed’s seeds generally germinate when temperatures begin to cool in the fall (late October-November). Burweed then grows mostly unnoticed through the winter until spring, when it then produces the hard, spiny burs that contain the plant’s seeds and the plants finally die. Once the burs have formed, Burweed’s presence makes walking on newly greened-up spring turf extremely painful for pets and people (barefoot of course, the burs aren’t large enough to puncture shoe soles). At this point of the plant’s life, once it has made its unwanted presence known, control is not feasible as the Burweed plants have set seed, ensuring a new crop next year, and killing the remaining foliage doesn’t remove the burs. What is a homeowner to do?
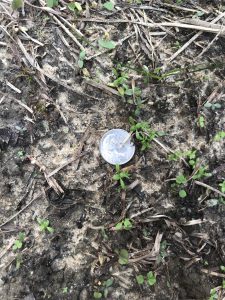
Newly germinated Lawn Burweed. Photo courtesy of the author.
Fortunately, Lawn Burweed is relatively easy to control chemically if one pays close attention to seasonal changes and uses herbicides (either pre-emergent or post-emergent herbicides) effectively.
Pre-emergent Herbicide Options: The first chemical control option for Lawn Burweed is a timely application of the pre-emergent herbicide Isoxaben (sold under various brand names at most farm or garden stores) to prevent Burweed seeds from germinating, greatly reducing plant populations. However, pre-emergent Isoxaben applications must be made before the plants sprout and begin to grow to be effective. For Burweed, this generally means application in October, once nighttime temperatures dip into the 55-60 degrees F range for several nights in a row, as consistent temperatures in this range give Burweed seeds the signal to germinate. Though we’re already past the point of pre-emergent herbicides being an option for control this year, homeowners should plan to include this method in their Lawn Burweed control plan for fall 2020!
Post-Emergent Herbicide Options: If you haven’t already used a pre-emergent herbicide this fall for Burweed control, you must turn to post-emergent options. Like pre-emergent herbicides, timing is critical if you want your post-emergent applications to work! These herbicides are most effective when Burweed plants are young, small, vigorously growing, and haven’t set burs yet. Successful post-emergent applications may be made from December-early February before burs harden. Unlike pre-emergents, where there is only one strong option for Burweed control, many post-emergent herbicides exist that are extremely effective! When shopping, look for products containing the following active ingredients:
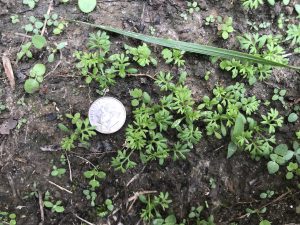
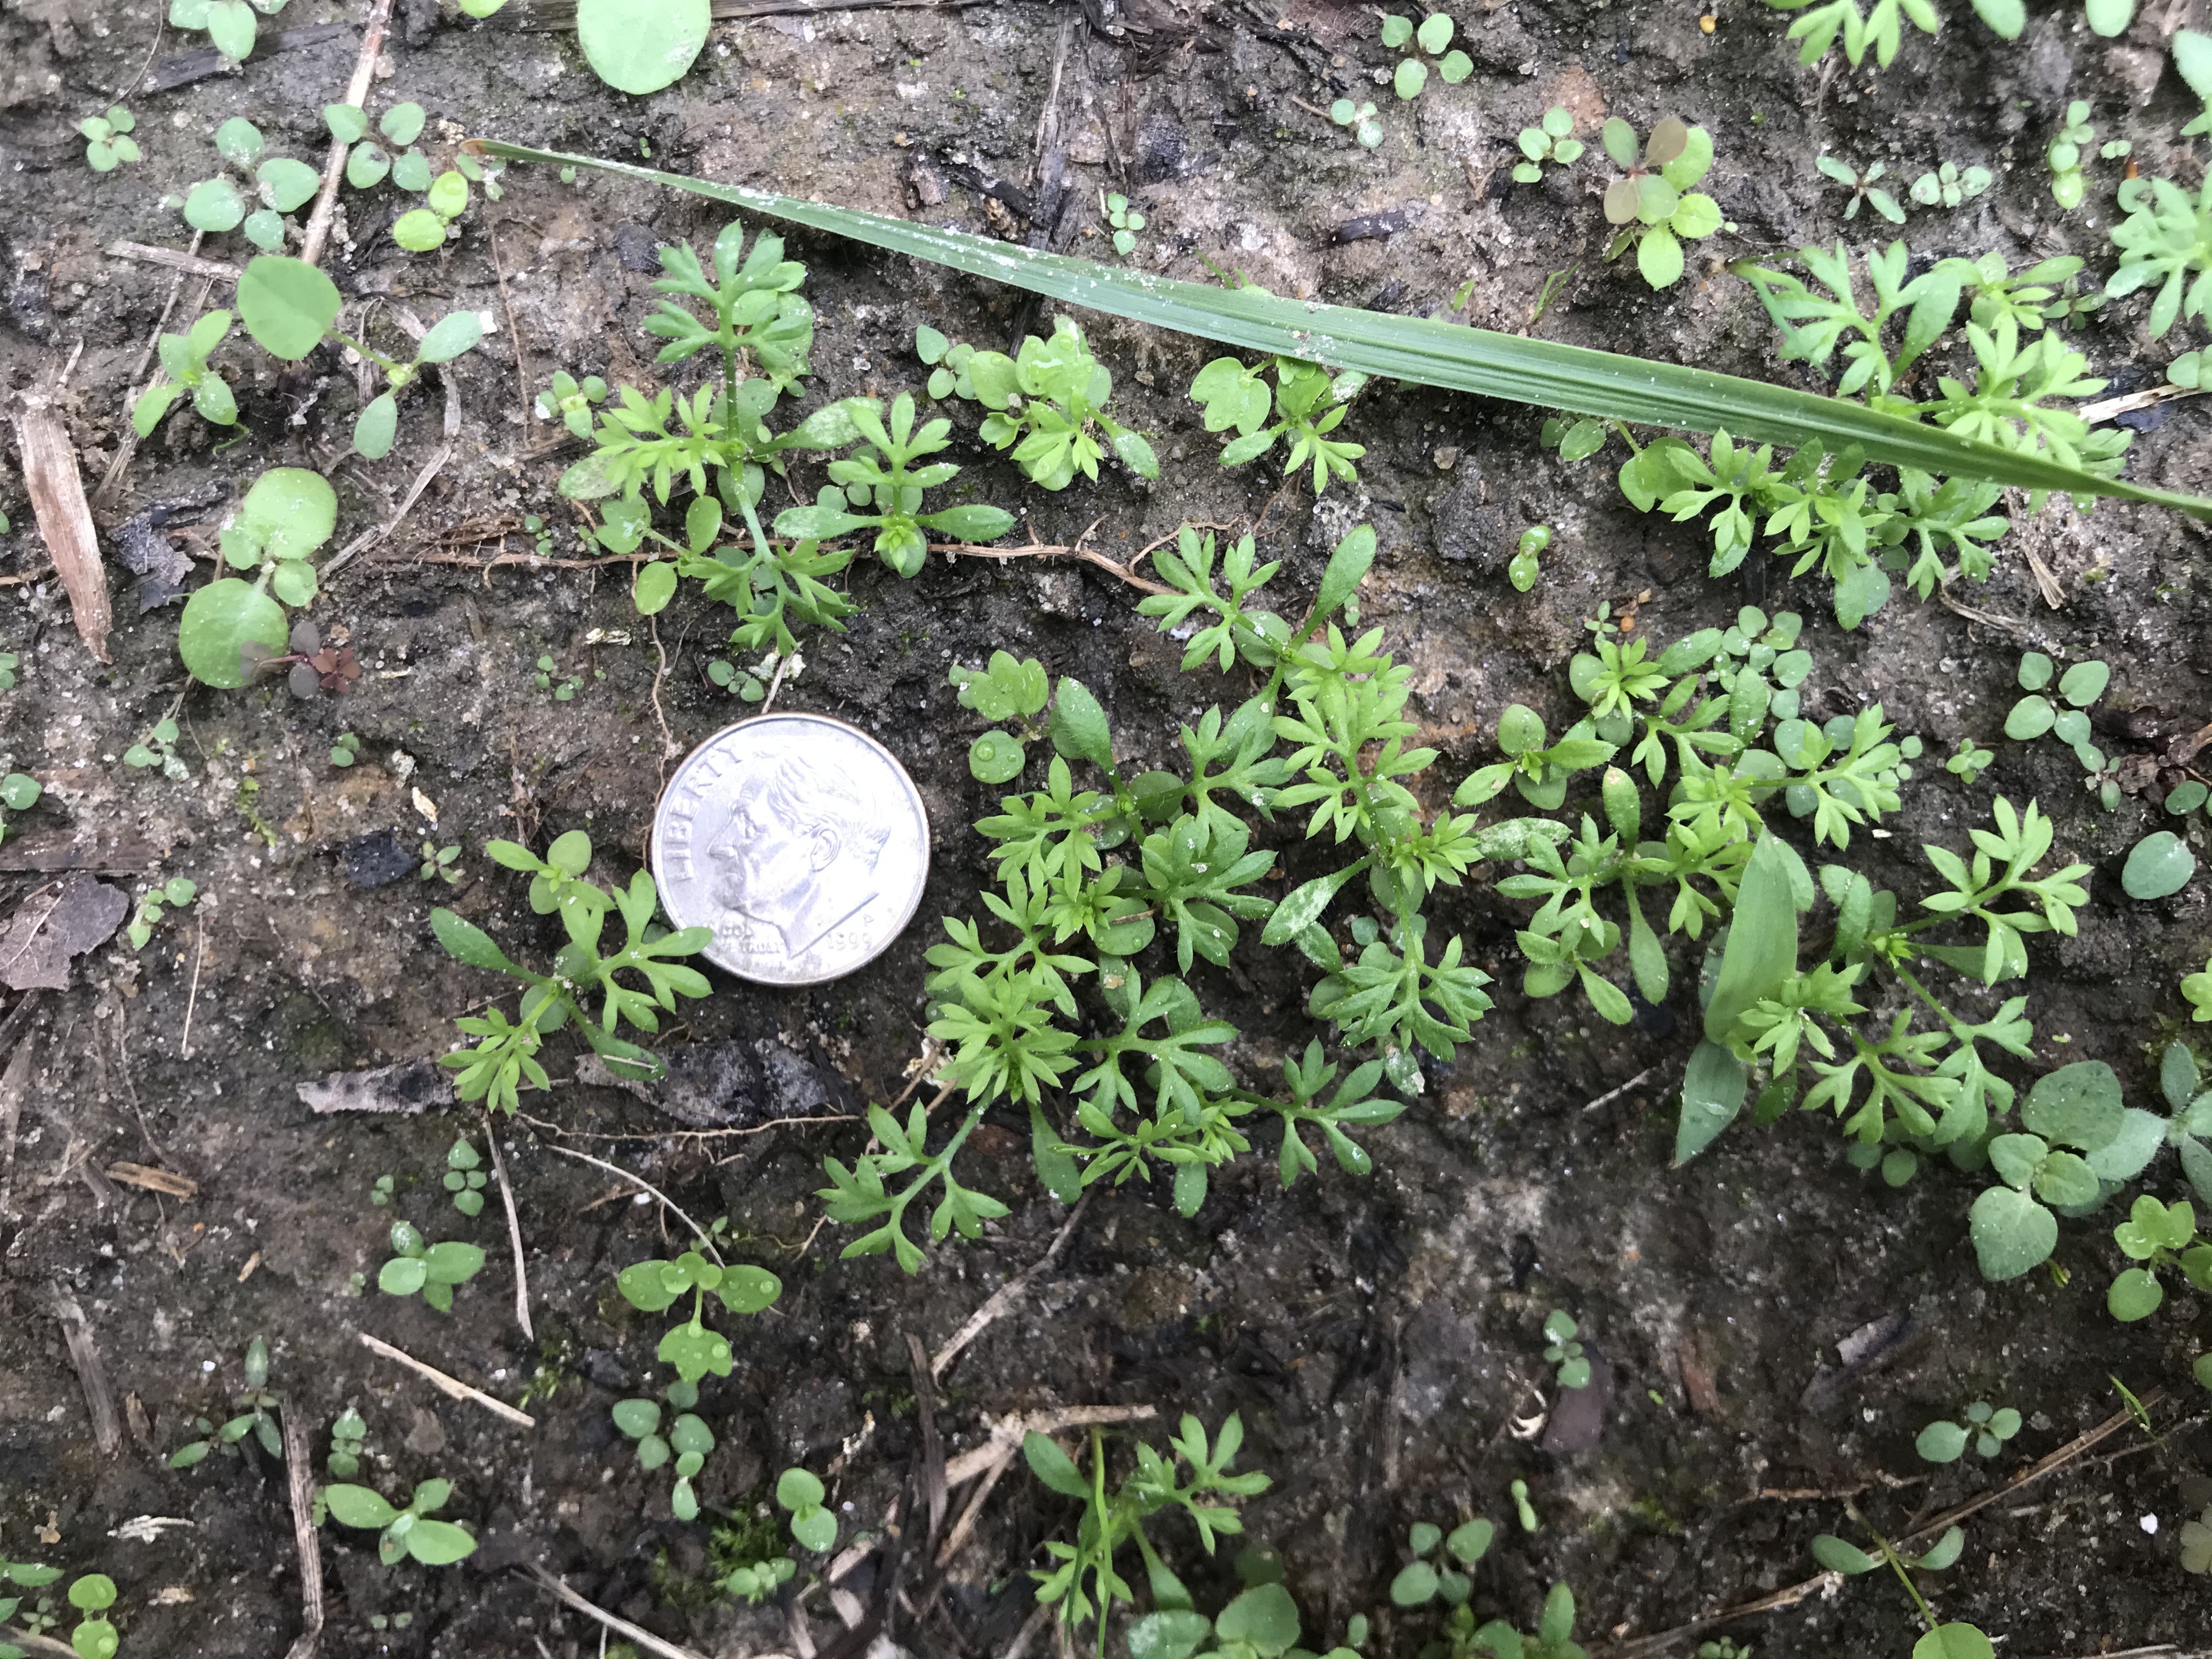
Lawn Burweed around 10 days after emergence. Photo courtesy of author.
- Atrazine – sold under many brand names and safe in Centipede, St. Augustine, & Bermudagrass. Do not use in Zoysia or Bahiagrass lawns.
- Dicamba, Mecoprop, 2,4-D – commonly sold in three-way formulations through many brand names. Generally safe in Centipede, St. Augustine, Bermuda, Zoysia, & Bahiagrass lawns.
- Metsulfuron – sold under several brand names and safe in Centipede, St. Augustine, Zoysia & Bermudagrass. Do not use in Bahiagrass. Be careful if used around ornamentals.
- Thiencarbazone, iodosulfuron, dicamba – sold as Celsius WG from Bayer. Safe in Centipedegrass, Zoysiagrass, Bermudagrass, and St. Augustinegrass. Do not use in Bahiagrass.
Lawn Burweed control with of all the above-listed herbicides will be most effective with a follow-up application 10-14 days later.
Note: With the exception of the Thiencarbazone, iodosulfuron & dicamba mixture (Celsius), do not apply any of these post-emergent herbicides during spring turf green up.
As always, if you have questions about Lawn Burweed control or any other horticulture or agriculture related questions, please contact your local UF/IFAS County Extension office or consult any of the following related articles: https://nwdistrict.ifas.ufl.edu/hort/2015/10/06/lawn-burweed-prevention-is-easier-than-cure/ and http://blogs.ifas.ufl.edu/washingtonco/2017/10/11/prepare-now-to-avoid-lawn-burweed-infestation-later/
Happy gardening!
by Matt Lollar | Sep 7, 2019
A couple weeks ago, I was on a site visit to check out some issues on Canary Island Date Palms. The account manager on the property requested a site visit because he thought the palms were infested with scale insects. He noticed the issue on a number of the properties he manages and he was concerned it was an epidemic. From a distance, lower fronds were yellowing from the outside in and the tips were necrotic. These are signs of potassium deficiency with possible magnesium deficiency mixed in.
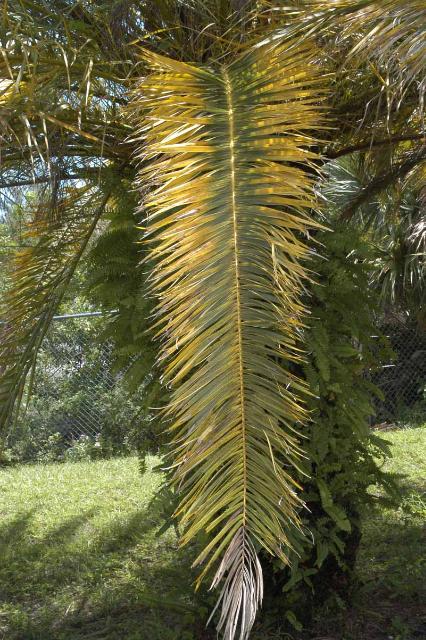
Transitional leaf showing potassium deficiency (tip) and magnesium deficiency (base) symptoms. Photo Credit: T.K. Broschat, University of Florida/IFAS Extension
Nutrient deficiencies are slow to correct in palm trees. It’s much easier to prevent deficiencies from occurring by using a palm fertilizer that has the analysis 8N-2P2O5-12K2O+4Mg with micronutrients. Even if the palms are part of a landscape which includes turf and other plants that require additional nitrogen, it is best to use a palm fertilizer with the analysis previously listed over a radius at least 25 feet out from the palms. However, poor nutrition wasn’t the only problem with these palms.
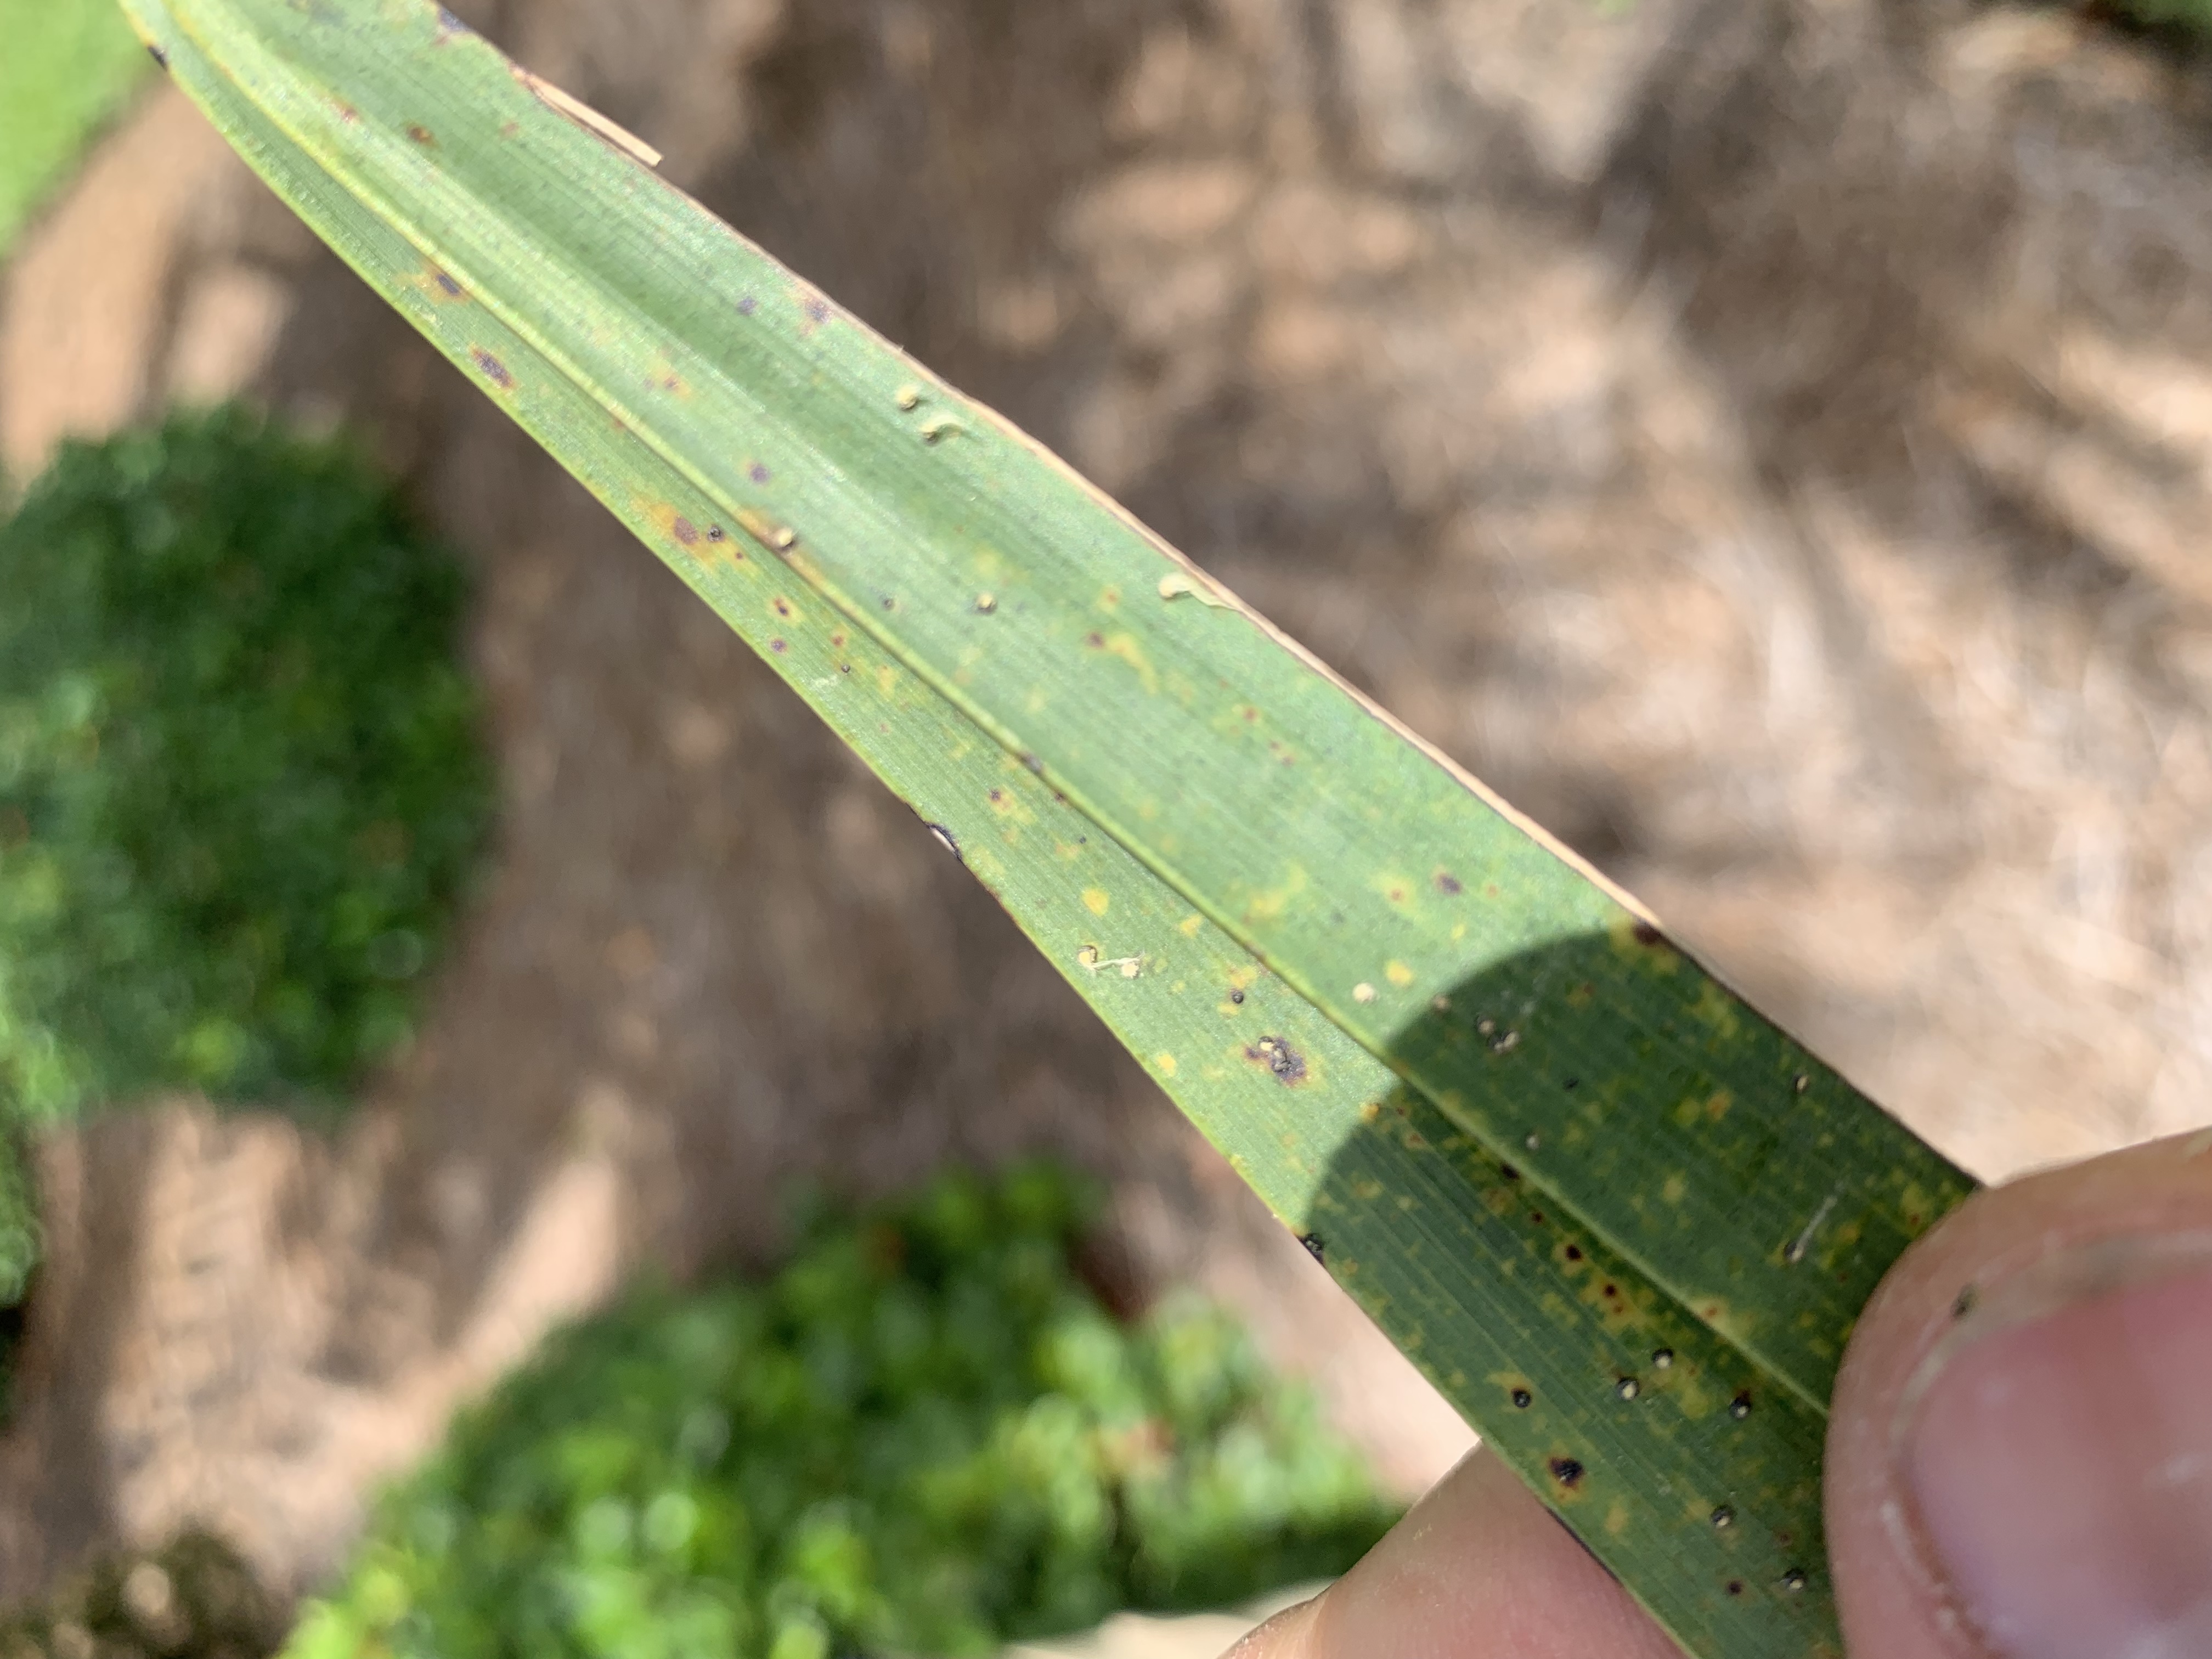
Upon closer look, the leaflets were speckled with little bumps. Each bump had a little white tail. These are the fruiting structures of graphiola leaf spot also known as false smut.

Graphiola leaf spot (false smut) on a Canary Island Date Palm. Photo Credit: Matt Lollar, University of Florida/IFAS Extension – Santa Rosa County
Graphiola leaf spot is a fungal leaf disease caused by Graphiola phoenicis. Canary Island Date Palms are especially susceptible to this disease. Graphiola leaf spot is primarily an aesthetic issue and doesn’t cause much harm to the palms infected. In fact, the nutrient deficiencies observed in these palms are much more detrimental to their health.
Graphiola leaf spot affects the lower fronds first. If the diseased, lower fronds are not showing signs of nutrient deficiencies then they can be pruned off and removed from the site. All naturally fallen fronds should be removed from the site to reduce the likelihood of fungal spores being splashed onto the healthy, living fronds. A fungicide containing copper can be applied to help prevent the spread of the disease, but it will not cure the infected fronds. Palms can be a beautiful addition to the landscape and most diseases and abiotic disorders can be managed and prevented with proper pruning, correct fertilizer rates, and precise irrigation.
by Danielle S. Williams | Aug 22, 2019
Recently, I received a call about a garden not producing the way it used to. After speaking with the homeowner, I decided to take a visit to see what was going on. On my visit, I could see that the tomatoes were stunted, yellow and wilting, the squash plants were flowering but not setting fruit, and the okra was stunted. After digging up some of the sick plants and examining the roots, the problem was as clear as day…root-knot nematodes.
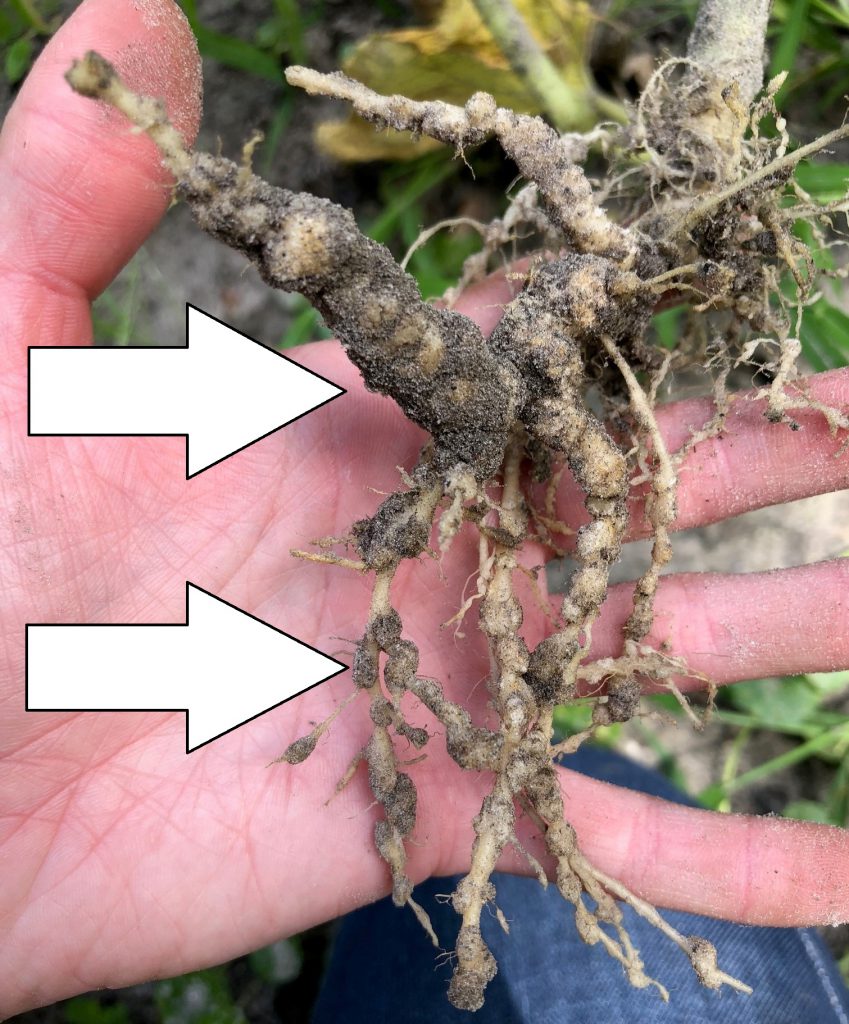
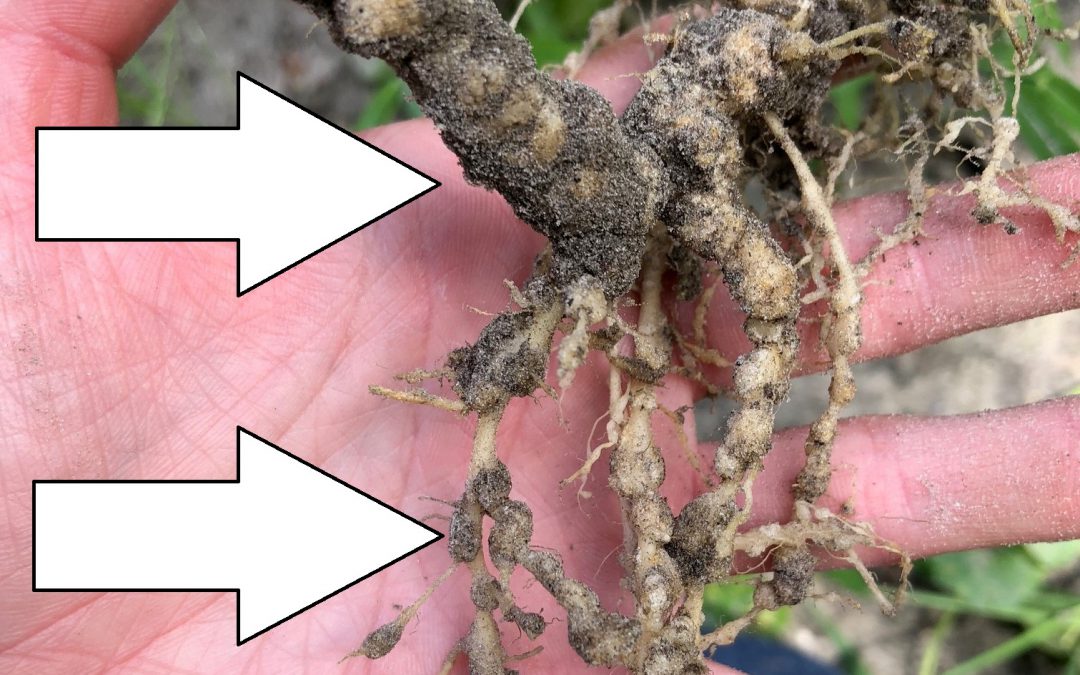
Galls on roots from root-knot nematodes
Root-knot nematodes are microscopic, unsegmented roundworms that live in the soil and feed on the roots of many common garden plants. Some of the most commonly damaged crops are tomatoes, potatoes, okra, beans, peppers, eggplants, peas, cucumbers, carrots, field peas, squash, and melons. Root-knot nematodes enter the root and feed, causing knots or galls to form. These galls are easily recognizable on the roots. If you’re inspecting the roots of beans or peas, be careful not to confuse nematode galls with the nitrogen-fixing nodules that are a normal part of the root system. As the nematodes feed, the root system of the plant becomes damaged and the plant is unable to take up water and nutrients from the soil. As a result, the plant may show symptoms of stunting, yellowing, and wilting.
What can I do about nematodes?
There are currently no nematicides labeled for use in the home garden but the best means of root-knot nematode management involves using a combination of strategies that make your garden less susceptible to attack.
Grow Resistant Varieties
Some varieties of crops are resistant to root-knot nematodes. This means is that a particular nematode can’t reproduce on the plant roots. When buying seed, read the variety label. The label may have ‘VFN’ written in capital letters. These letters indicate that the variety has resistance to certain diseases: V = Verticillium wilt; F = Fusarium wilt; and N = root-knot nematode. It’s best to use resistant varieties when root-knot nematodes are present.
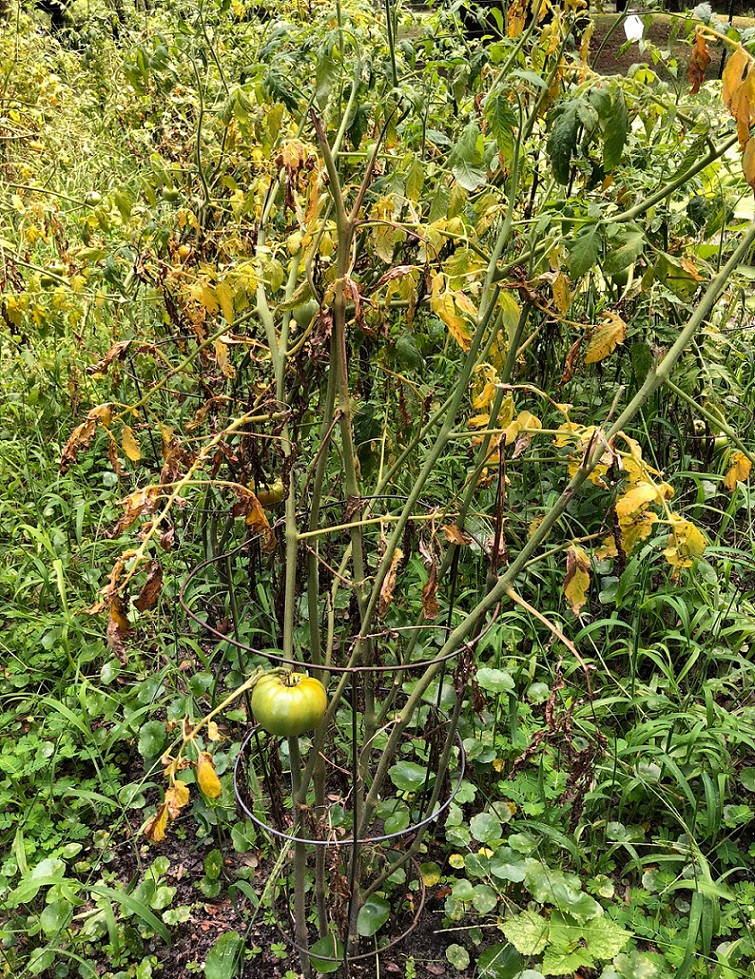
Tomato plant showing signs of nematode damage – yellowing and wilting.
Sanitation
If you suspect you may have a nematode problem, be sure not to move soil or infected plant roots from an infected area to a clean area. Nematodes can easily be spread by garden tillers, hand tools, etc. so be sure to disinfect all equipment after use in problem areas.
Infected roots left in the soil can continue to harbor nematodes. After the crop is harvested, pull up the roots and get rid of them. Tilling the soil can kill nematodes by exposing them to sunlight.
Cover crops and Crop Rotation
Cover crops and crop rotation isn’t just a concept for farmers…gardeners need to implement the same practices! While this may take some planning, it is the most effective way to reduce pests and diseases.
Cover crops are crops that are not harvested and are typically planted between harvestable crops. They help improve soil quality, prevent soil erosion, and help control pests and diseases. Selecting cover crops that aren’t susceptible to root-knot nematode attack is key. When growing a cover crop that nematodes can’t reproduce on, populations should decline or not build up to begin with. Grain sorghum and millet can be planted as a summer cover crop and rye in the winter. French marigolds have been shown to reduce nematode populations as well.
Another simple way to manage root-knot nematodes is by crop rotation. Crop rotation is the practice of not growing crops that are susceptible to nematode attack, in the same spot for more than one year. Crops that aren’t susceptible to attack are cool season crops in the cabbage family such as broccoli, cauliflower, Brussels sprouts, collards and kale.
Root-knot nematodes can wreck havoc on a garden so it’s important to take the necessary precautions to avoid them. It may require planning and patience but it will be worth it in the long run!
For more information on this topic, use the links to the following publications:
Nematode Management in the Vegetable Garden
Featured Creature: Nematodes